
As a seasoned survival horror gamer with countless hours spent navigating the twisted landscapes of Silent Hill, I must say that the Clock Puzzle in the Blue Creek Apartments from the Silent Hill 2 Remake was a true testament to my detective skills and patience. The intricate steps required to find each hand of the clock were challenging yet satisfying, much like piecing together the fragments of a shattered psyche.
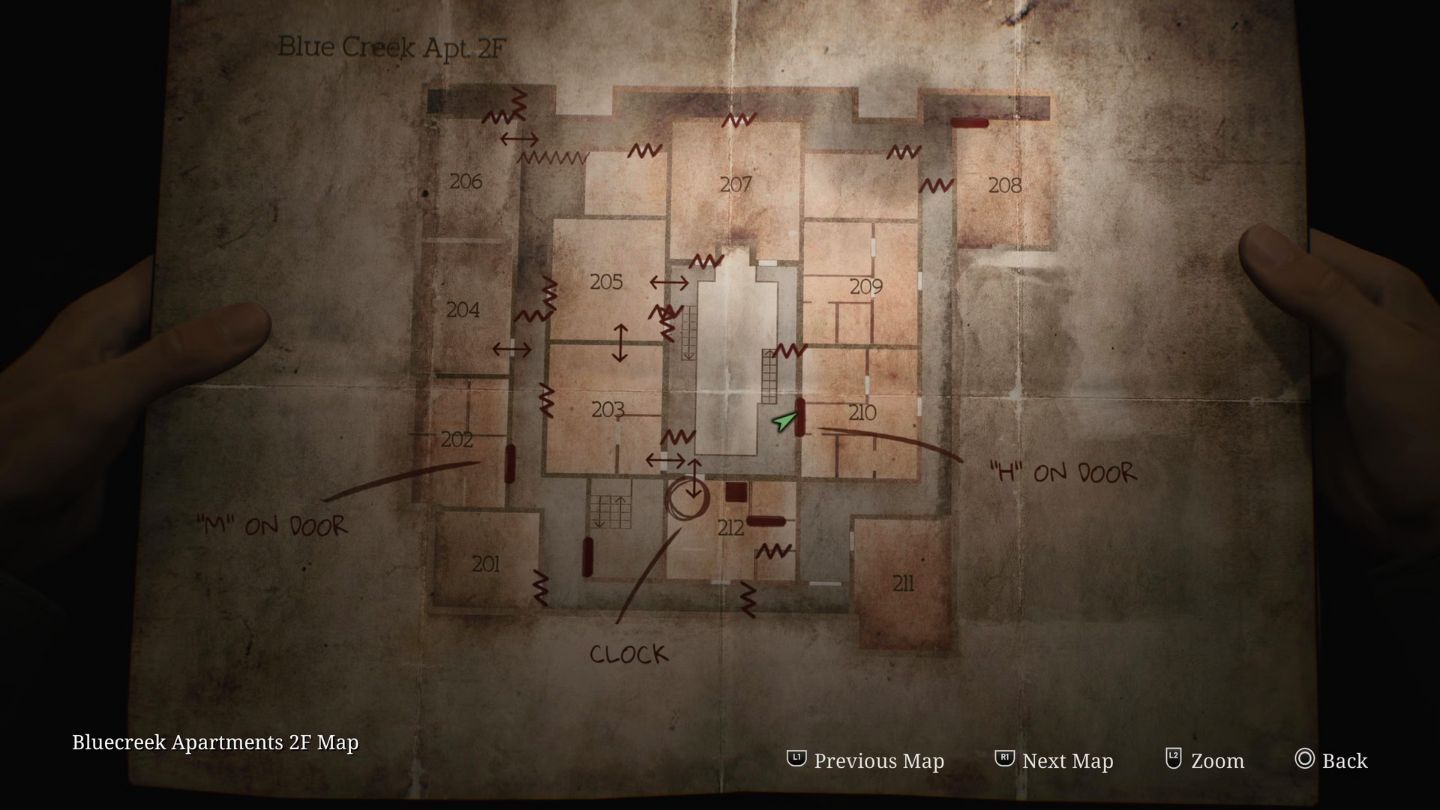
In the Silent Hill 2 Remake, the Clock Puzzle can be found in apartment Room 212, an early area you visit following your entrance into the apartment complex, a location that becomes accessible shortly after the game’s introduction.
Just like the other puzzles within the game, the Clock Puzzle grants access to a fresh region within the Blue Creek Apartments. To solve it successfully, here are some essential tips:
How To Solve the Clock Puzzle in Blue Creek Apartments
This puzzle consists of a sequence of tasks. Completing each one brings you nearer to its solution and grants access to various rooms within the apartments.
Upon your initial visit to Apartment 212, you’ll come across a puzzle on the table, which hints at three figures: Henry, Scott, and Mildred.
The original note says:
Henry fears Scott, he’ll run from him and hide,He’s fled to the west, to the other side.But here comes Mildred, with unknown intent,Scott lies face down, blind to her descent.
This riddle holds the key to setting the clock hands:
- Henry “fled to the West,” meaning the Hour Hand should be set to 9.
- Scott is positioned opposite Henry, so the Second Hand goes to 3.
- Mildred is “descending” onto Scott, which places the Minute Hand at 2.
In a clock puzzle, the first letters of the names on the puzzle might match the positions of the clock’s hands, making them the initial hints for solving the riddle.
However, prior to setting the specified times, you should first discover the positions of the clock hands by resolving the puzzles hidden throughout the apartments.
Save at the point in Apartment 212 before starting the puzzle and after making progress. This helps avoid backtracking if you face enemies or have trouble with any part of the puzzle.
How to Find the Hour Hand
Your first objective is to find the Hour Hand, which is located in Apartment 307.
It’s locked inside a radio suspended from the ceiling by chains. To bring the radio down and retrieve the Hour Hand inside, you’ll need to interact with three valves located in different rooms:
- Head to Apartment 305 first to find and turn the first valve. Once you turn the valve, be ready to fight off enemies that spawn in response.
- Afterward, grab the key to Apartment 306 from a table before leaving.
- Use the key to unlock the apartment. Inside, you’ll find a gap leading to Apartment 304. Crawl through it to reach the second valve.
- Go to Apartment 304 and turn the second valve, but it will break off from the machine. Grab the broken valve, as you’ll need it for the final step.
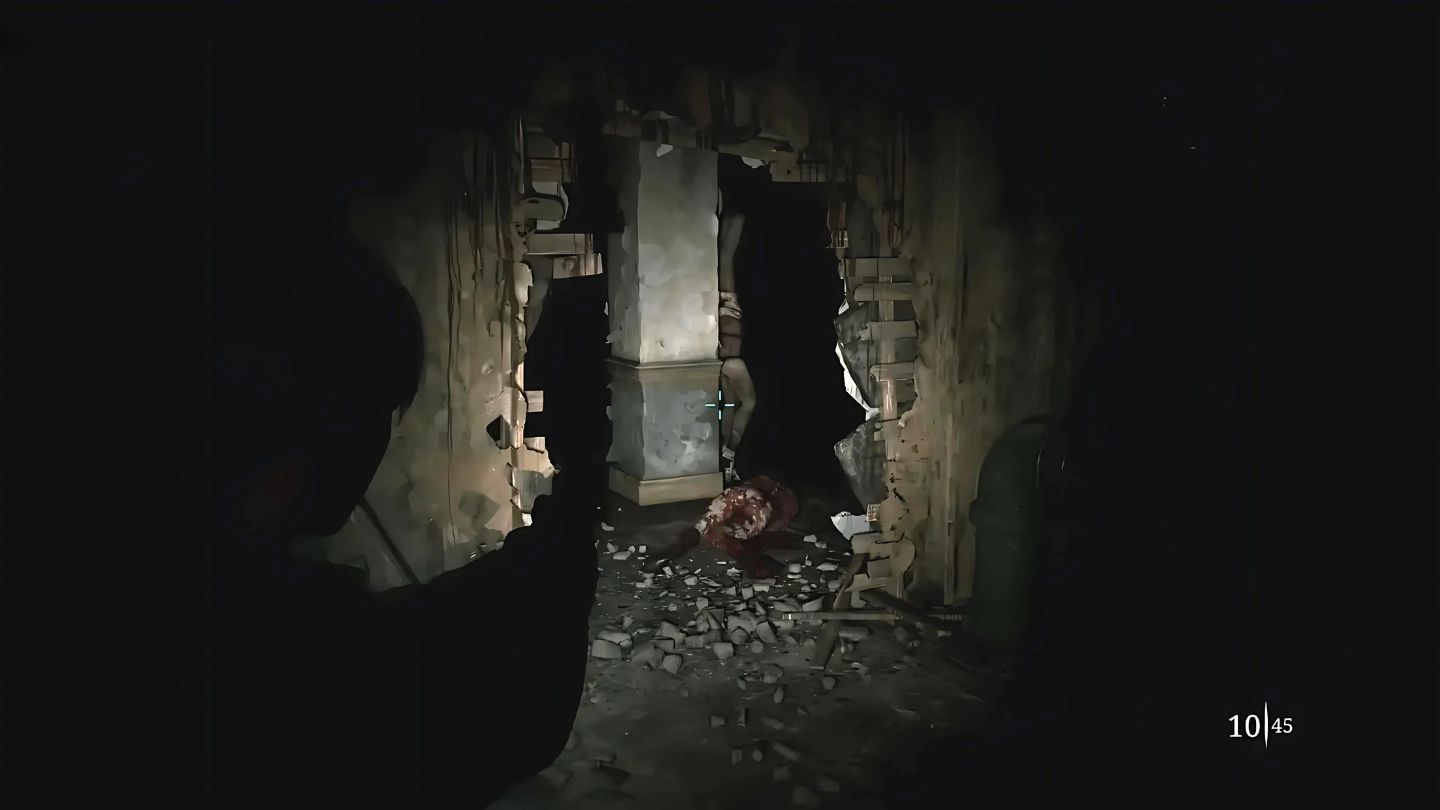
- Return to Apartment 307 and install the broken valve onto the third machine. Turning this valve will finally release the chains holding the radio, causing it to fall. Once it crashes to the floor, you can search the radio to retrieve the Hour Hand.
Once you have the Hour Hand, return to the clock in Apartment 212 and set it to 9.
How to Find the Minute Hand
Doing so will unlock Apartment 210, marked with an “H” on the door.
Within, break down a damaged wall in the kitchen area leading to the bathroom. Explore the bathroom, locate the Minute Hand therein.
It turns out that you’ve found yourself stuck within the confines of the apartment, but there’s a single route to freedom: figuring out the solution for the Seesaw Puzzle.
Here’s how to figure it out:
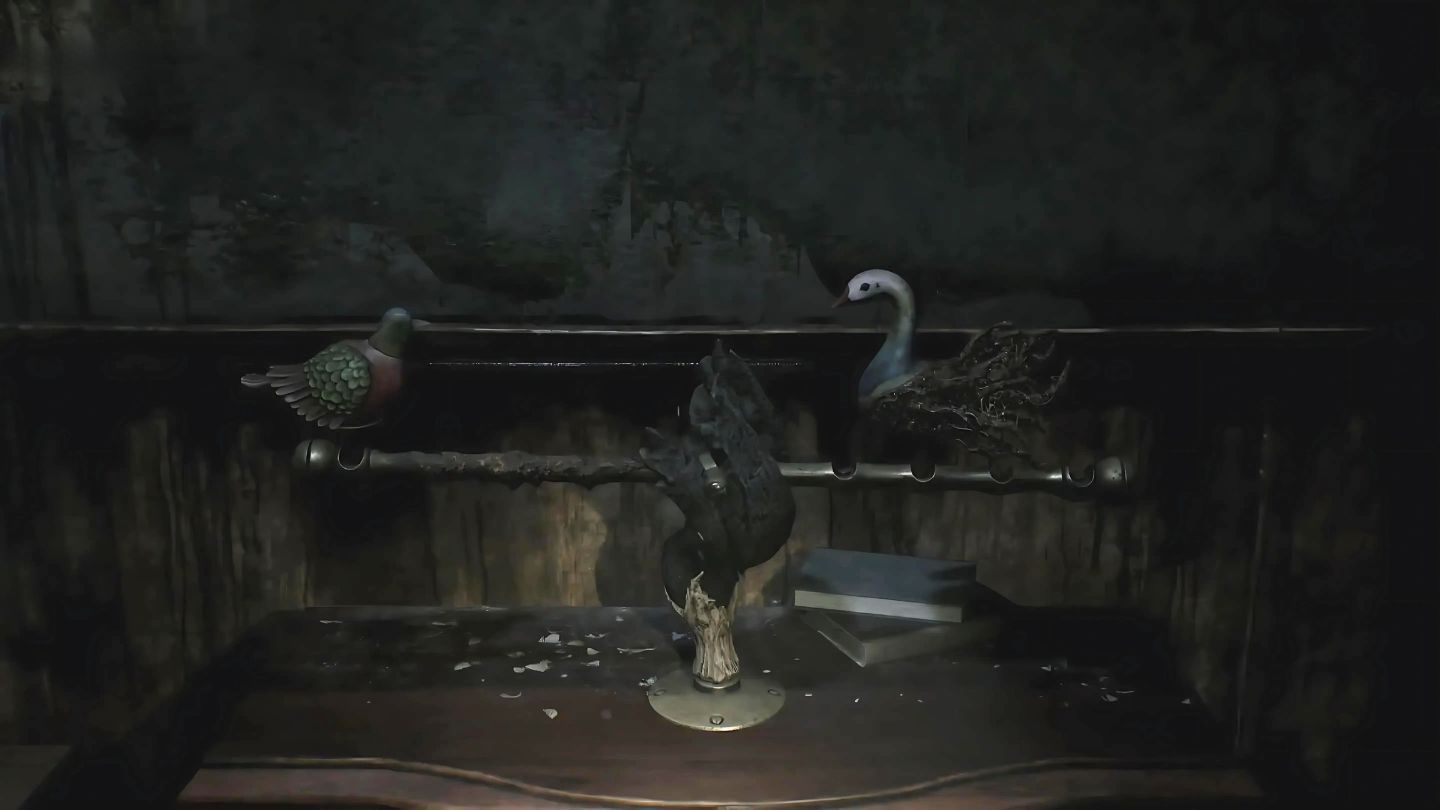
- Collect the Pigeon Figurine from the open wardrobe in Apartment 210.
- Proceed to Apartment 209, where you’ll find a divider blocking the bathtub. Break through it to retrieve the Malformed Figurine.
- In Apartment 211, you’ll find a wall in the kitchen that can be broken. Once through, collect the Swan Head from the counter.
First, assemble the Misshapen Statuette and Swan Statuette in your items to form a complete statuette. Later, position both statuettes (Swan and Pigeon) on the teeter-totter.
The aim here is to carefully position the little statues so they stand securely, thereby activating the Winged Lock, a key to this puzzle that will let us open the door and exit our apartment.
Once you have the Minute Hand, return to the clock and set it to 2.
How to Find the Second Hand
This unlocks Apartment 202, marked with an “M” on the door.
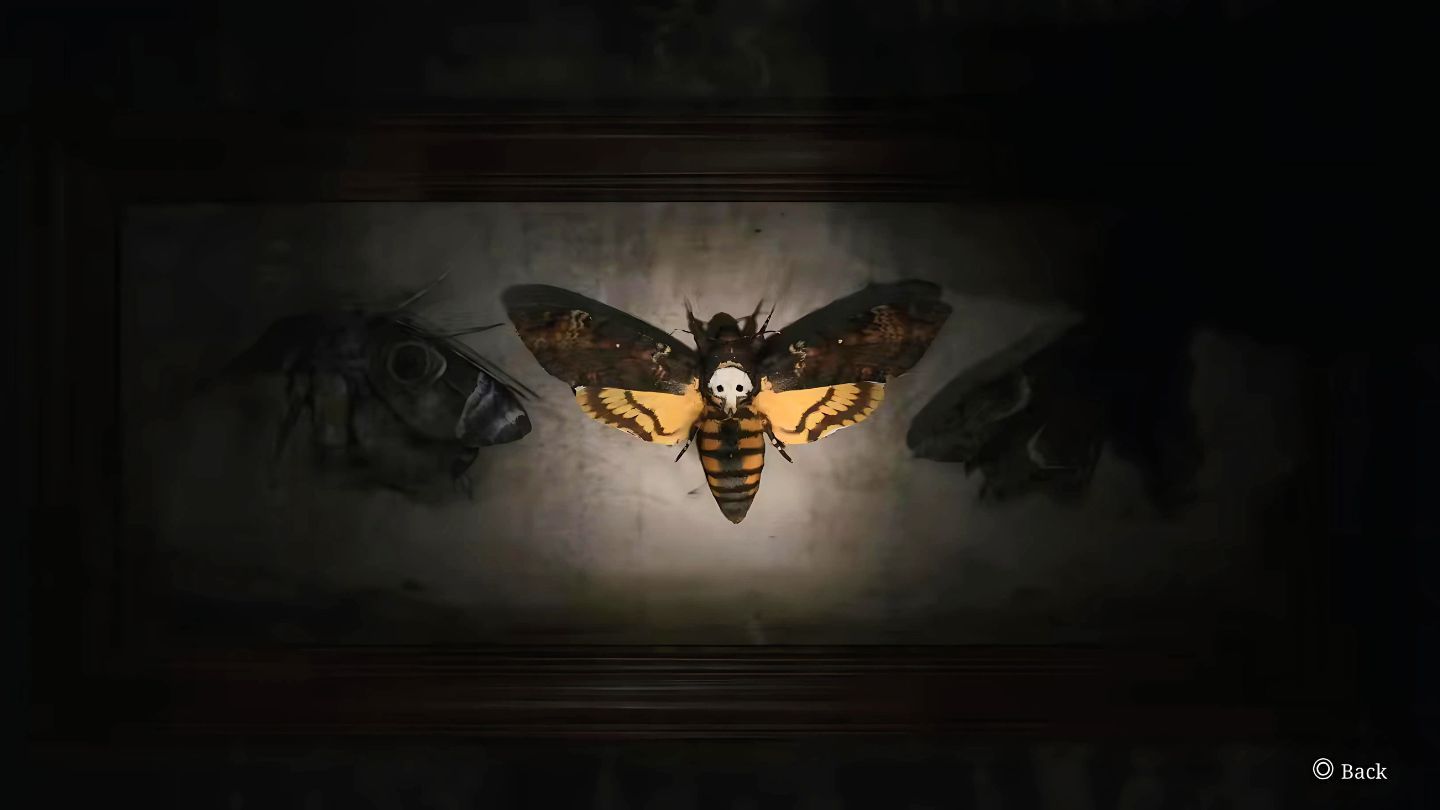
In here, you’ll encounter a riddle centered around moths that are pinned onto boards. Solve the Moth and Combination Lock enigma to discover the Second Hand. Afterward, revisit the Grandfather Clock and adjust it according to these instructions:
- Hour Hand: 9
- Minute Hand: 2
- Second Hand: 3
After properly aligning your hands, you’ll find the door labeled with an “S” on the first level will open. Yet, before making a beeline for that space, it might be wise to explore the freshly accessible room opposite the clock as well.
You can find a Health Drink and the How the Time Flies Strange Photo collectible.
Which puzzle did you find the most challenging in the game? Comment down below!
Read More
- Cookie Run Kingdom Town Square Vault password
- Maiden Academy tier list
- Pi Network’s Grand Migration: 10 Million and Counting!
- Kingdom Come Deliverance 2: Lion’s Crest DLC Quest Guide
- Former ‘Bachelorette’ Star Katie Thurston Reveals Breast Cancer Diagnosis: “Waiting on Learning What Stage”
- Cuddly Cats Take Over in the Wildest Night of the Living Dead Remake!
- NEAR Protocol Launches New Governance Proposal
- Carrie Underwood Says It Was ‘Impossible’ Not To Feel Nostalgic In Return To American Idol, But One Part Was Apparently Pretty Painful
- Cookie Run Kingdom: Shadow Milk Cookie Toppings and Beascuits guide
- Unleashing the Digital Rupee: The Wallet You Didn’t Know You Needed! 🤑💰
2024-10-07 12:43