In this guide, we’ll help you locate all the parts of the Totem of Perseverance, which is the last and concluding totem for the Avowed’s Totem Shrine. Similar to its predecessors, each fragment of this totem can be found in a single location. For this one, it’s the region known as Galawain’s Tusk. Once you’ve gathered all fragments for Galawain, you’ll unlock the final six totem bonuses. Here, we’ll show you where to find the totem pieces within Galawain’s Tusk, and reveal the benefits that each piece provides.
Where to Find the Fragments of the Spoils Document in Avowed
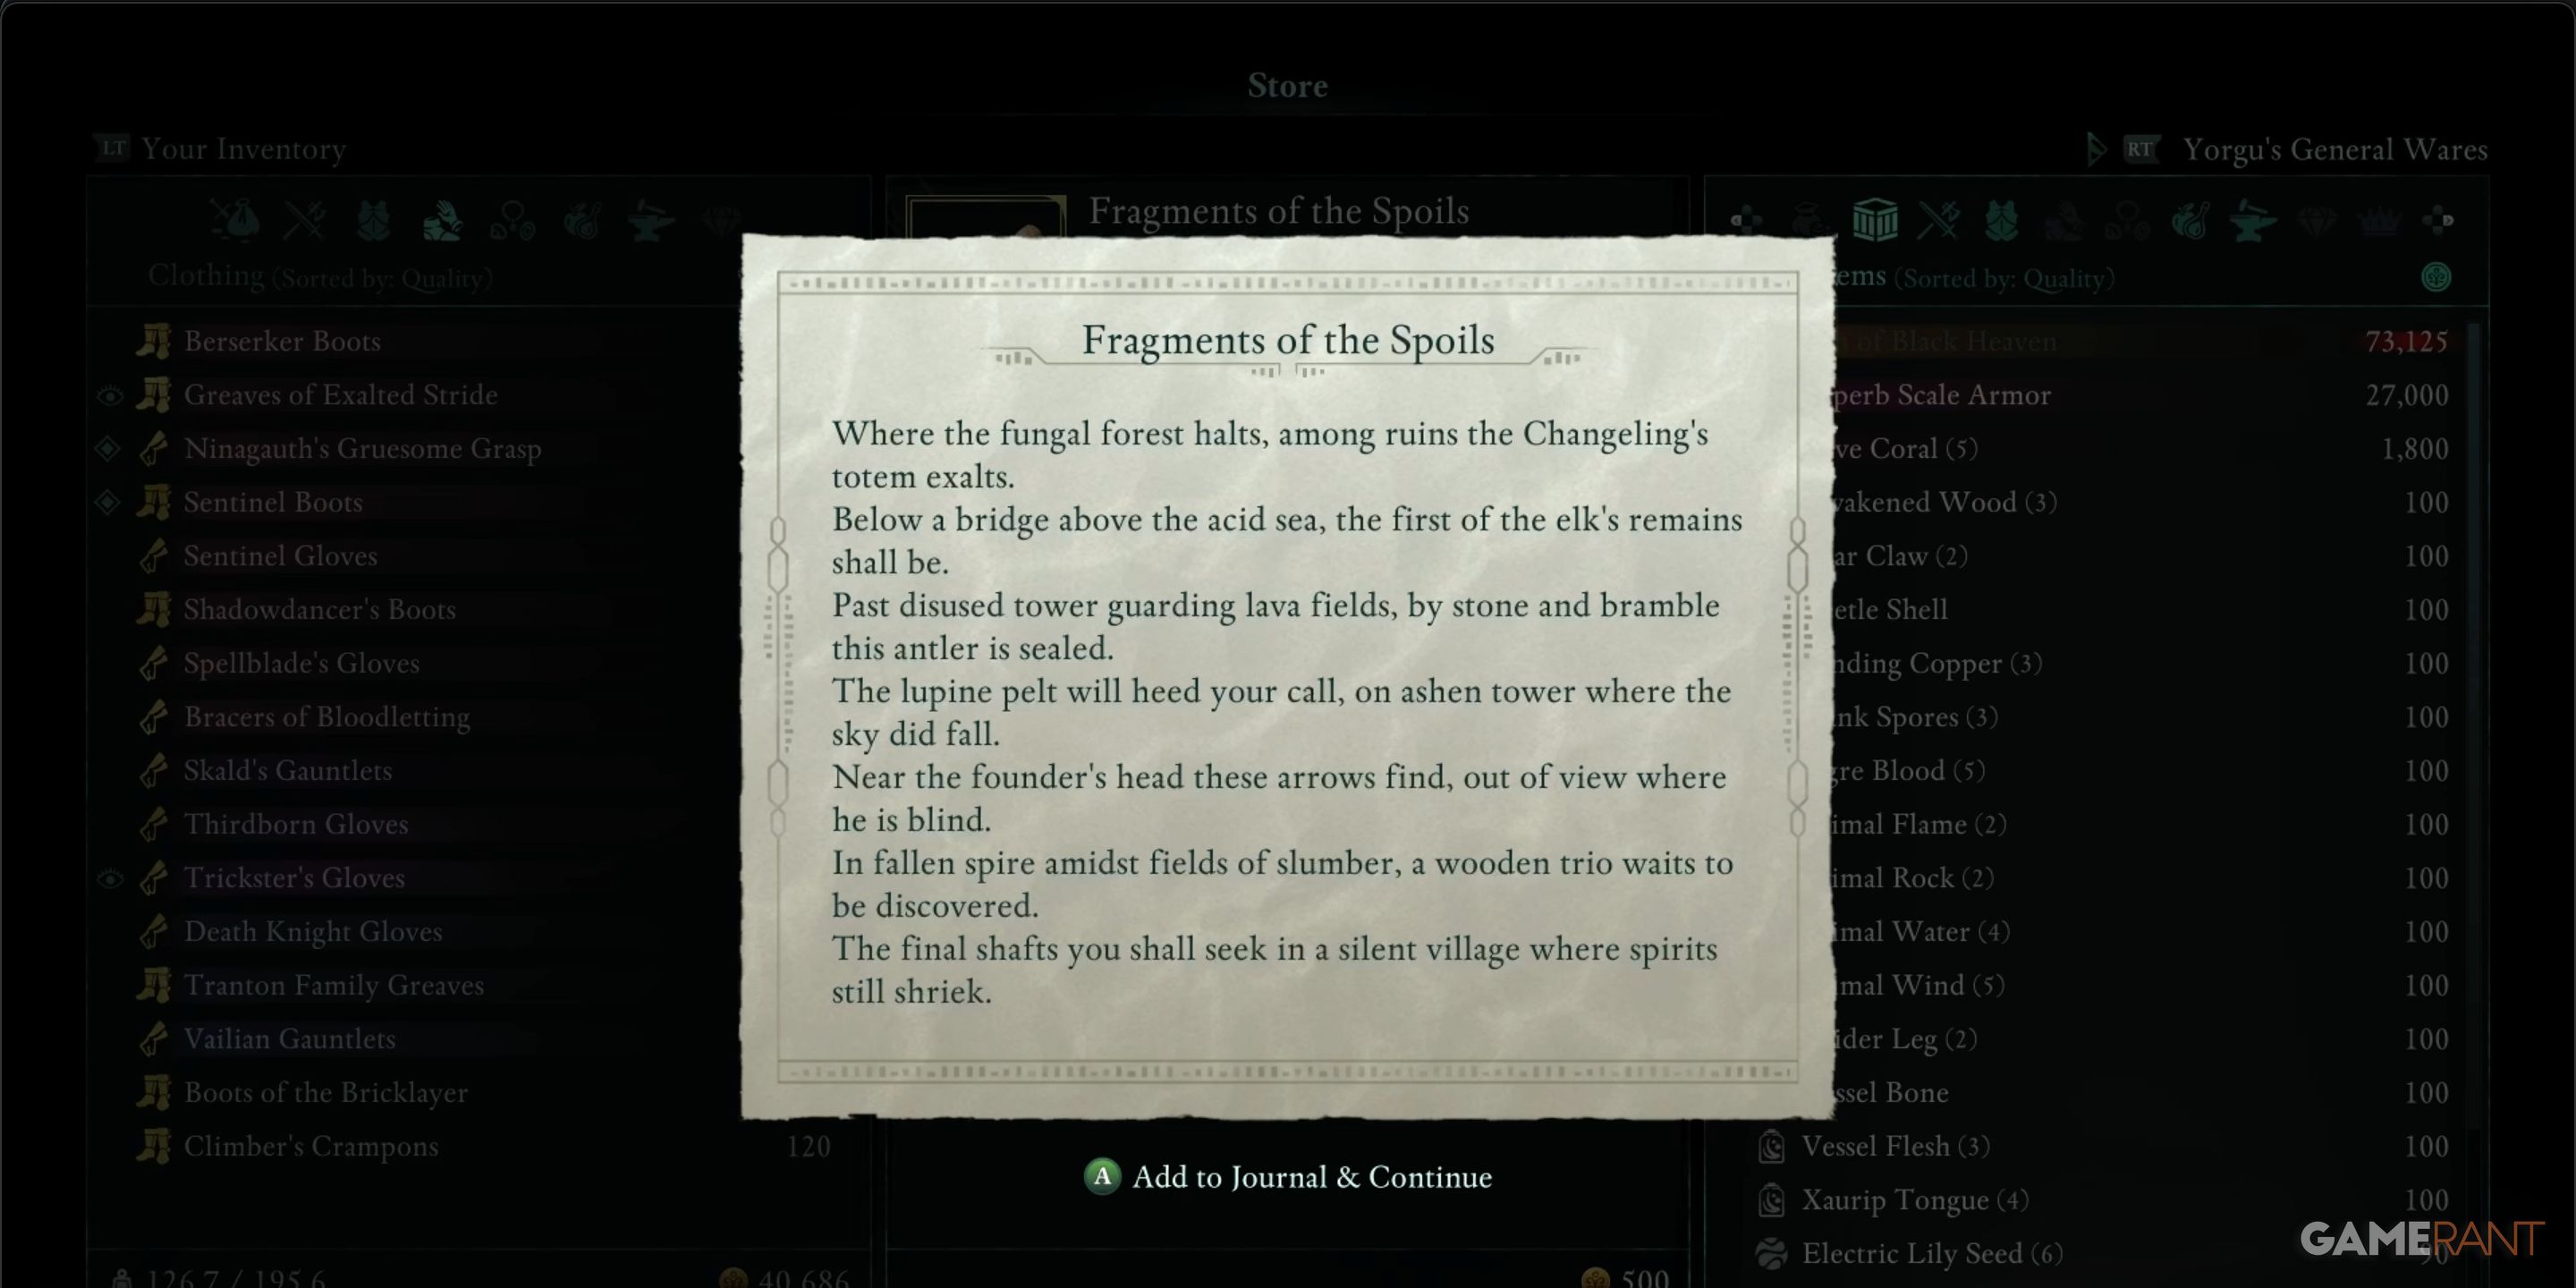
Each of the four totems in Avowed come with a guide that hints at the whereabouts of each separate item. These items are exclusively offered by a single vendor, and the price for all is consistently 500 gold. In this instance, the guide – named “Fragments of the Spoils” – can be obtained from Quartermaster Yorgu at Solace Keep.
If you haven’t been to Solace Keep before, make your way towards the heart of Galawain’s Tusk in the east. You’ll spot a bridge there that takes you into the castle. To enter, simply chat with Warden Kosmin when you arrive.
Every time we initially tried to access the keep, Marius was always part of our group. There were no problems encountered, and we were consistently granted entry. But it’s important to note that the result might vary if Marius is not present with you.
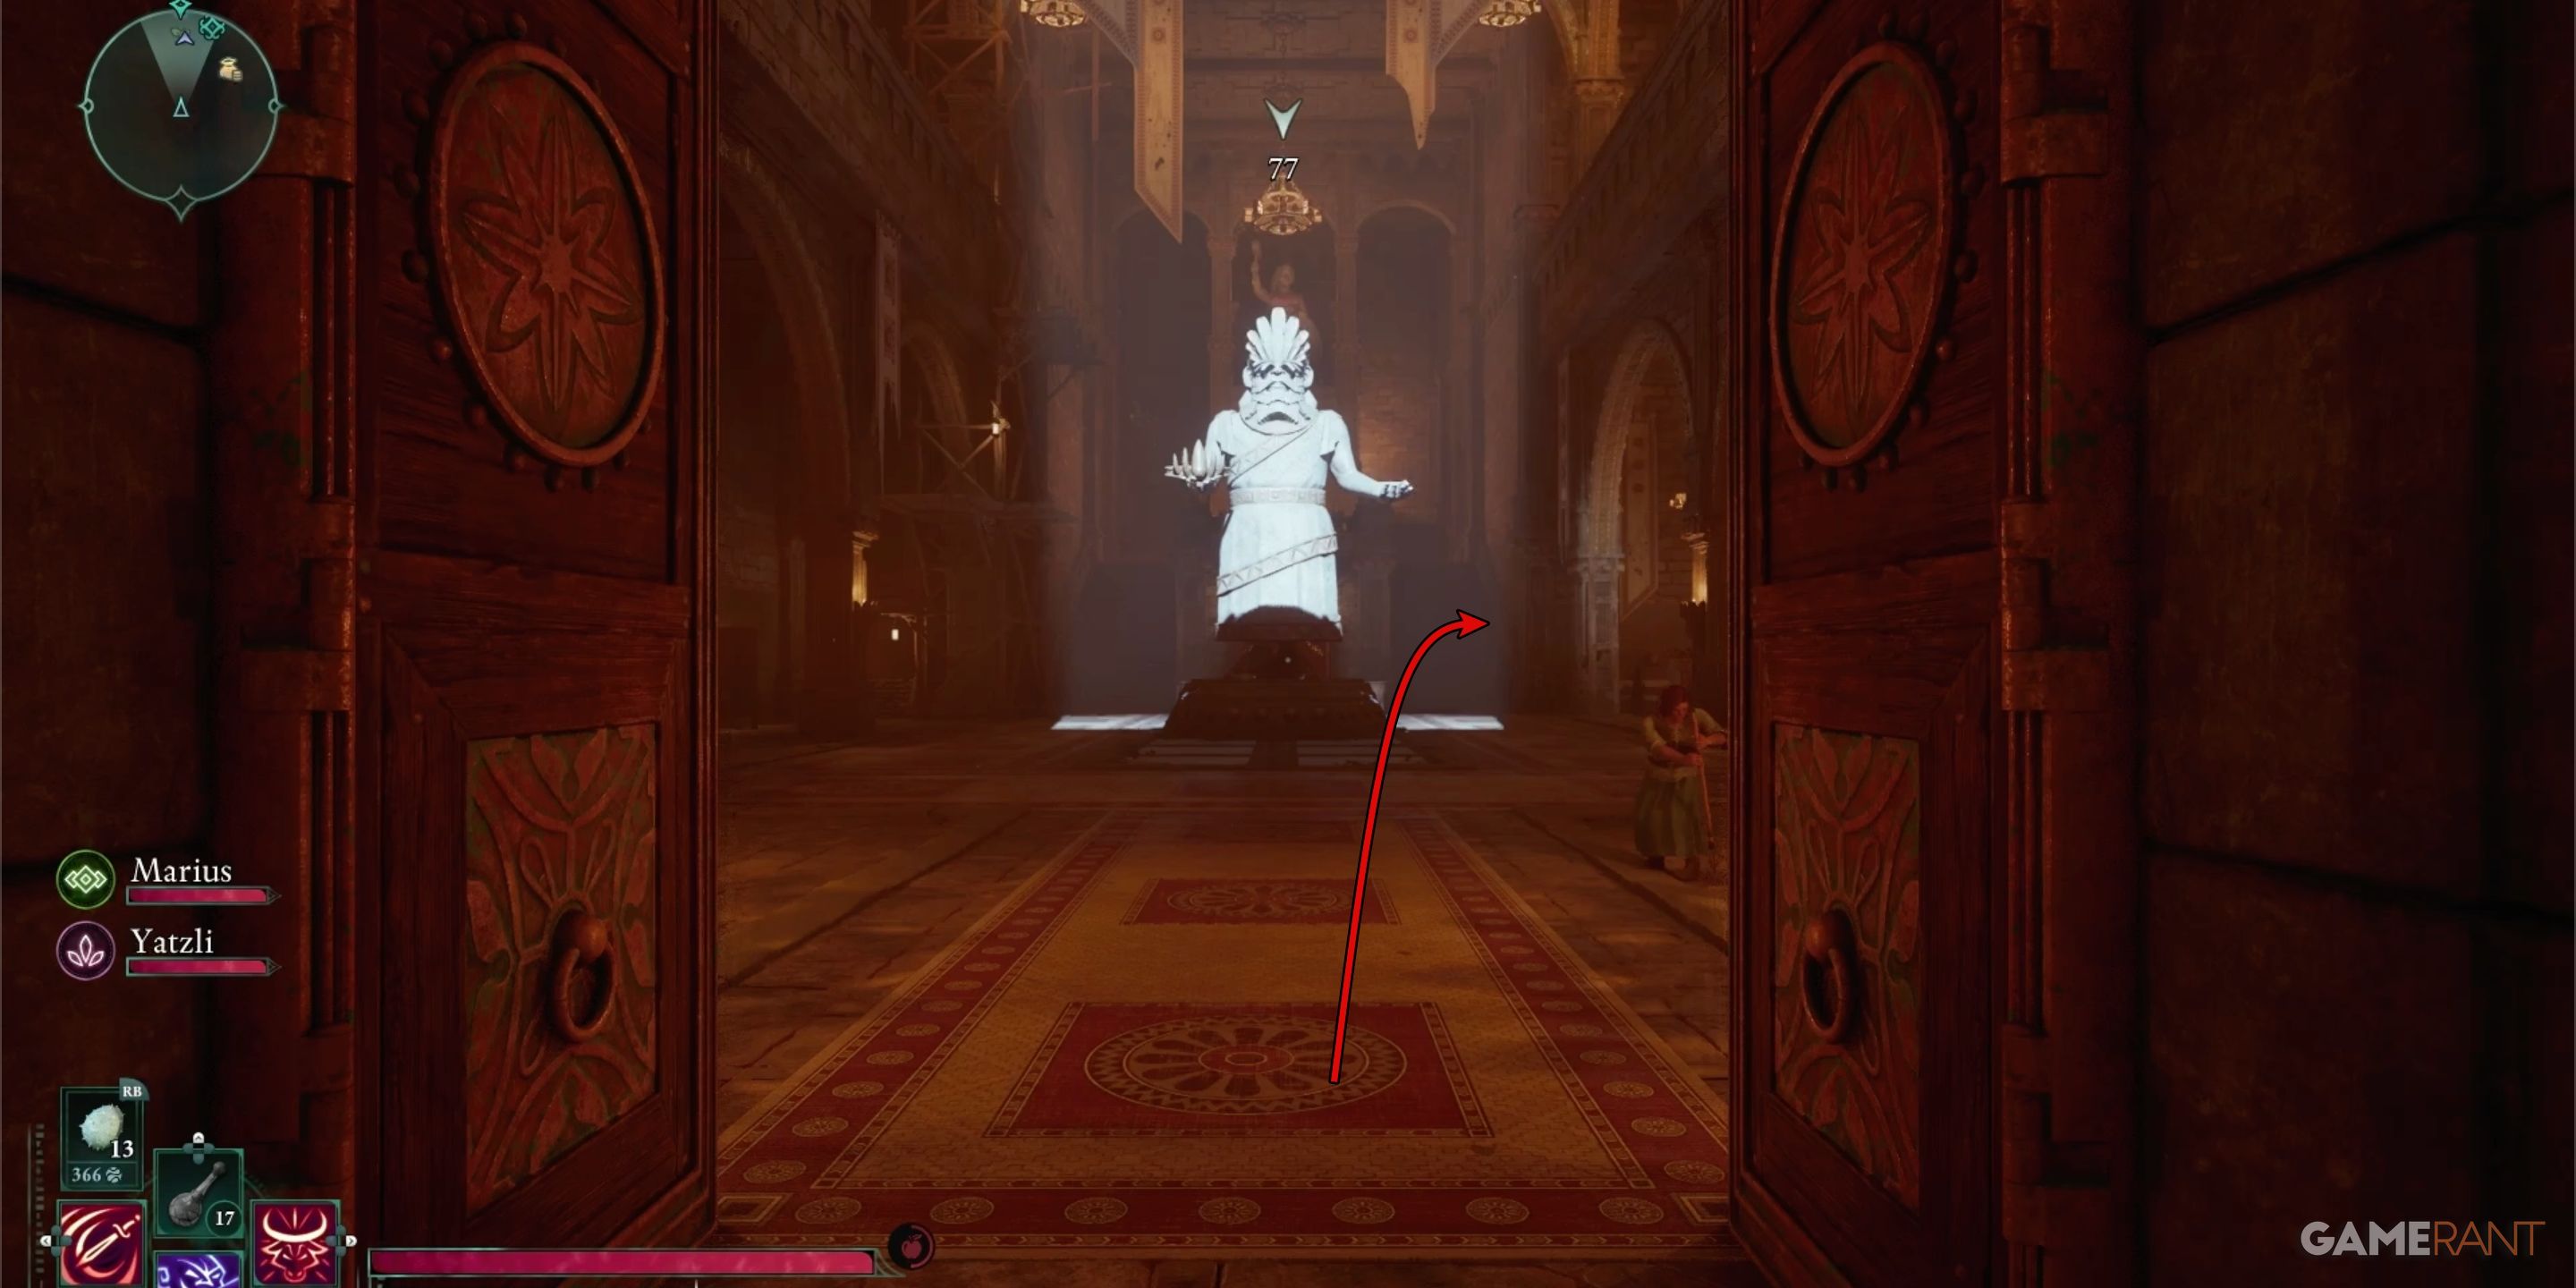
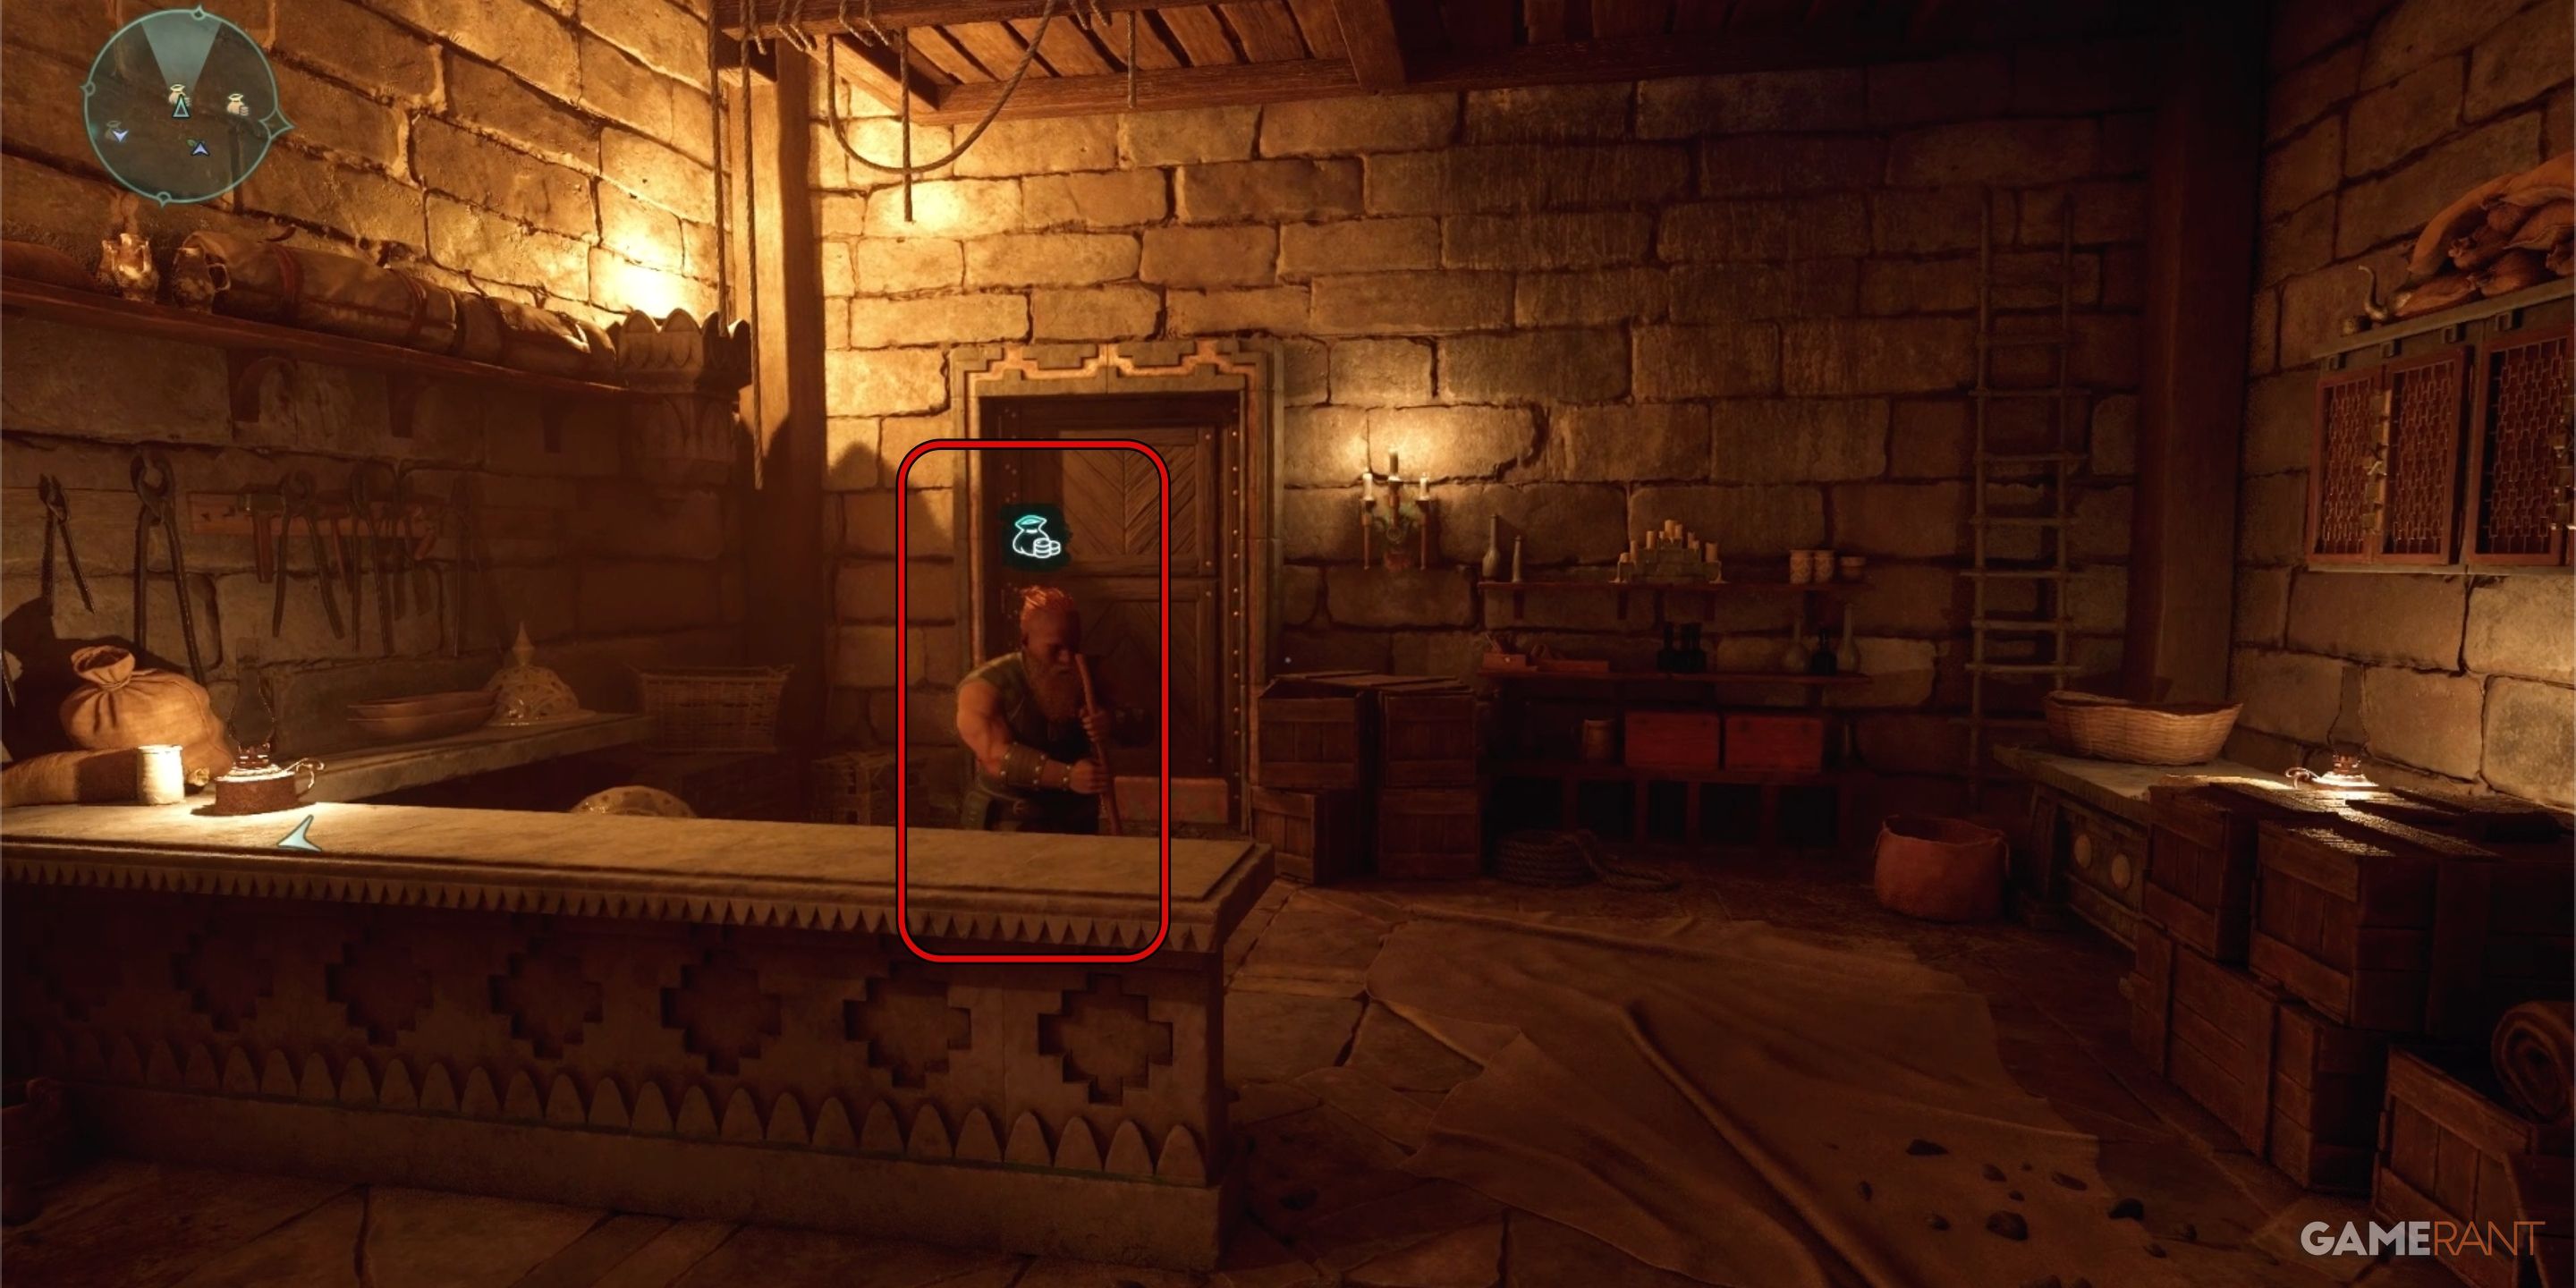

In the grand hall within the fortress, with the colossal statue before you, I, a devoted fan, would guide you to seek Yorgu hidden in the snug right nook behind that very statue. It’s there where you can obtain the coveted document straight from his hands.
Galawain’s Tusk Totem Core Location – Avowed
The initial point mentioned in the document, as well as the quest description, refers to an object called the “Totem Core”.
The first thing you see on the document or the quest details is referred to as the “Totem Core”. To clarify, the riddle goes like this:
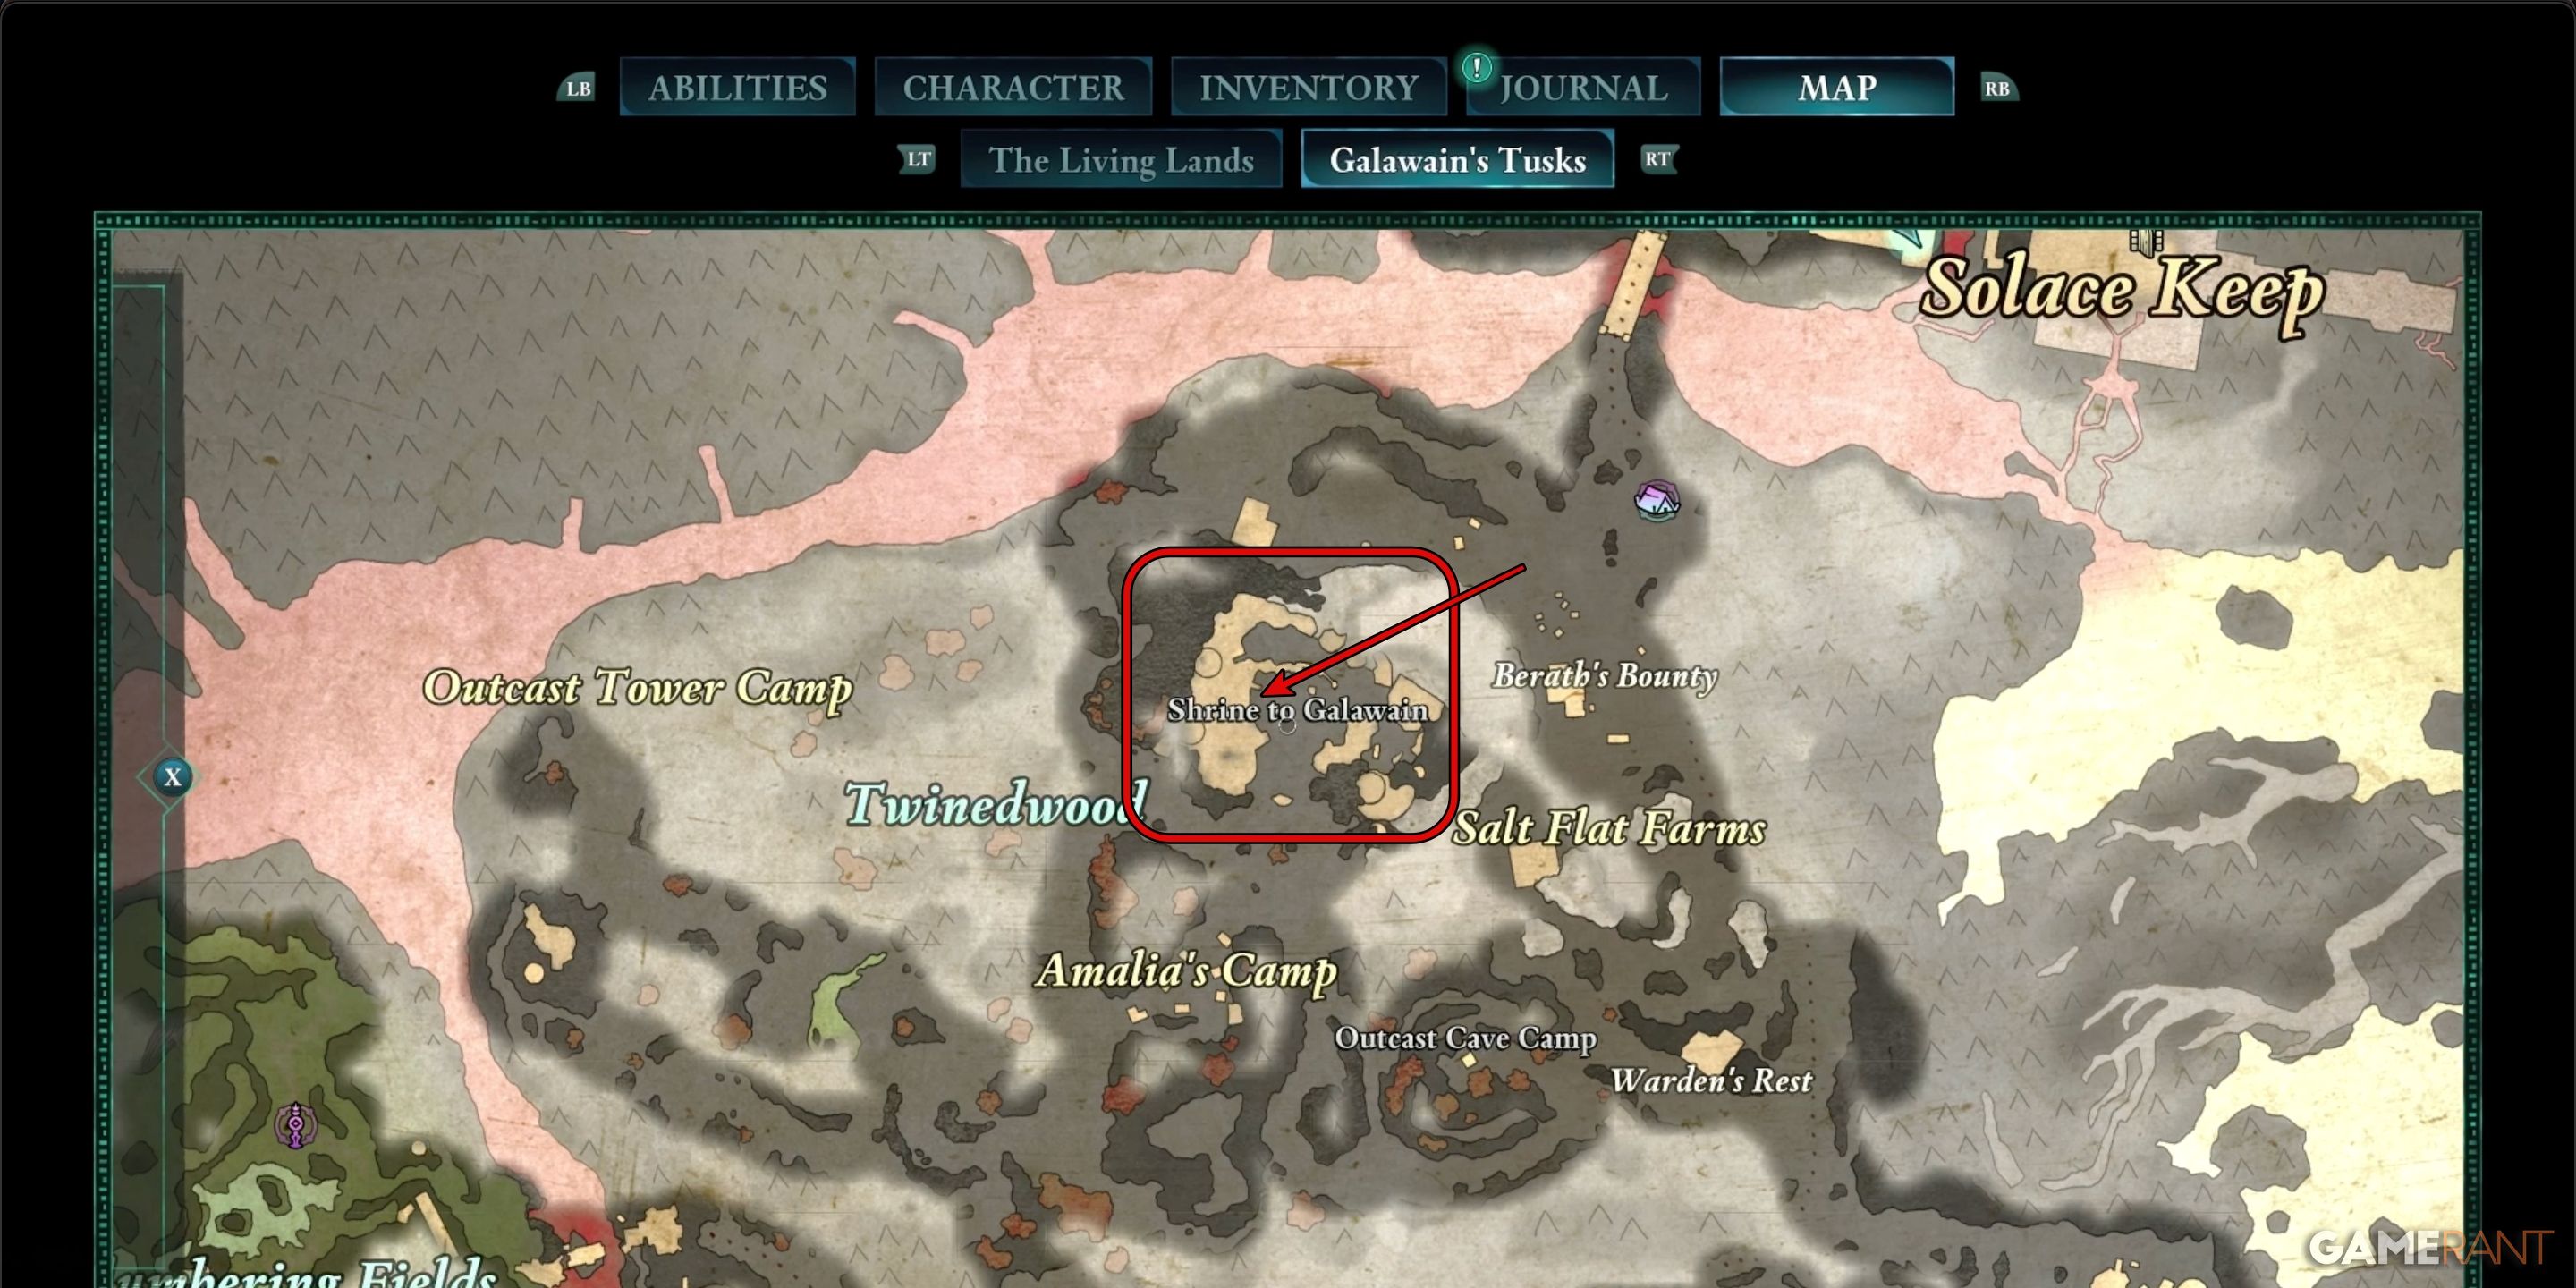
Where fungal forest halts, among the ruins the Changeling’s totem exalts.
- Riddle Solution: Shrine to Galawain

The Temple Dedicated to Galawain is situated within the Twinedwood district, nestled at the southwest edge of Galawain’s Tusk, near the Solace Keep Party Camp. Upon arrival, you will encounter two colossal Ogres in the temple’s main courtyard. Once they are defeated, ascend the steps leading to one of the larger platforms. Upon reaching the top, you’ll notice a distinct shrine area with its own set of stairs. The Totem Core is positioned on a small pedestal in the center of this shrine area.
In the game called Avowed, make sure to gather all the Totem Bases linked with each totem prior to positioning any pieces at the Totem Shrine. That’s why a message saying “Totem Base Required” appears when you attempt to access the shrine without it.
Antler of Perservering Stag Location – Avowed
As a devoted admirer, I’d like to share that the item number two on the list is none other than the “Antler of the Persistent Stag.” The mystery surrounding it can be encapsulated thusly:
Below a bridge above the acid sea, the first of the elk’s remains shall be…
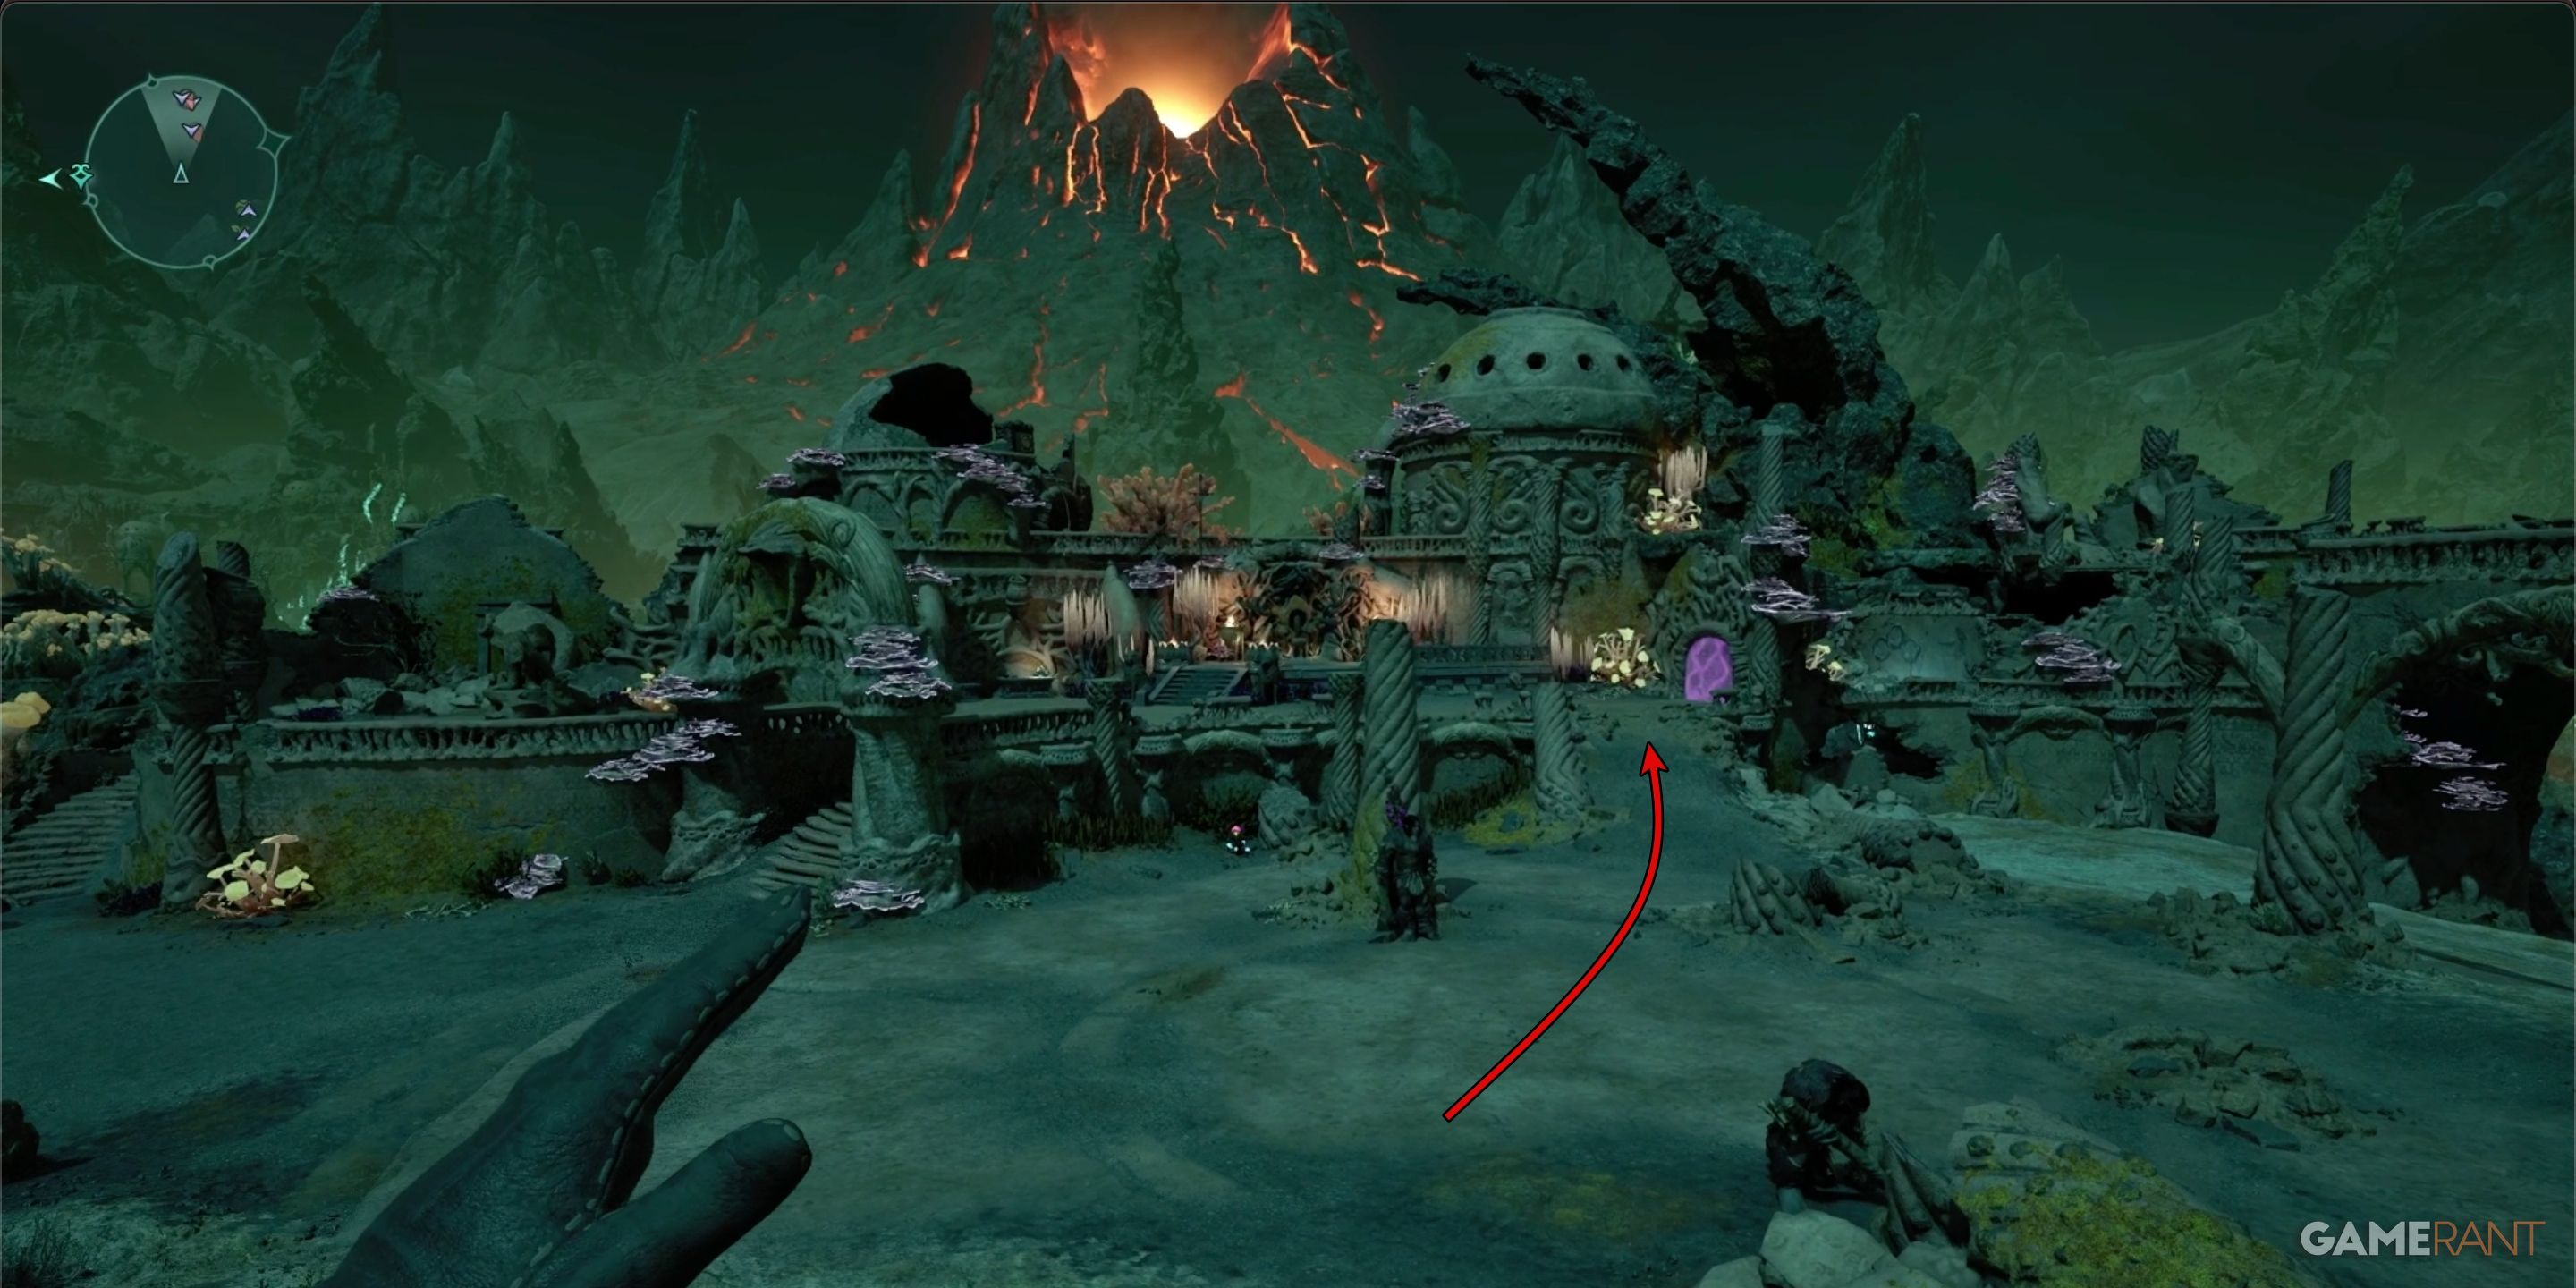
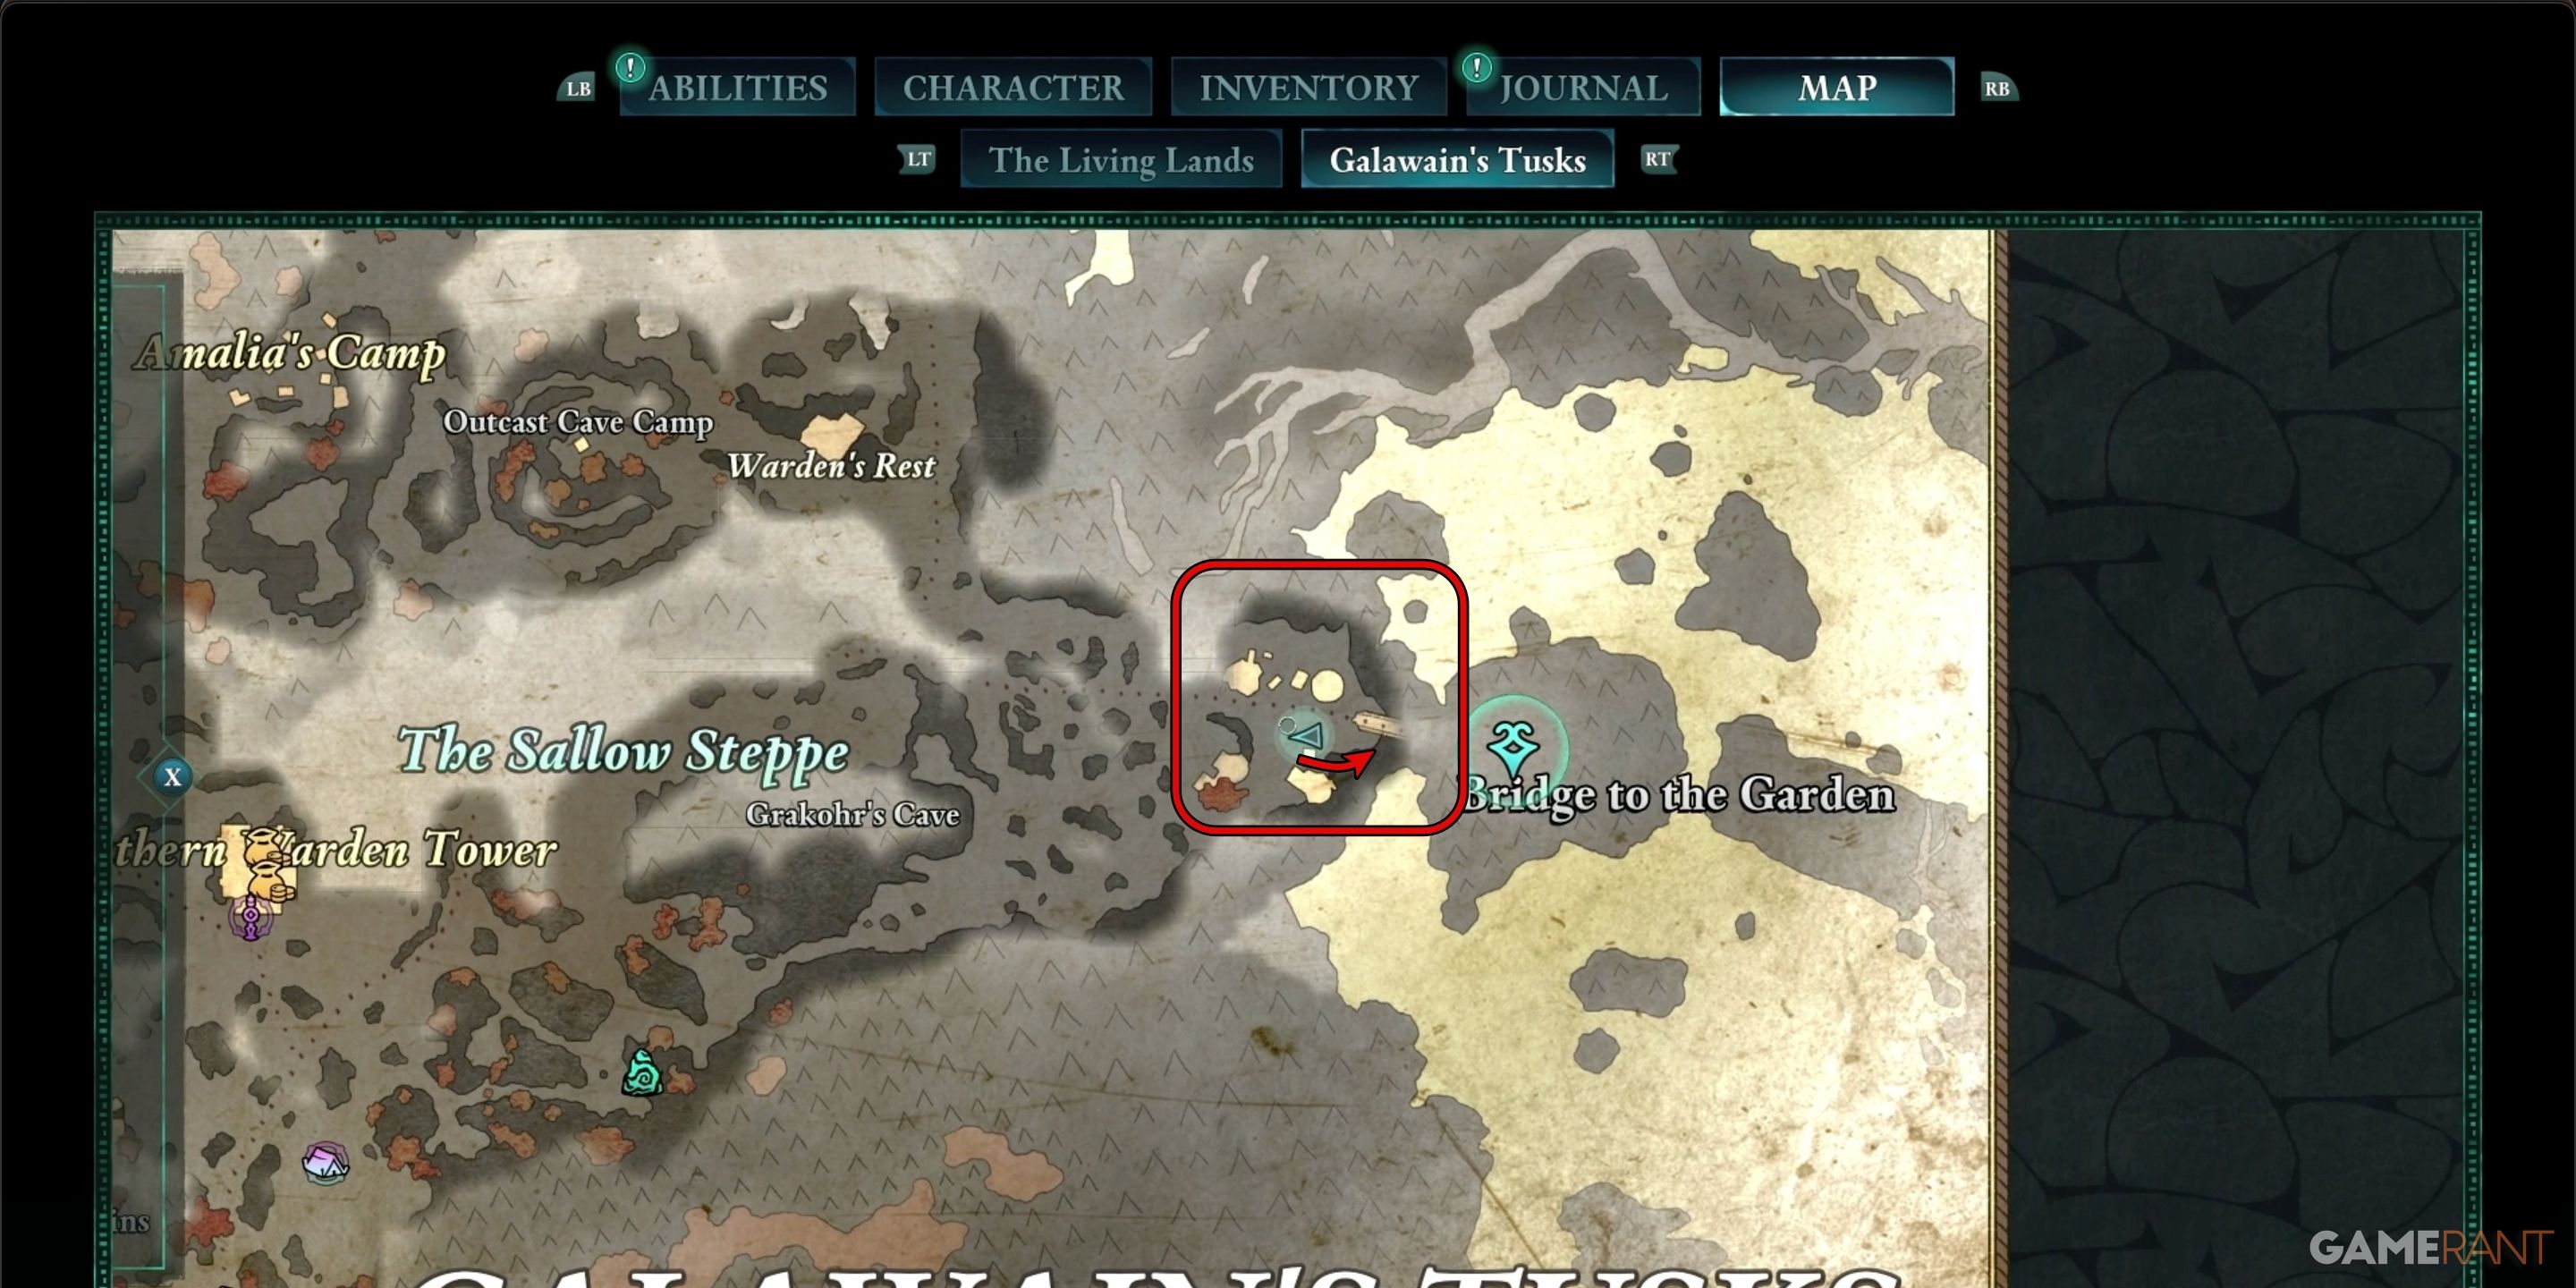
- Riddle Solution: Bridge to the Garden

In the thrilling adventure of Galawain’s Tusk, titled “Our Dreams Divide Us Still“, I will guide you through your mission where you’ll be on a quest to find the elusive “Steel Garrote“. This crucial item can be discovered in the southeastern part of the map, nestled closely to the “Bridge to the Garden” area.
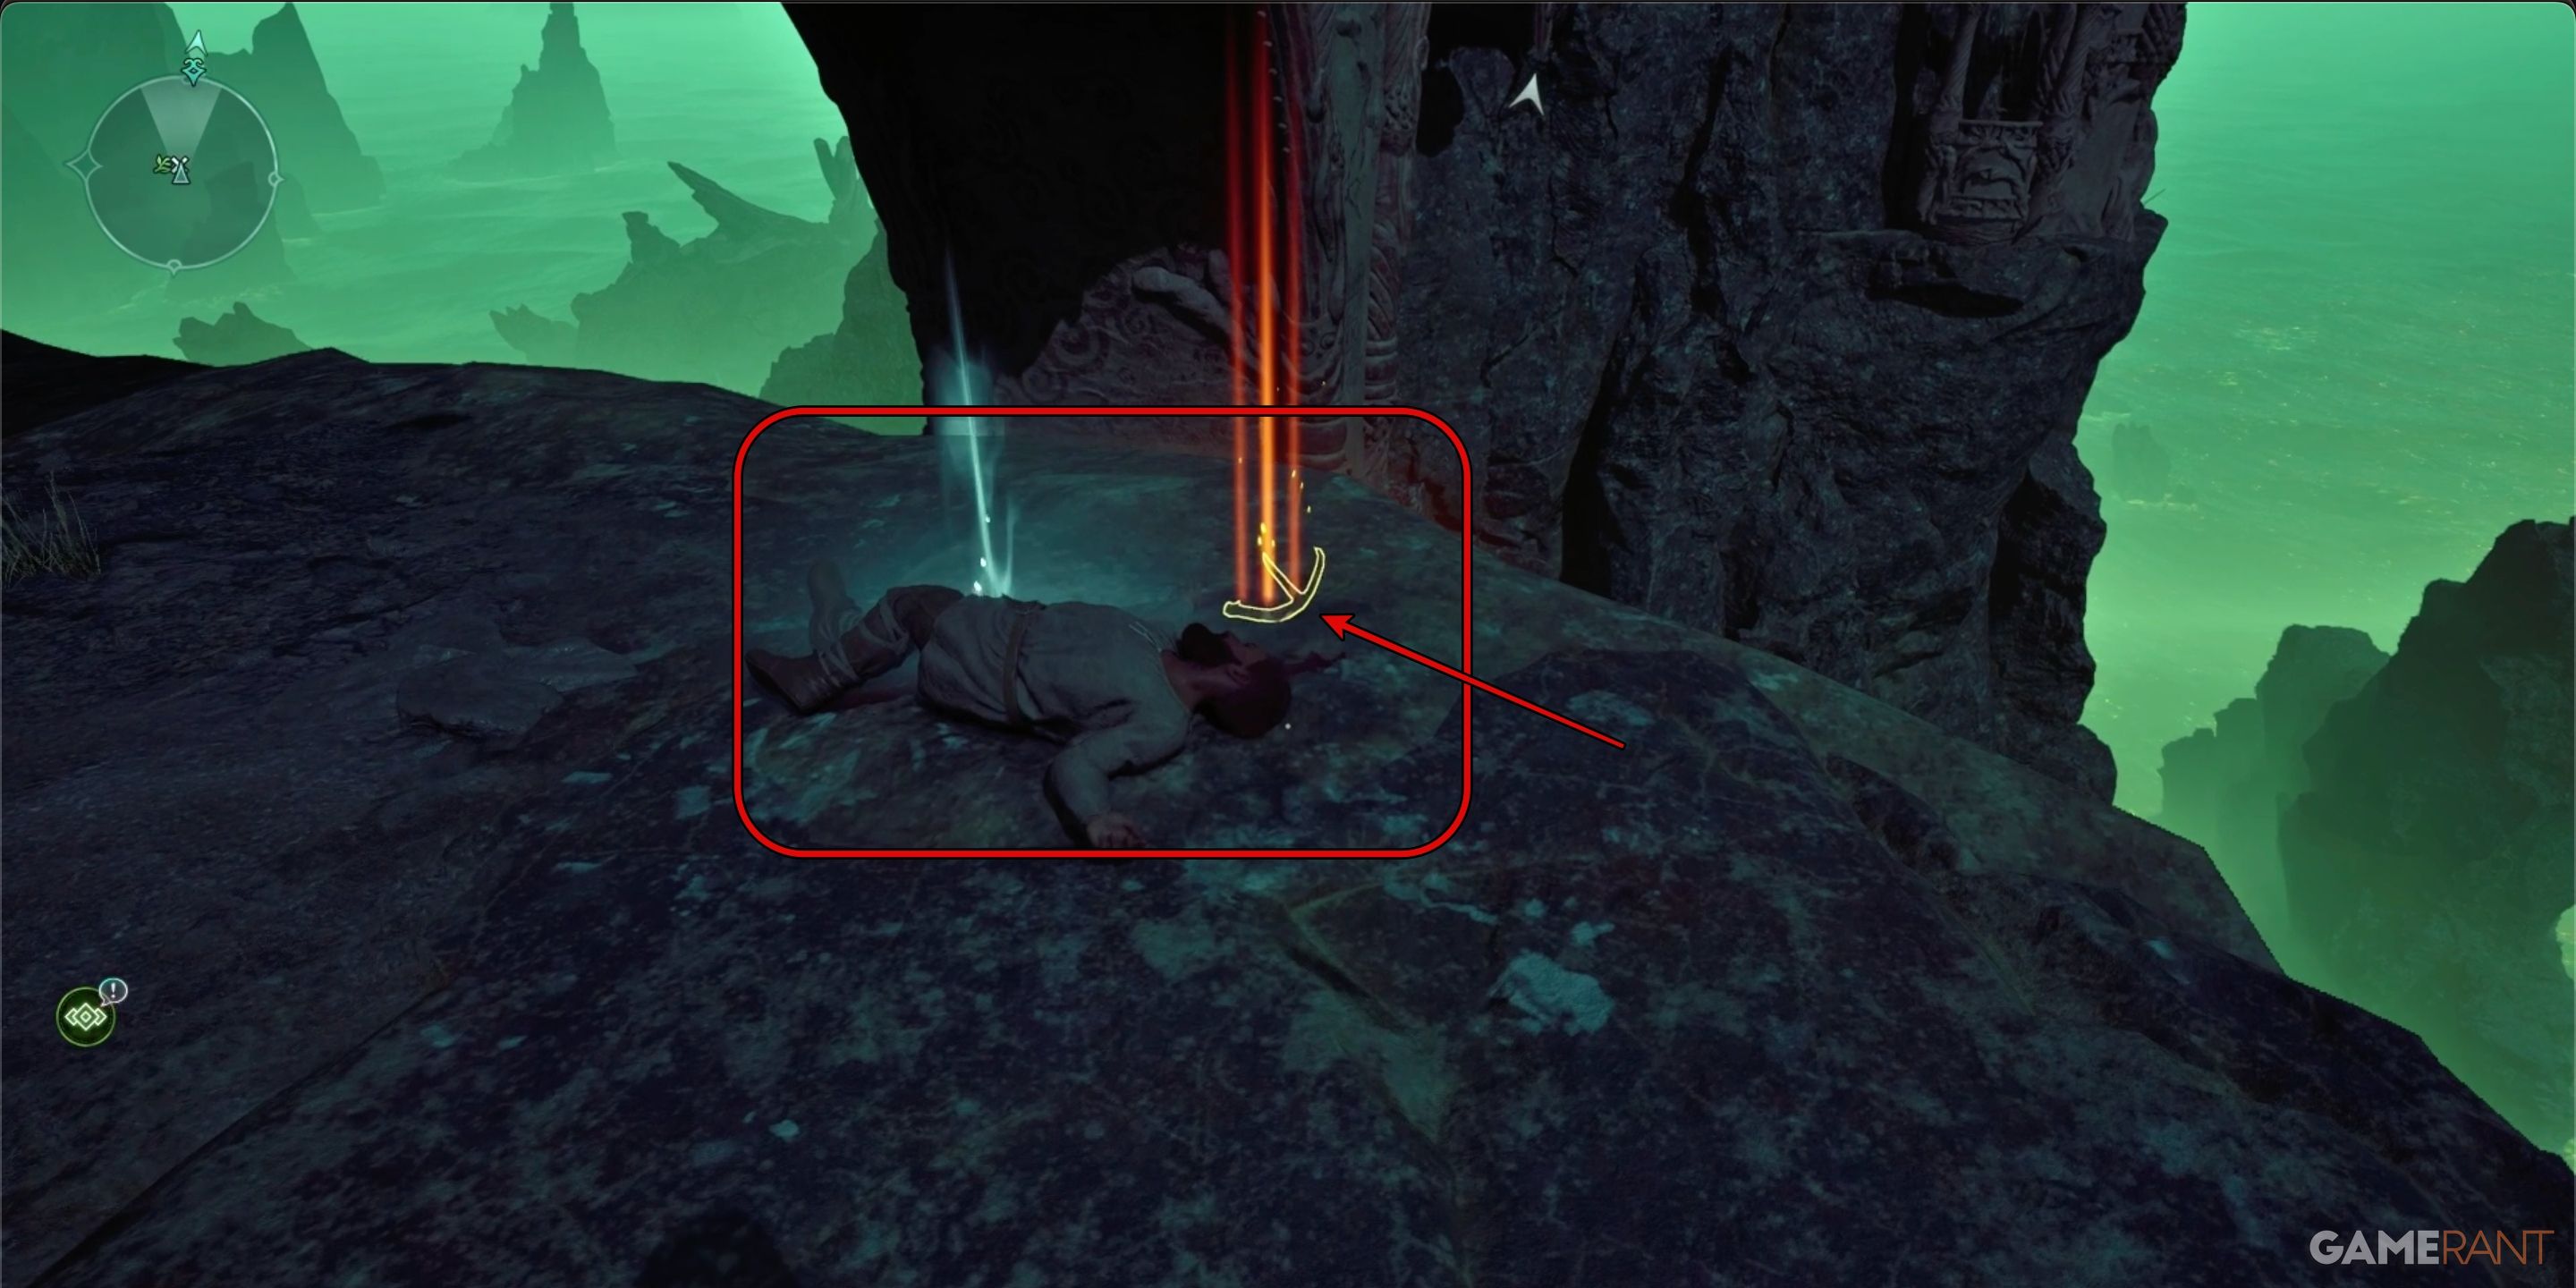
Starting from the spot indicated on the given map, you can traverse along the path and reach a modest overhang beneath the damaged bridge. There, you will discover the Antler of the Tenacious Stag in close proximity to an unresponsive figure.
Antler of Pursued Stag Location – Avowed
In “Fragments of the Spoils,” the solution to the third enigma directs you towards the Antler of the Chased Deer. The third hint given in “Fragments of the Spoils” will guide you to the antler that was once worn by a deer being hunted.
Past disused tower guarding lava fields, by stone and bramble this antler is revealed
- Riddle Solution: North of Pargrun Cache
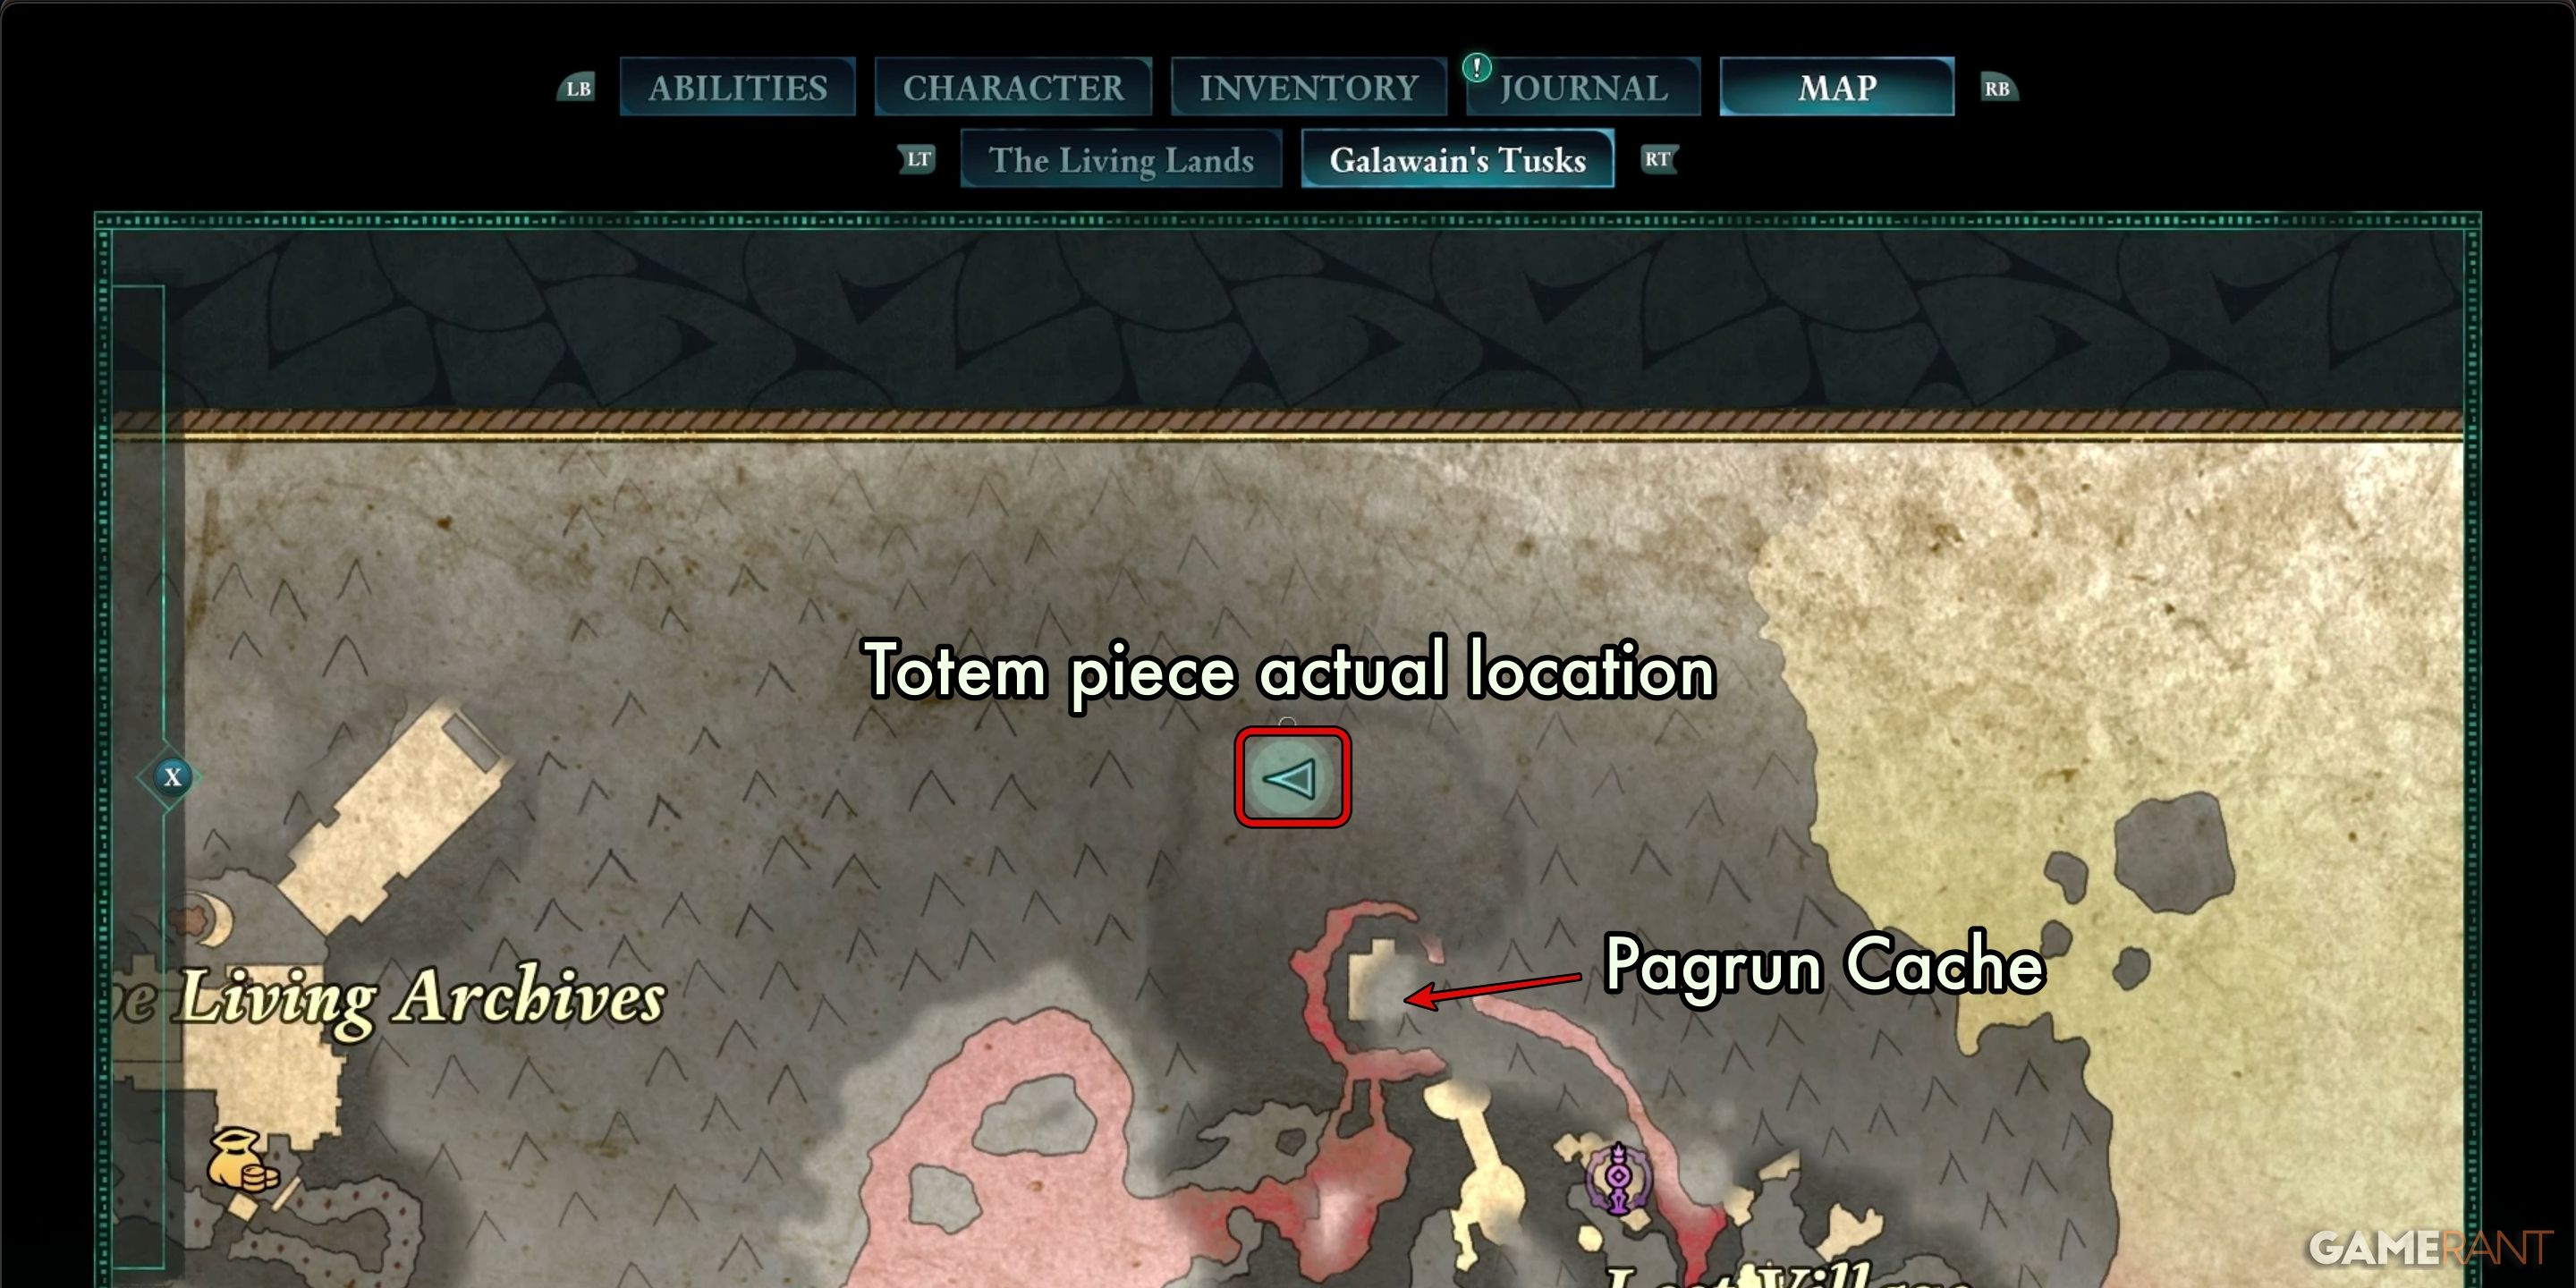
You can discover this totem artifact hidden within a concealed cave, located to the north of Galawain’s Tusk Pagrun Cache. This cache itself lies to the northwest of the mysterious Lost Village, where Marius’ companion quest leads you.
- Make sure you bring Yazli, as she’ll need to dispel illusions.
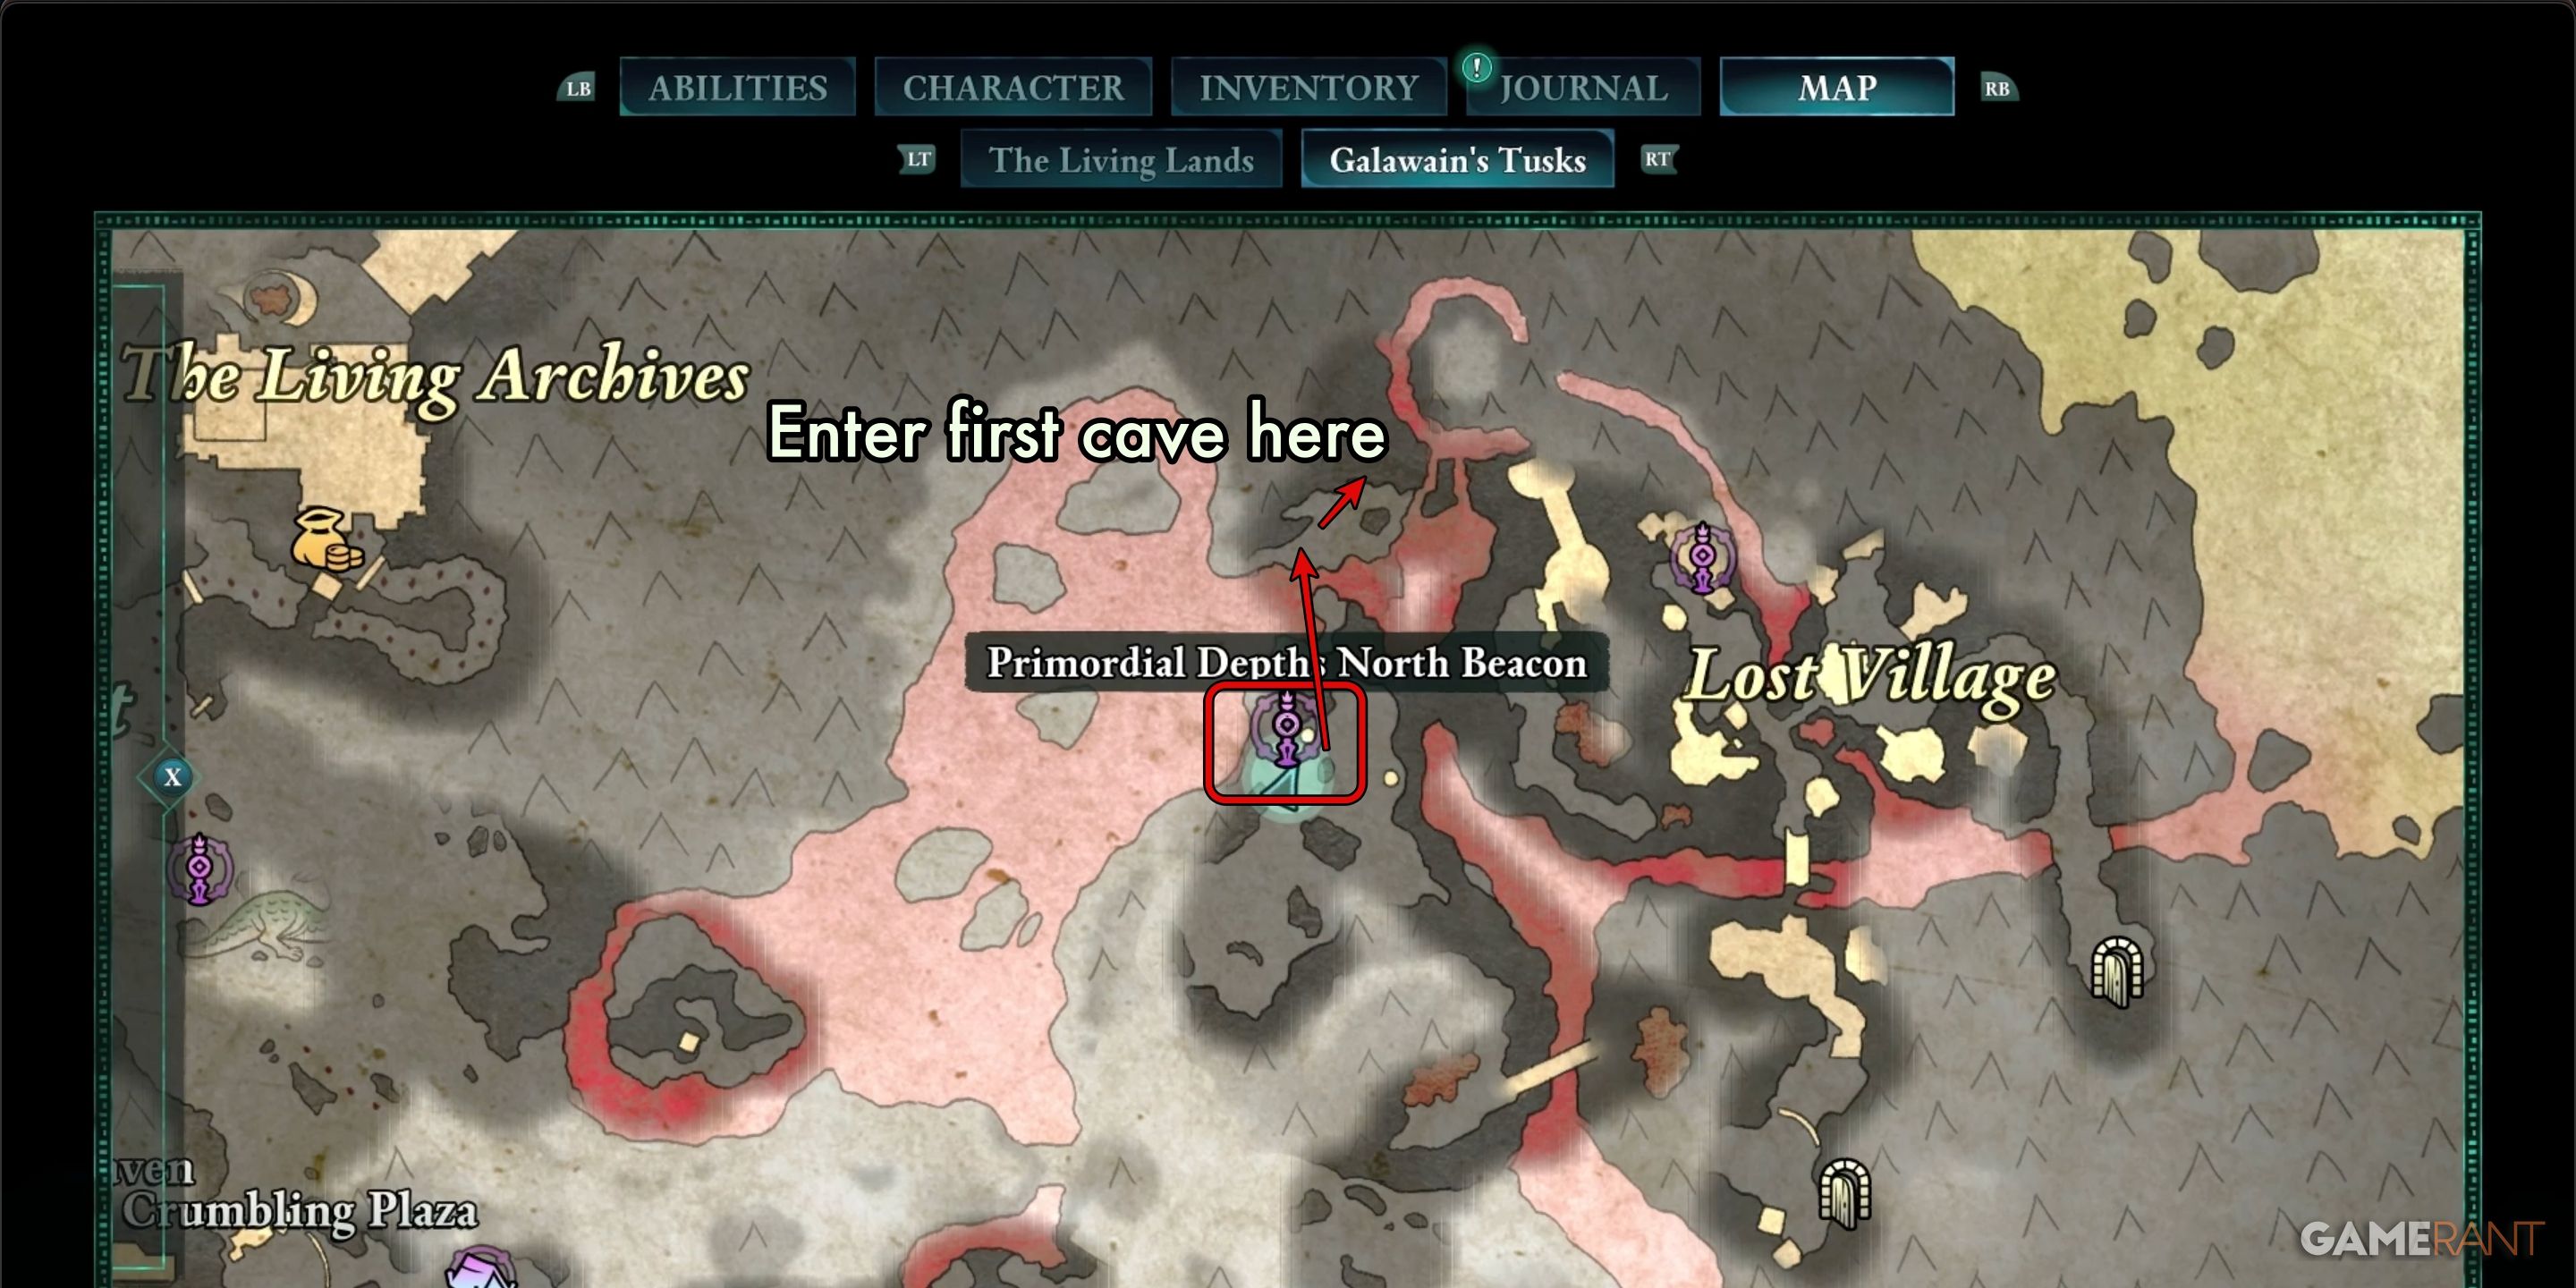
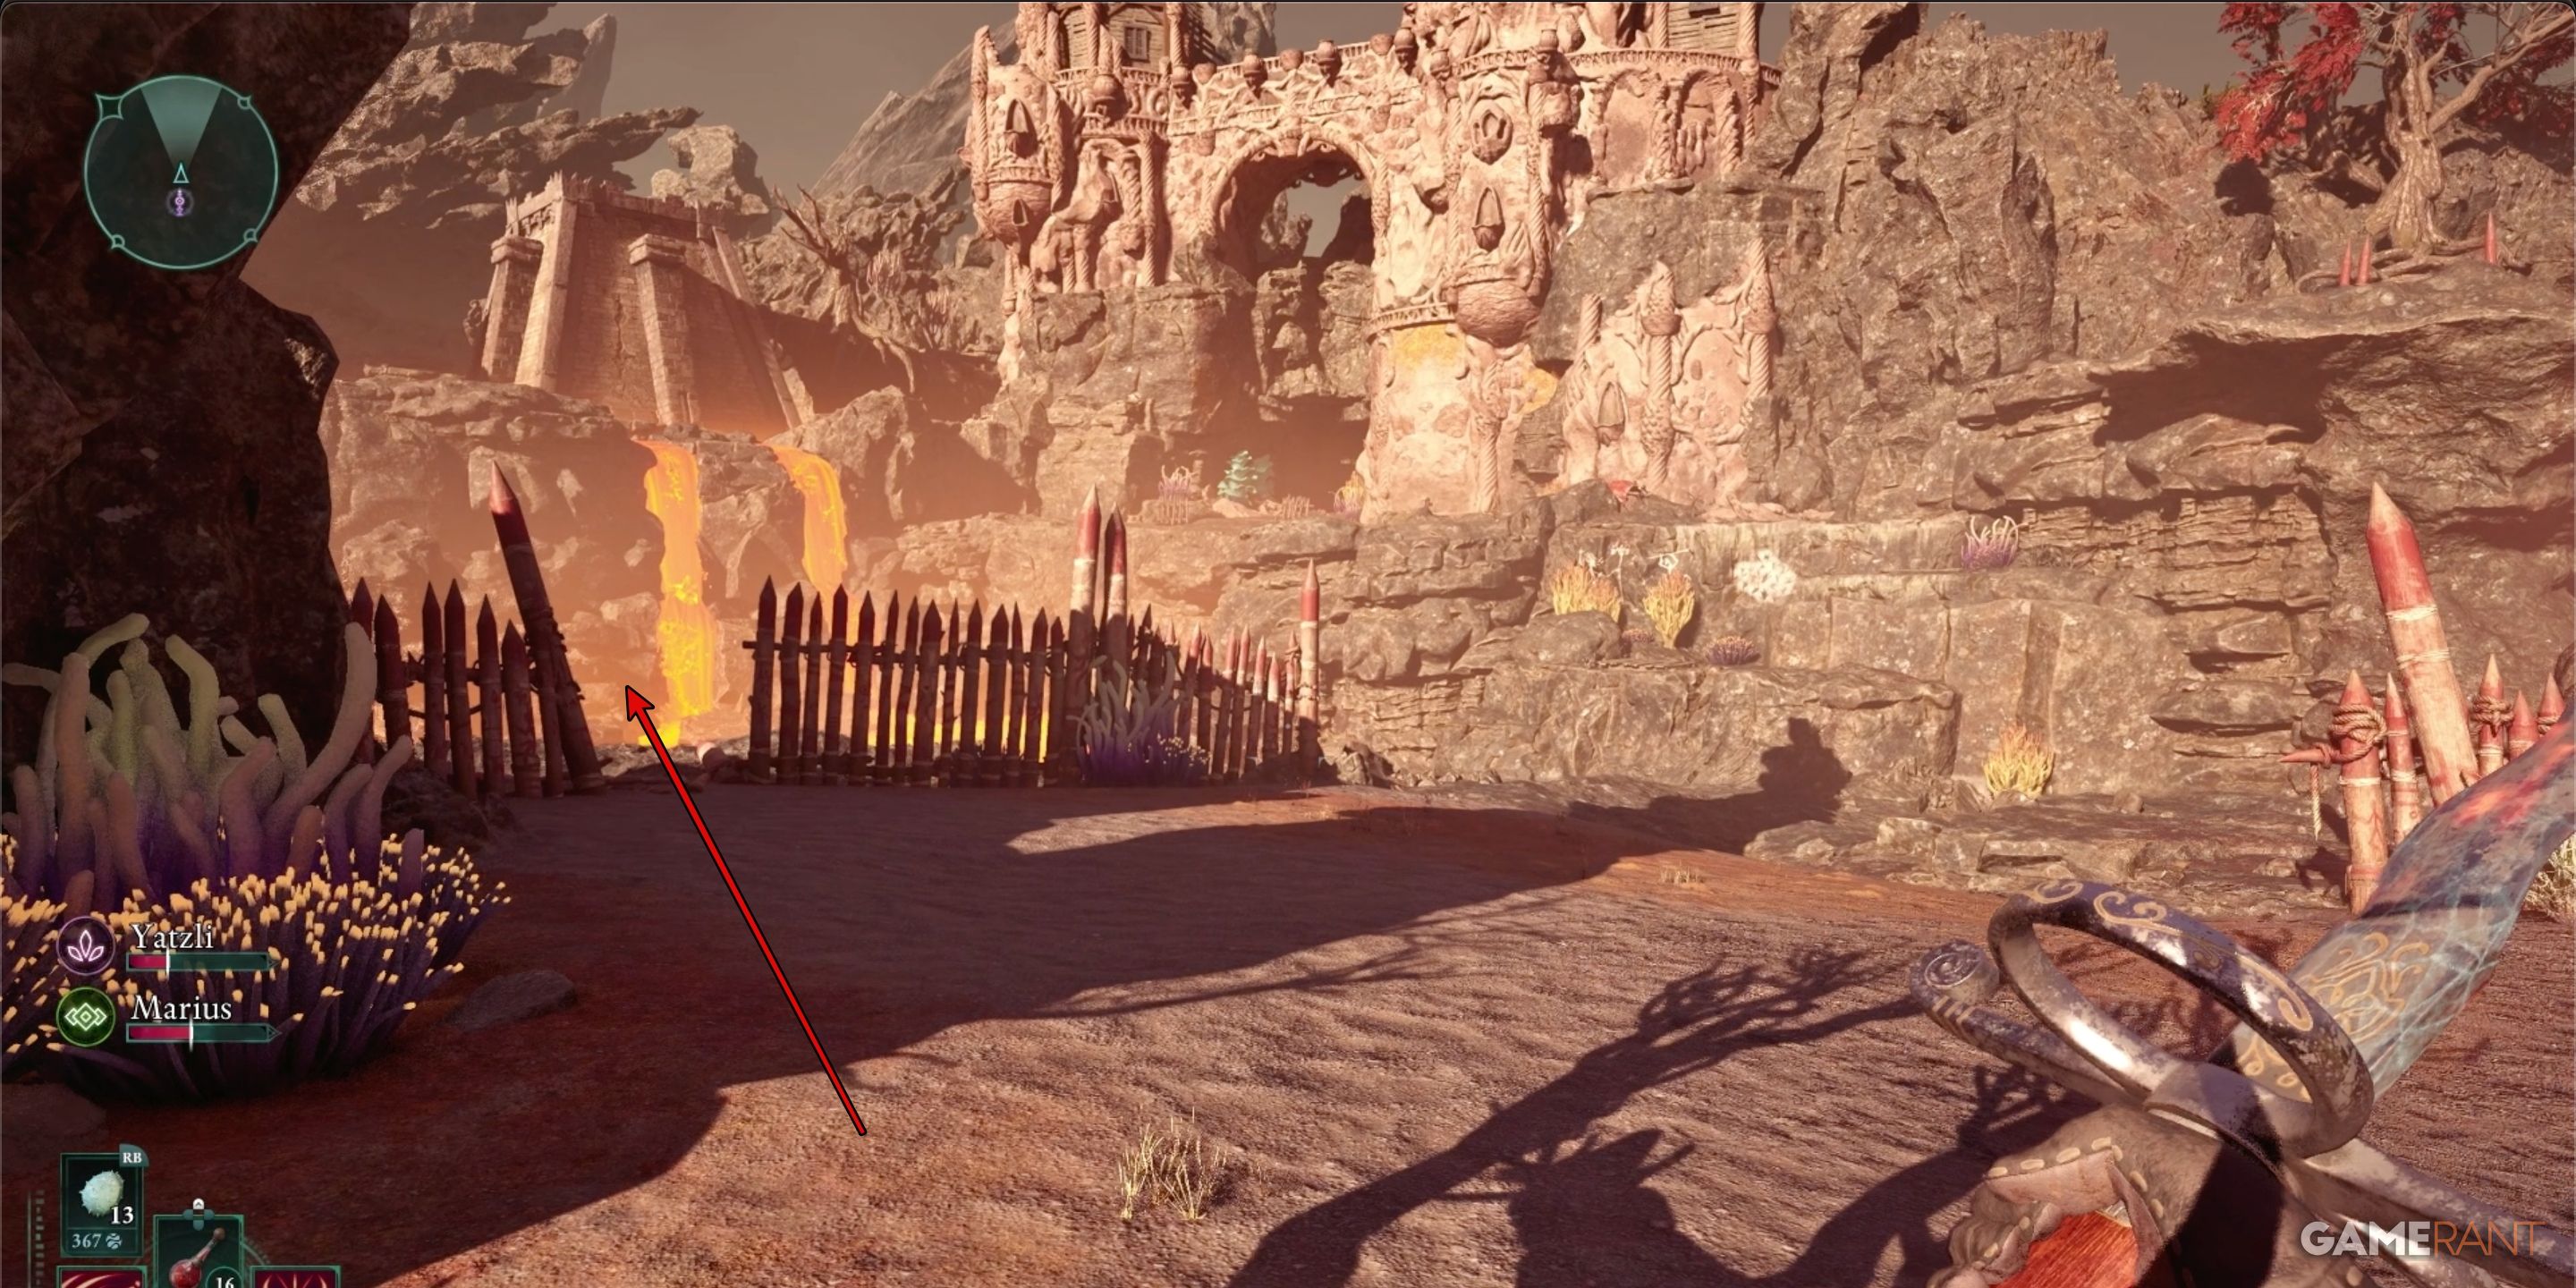
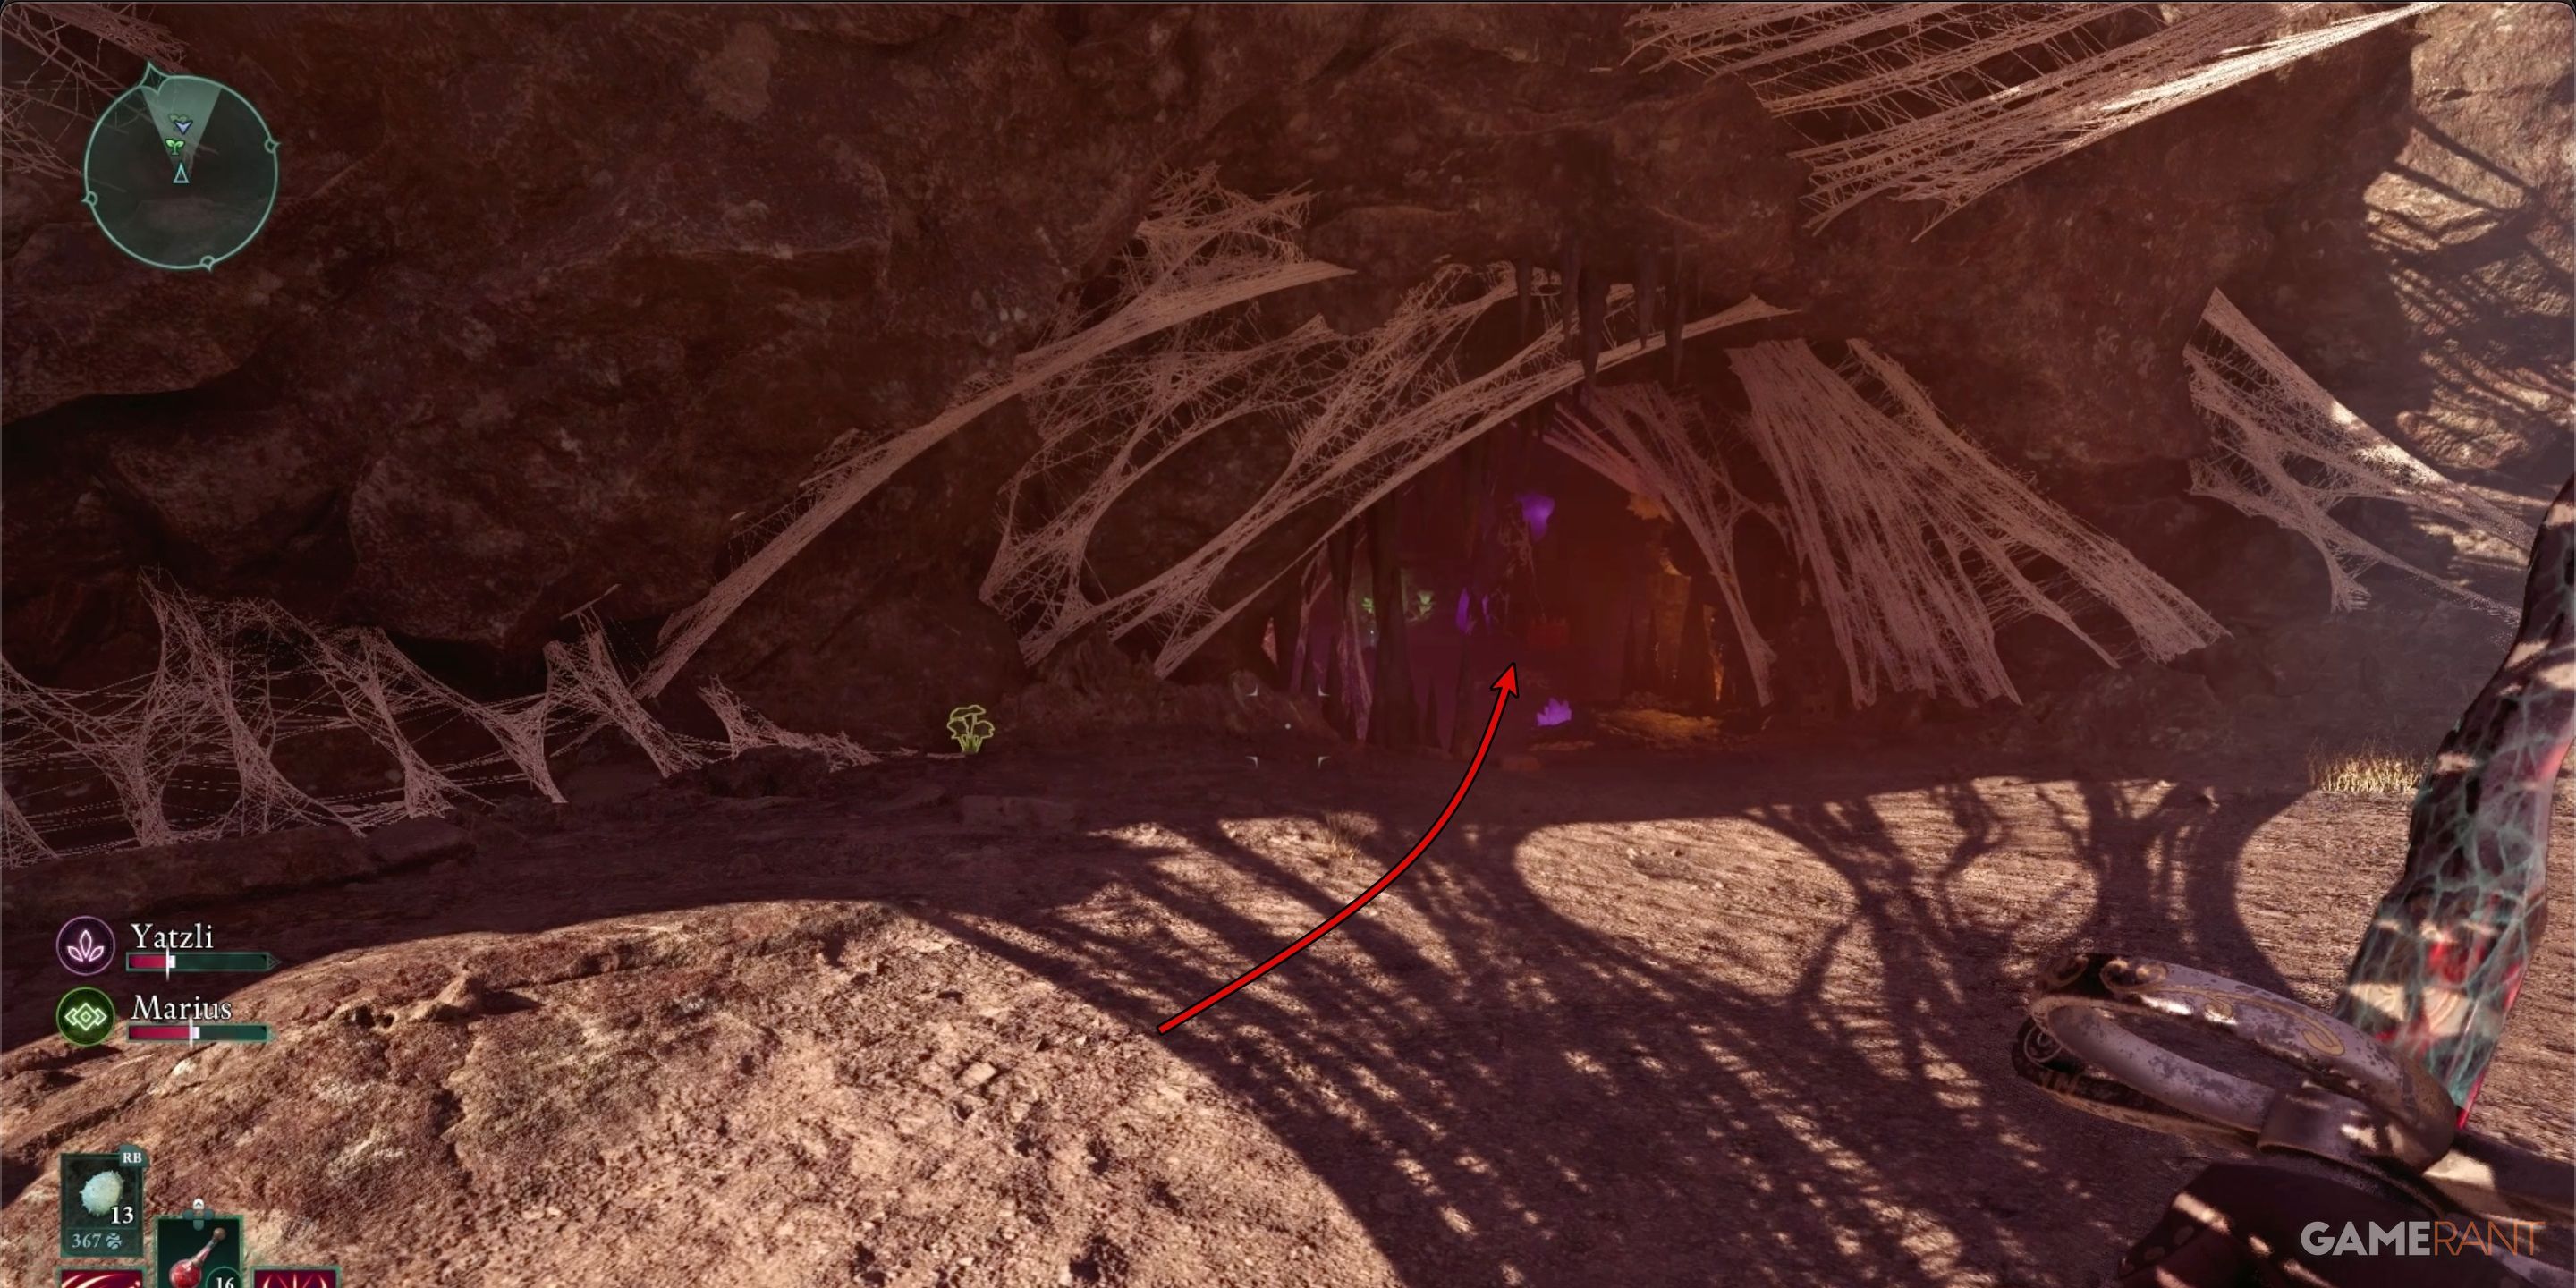
To get to this location most conveniently, begin at the “Primeval Depths North Beacon” and proceed northward through the broken part in the spiked enclosure. After crossing the river of molten rock, enter the cave. Proceed with caution as there are numerous spiders that you’ll need to handle. You’ll spot a tiny gap in the cave wall as well as a larger entrance into a room filled with lava. The small opening will lead you to the same chamber, so you can opt for either route.
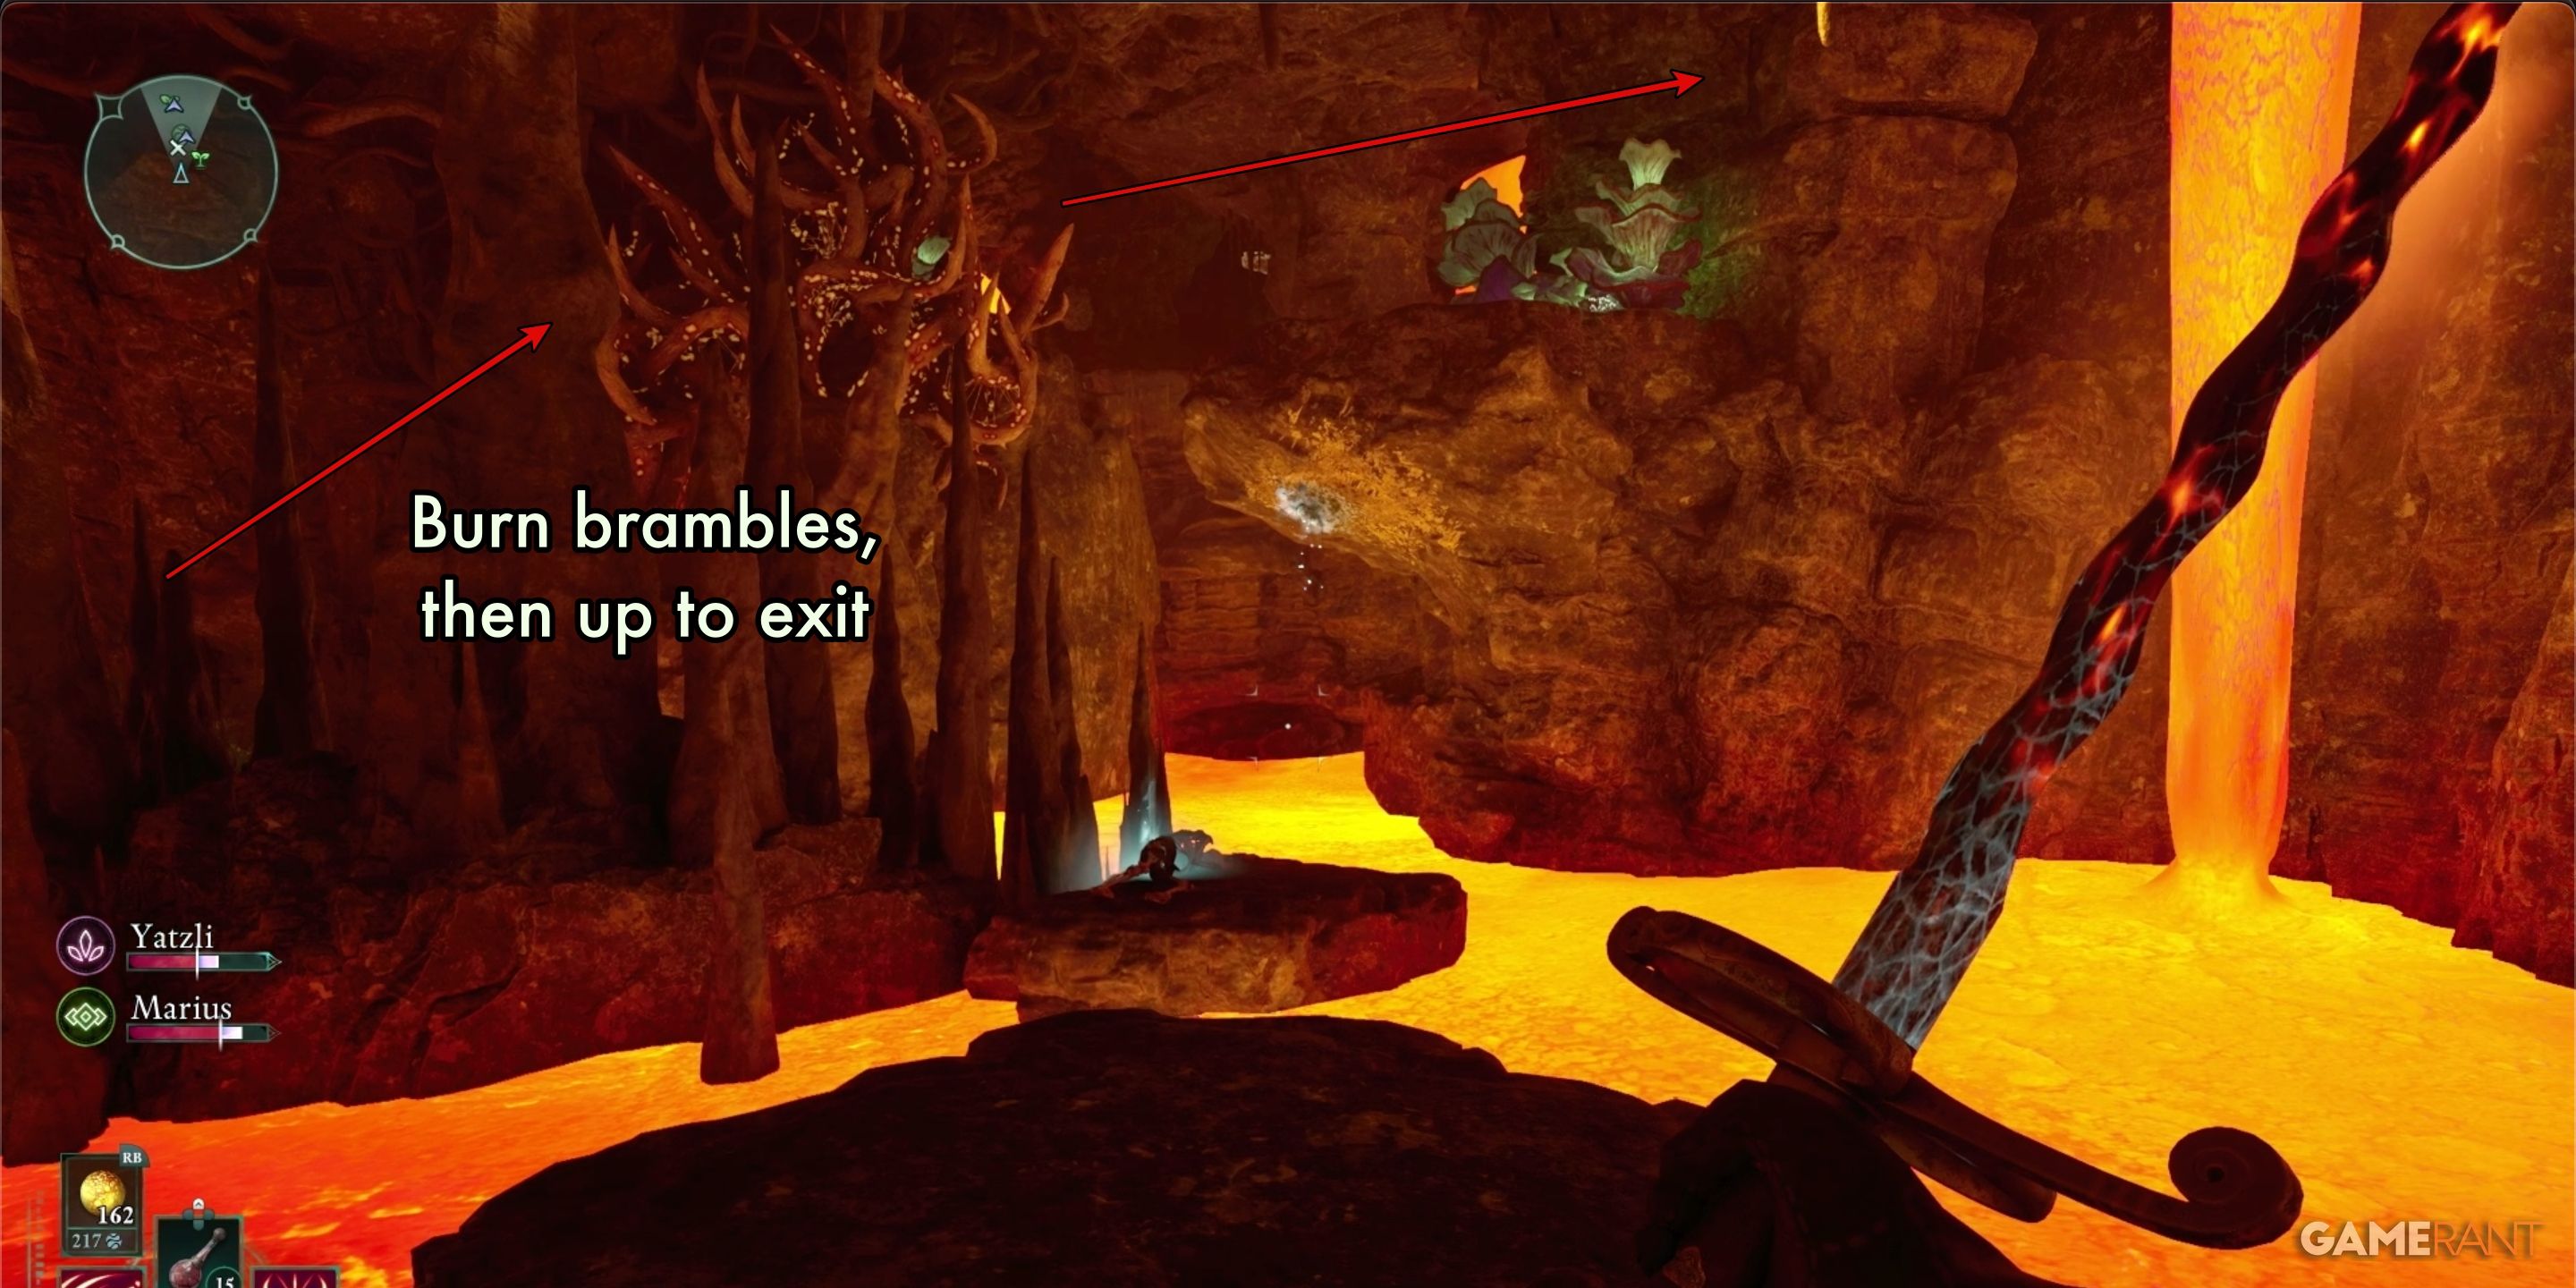
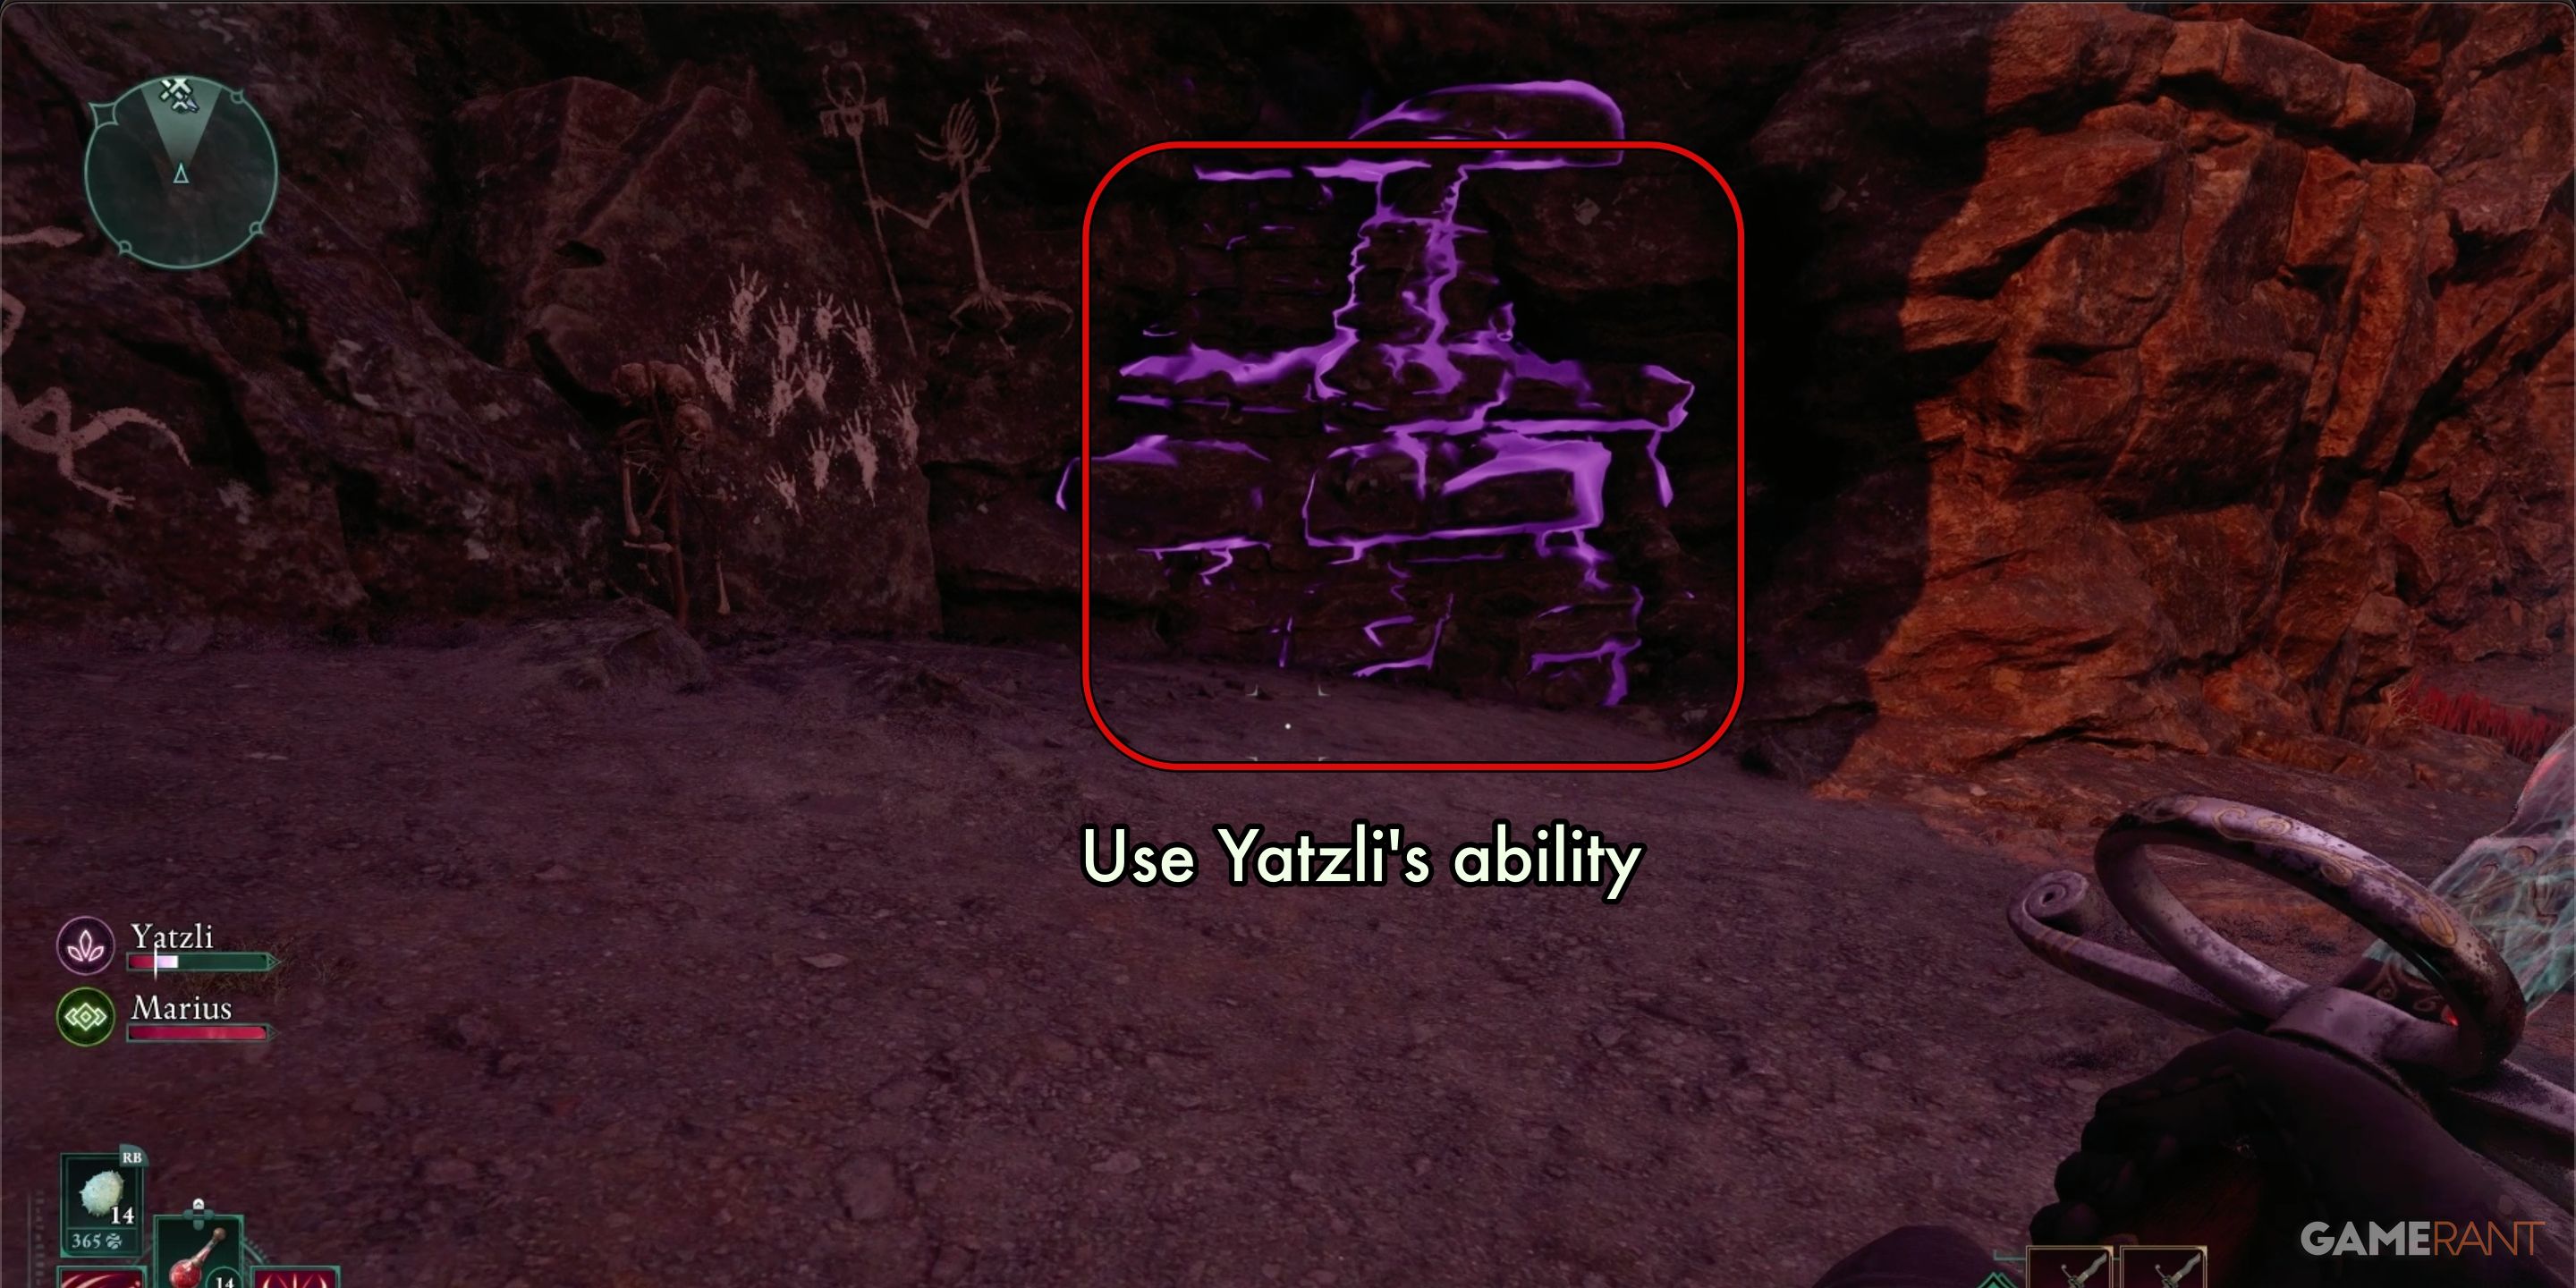
First, burn the brambles located on the higher ground before proceeding. Once that’s done, ascend towards the exit of the second cave chamber. Upon exiting the final tunnel, you will come across the Pagrun Cache structure straight ahead. To reach the cache, veer left out of the tunnel instead of right as initially suggested. Walk along the path until you spot Xaurip paintings on the rock wall to your right. At this point, pause and adjust your direction. You should now see an imaginary wall barricading a cave entrance.
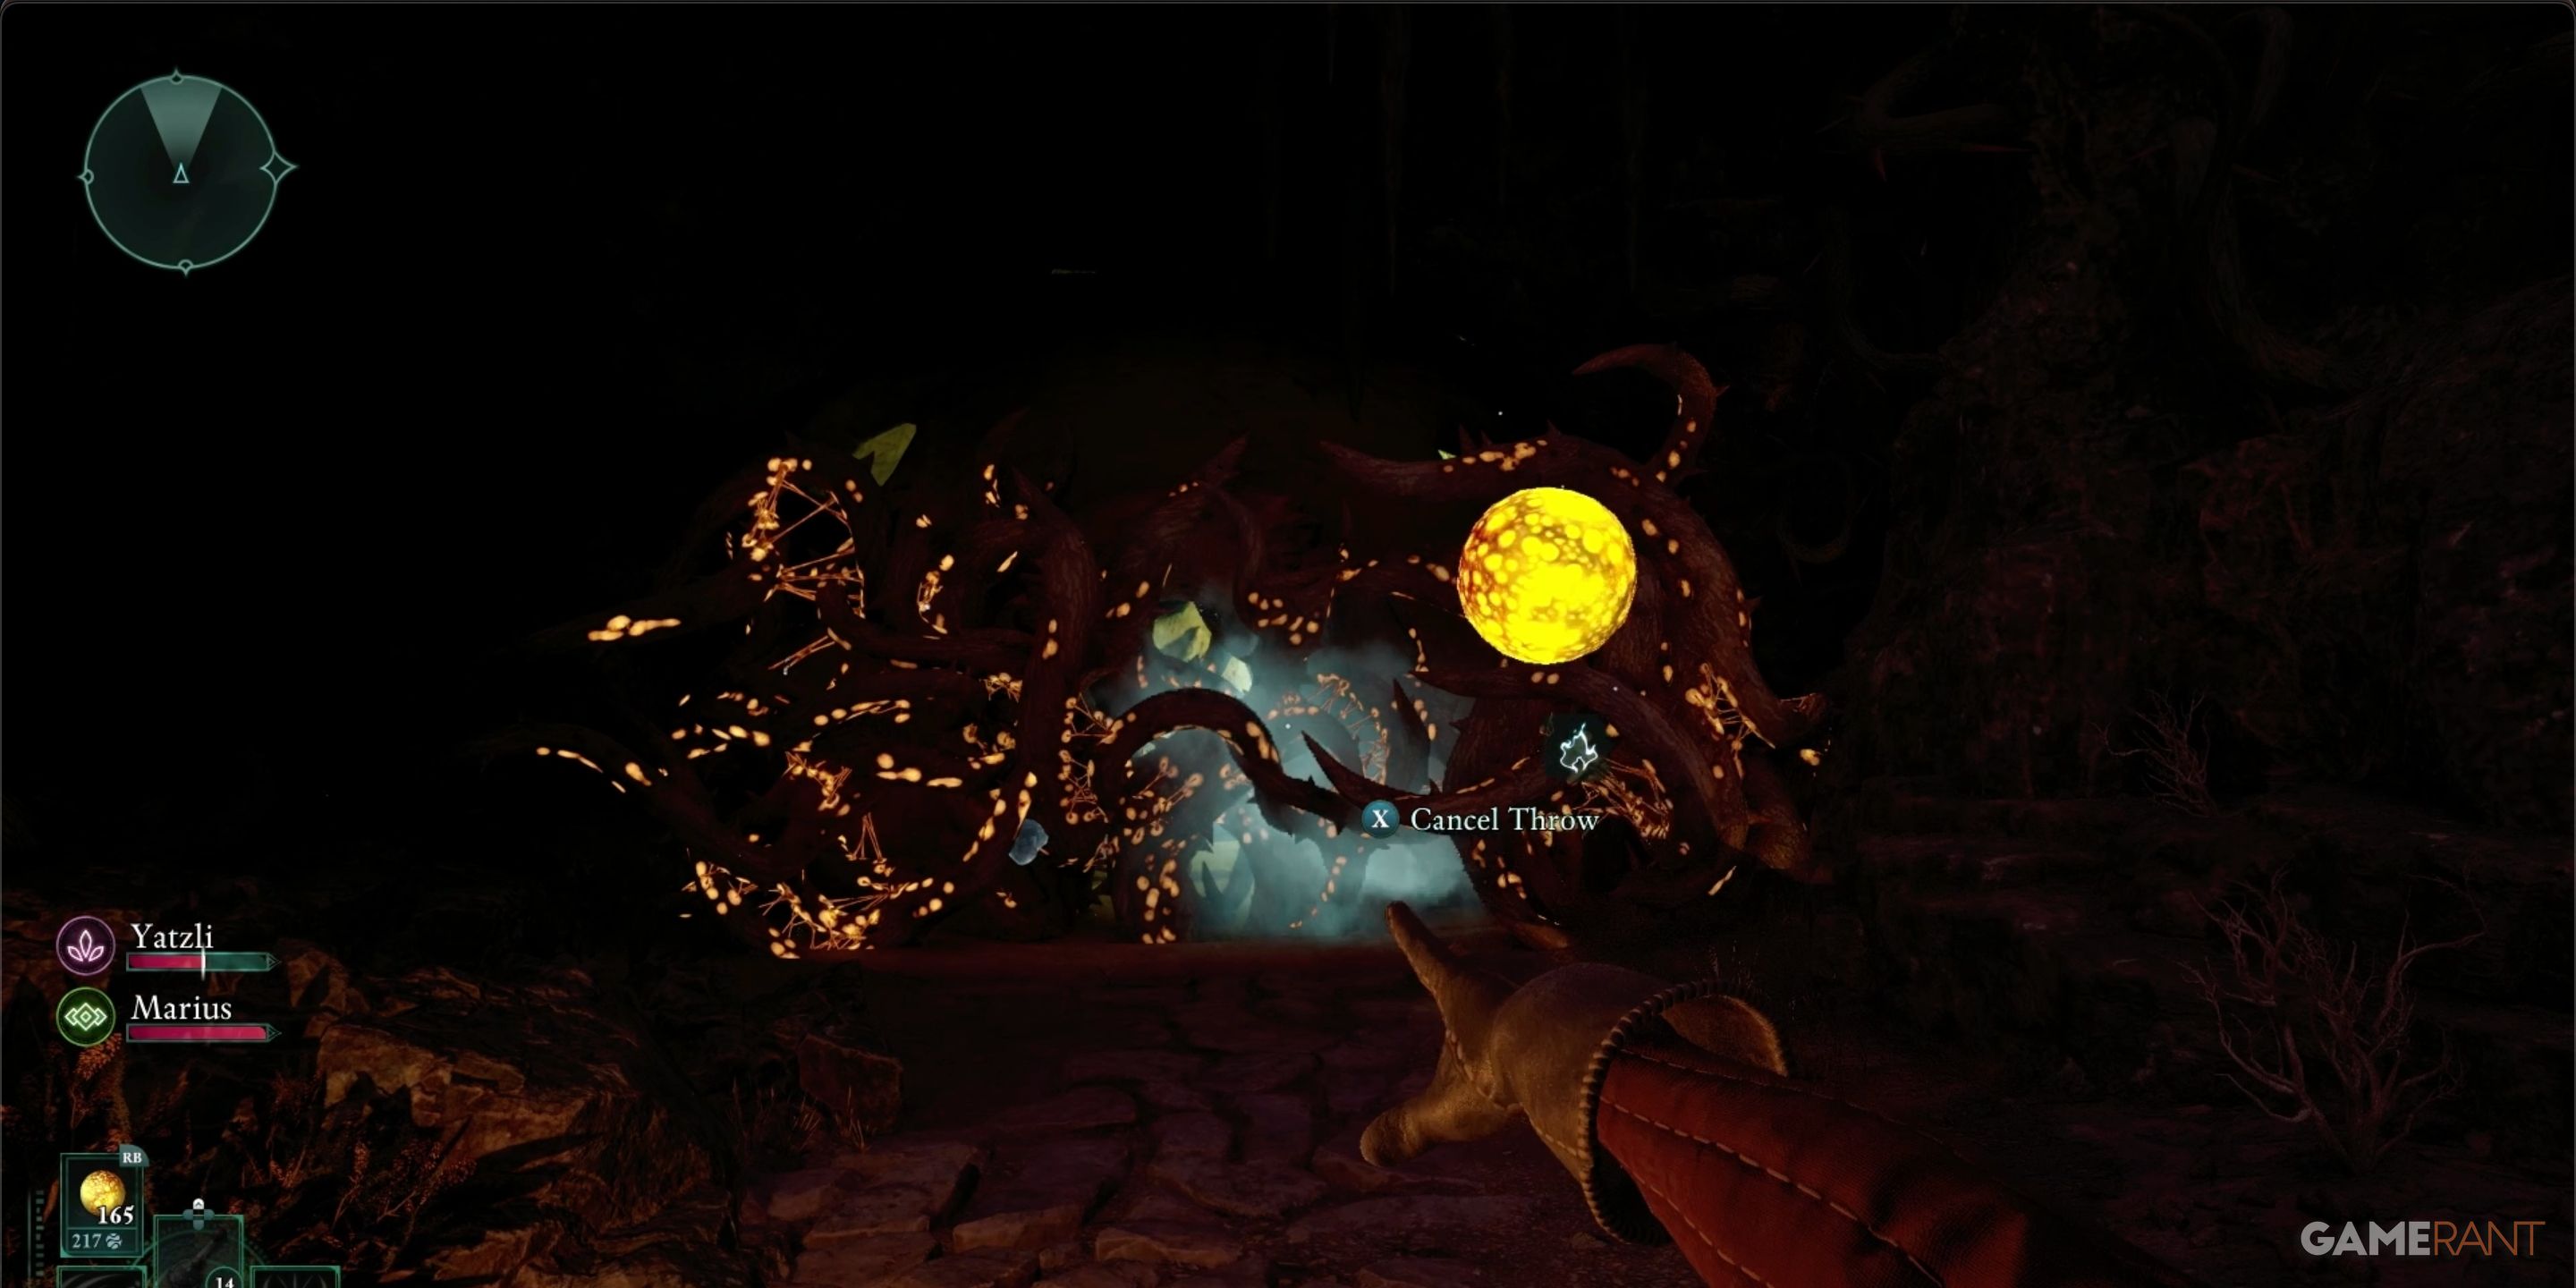
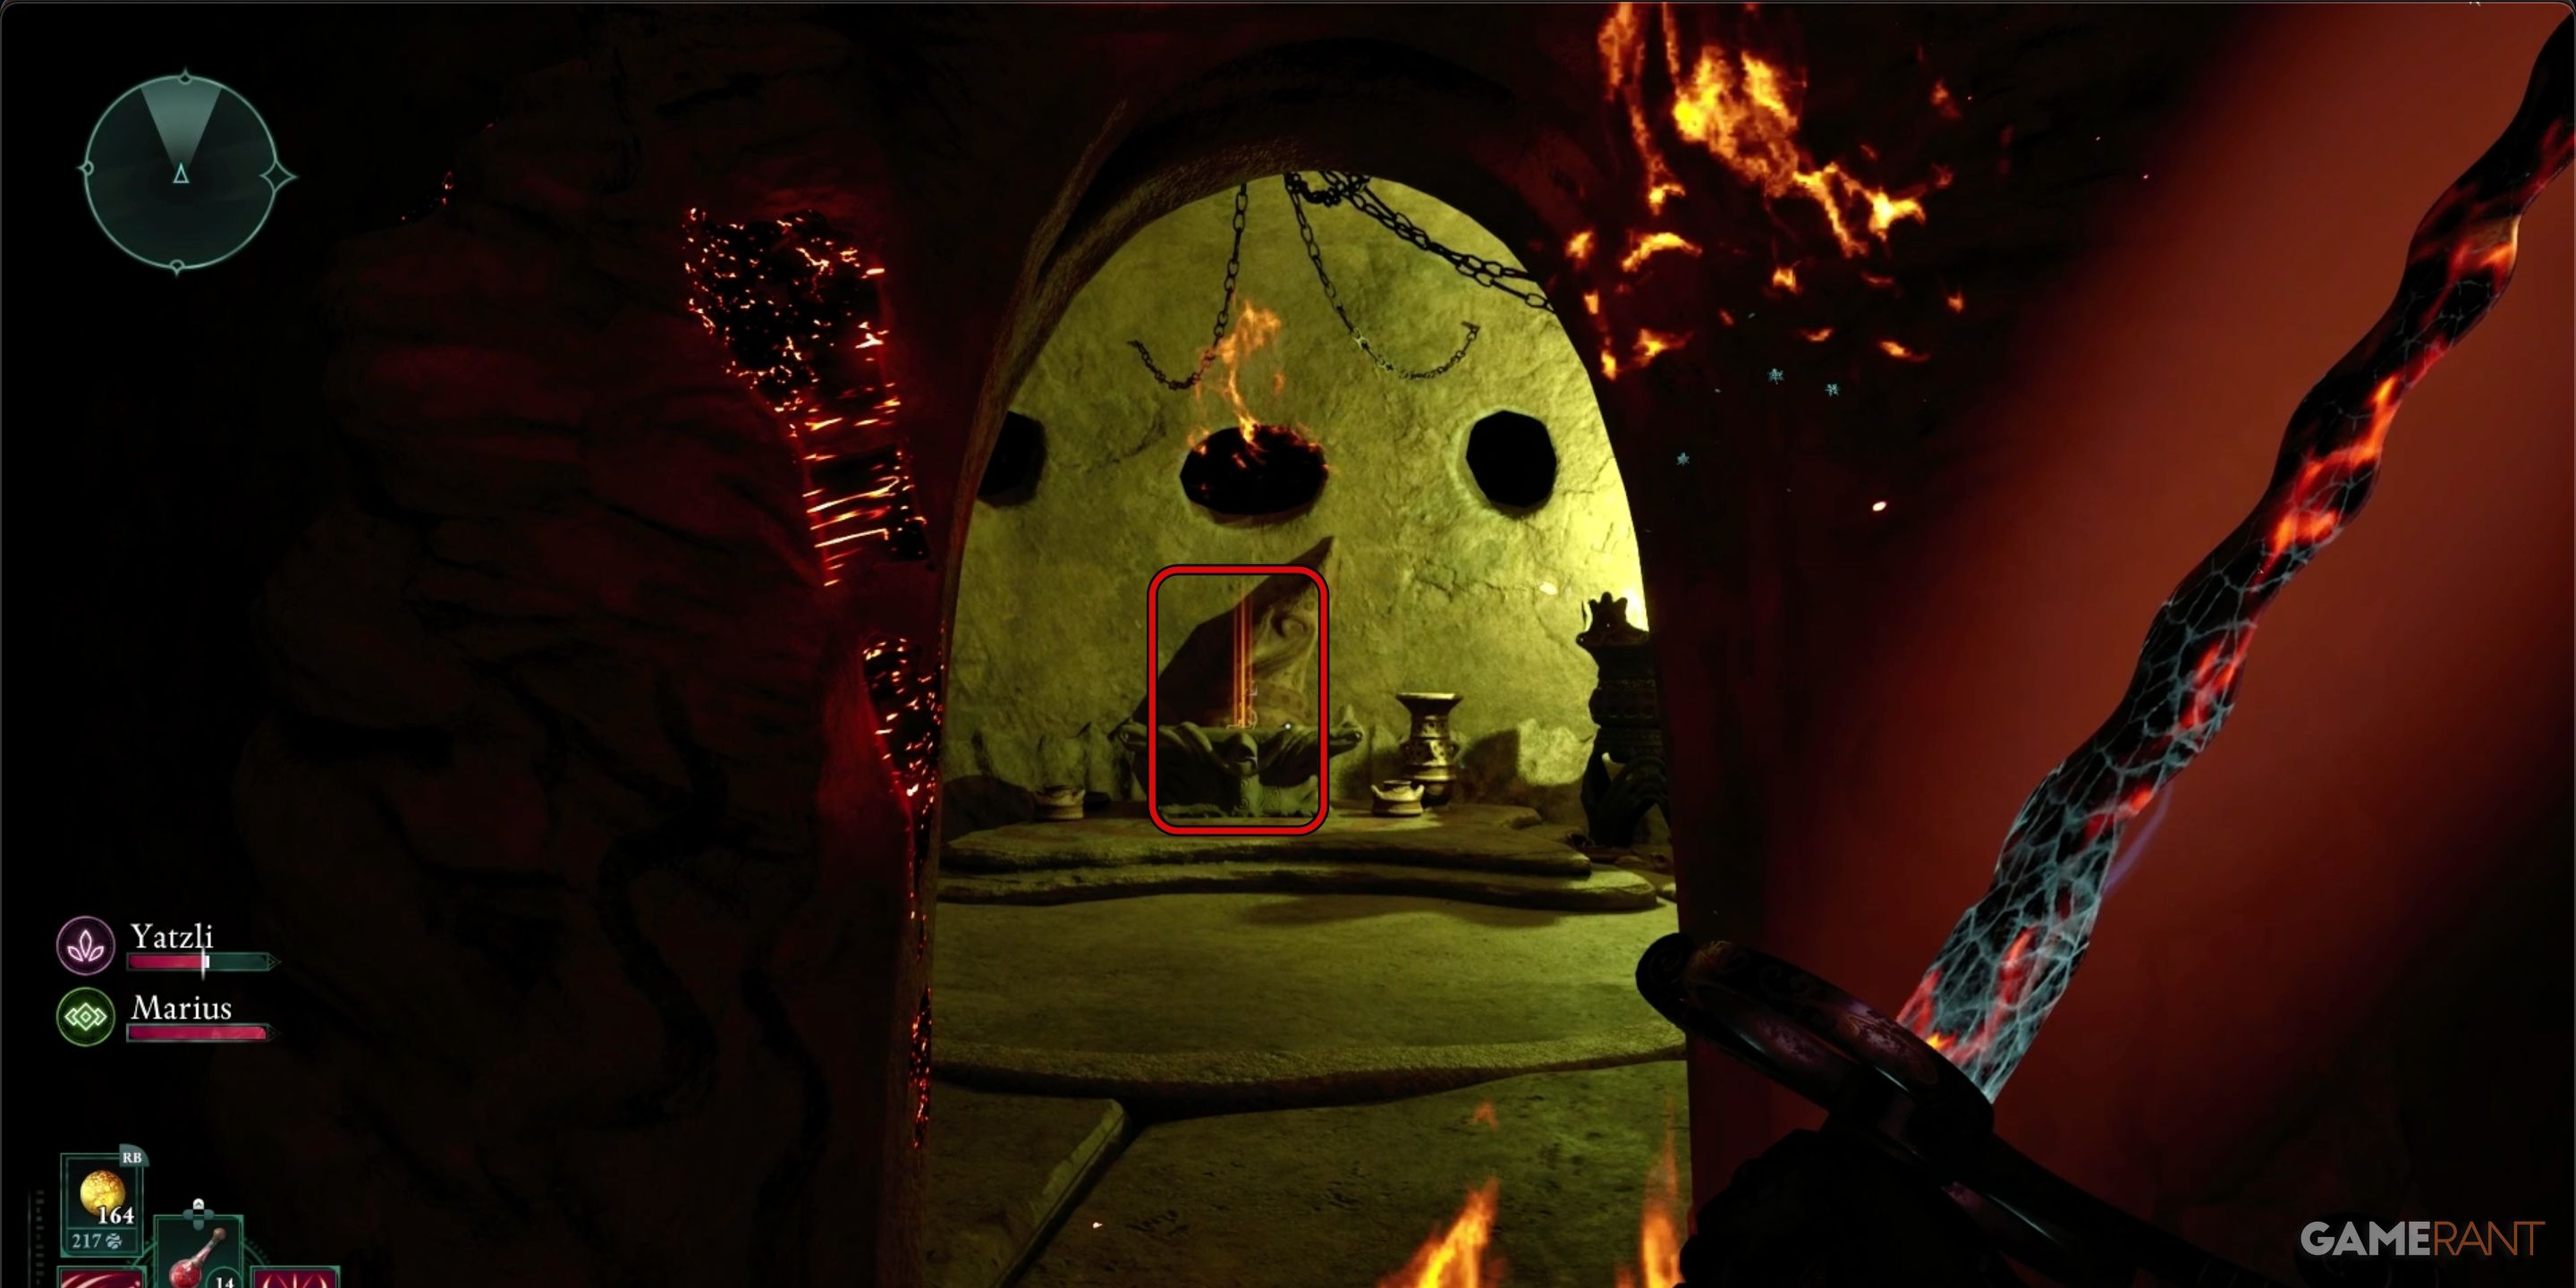
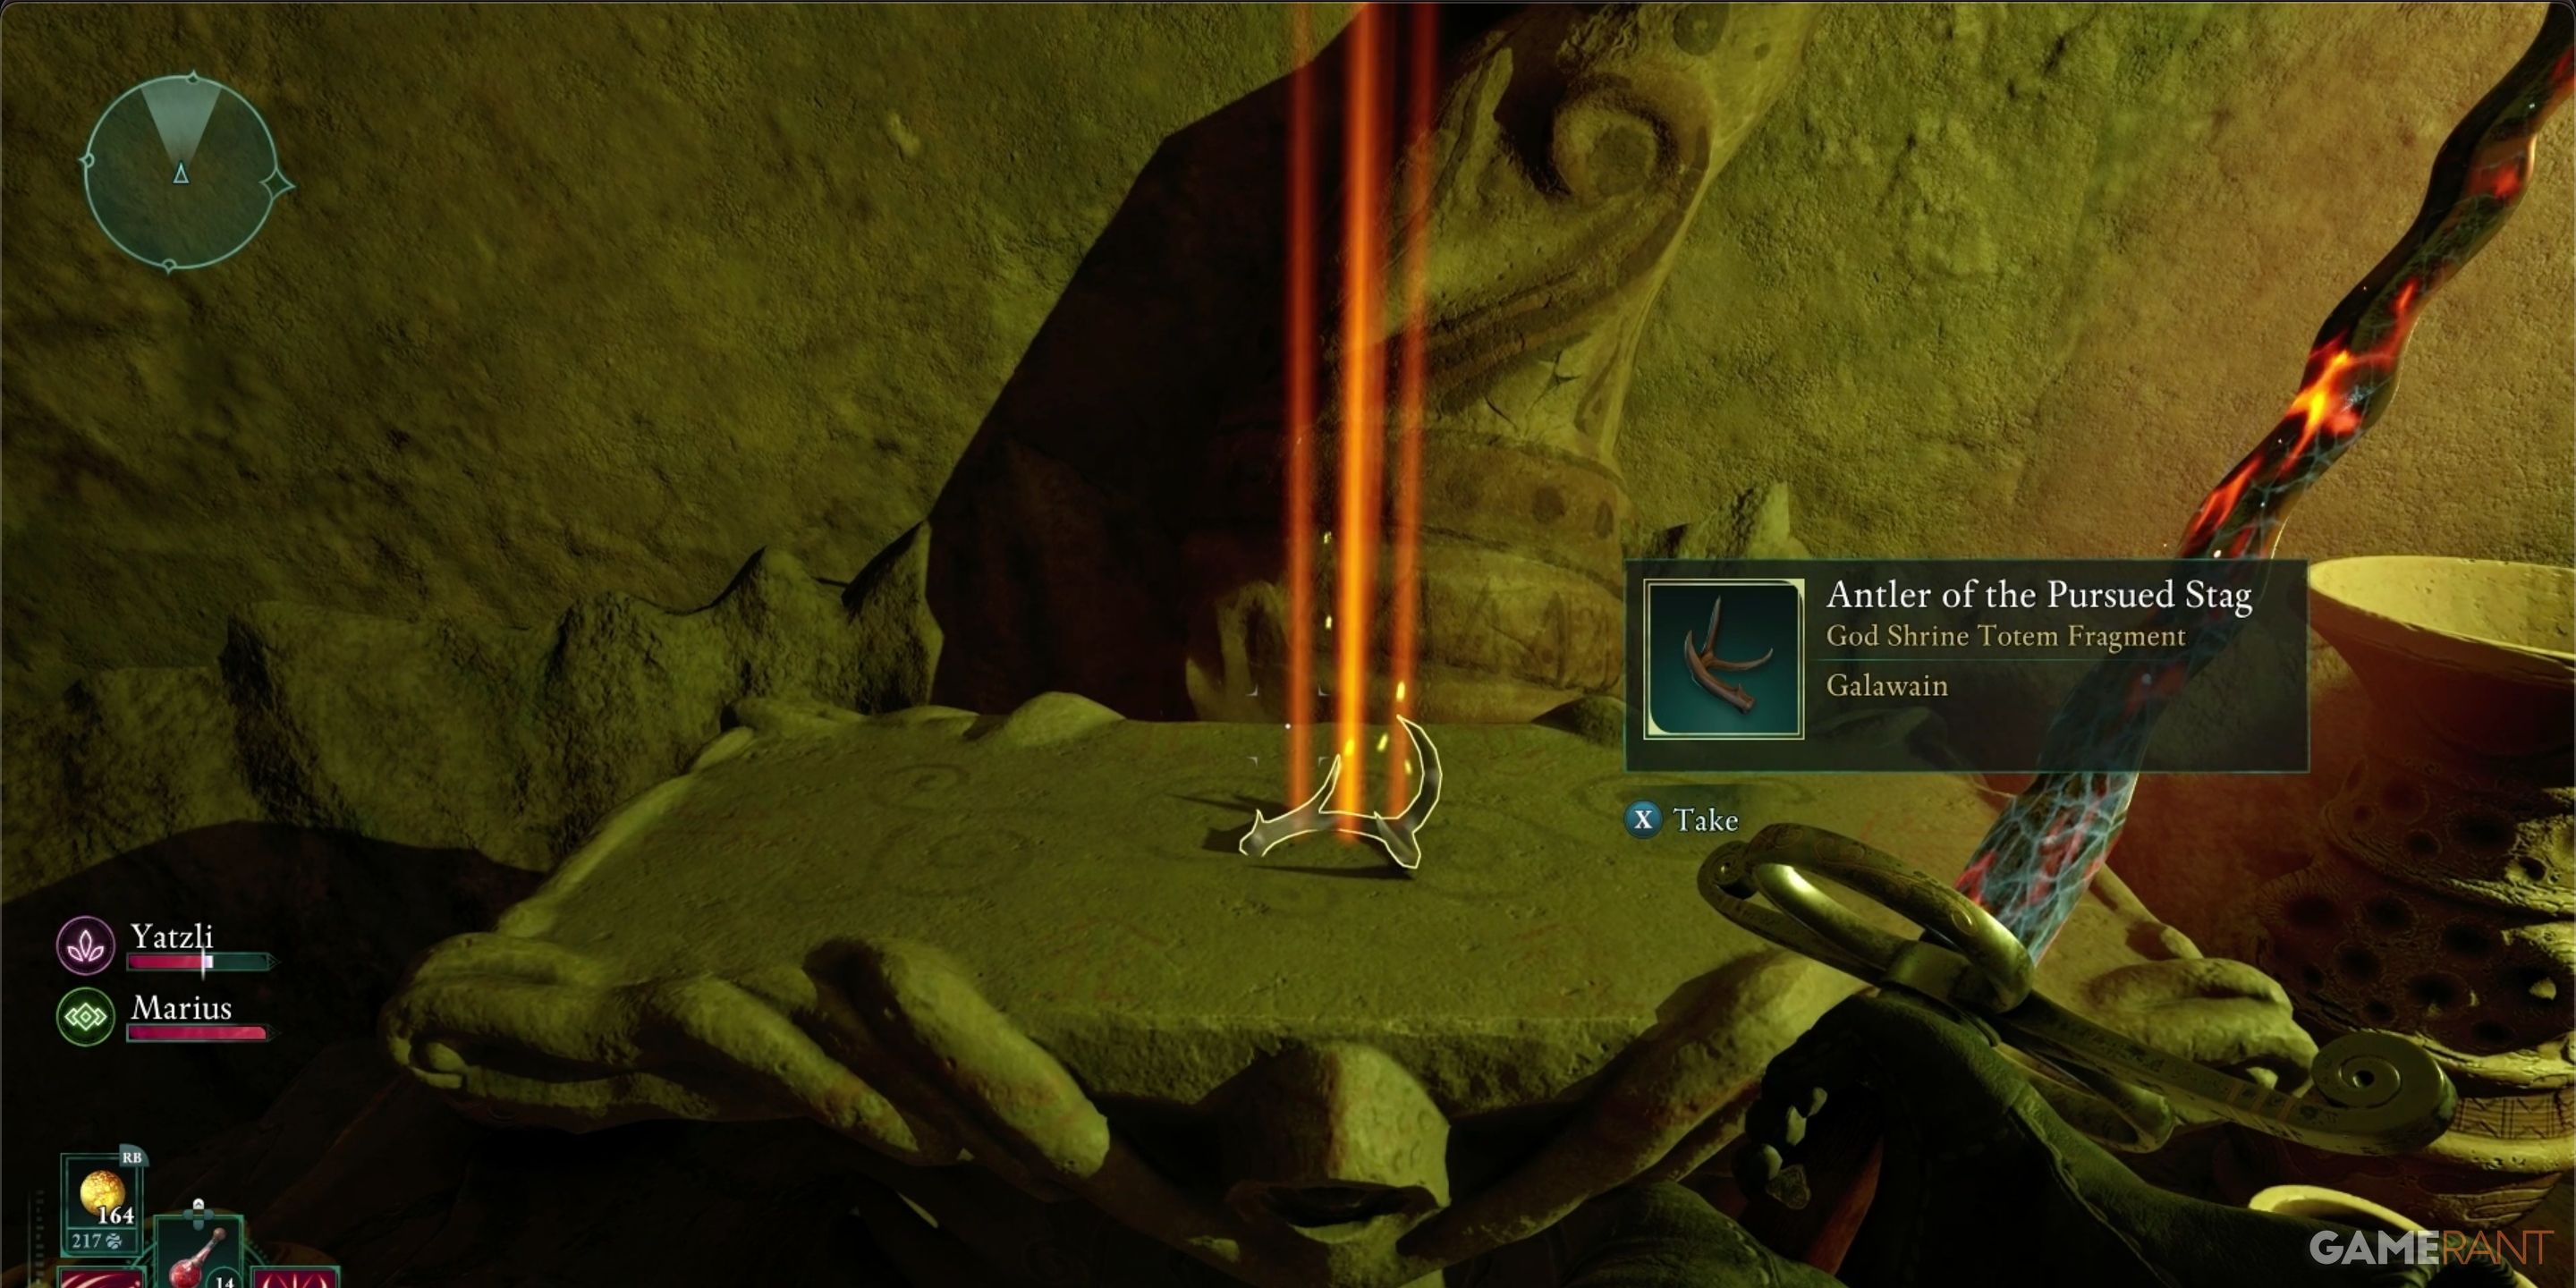
Within the cavern, there’s a substantial thorny barrier you need to set alight. Behind this prickly barricade, you’ll find a humble hut where the Antler of the Pursued Stag resides.
Inside the cave, a massive thorny hedge awaits your fire. Beyond it lies a cozy hideaway housing the Antler of the Hunted Deer.
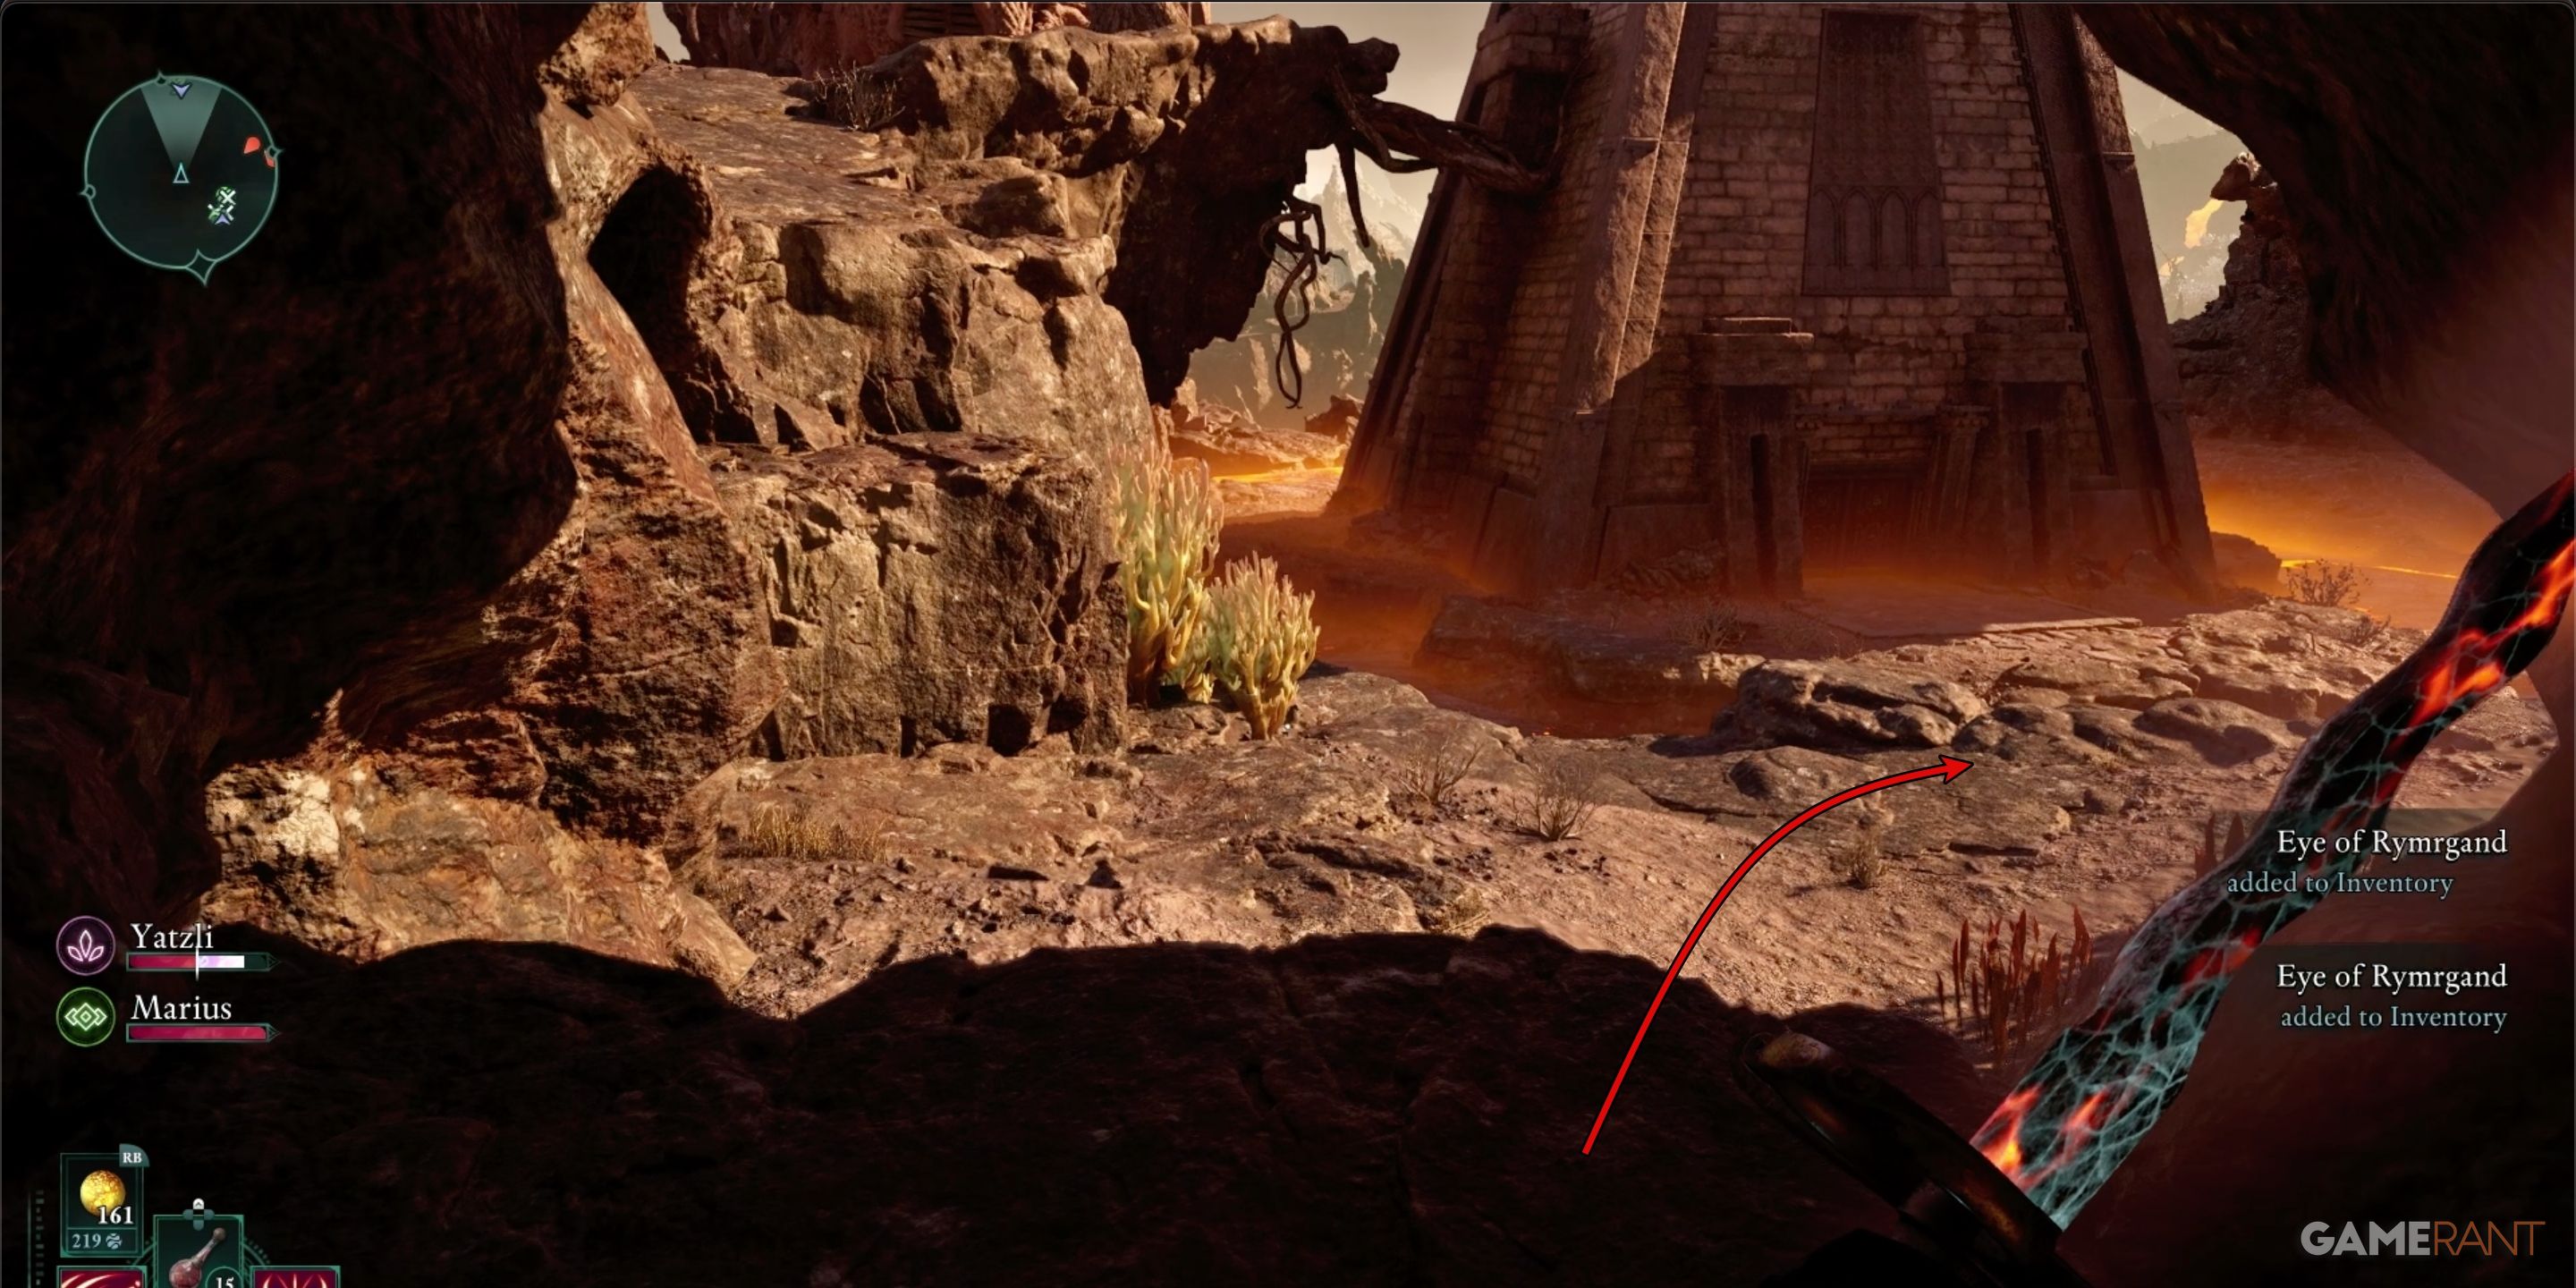
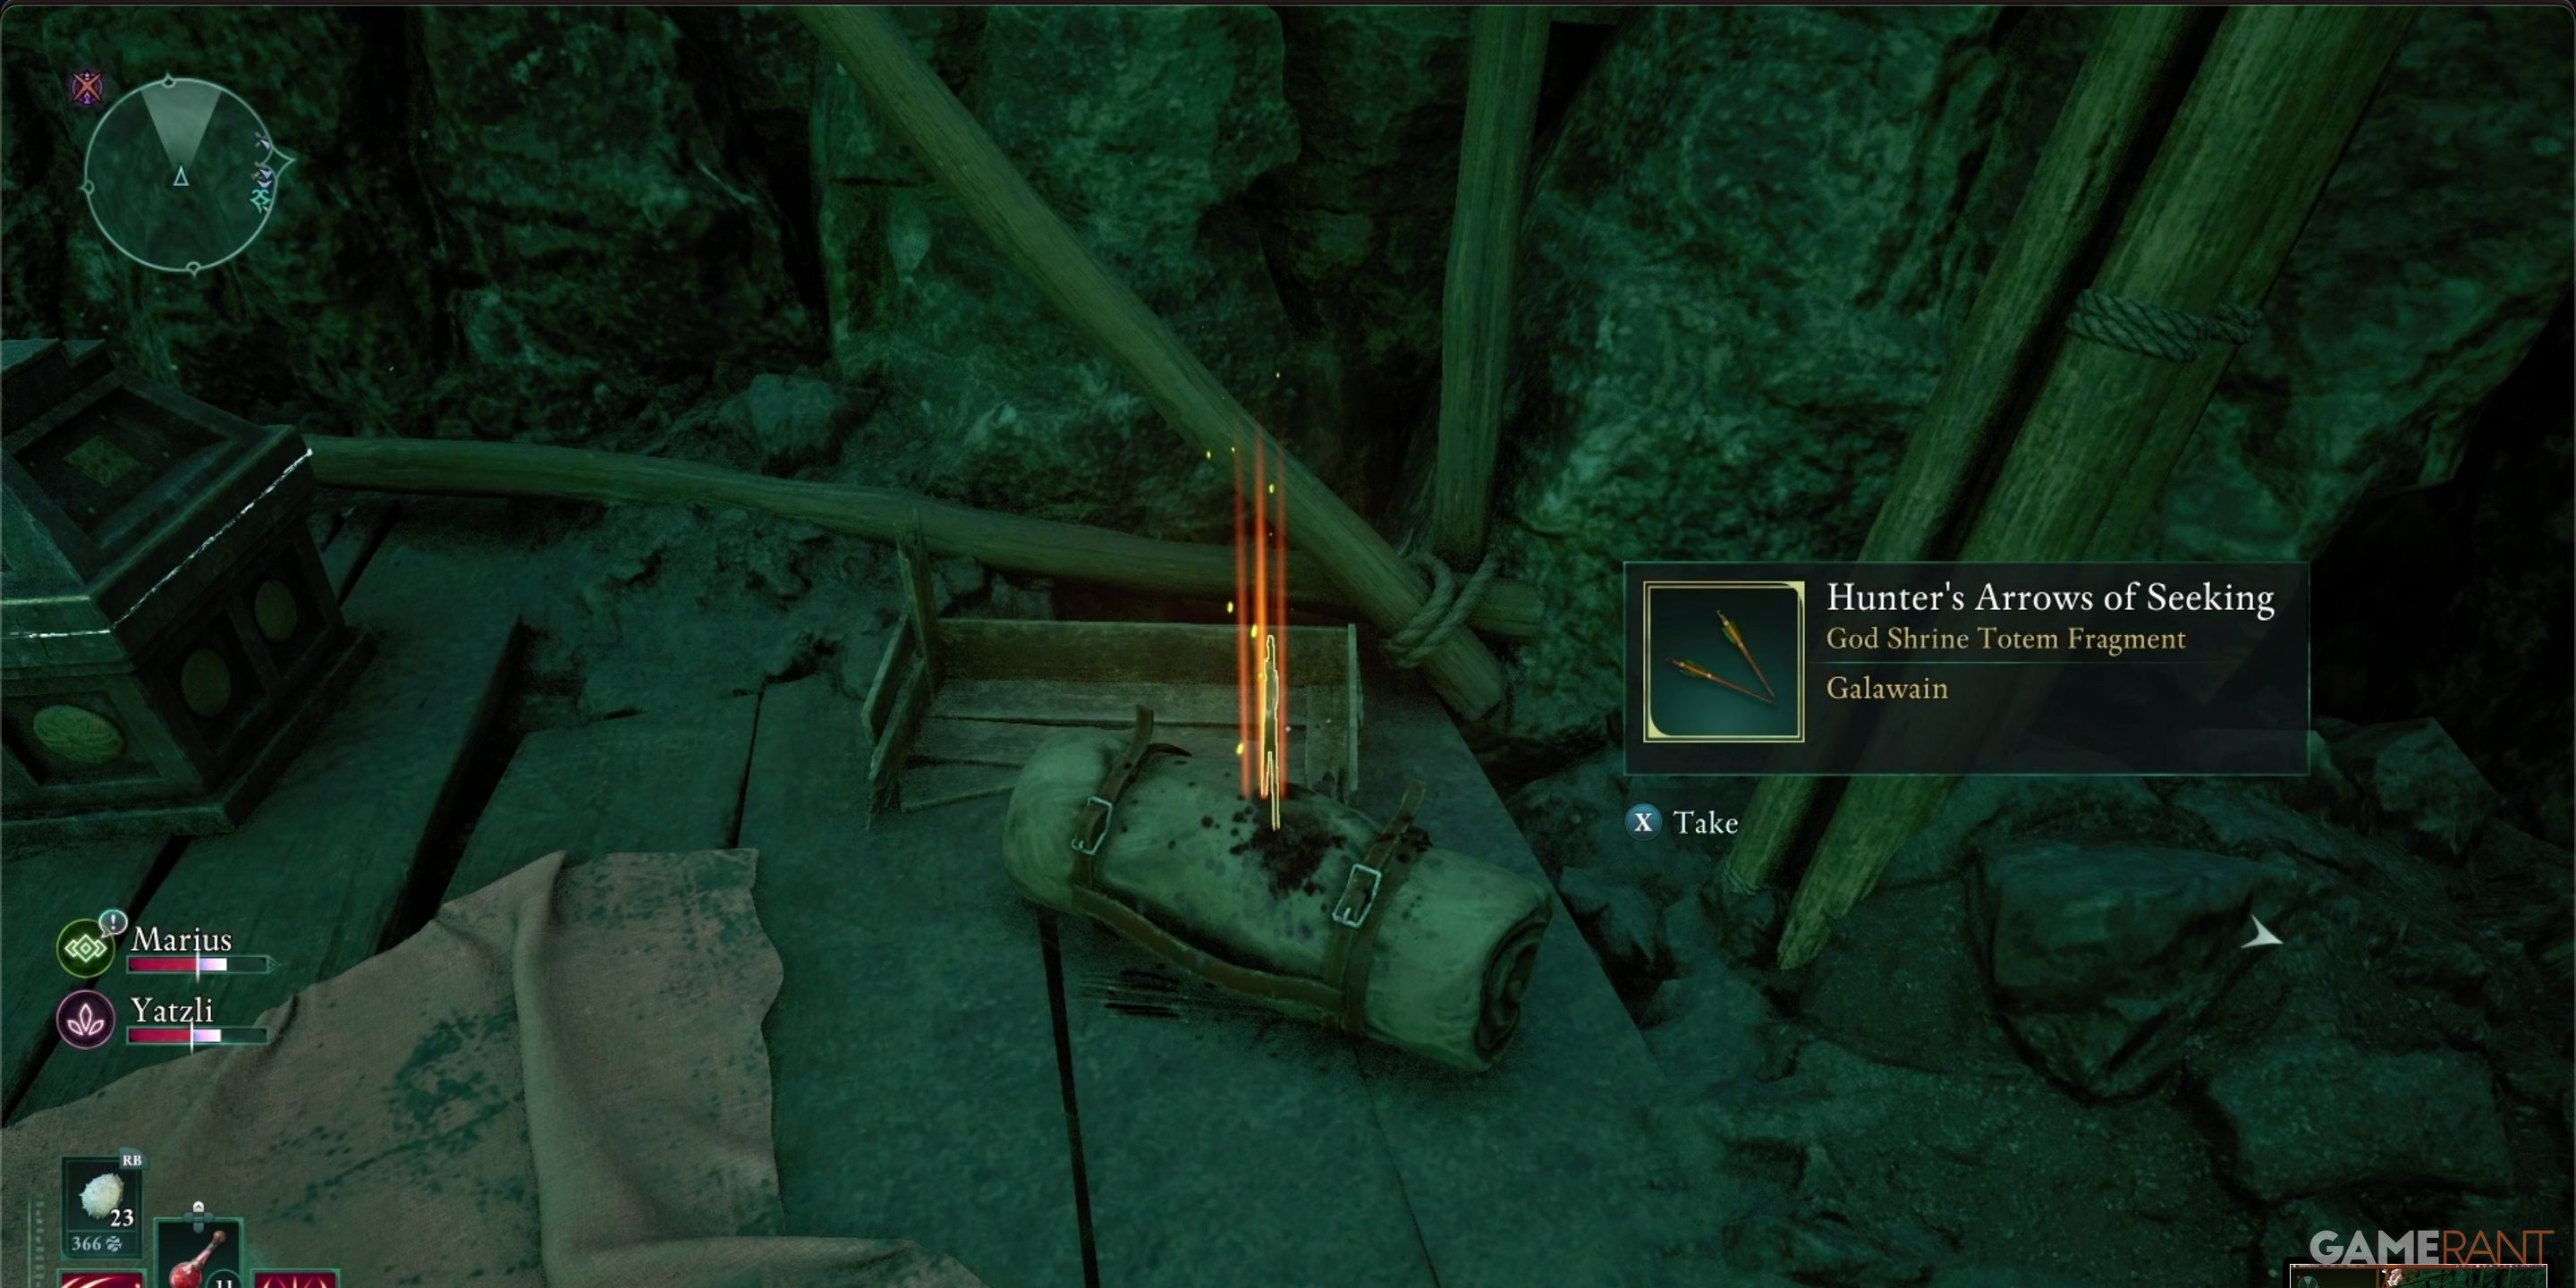
As soon as you grab the Antler, proceed to gather the last set of Hunter’s Arrows required for Surviving. Head towards the final segment for the path details. In essence, take a left turn at the Pargrun Cache instead of right, then follow the rock wall on your left until you encounter an ancient Godless ruin.
Wolf’s Pelt Trophy Location – Avowed
In the puzzle collection known as “Fragments of the Spoils,” the solution to the fourth enigma will guide you towards obtaining the Wolf’s Pelt Trophy fragment. The phrasing reads:
In the series of challenges called “Fragments of the Spoils,” the answer to riddle number four will direct you to where the Wolf’s Pelt Trophy piece can be found.
The lupine pelt will heed your call, on ashen tower where the sky did fall
- Riddle Solution: Ash Forest Outpost
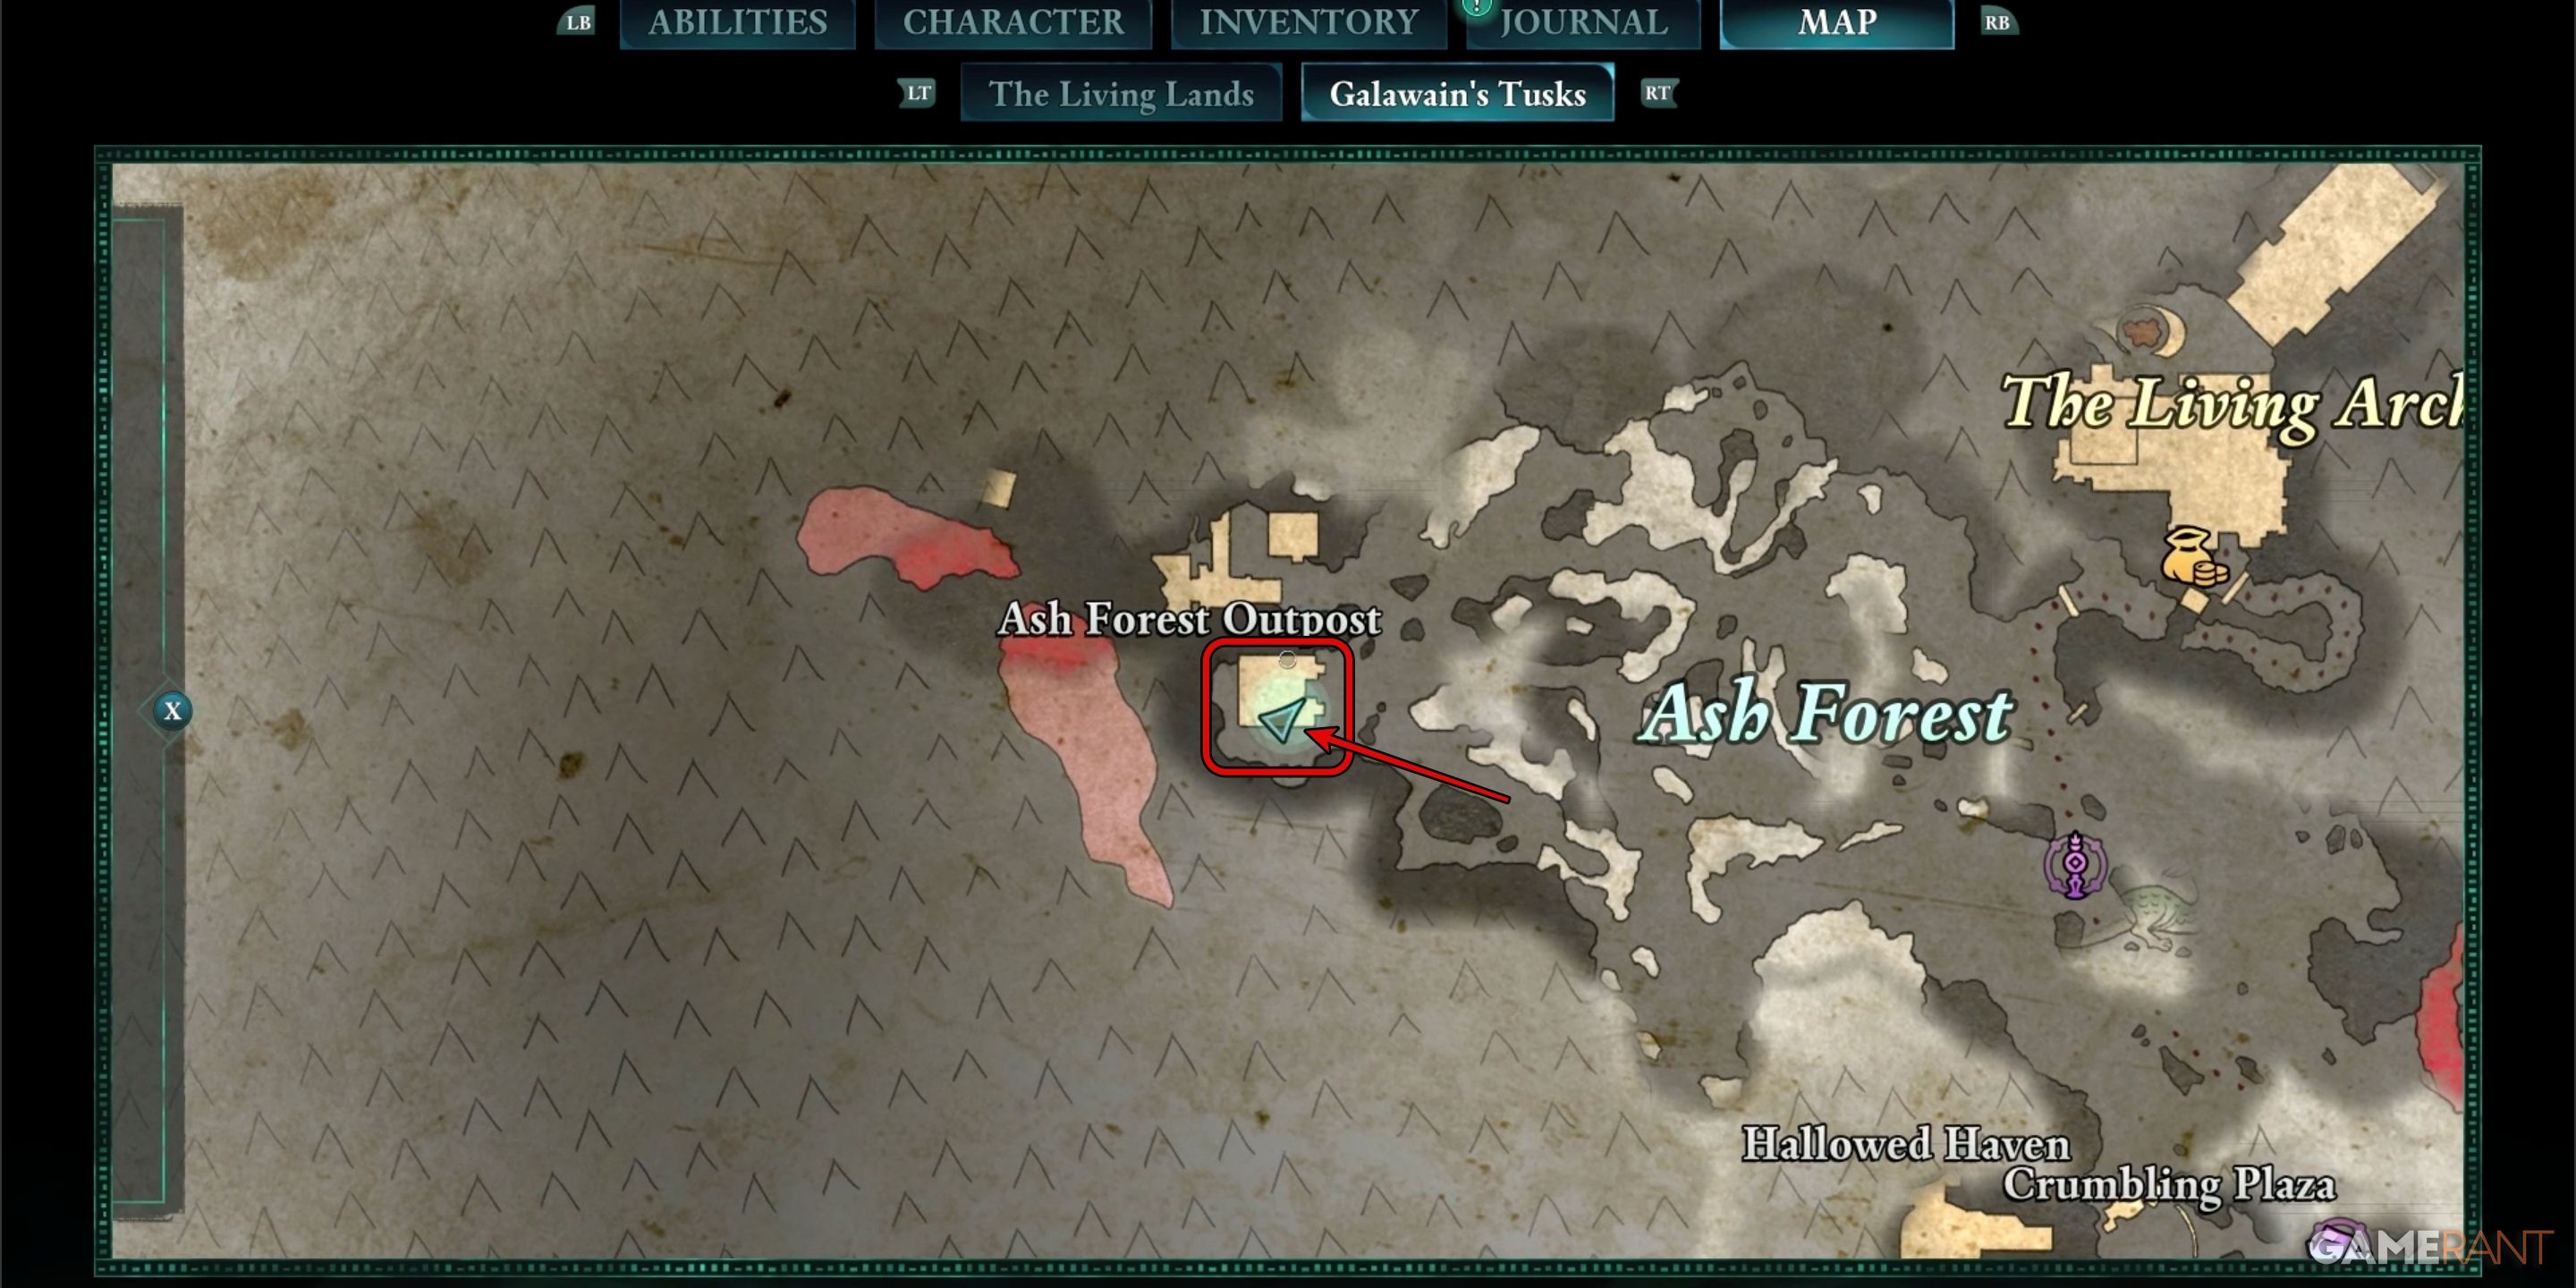
If you’ve finished or are currently working on the “Homecoming” mission, chances are you already have a guide or fast-travel point leading you towards the location for the Wolf’s Pelt Trophy. In case you can travel there, make your way to the Ash Forest Beacon located in the northwest corner of Galawain’s Tusk.
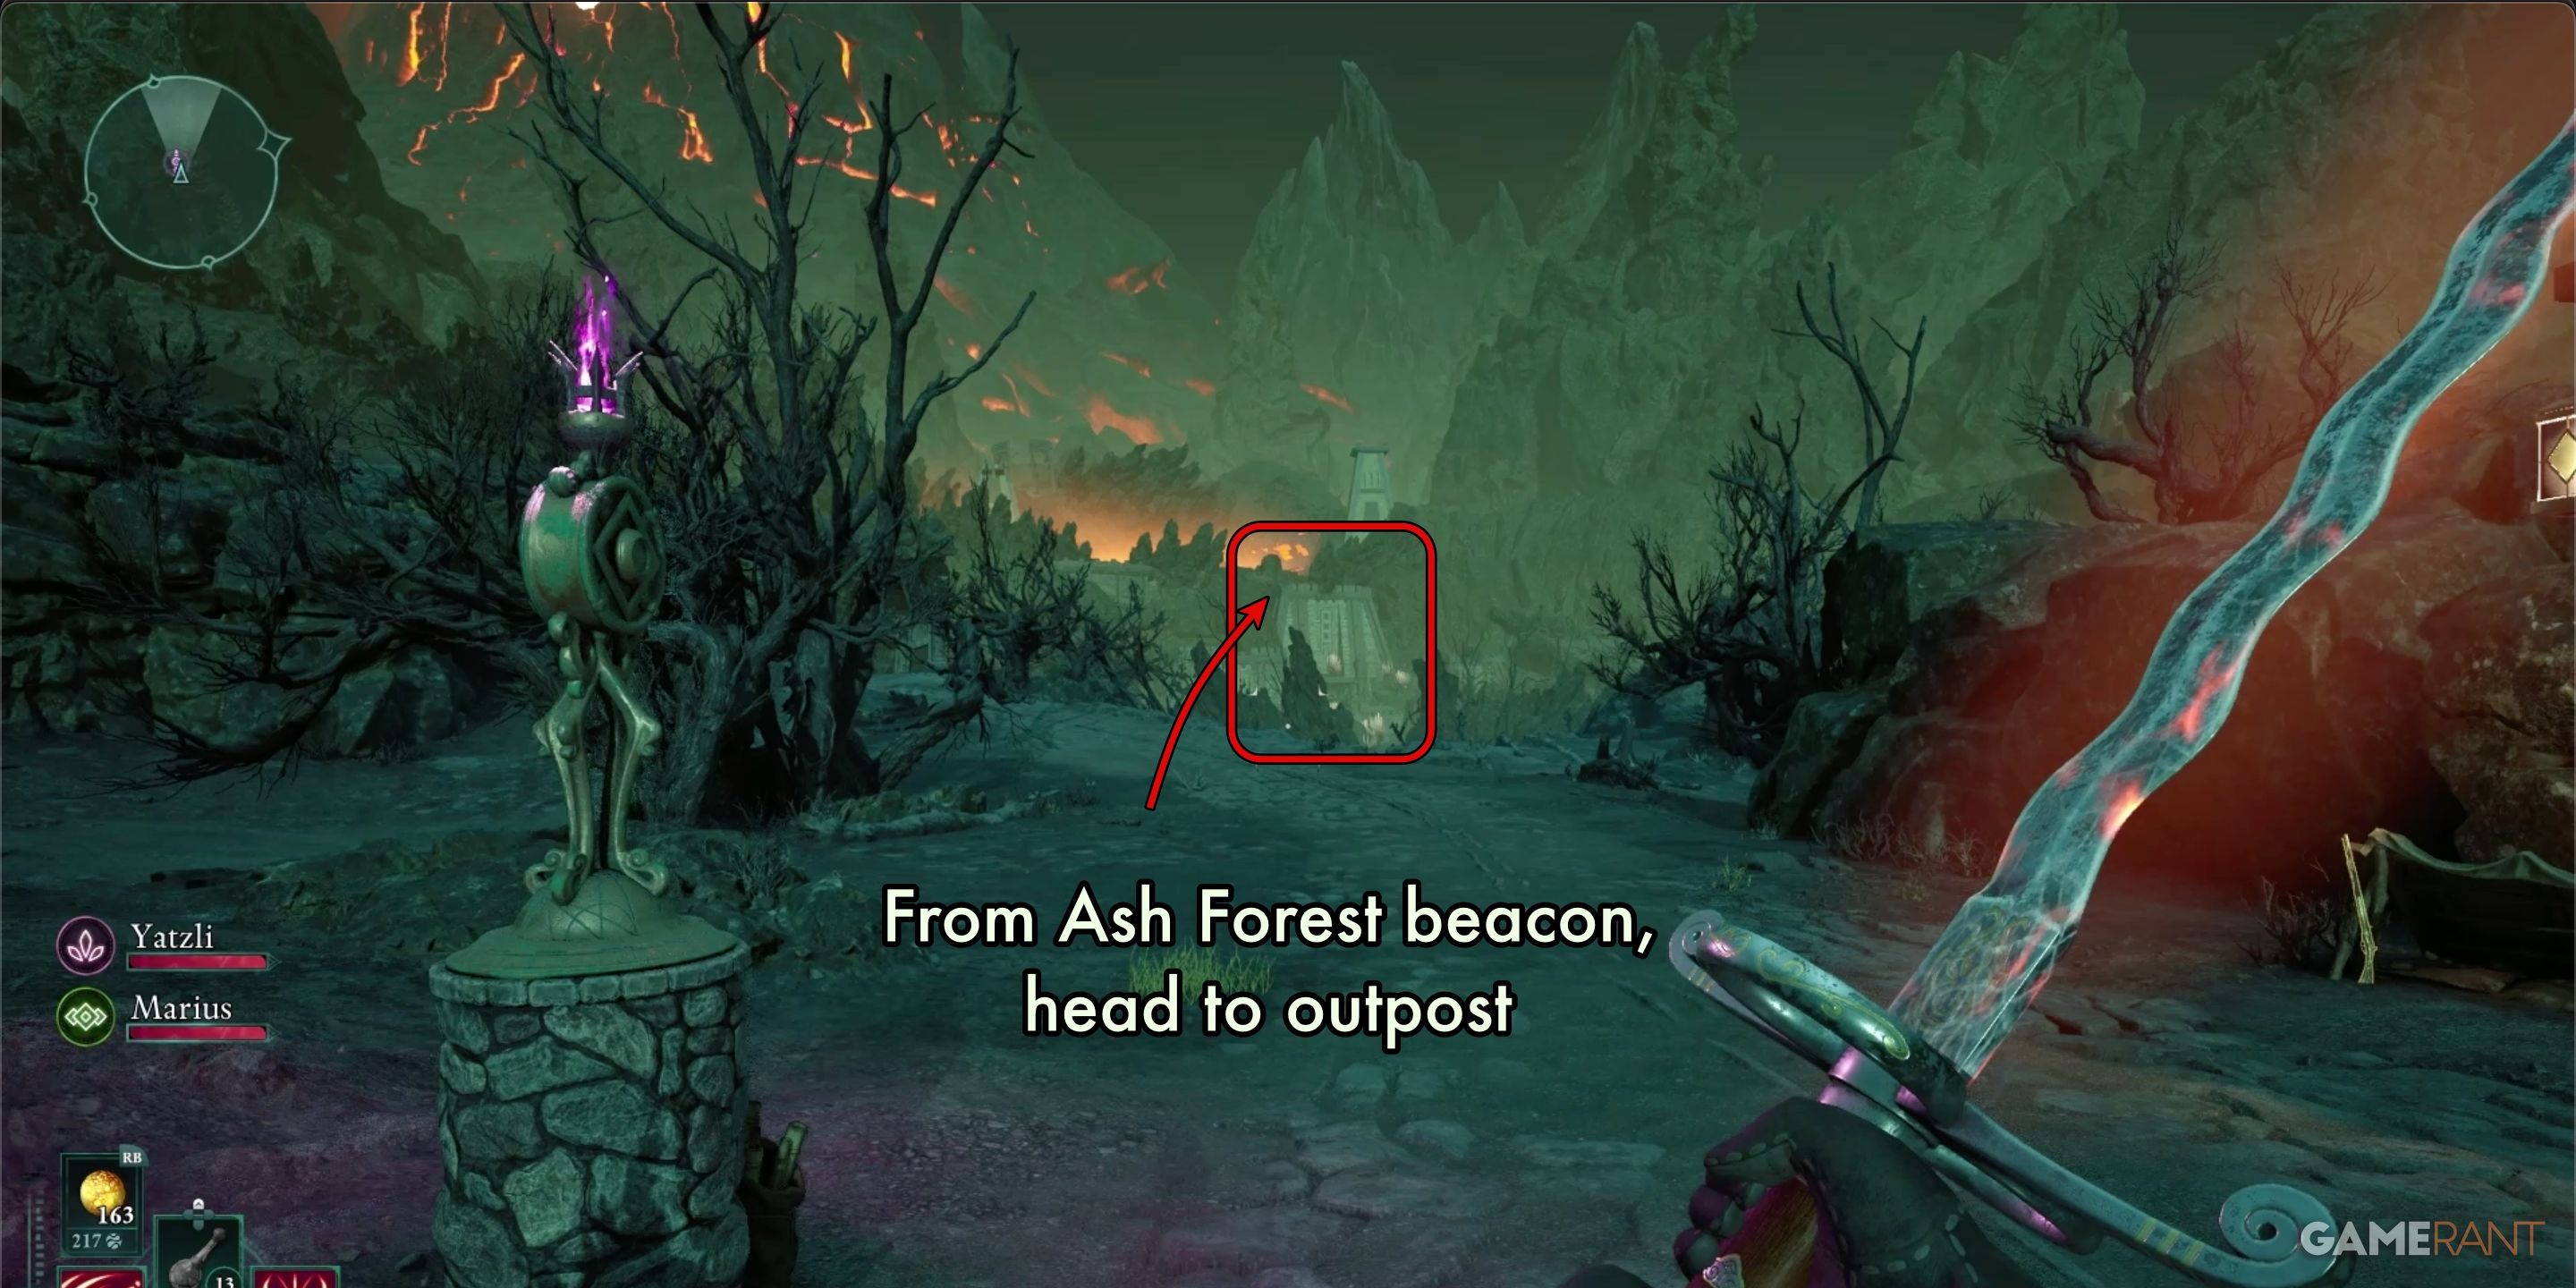
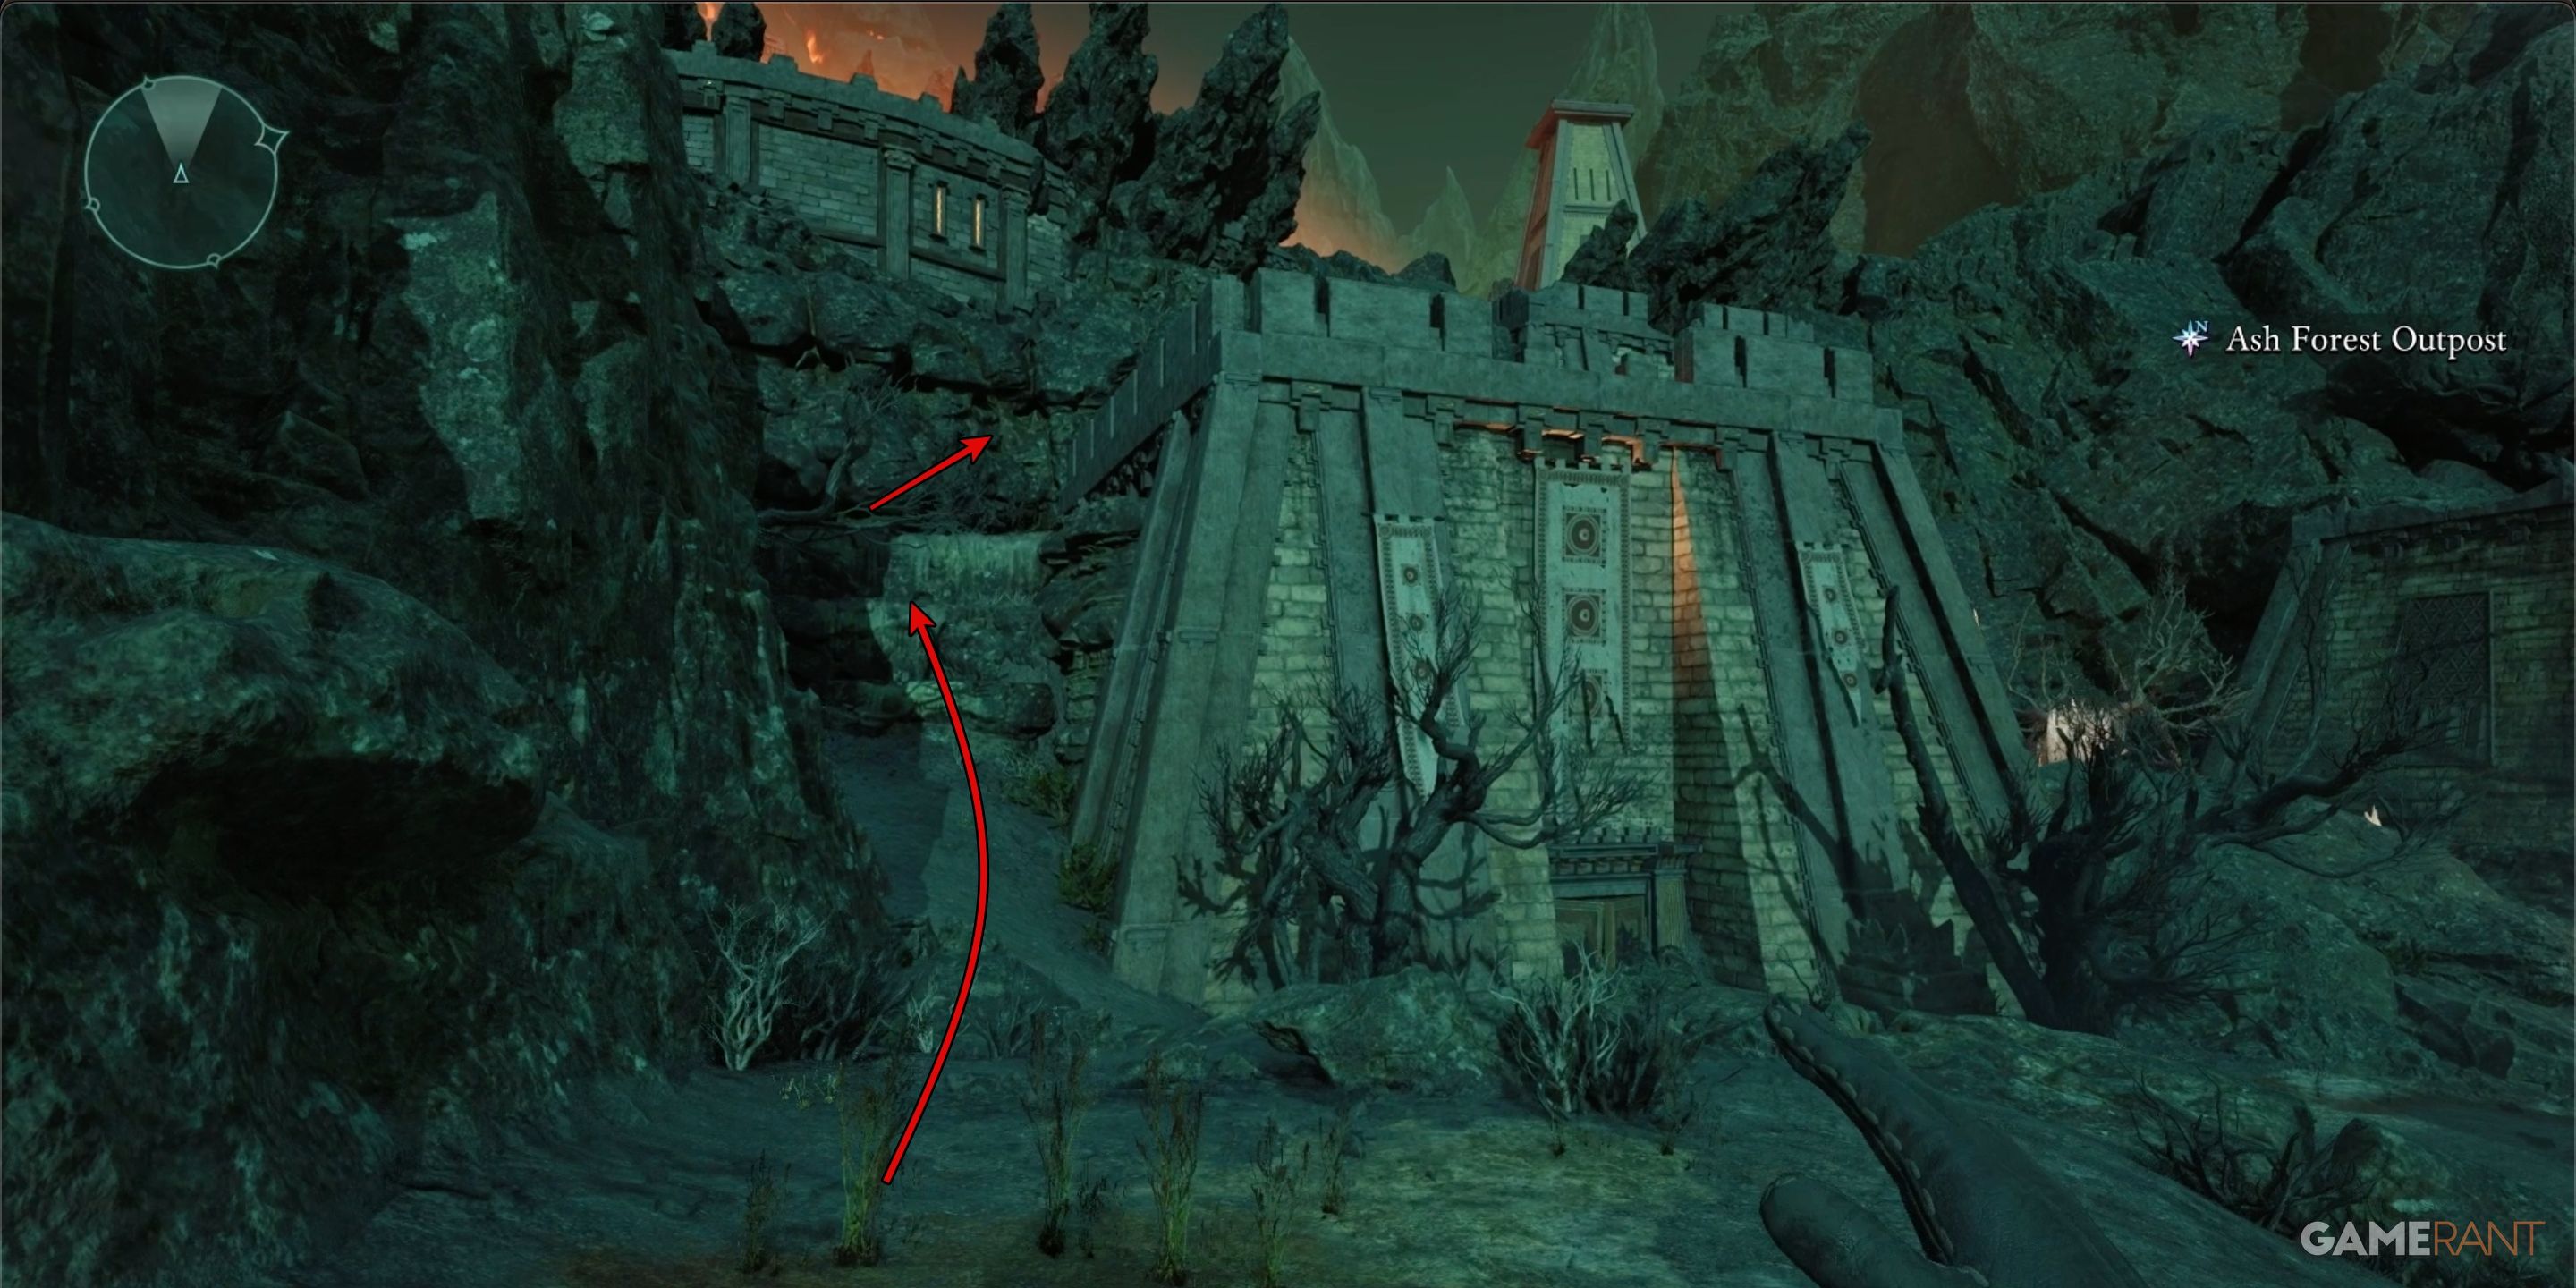
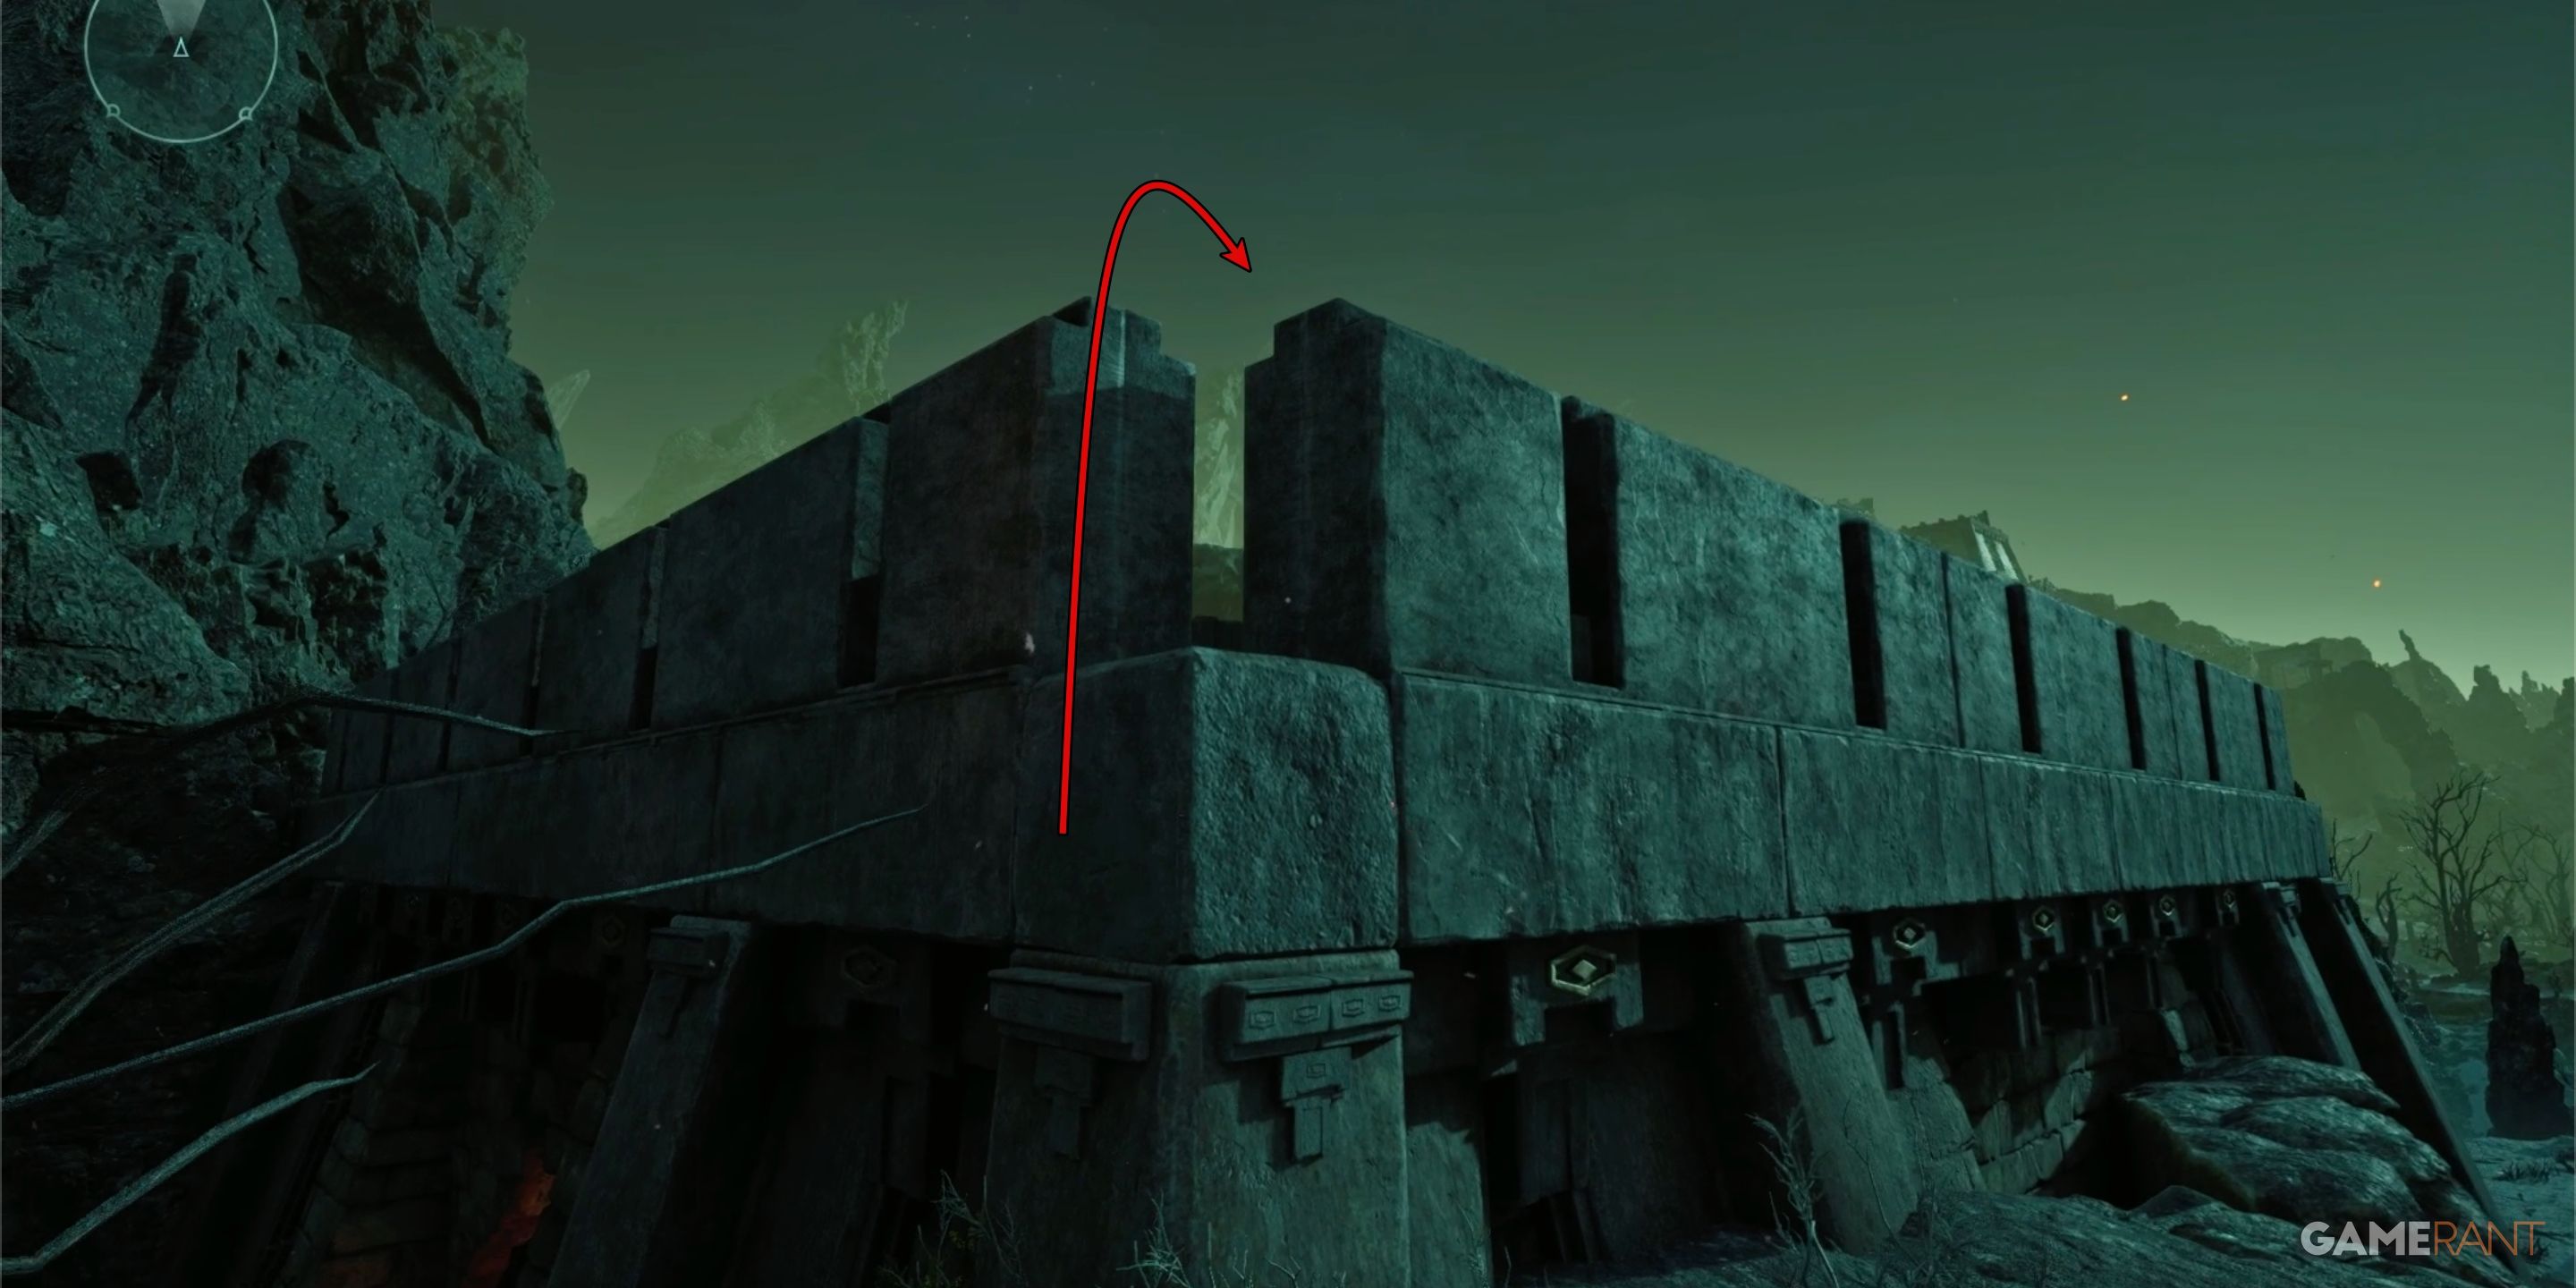
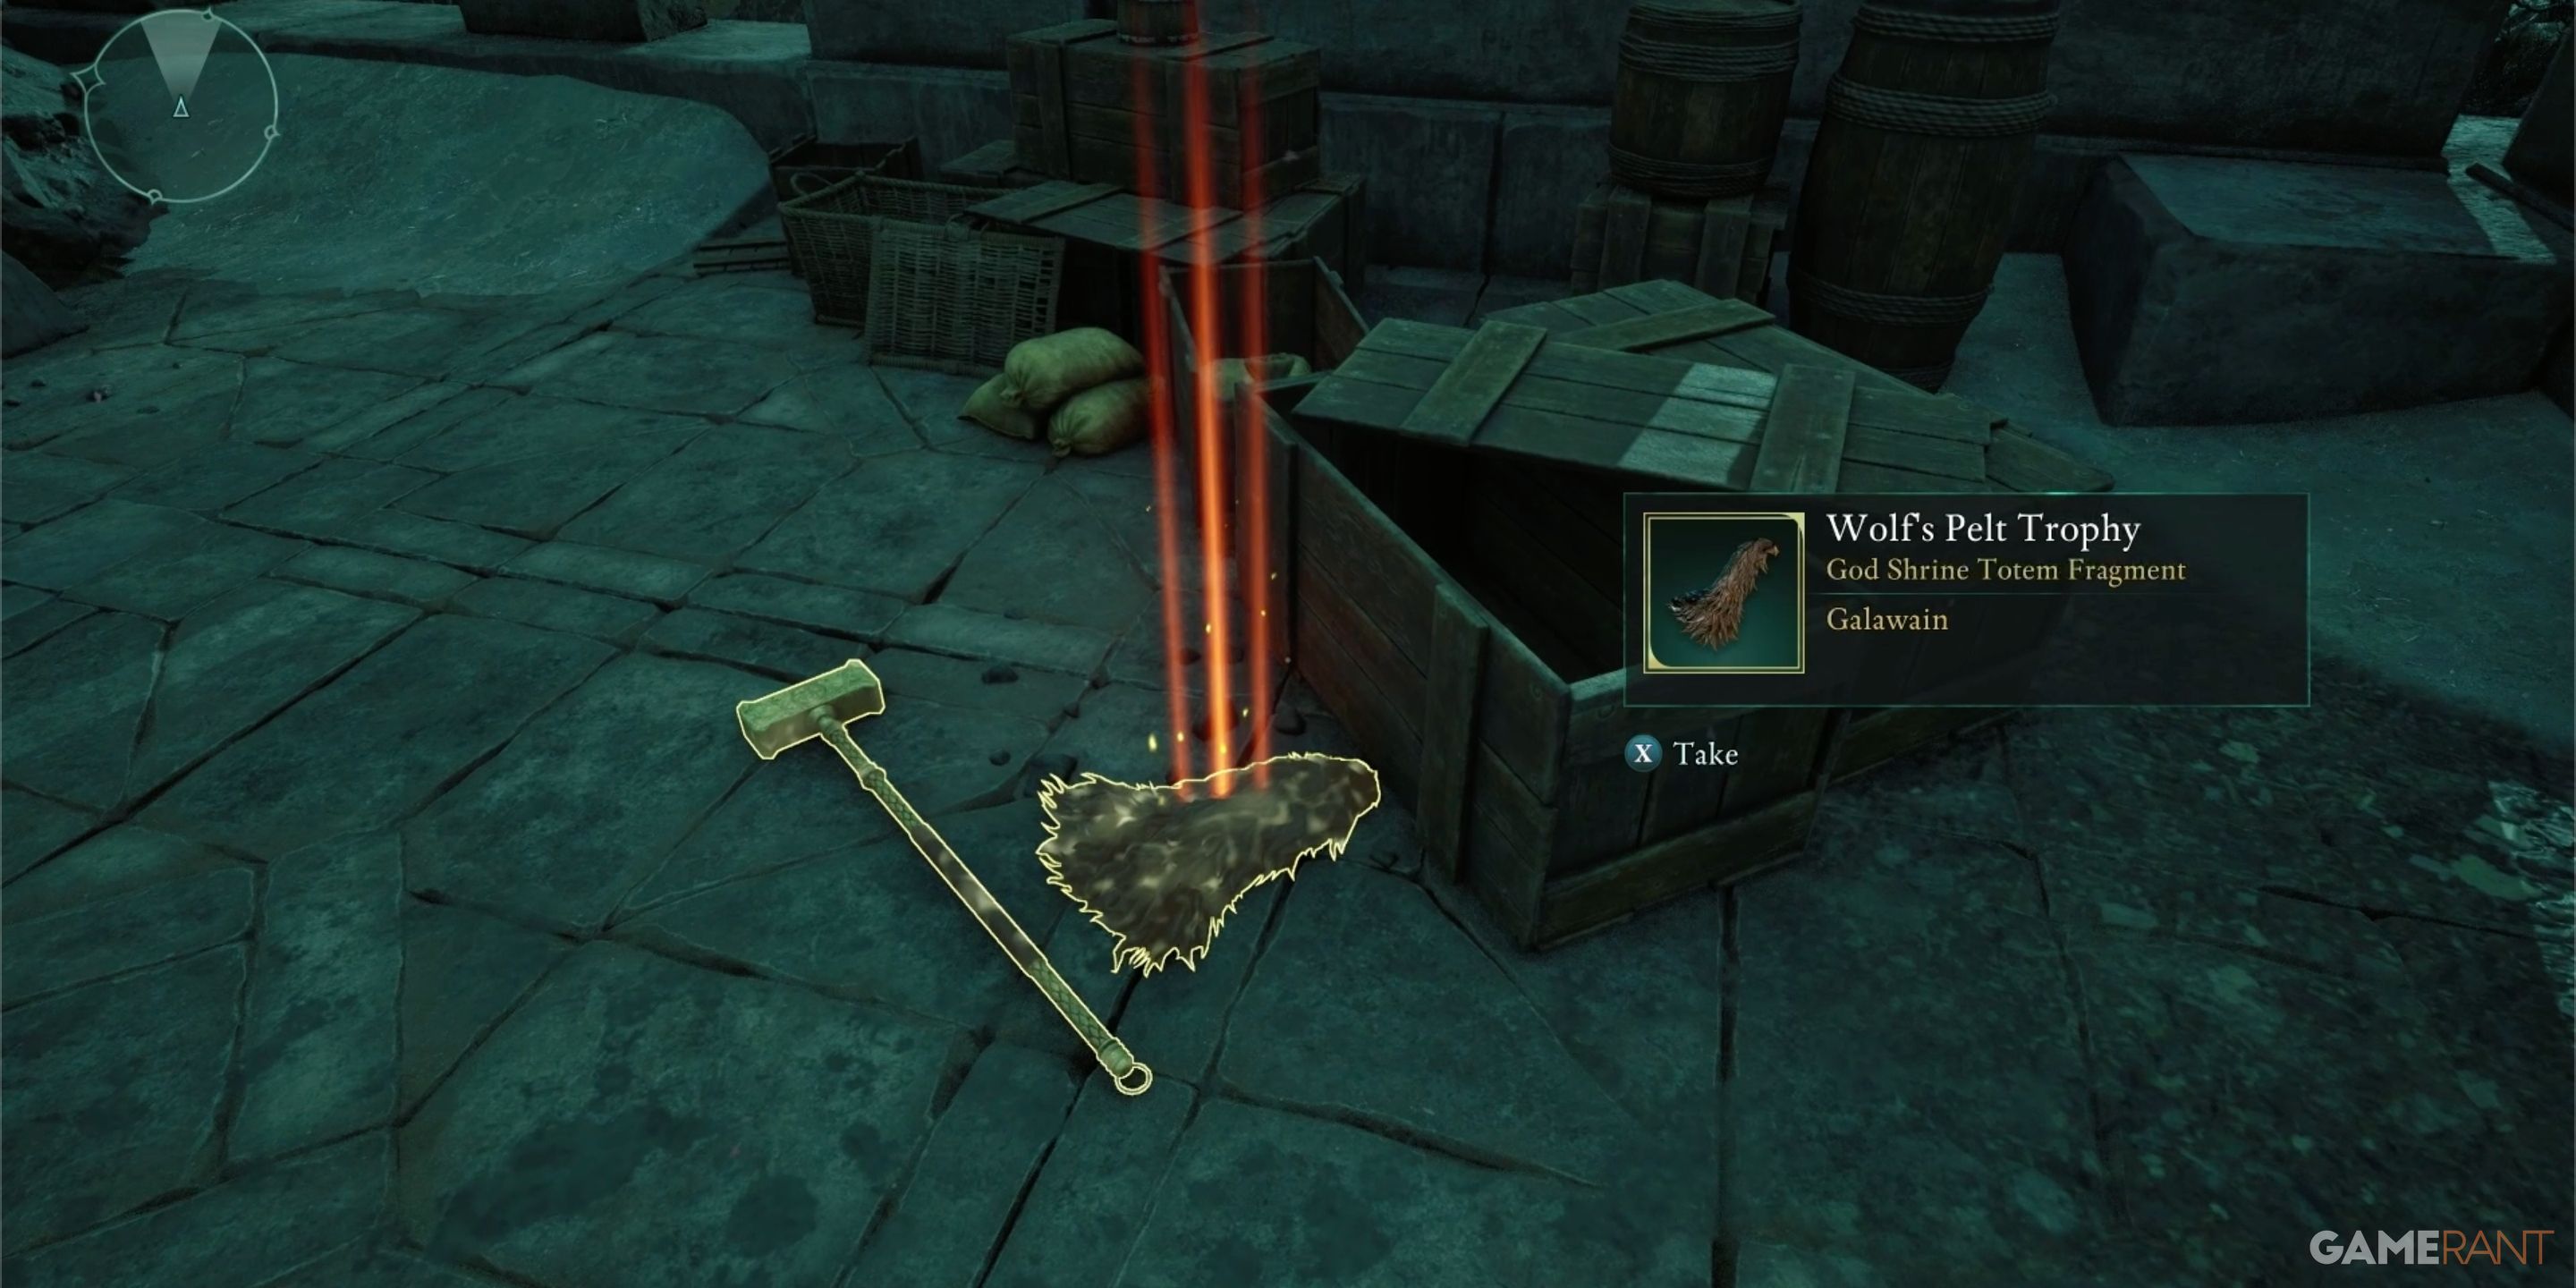
Go to the western boundary of Ash Forest, and there you’ll find the Ash Forest Outpost. Your goal is to ascend the tallest structure towards the south. On the left side of this structure, you’ll notice a line of rocky outcrops that can be scaled. Once you’ve reached the summit of these outcrops, you should be able to leap up and gain access to the top of the outpost building.
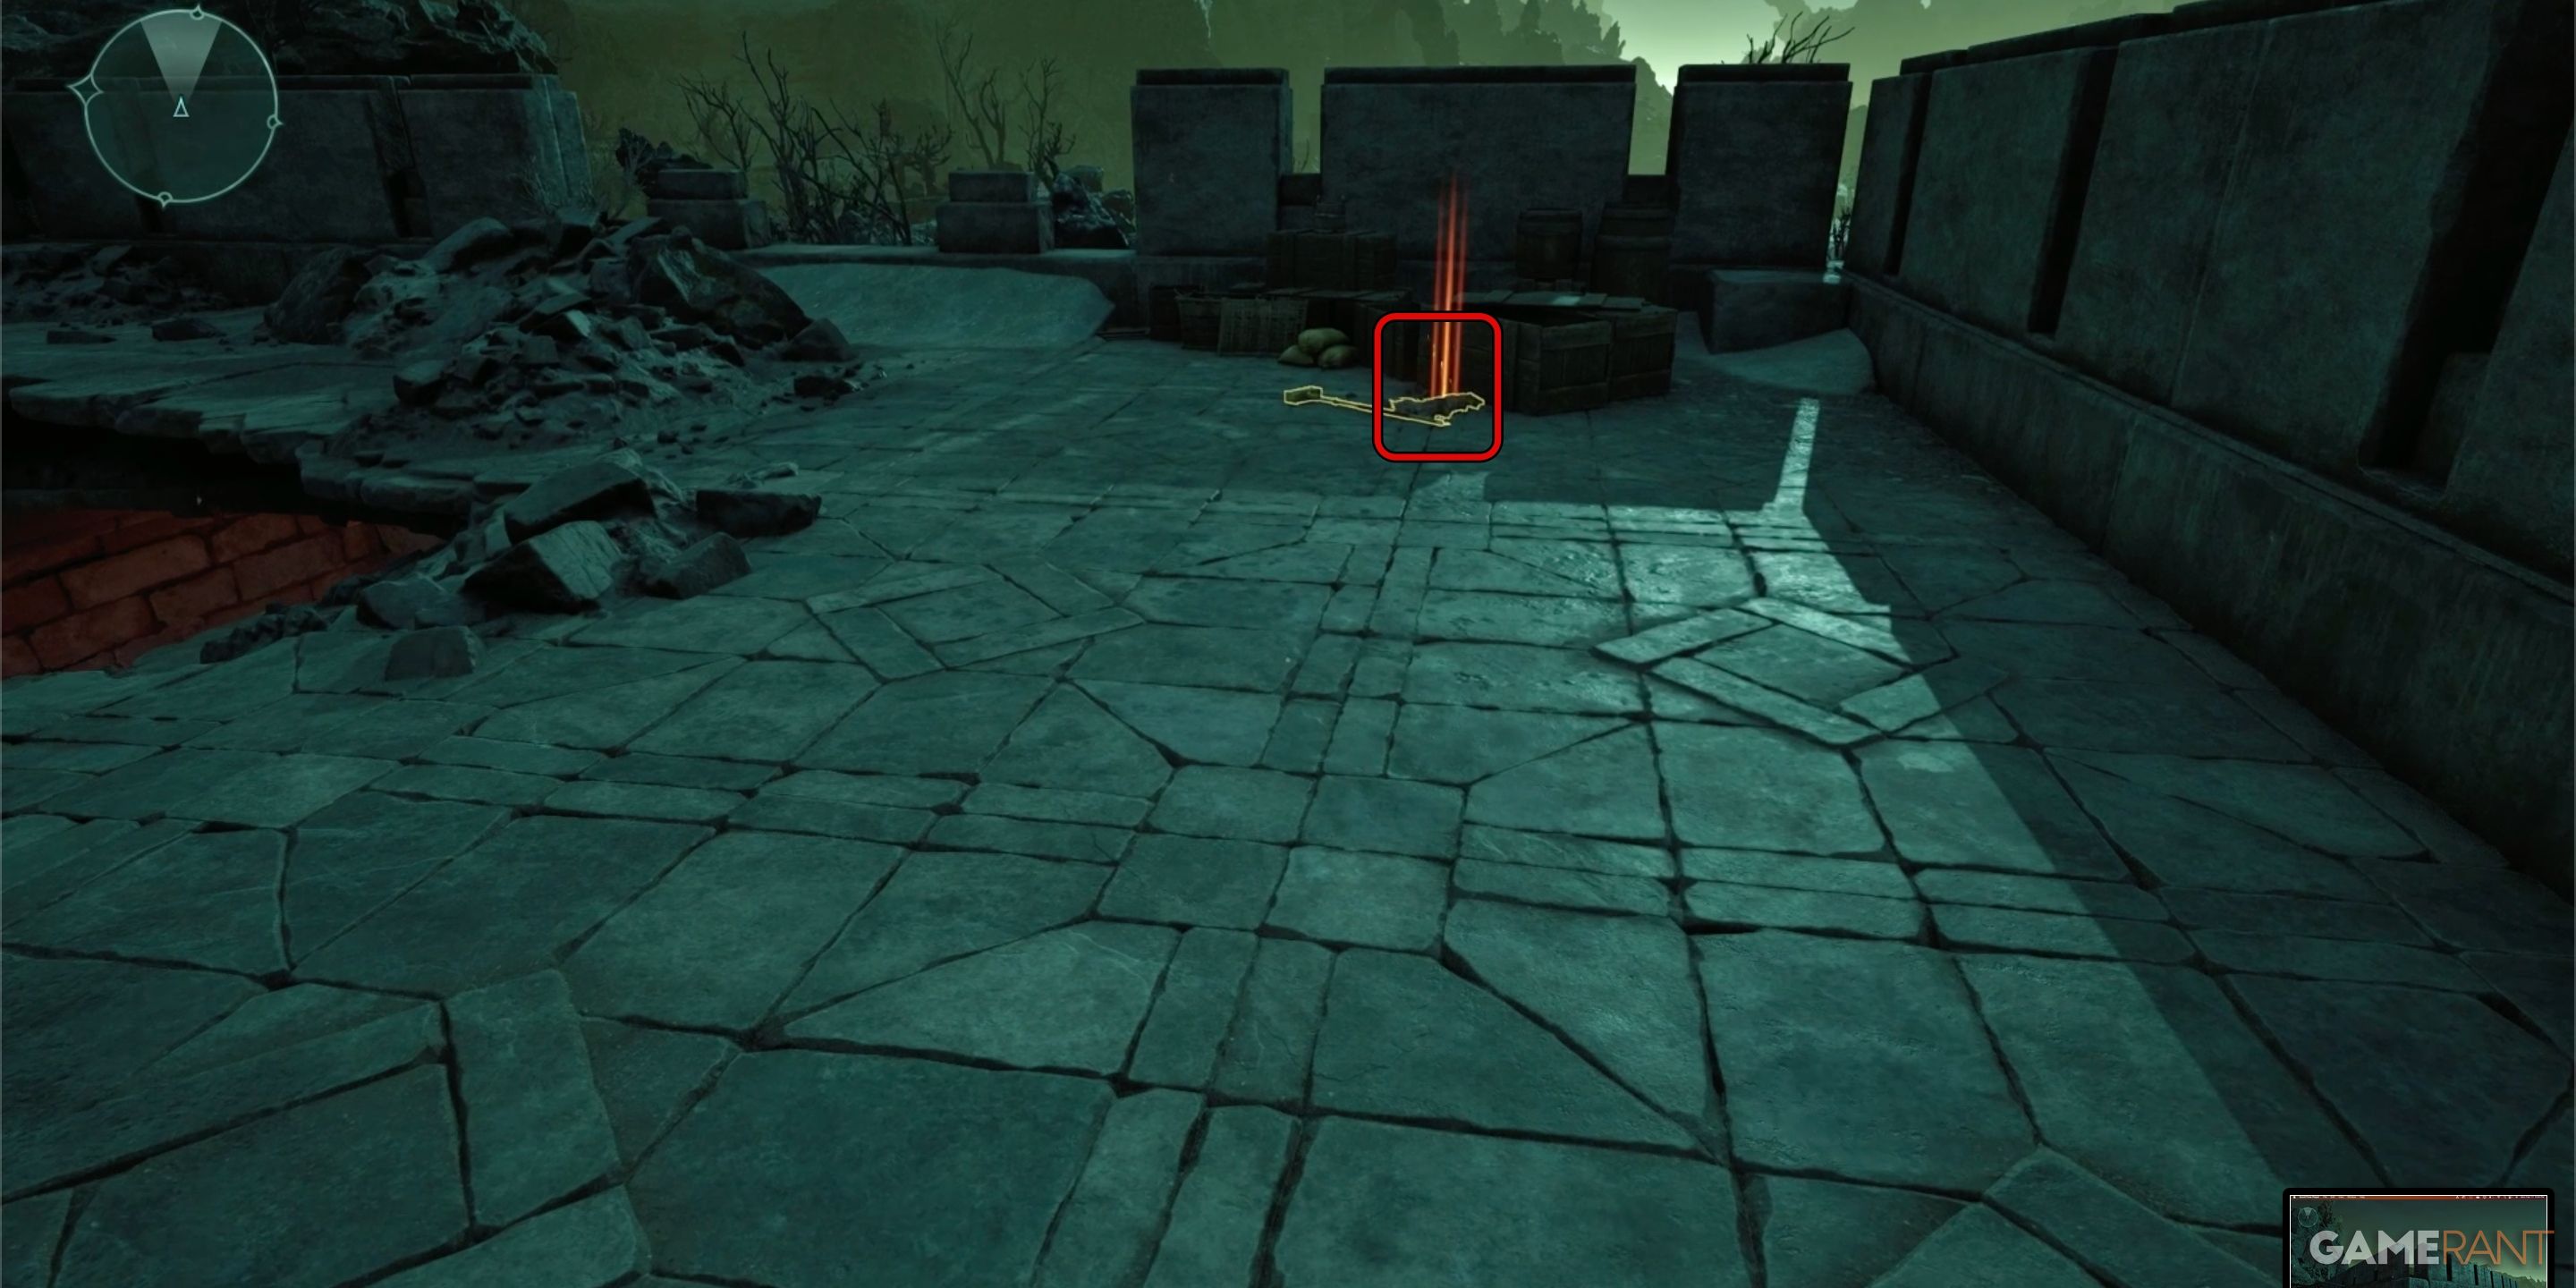
Atop the structure, you’ll come across the “Wolf’s Pelt Trophy” resting on the floor close to a box and a massive hammer.
Hunter’s Arrows of Seeking Location – Avowed
The next section will lead you to the peak of Mount Forja, where you can discover the Hunting Arrows of Seeking. Here’s a hint for finding them:
Near the founder’s head these arrows find, out of view where he is blind
- Riddle Solution: Mt. Forja Summit/Mines
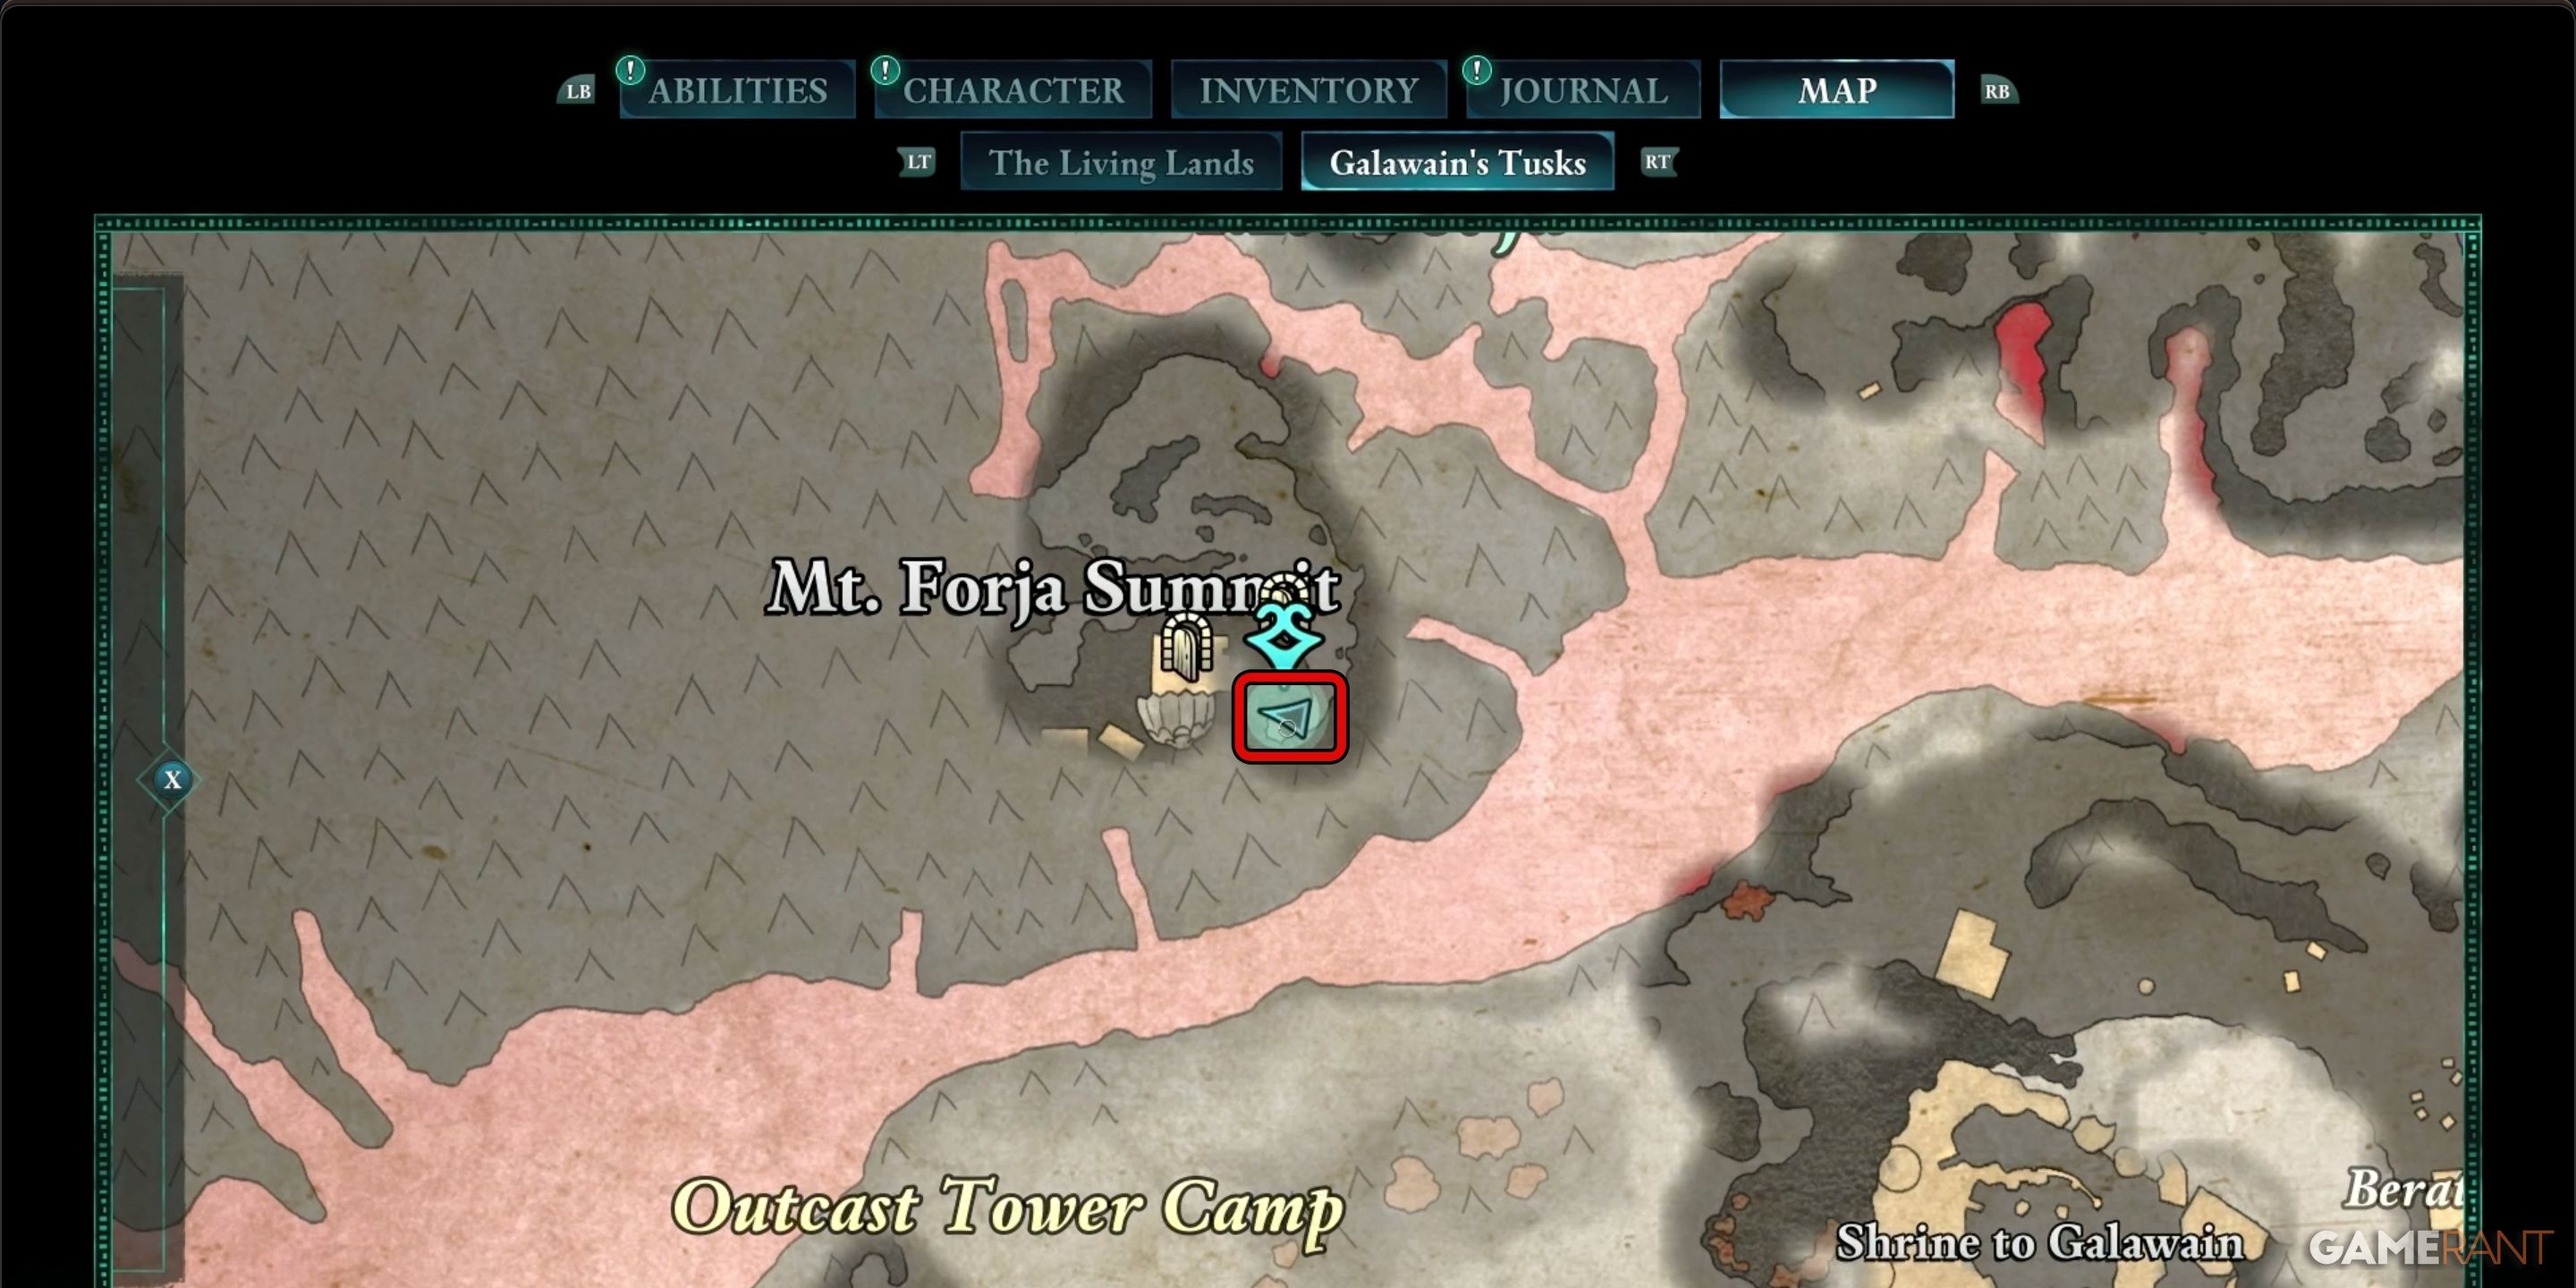
To conquer the peak of Mount Forja, just stick to the main quest line called “Our Dreams Remain Divided“. Once you’ve vanquished the boss (a significant spoiler, you’ll recognize it as it appears), atop Mount Forja, follow a short trail on the mountain side. There, near a chest, you’ll discover the Arrows of Seeking for the Hunter.


Hunter’s Arrows of Slaying Location – Avowed
In the sixth section of “Fragments of the Spoils,” you’ll find the arrow known as the Hunter’s Arrow of Slaying. Here’s a hint for where to locate it:
The riddle goes:
In the fallen spire amidst fields of slumber, a wooden trio waits to be discovered
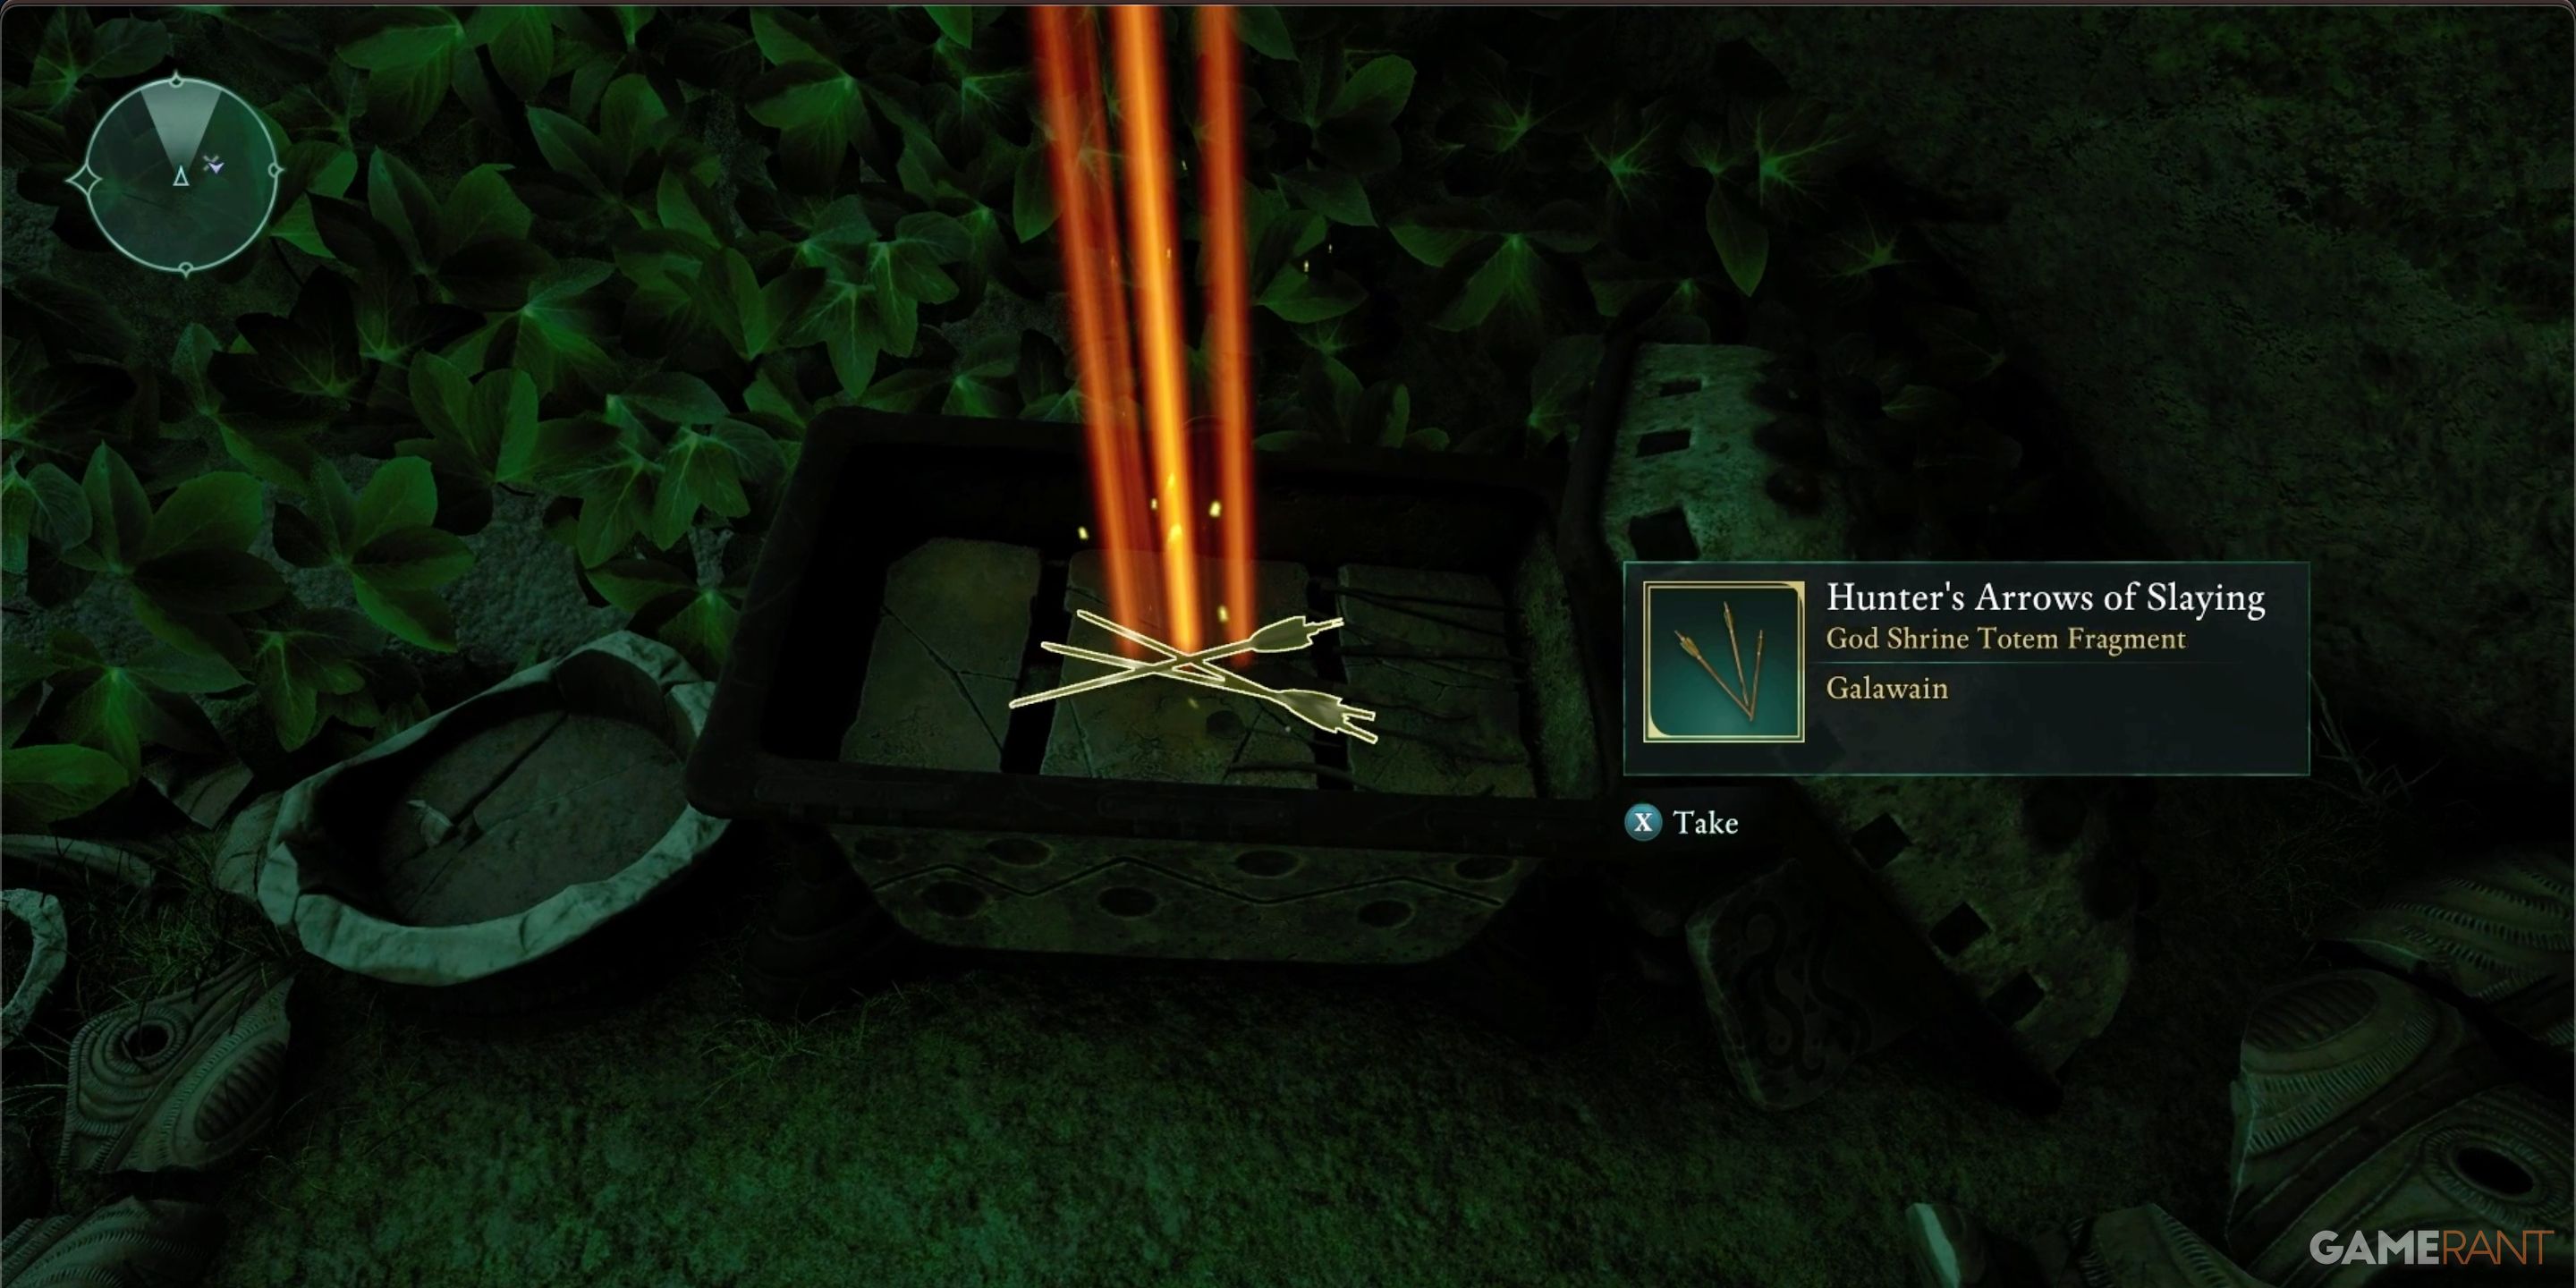
- Riddle Solution: Slumbering Fields Ruins
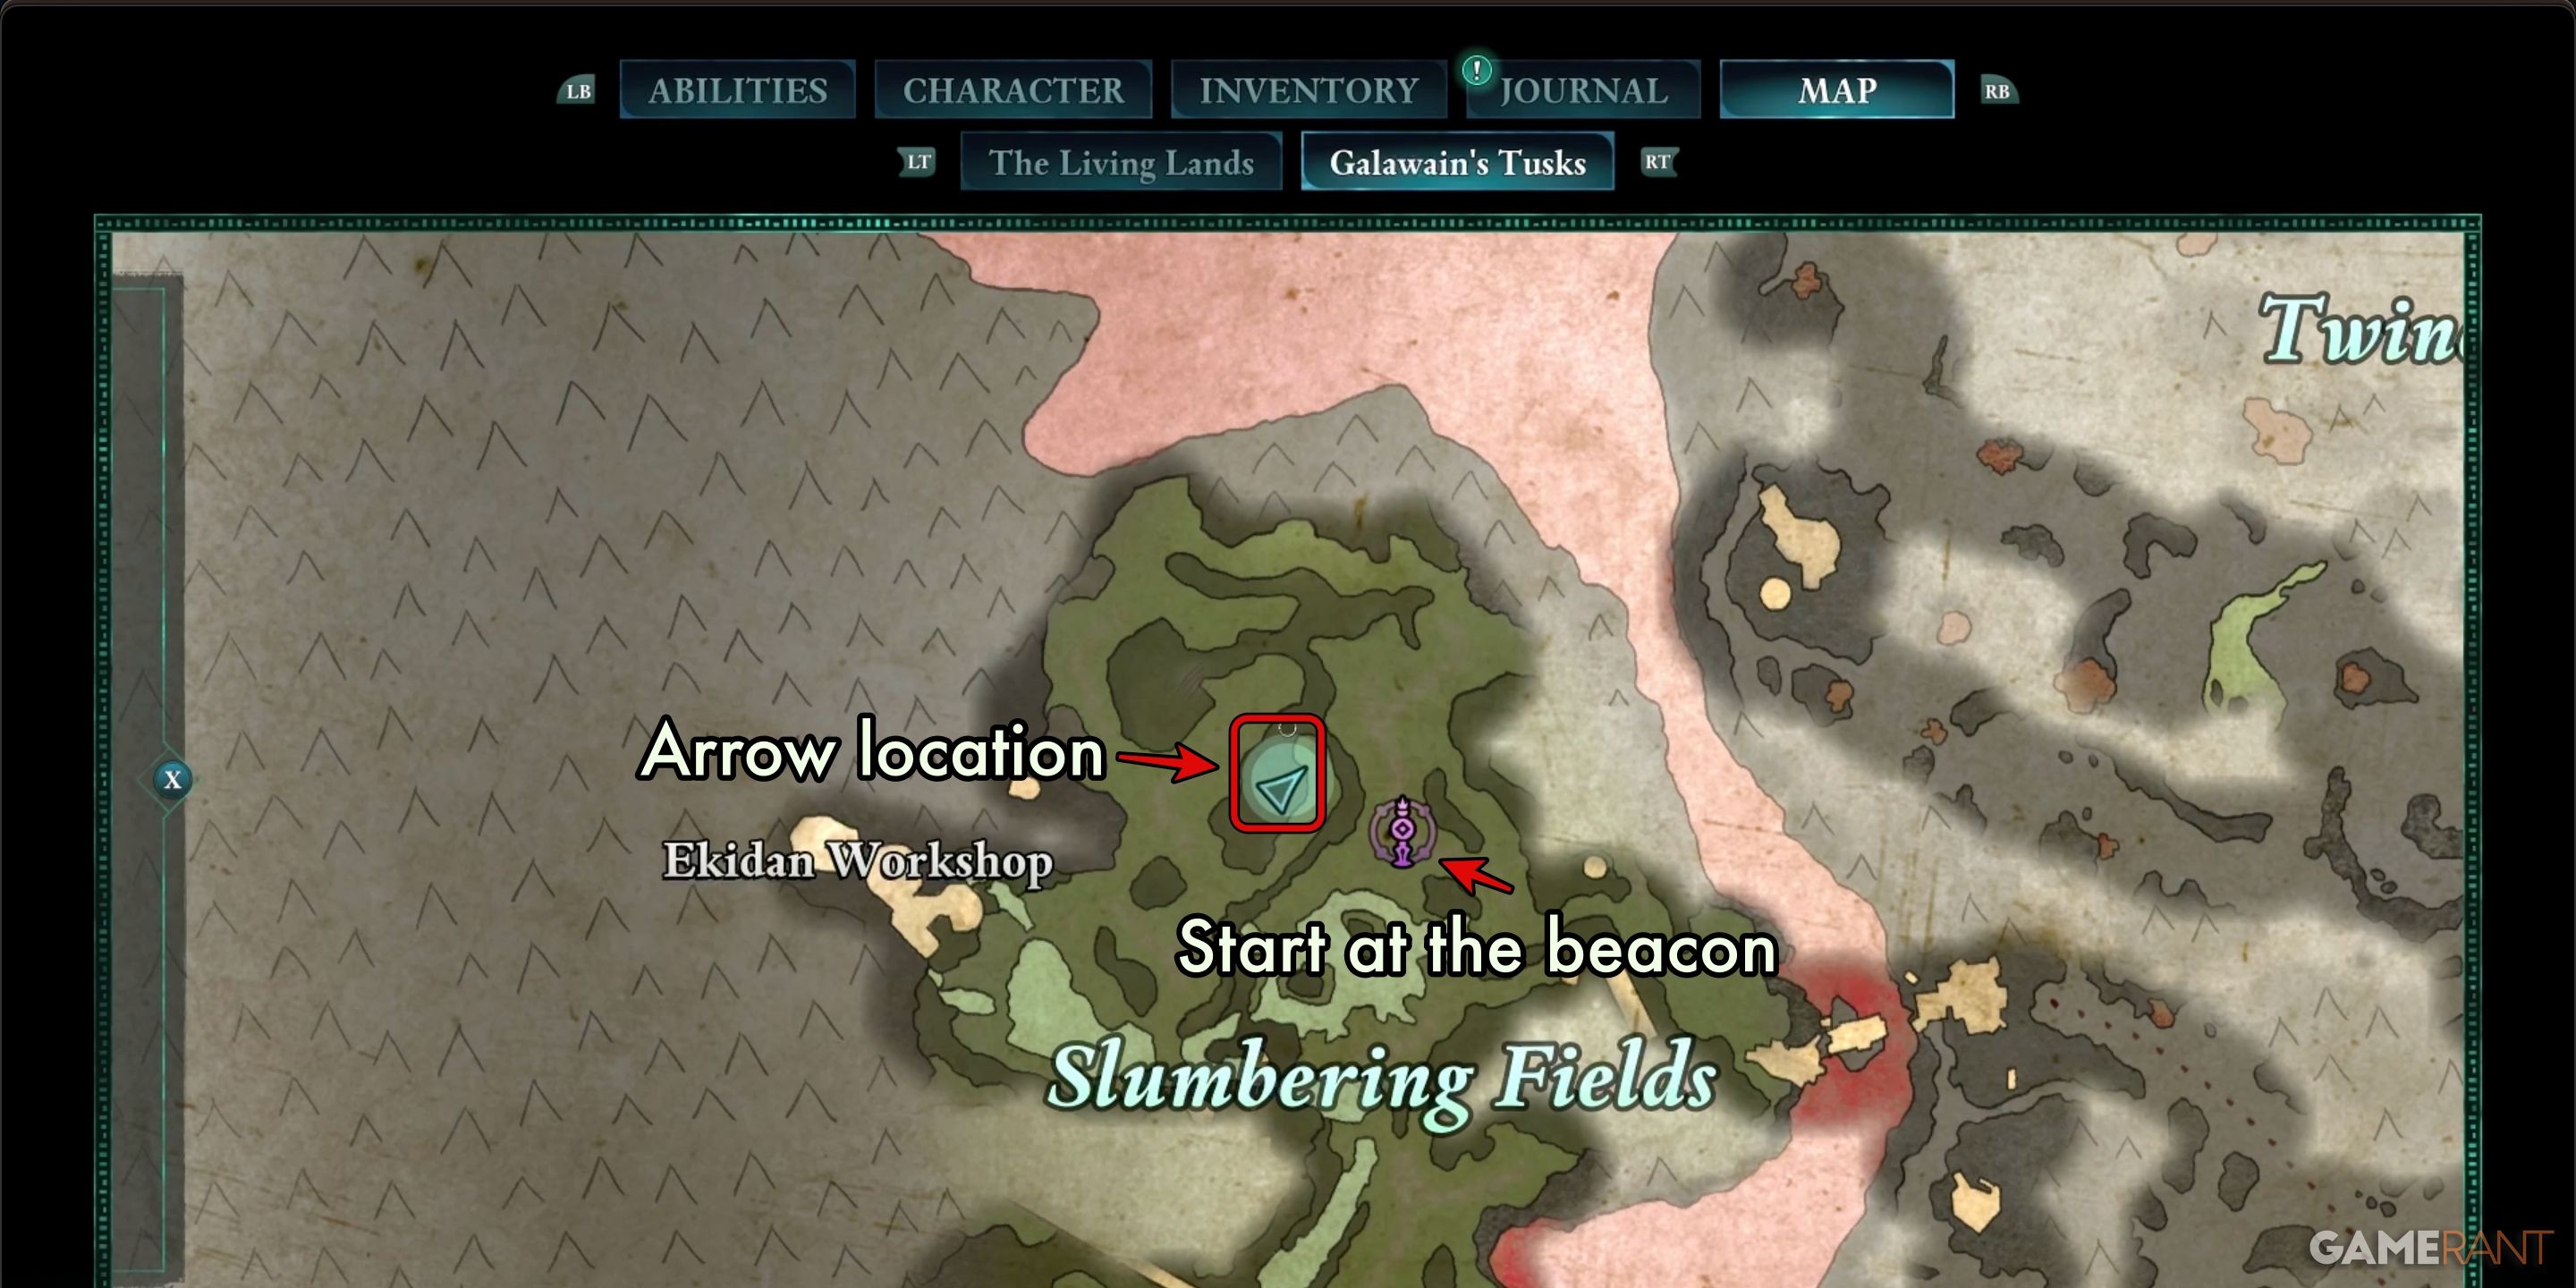
To locate the Hunter’s Arrows of Slaying, begin your journey at the “Slumbering Fields Beacon,” which lies within the region named Slumbering Fields. The Slumbering Fields can be found in the eastern part of Galawain’s Tusk, and they are easily identifiable as the only area on the map that appears green.
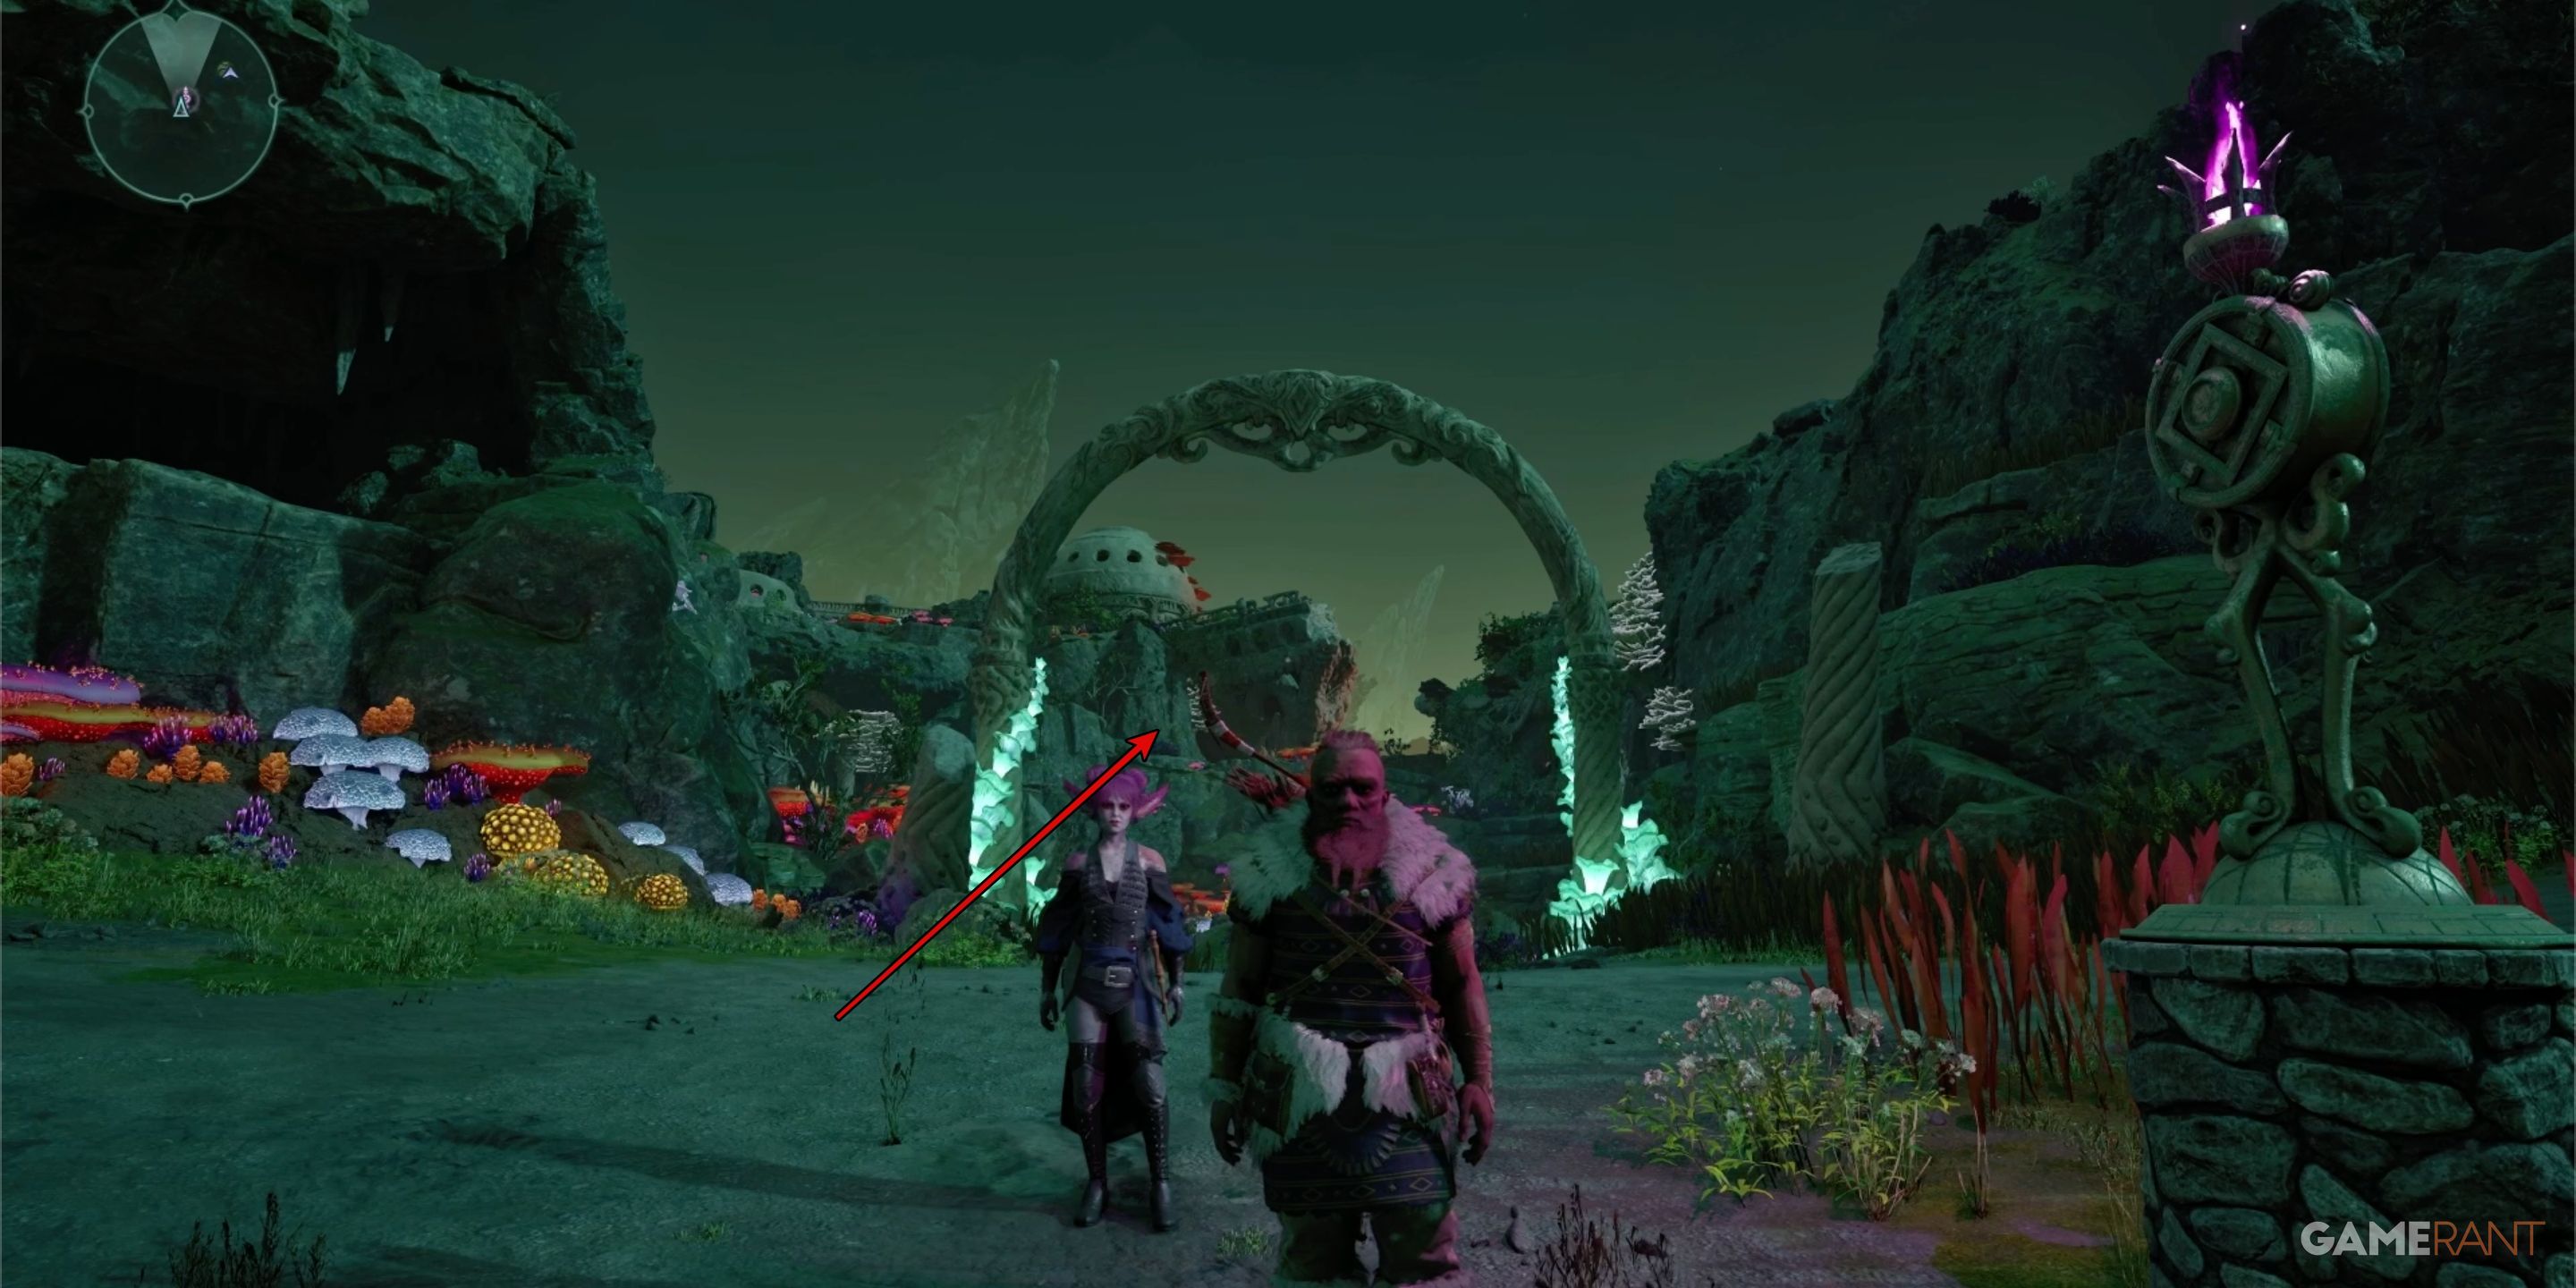
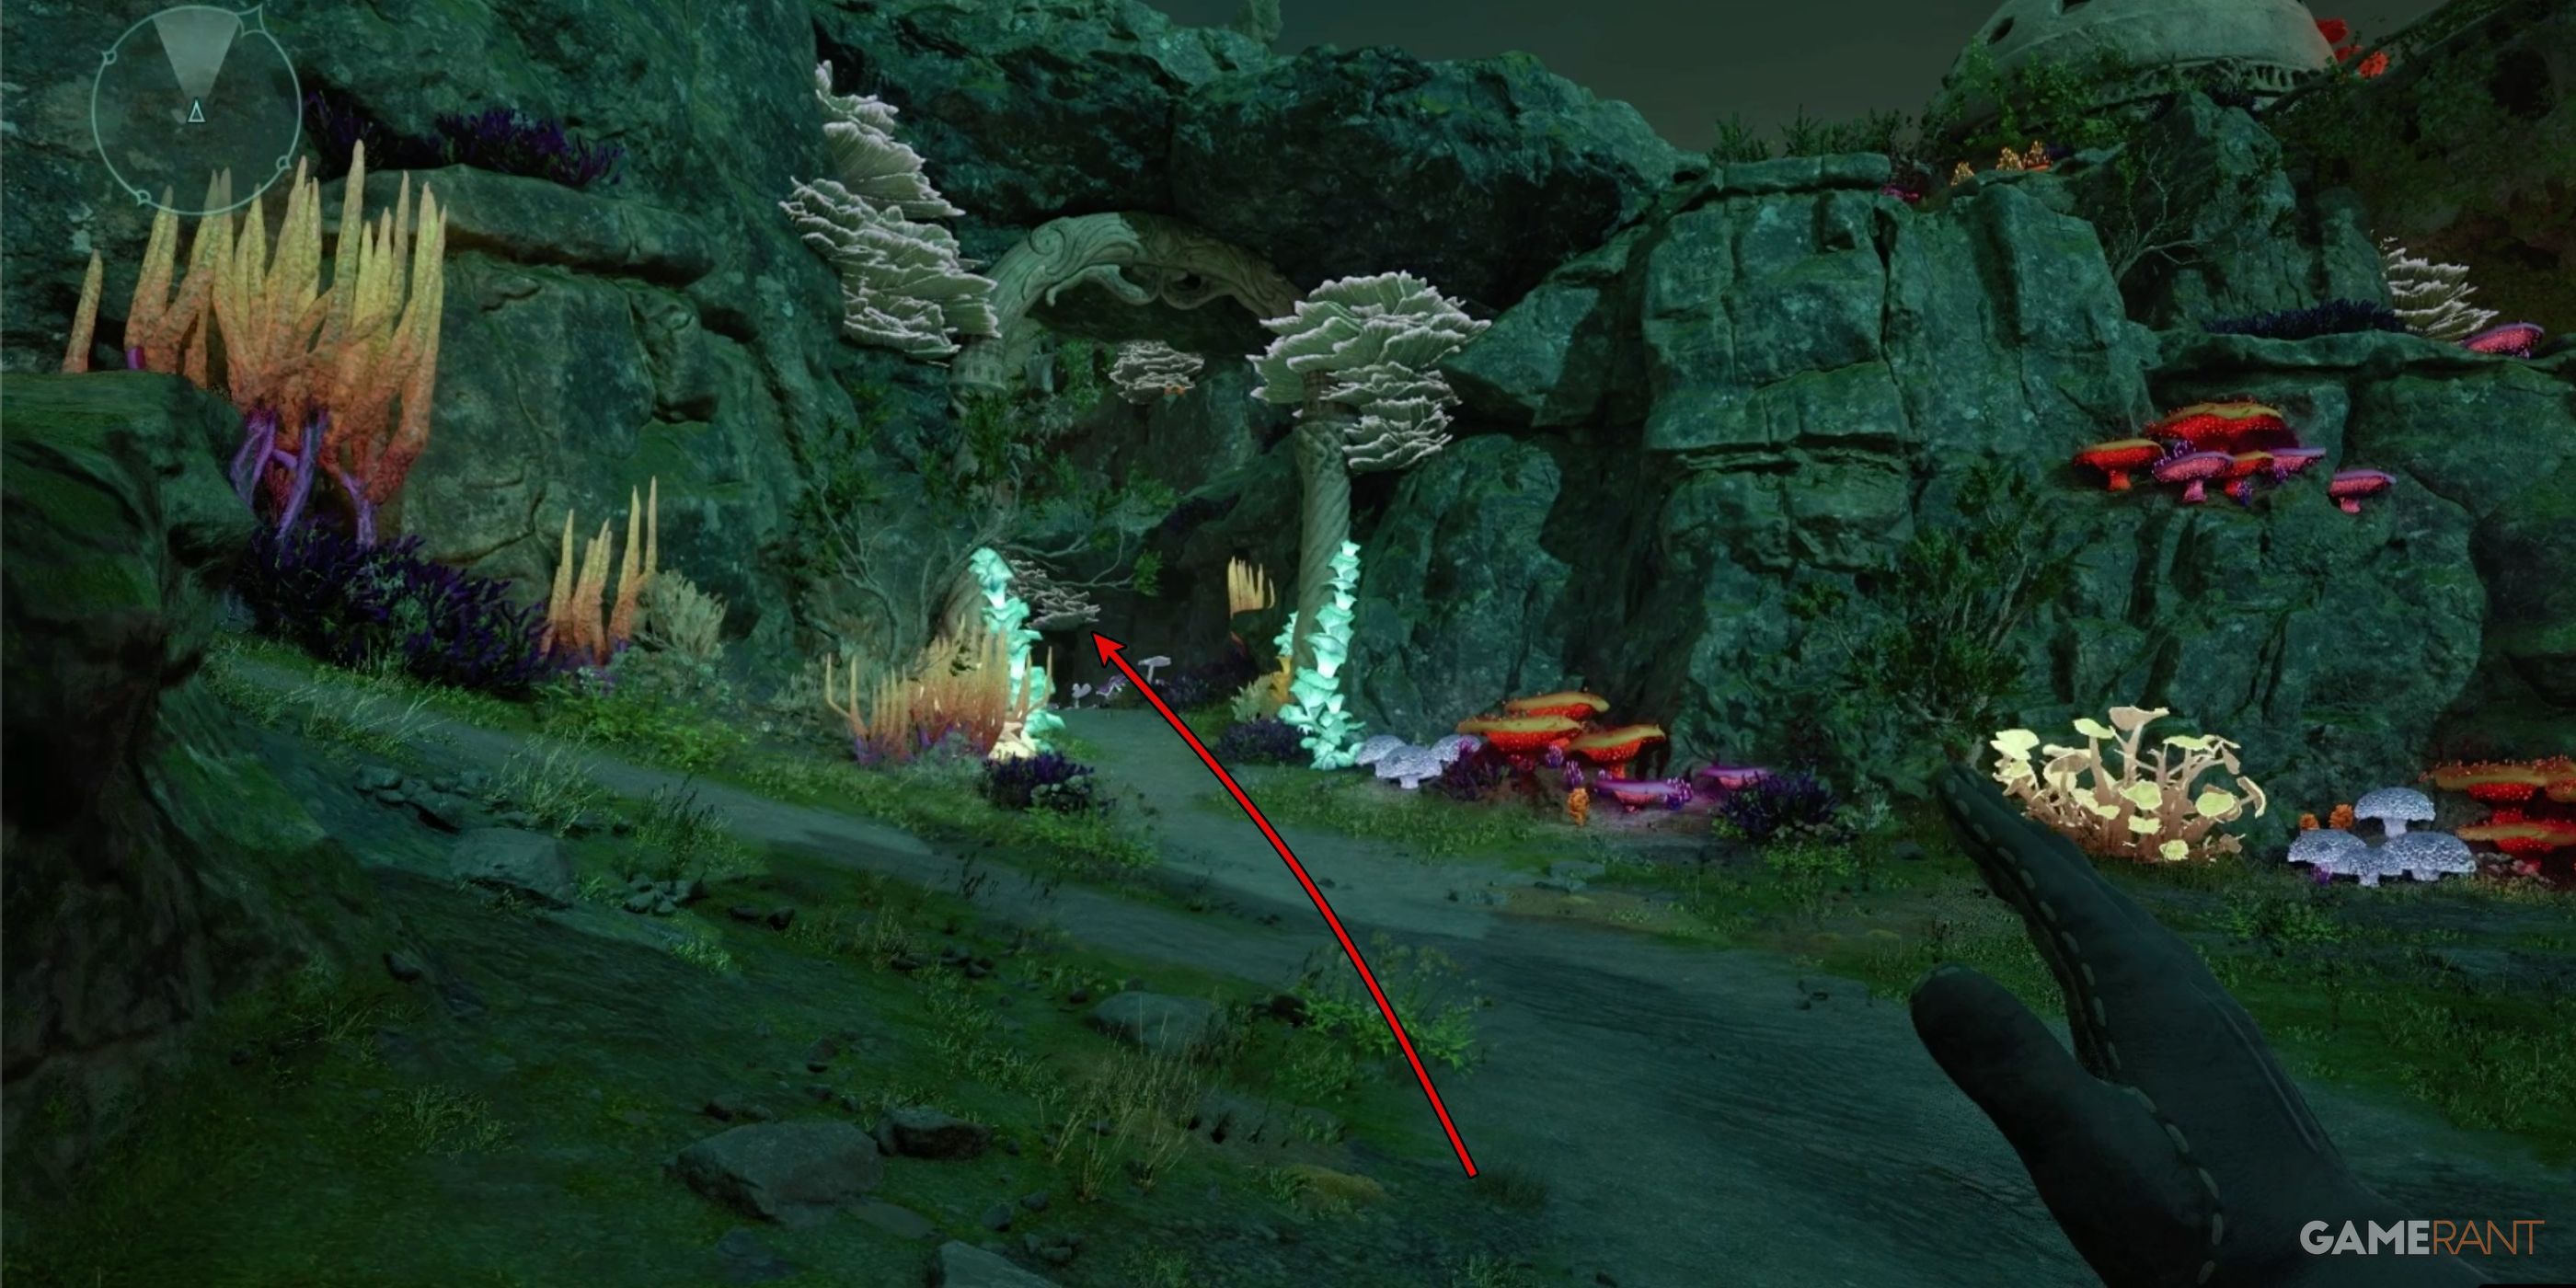
Starting from the landmark, proceed northward after passing the first archway. Keep going north, and you’ll spot another arch with a stone bridge on its summit. After passing this second arch, follow the earthy trail until it reaches a junction. At the intersection, take a left turn and continue under the third arch. Follow the path as it ascends the gentle slope to its peak.


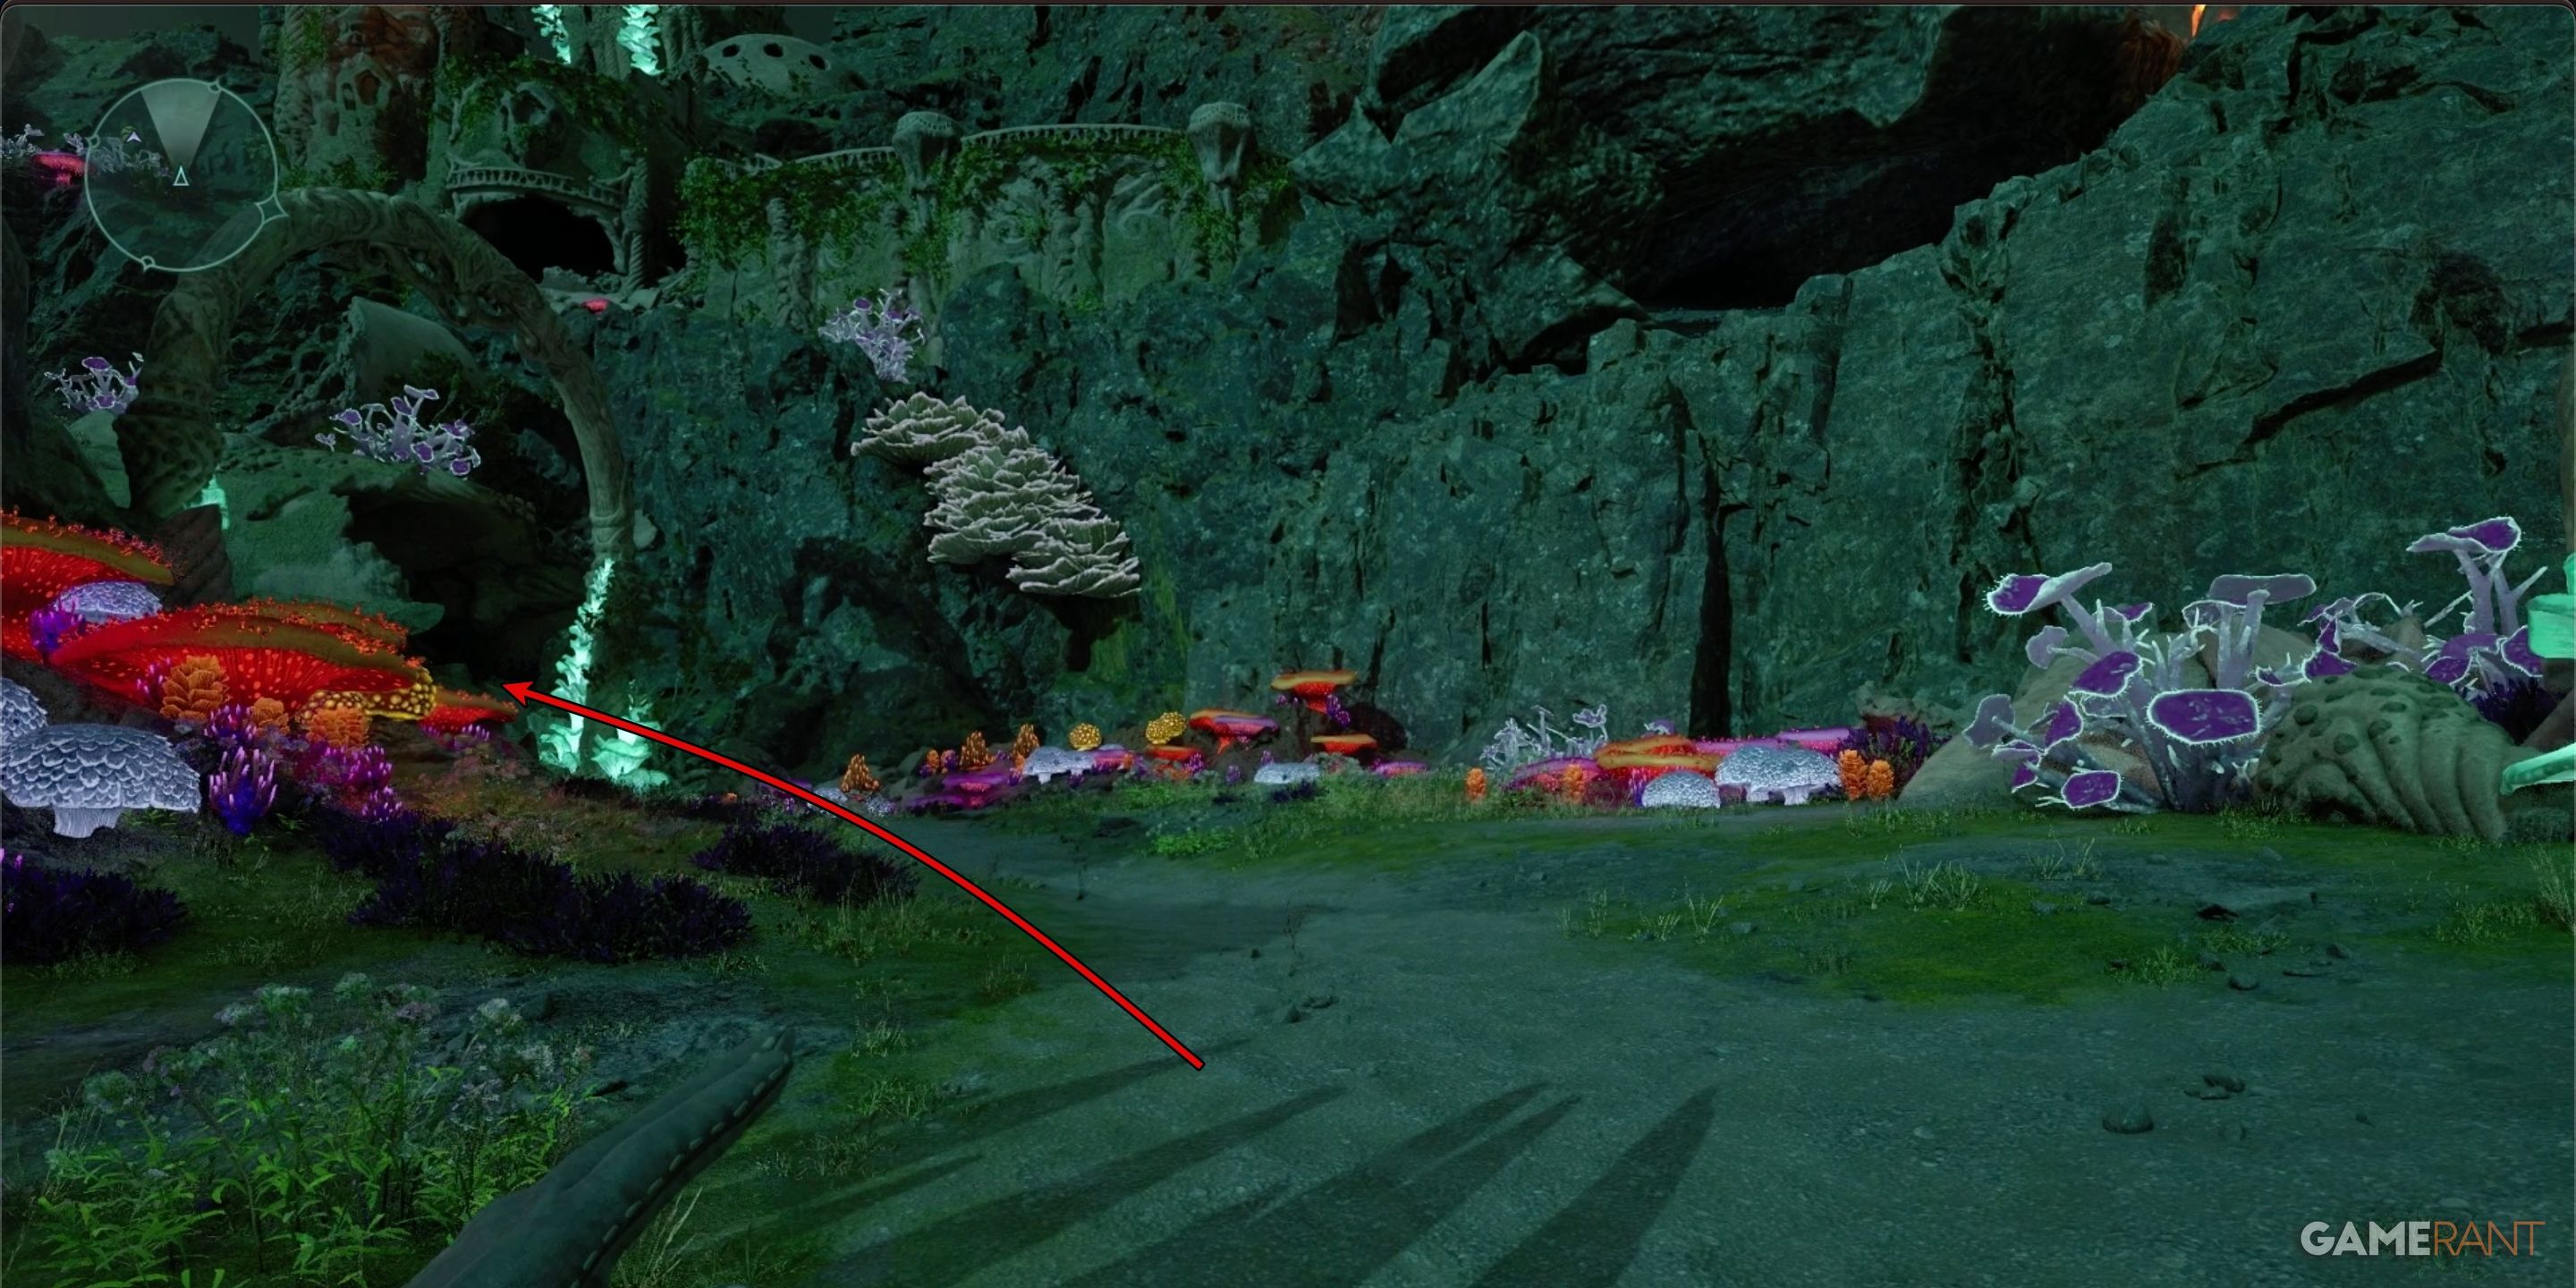
Atop the hill, you’ll find a massive stone formation resembling a tree trunk with a ring-like root system at its summit. Climb up using the stone platforms on the right side of this structure. Once there, notice a sizable hole in a rock face that grants access to a cozy little cave.
In the chamber, you’ll find the Hunter’s Arrows of Slaying in a chest.
Hunter’s Arrows of Surviving Location – Avowed
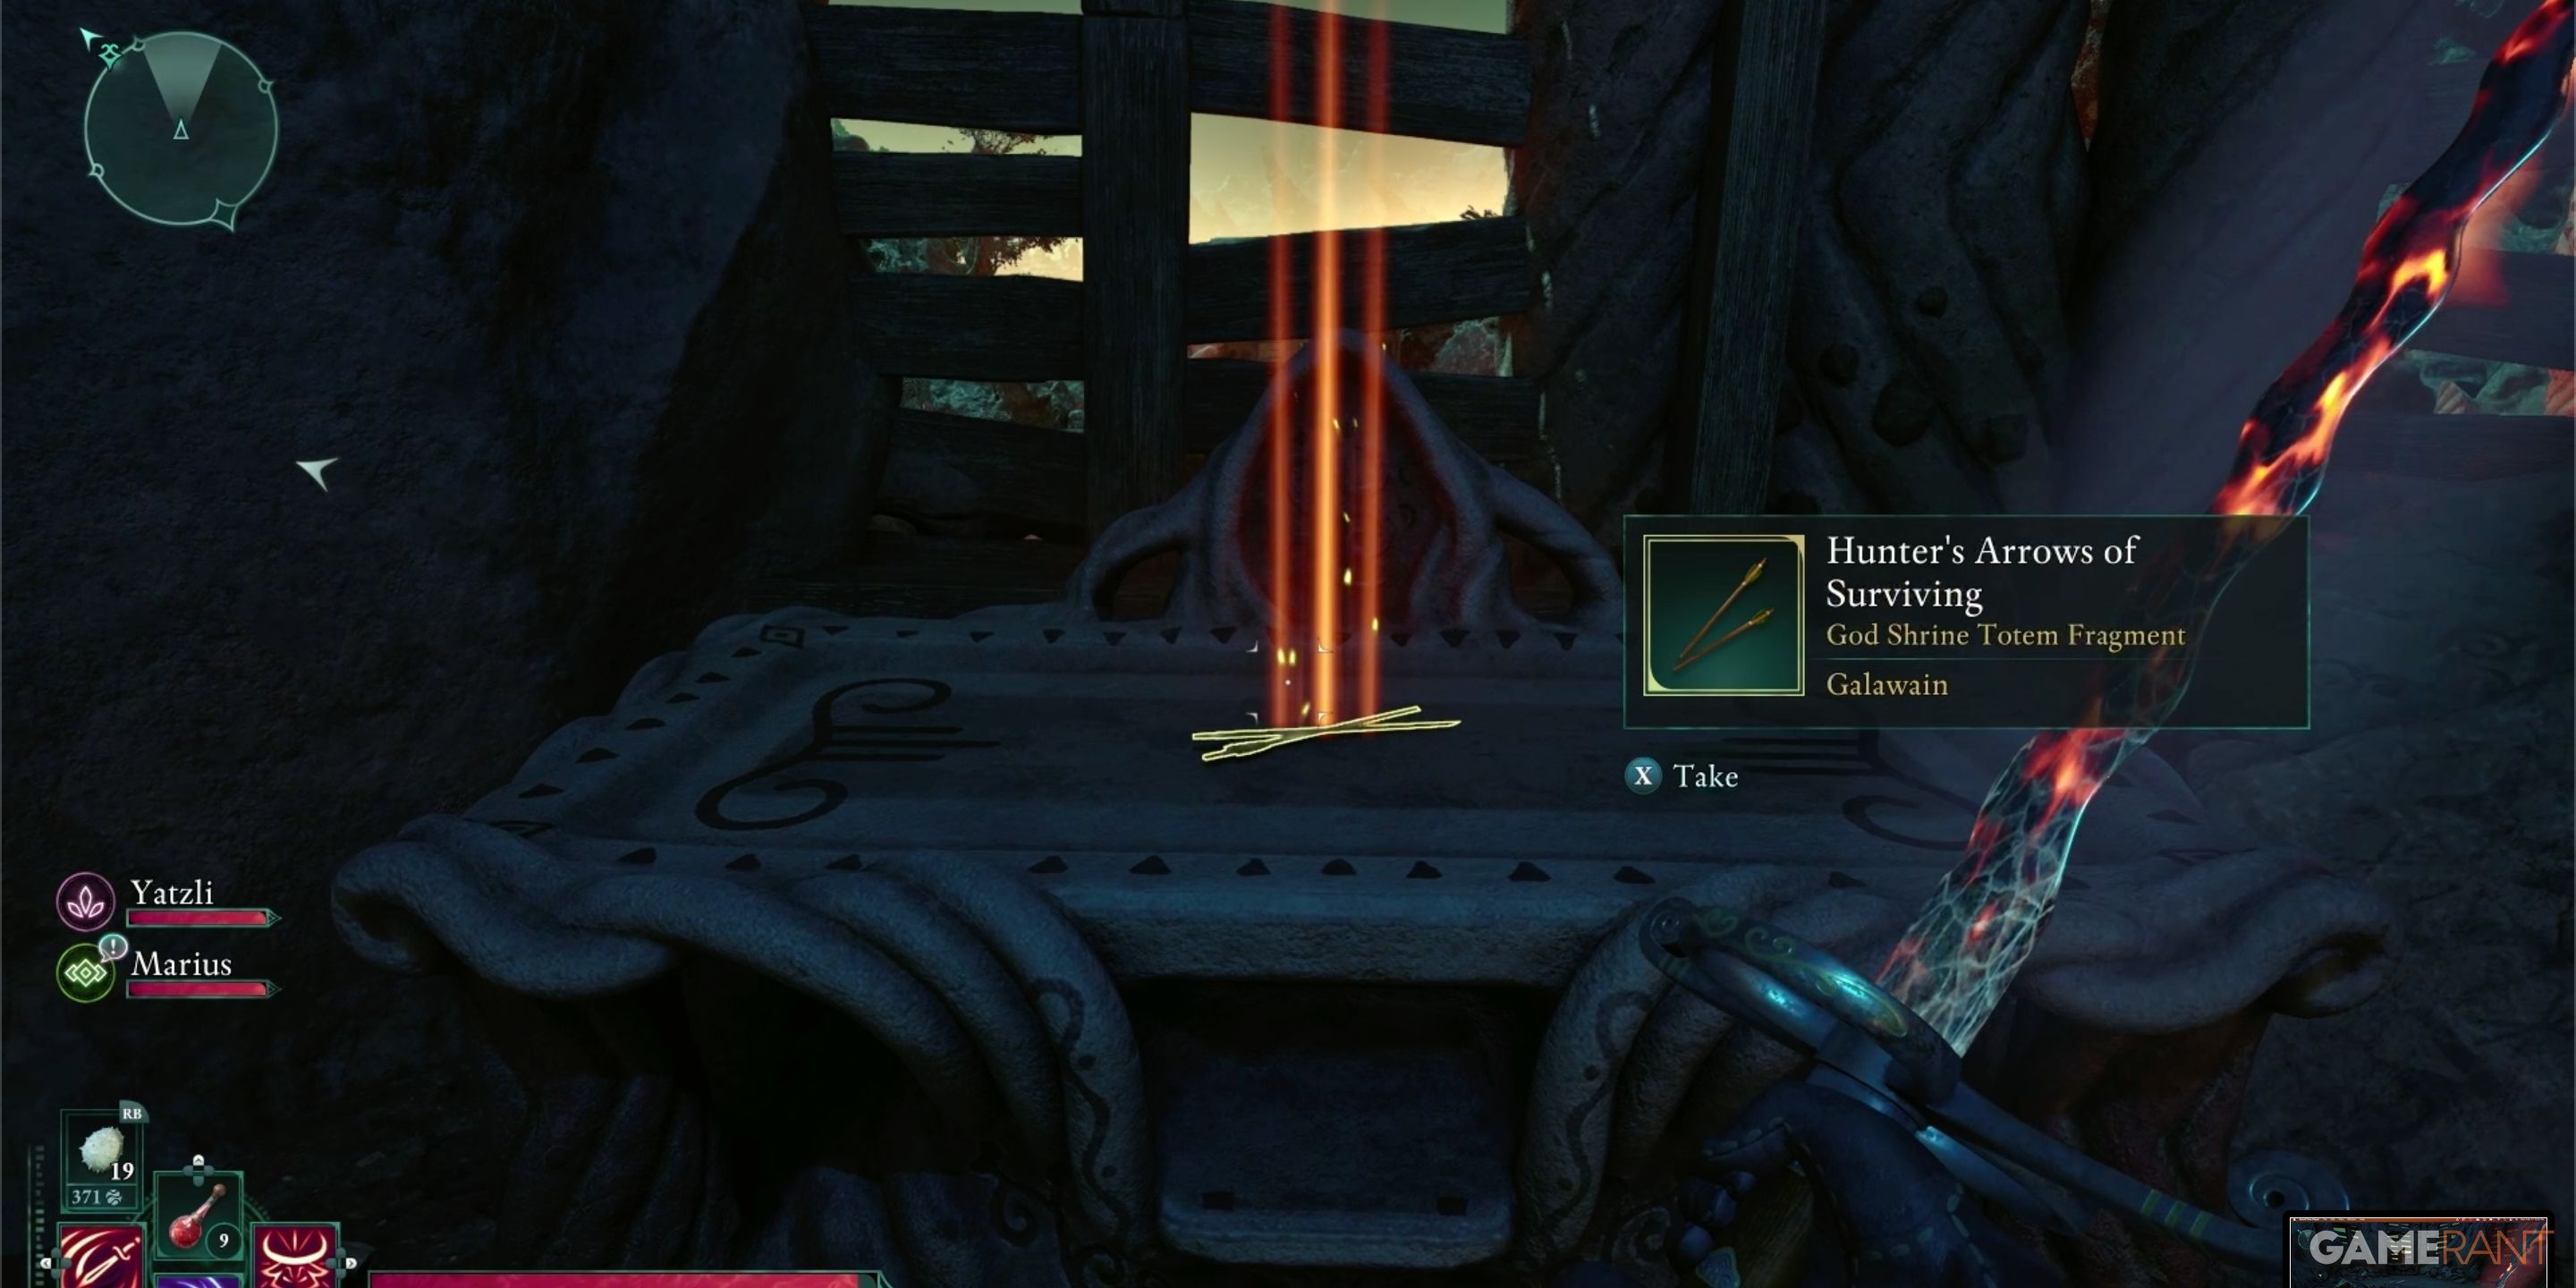
In the final puzzle of “Fragments of the Spoils,” your journey leads to the Godless remnants near the Forgotten Hamlet. This is indicated in the text.
The final shafts you shall seek in a silent village where spirits still shriek.
- Riddle Solution: Lost Village
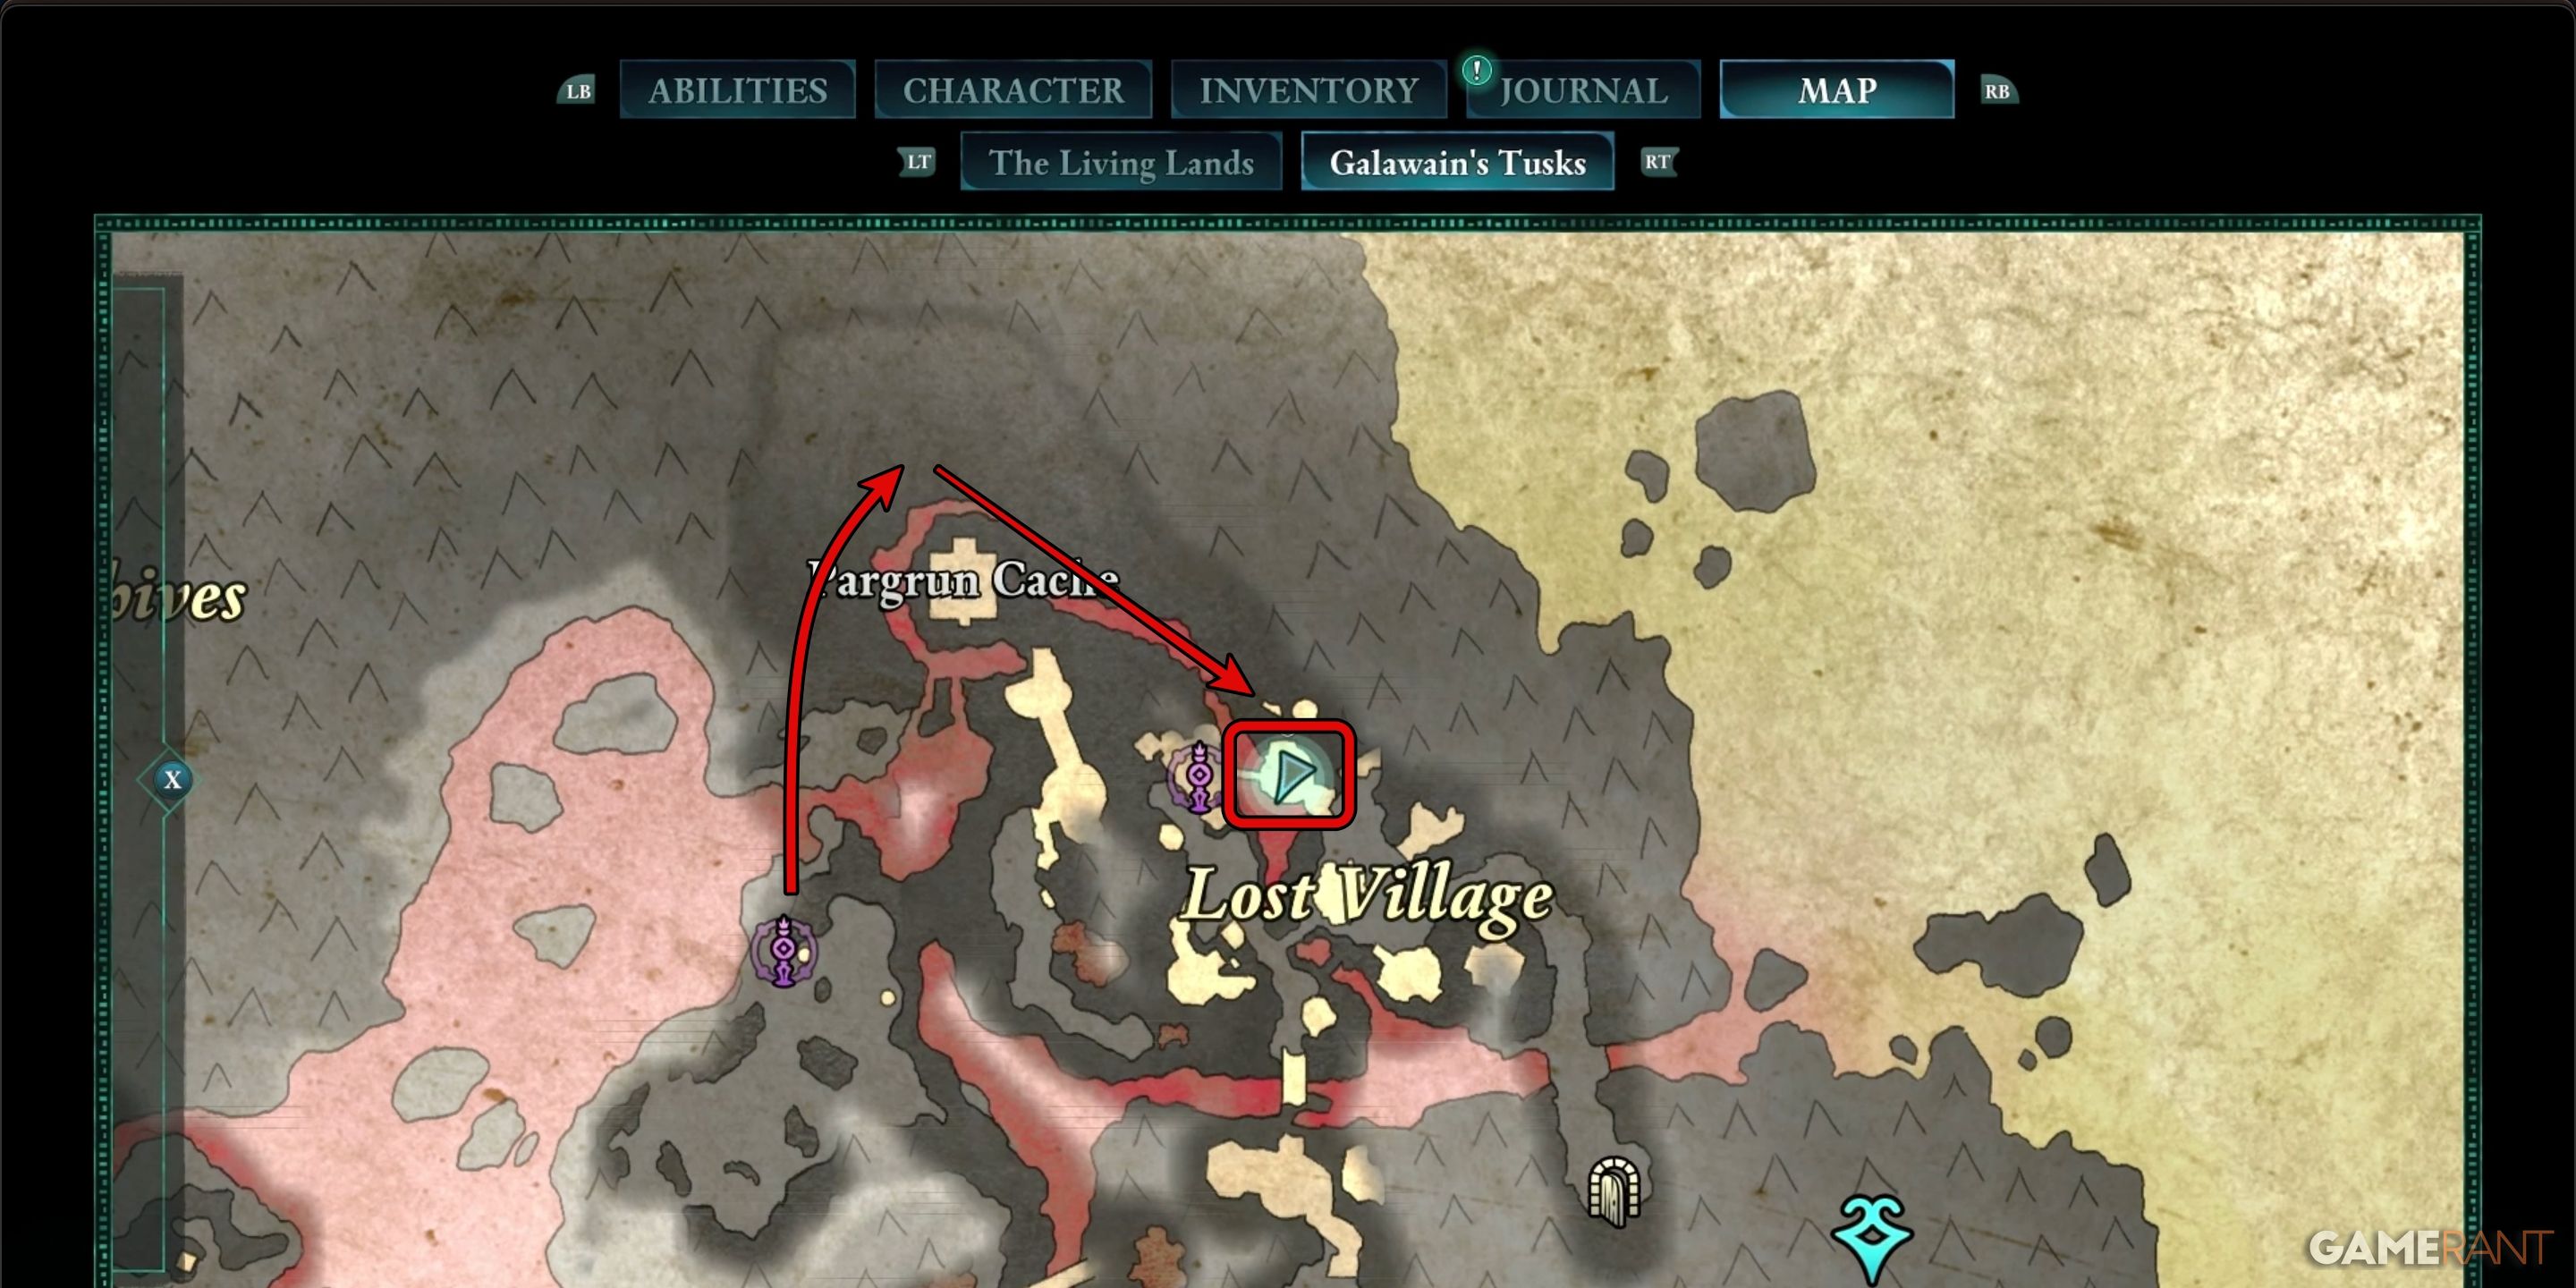
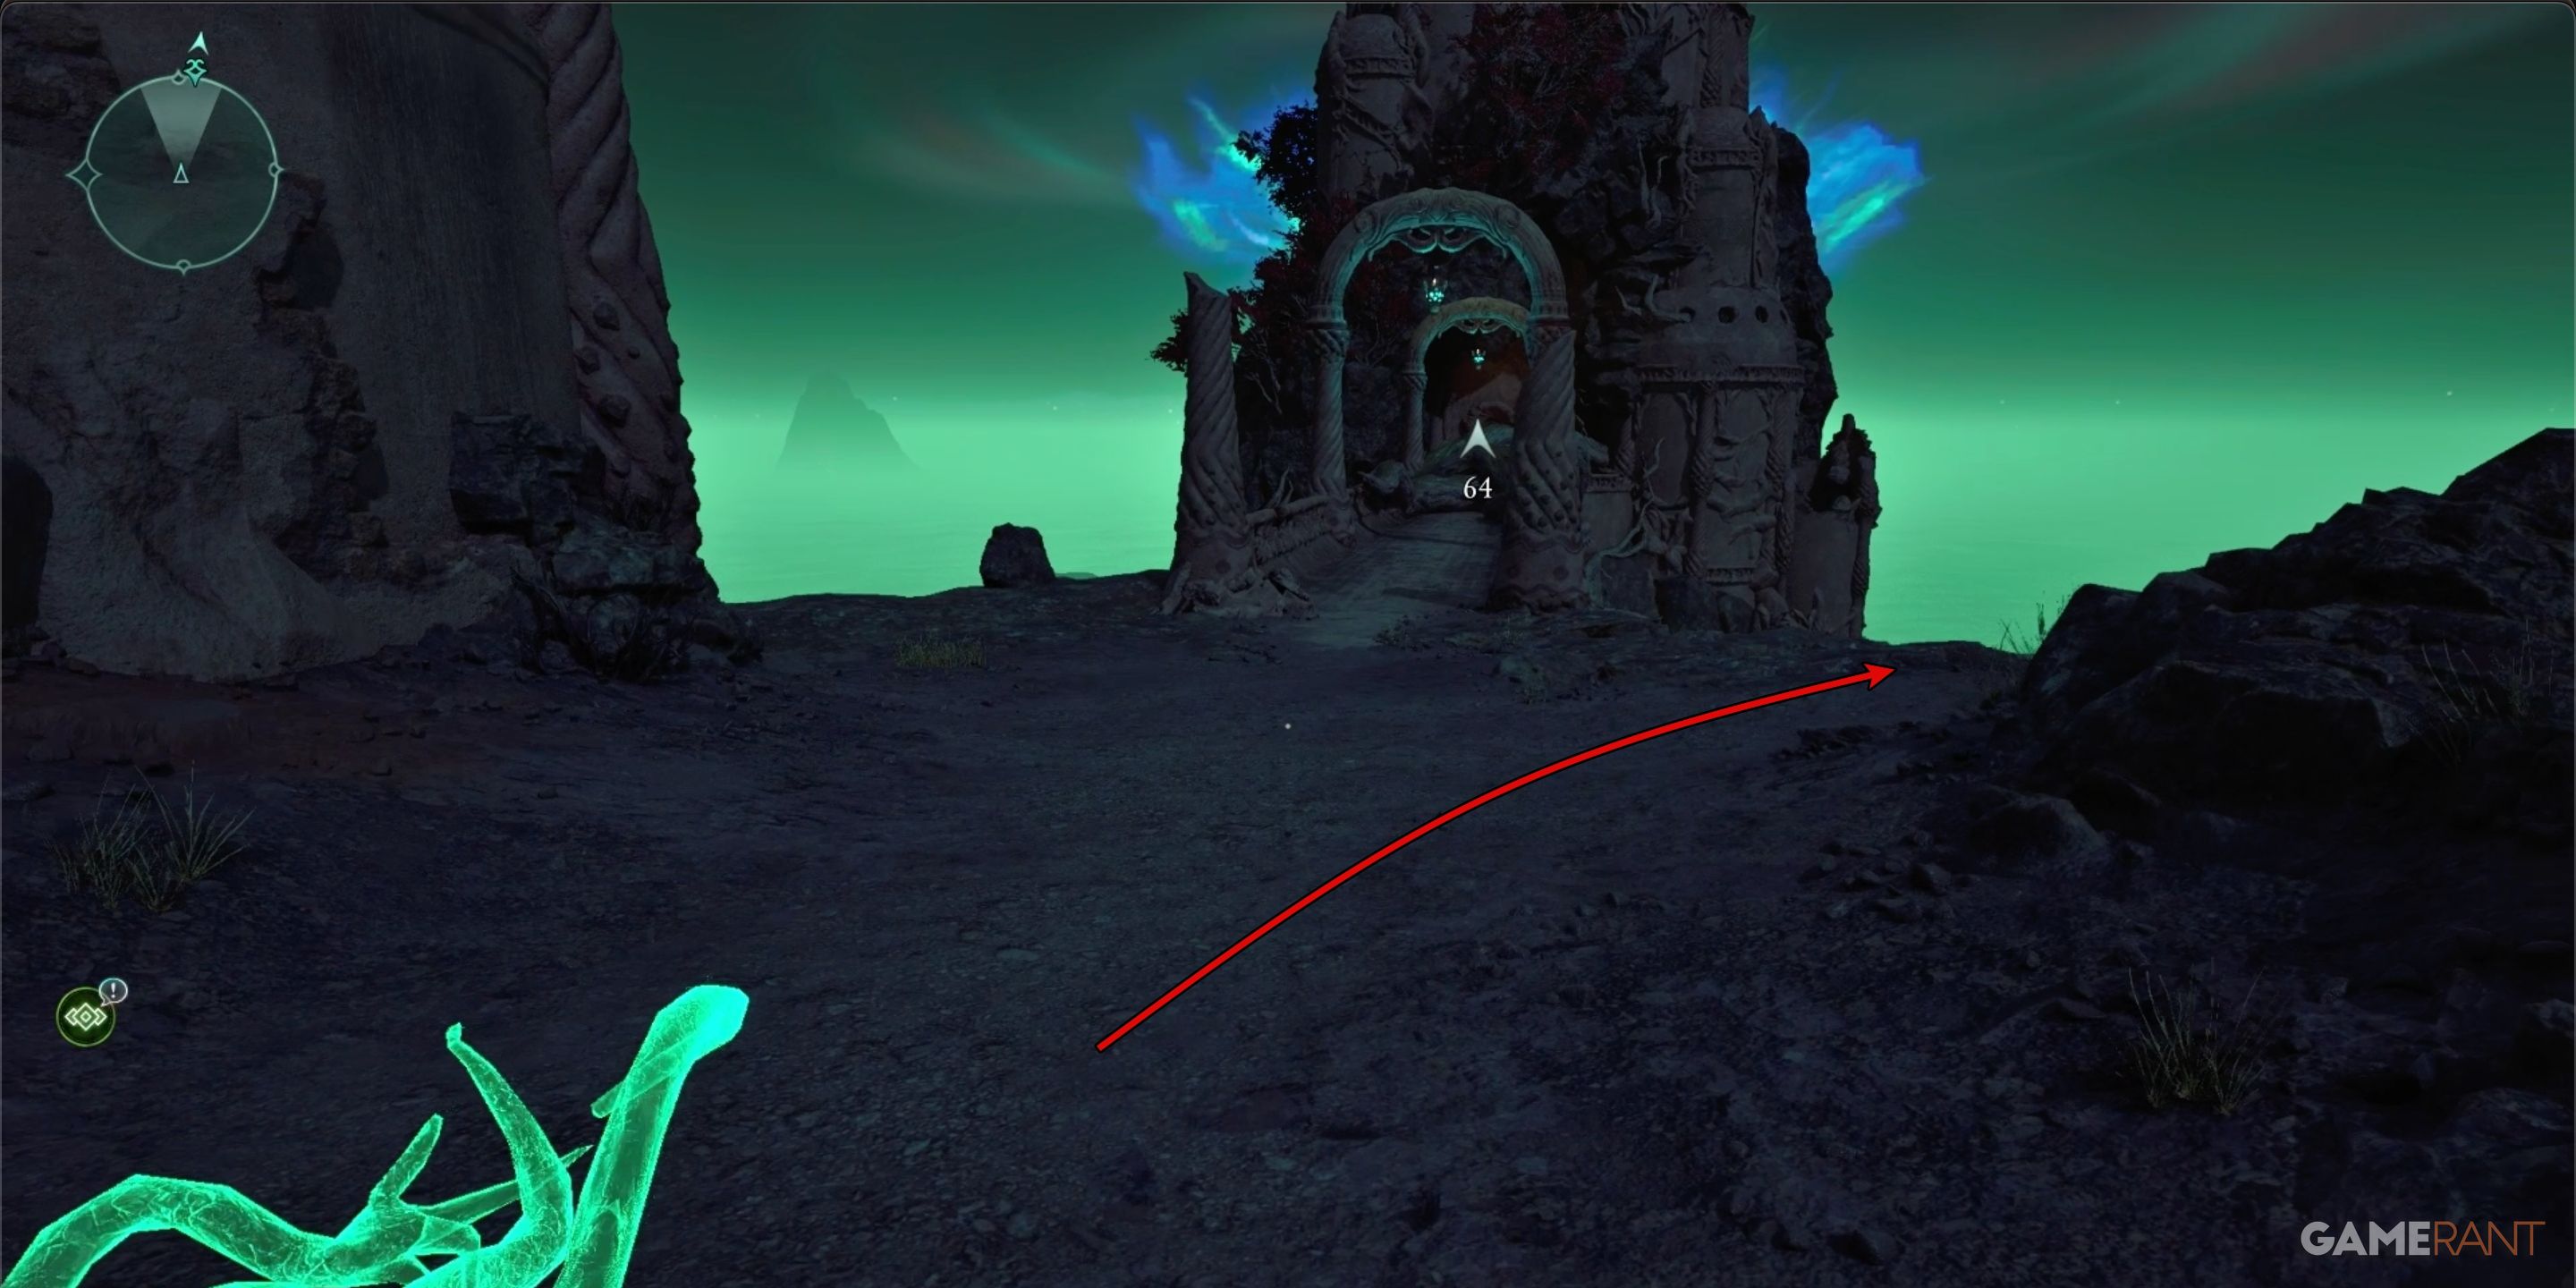
As a determined gamer, I stumbled upon some crucial Arrows of Survival not far from the Resilient Stag’s Antler. Instead of veering right after escaping the Pargrun Cache, I opted to head left and climb the steep rocky outcrops.


On a rocky outcropping high up, there lies a dome-shaped ancient ruin to your southeastern view. Traverse the stony trail and step into this weathered edifice. Within its walls, you will discover a collection of Hunter’s Arrows for Survival neatly arranged on a small table.
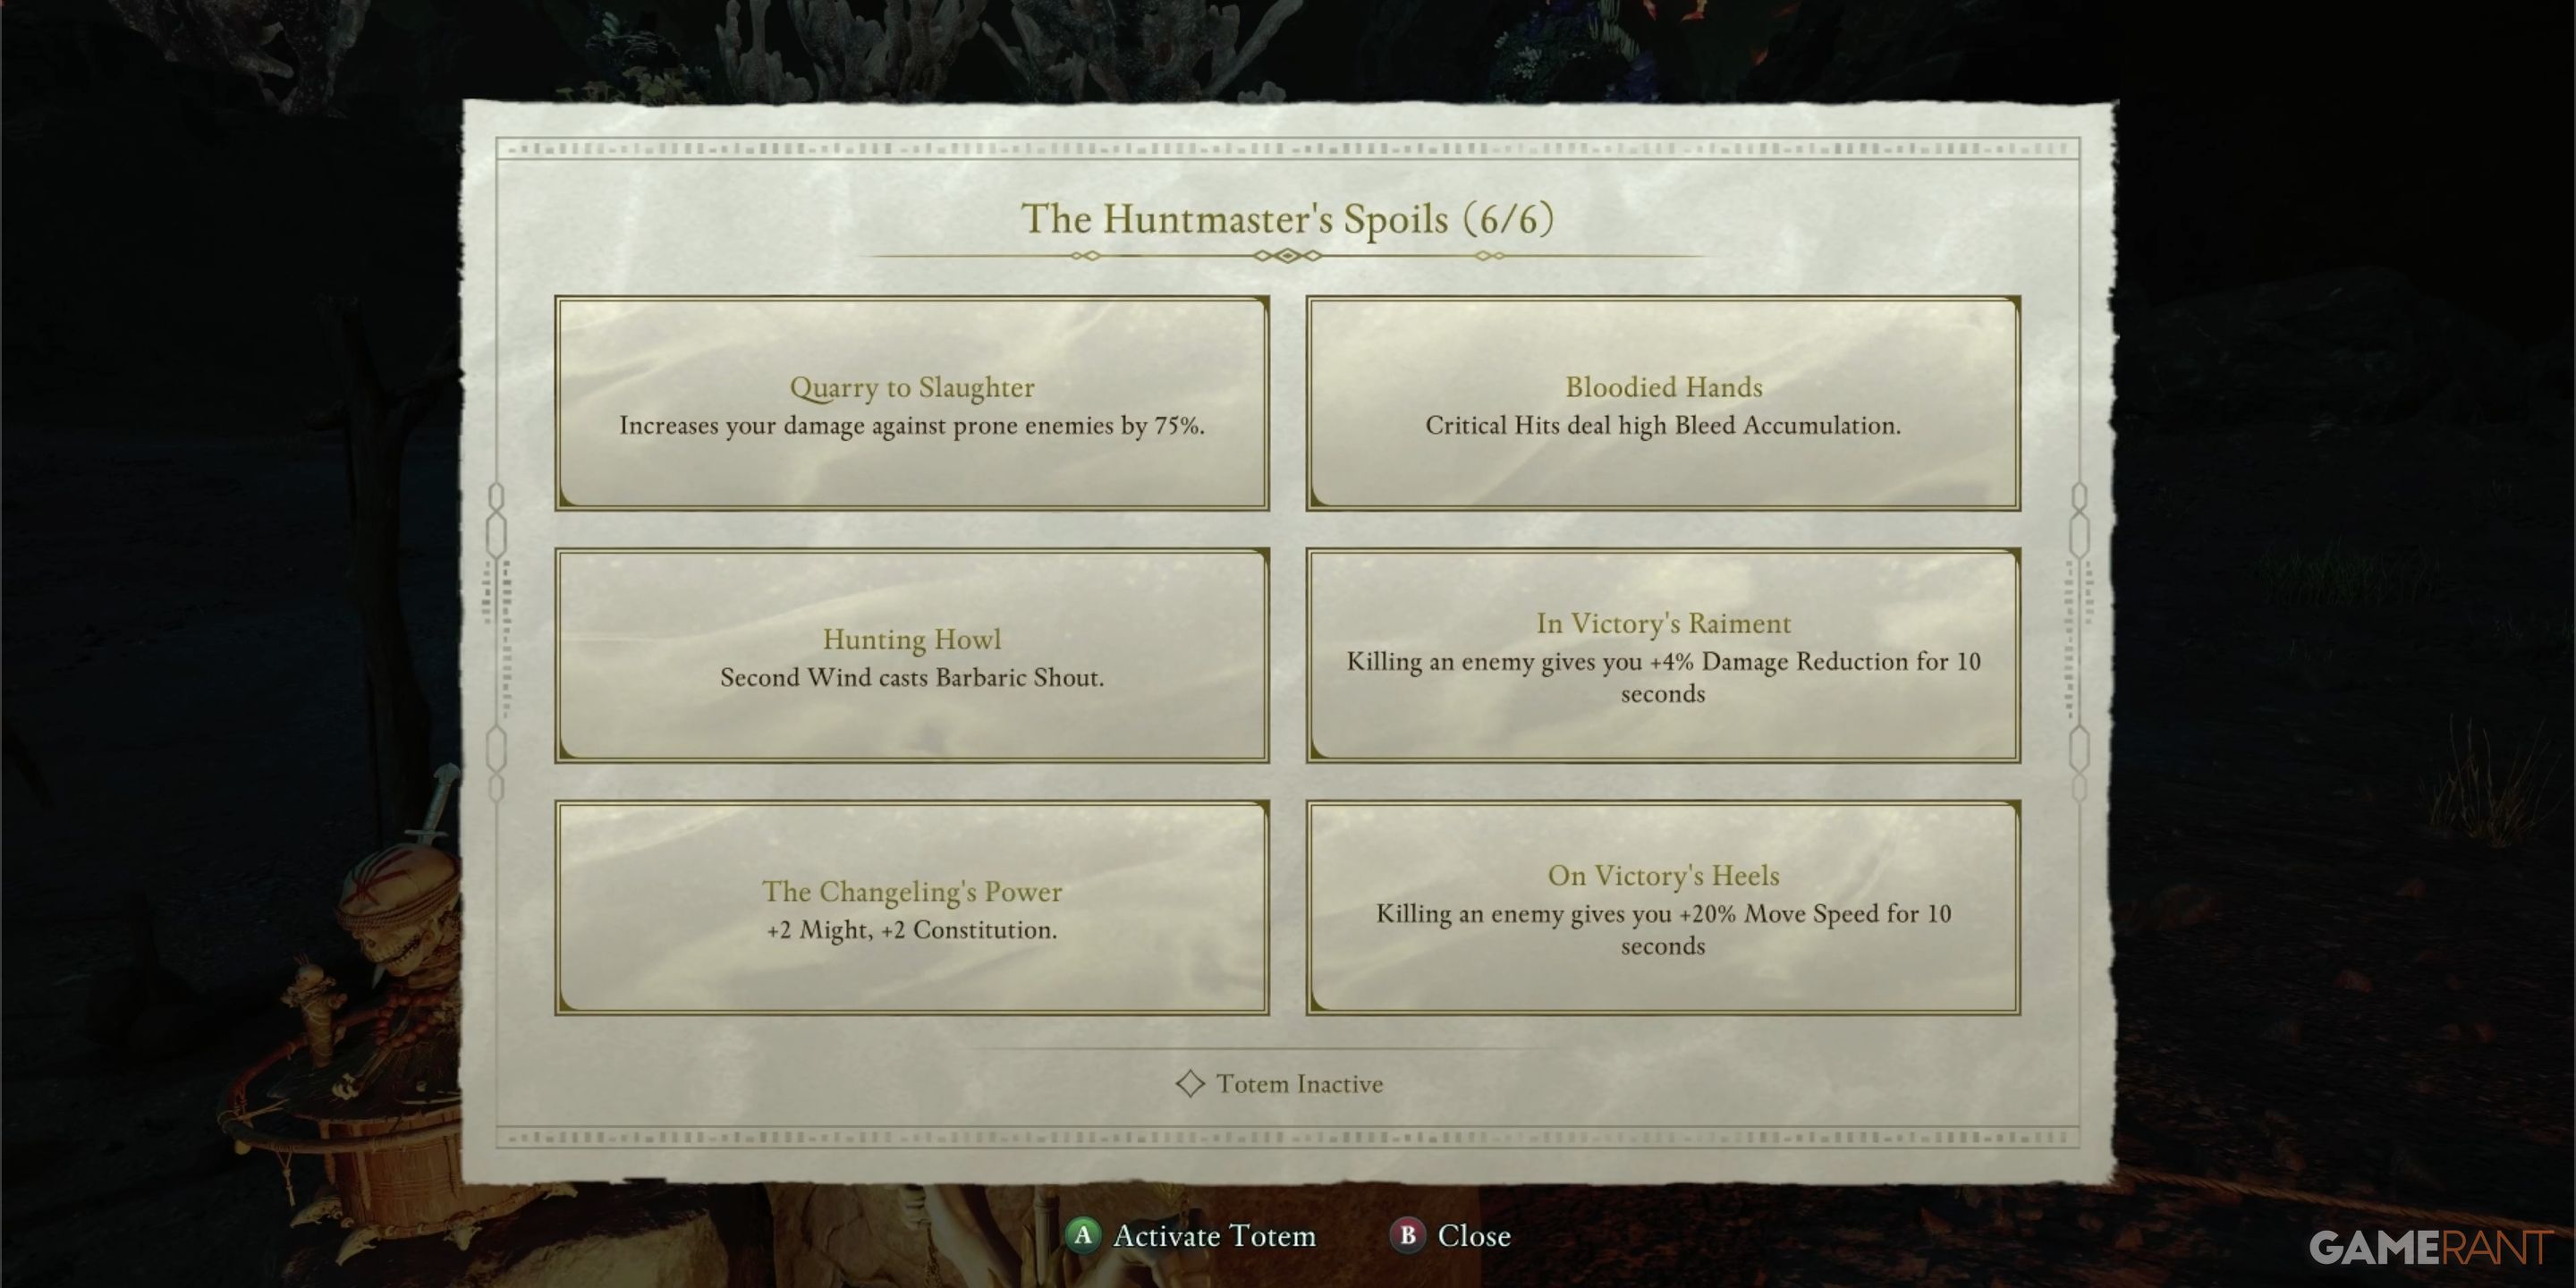
All Totem of Perseverance Perks – Avowed
| Perk Name | Perk Description |
|---|---|
| Quarry to Slaughter | Increases damage to prone enemies by 75% |
| Bloodied Hands | Critical hits deal high Bleed accumulation |
| Hunting Howl | Second Wind casts Barbaric Shout |
| In Victory’s Raiment | Killing an enemy gives you +4% damage reduction for 10 seconds |
| The Changeling’s Power | +2 Might, +2 Constitution |
| On Victory’s Heels | Killing an enemy gives you +2-% Move Speed for 10 seconds |
Read More
- Ludus promo codes (April 2025)
- Cookie Run Kingdom: Shadow Milk Cookie Toppings and Beascuits guide
- ZEREBRO PREDICTION. ZEREBRO cryptocurrency
- DEEP PREDICTION. DEEP cryptocurrency
- Grimguard Tactics tier list – Ranking the main classes
- Maiden Academy tier list
- Seven Deadly Sins Idle tier list and a reroll guide
- Mini Heroes Magic Throne tier list
- Fortress Saga tier list – Ranking every hero
- YouTuber Ms. Rachel Is Headed To Netflix, And I Think Parents Should Be Thrilled For One Big Reason
2025-02-18 08:56