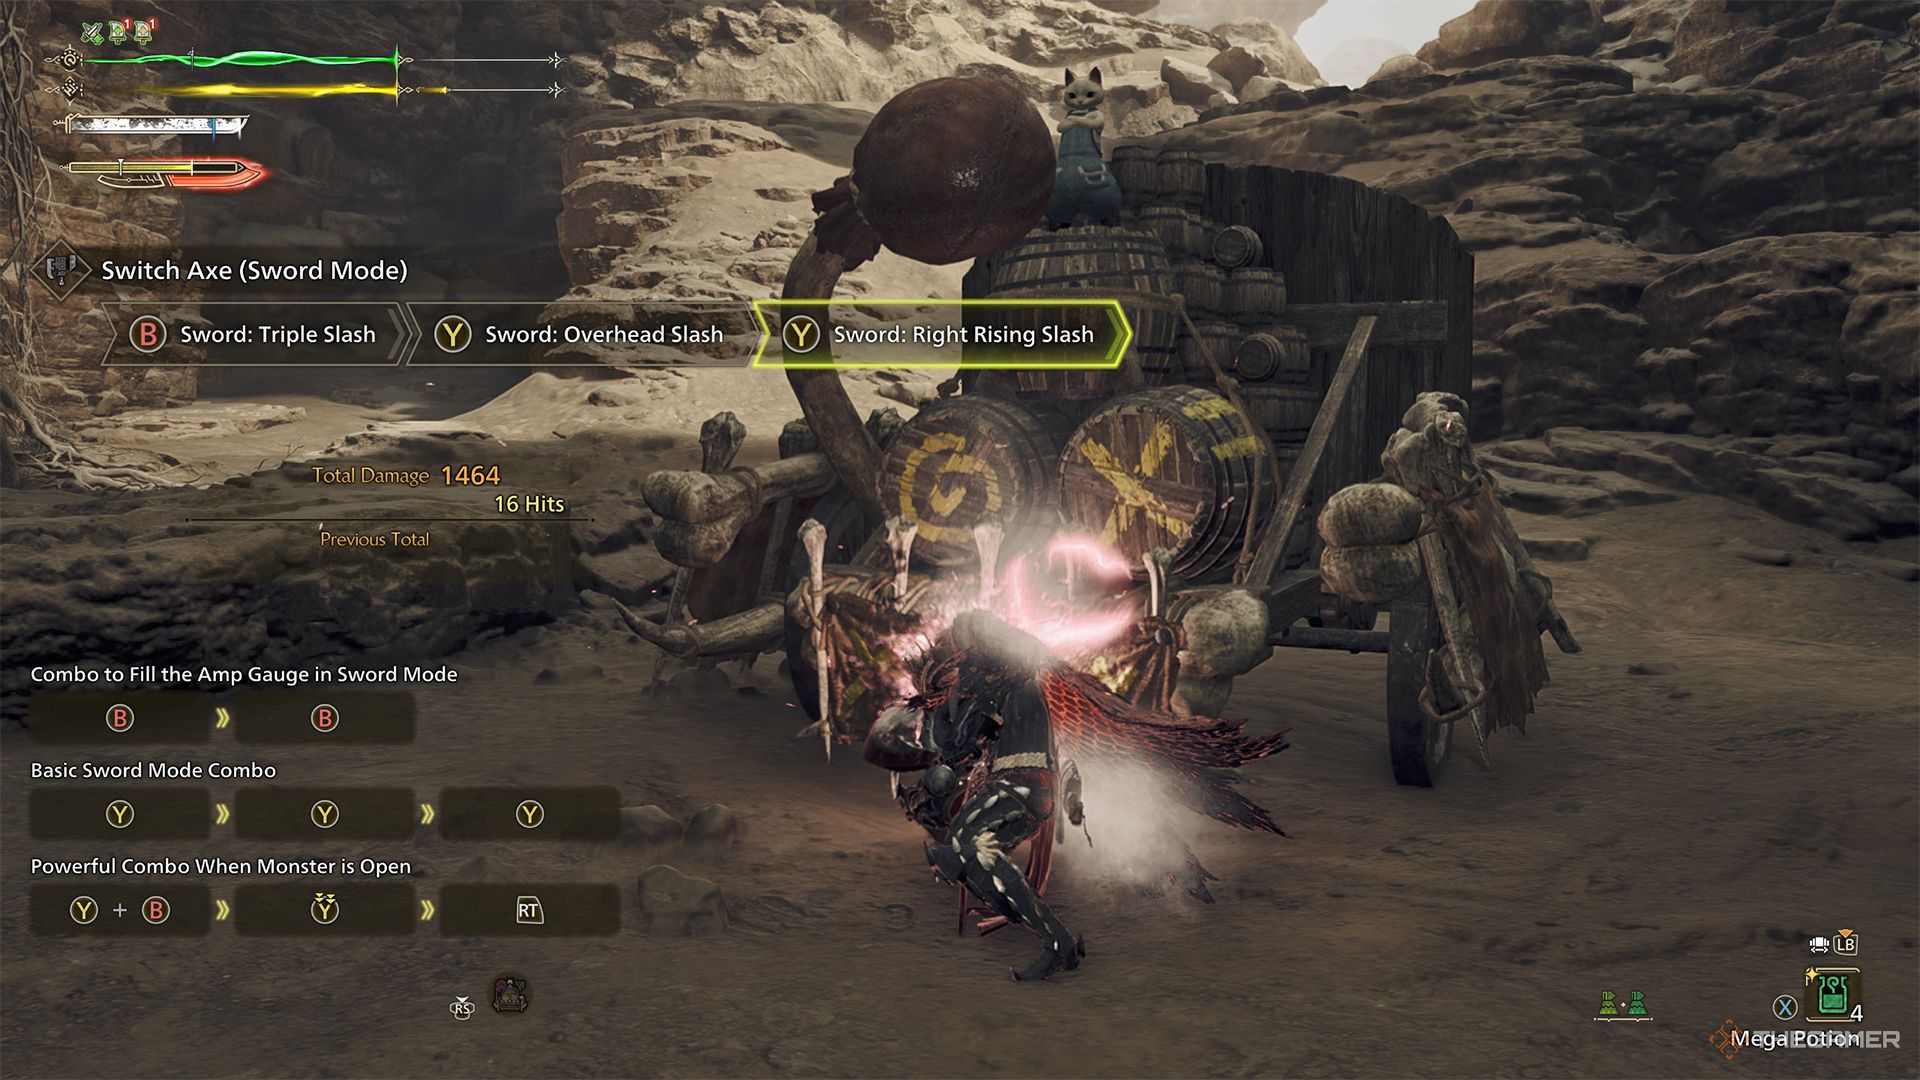
In Monster Hunter Wilds, The Switch Axe functions as a versatile weapon. It allows you to alternate between a heavy axe mode for charging up and a swift sword mode for unleashing powerful strikes, making it effective against even the most formidable beasts. When wielding the axe, your attacks build up the weapon’s power gauge. Once charged, you can transform into the sword mode and continue enhancing its strength.
Although it comes in various shapes, the Switch Axe isn’t the most complex weapon within this game and is generally easier to grasp compared to tools like the Charge Blade or Hunting Horn. To add, the Switch Axe has a relatively simple build structure that emphasizes maximizing its damage output, which we will delve into next.
Switch Axe Build Overview
This Switch Axe build primarily aims to maximize the weapon’s damage, achieving the highest potential by executing the Full Release Slash combo. To achieve this, it relies on the Gore Magala armor set that provokes Frenzy during battles with Large monsters. Combined with the Antivirus skill, it allows for a swift recovery from Frenzy, followed by an increase in Affinity.
In the form of a Sword, the Switch Axe delivers the highest damage, thanks to Full Release Slash’s significant power. This means you won’t often need to switch between Axe and Sword modes. Consequently, this build omits Rapid Morph. However, if you prefer a style that includes rapid morphing, feel free to choose that skill instead.
This build is generally a common DPS (Damage Per Second) setup that works well with multiple weapons within the game, making many of these items quite adaptable and flexible.
Switch Axe Build Guide

| Slot | Piece | Decorations |
|---|---|---|
| Weapon |
Critical Jewel 3 Critical Jewel 2 Paralyzer Jewel 1 | |
| Head | Counter Jewel 2 | |
| Chest |
Flayer Jewel 3 Mighty Jewel 2 | |
| Arms |
Jumping Jewel 2 Jumping Jewel 2 | |
| Waist |
Destroyer Jewel 2 Mighty Jewel 2 | |
| Legs |
Challenger Jewel 3 Sane Jewel 1 Sane Jewel 1 | |
| Talisman | Challenger Charm 2 | |
| Mantle | Corrupted Mantle |
Switch Axe Build Skill Overview
- Critical Boost Level 5
- Agitator Level 5
- Maximum Might Level 3
- Antivirus Level 3
- Critical Draw Level 2
- Evade Extender Level 2
- Constitution Level 2
- Critical Status Level 1
- Paralysis Attack Level 1
- Counterstrike Level 1
- Weakness Exploit Level 1
- Flayer Level 1
- Partbreaker Level 1
- Flinch Free Level 1
Gear And Skills Explanation
In the equipment slot, we’re equipping the Lala Barina weapon, featuring a base attack of 700, an Affinity of 15%, and the ability to cause 200 units of Paralysis. It also comes with three Jewel slots at levels 3, 2, and 1 respectively. We’ll fill these with a Critical Jewel level 3, a Critical Jewel level 2, and a Paralyzer Jewel level 1.
Artian Weapons could surpass even the strongest craftable weapons, but acquiring them requires multiple tries to get the appropriate skill set. For now, it’s recommended to use the Lala Selenocosmi as it has superior stats until you manage to create an Artian Switch Axe that outperforms it.
In instances where Paralysis proves inefficient, or if you’re drawn to the aesthetics of another type of weapon, other elementary weapon styles could come into play.
In the “Head” section, we’ve chosen the Guardian Fulgur Anjanath helmet. This helmet offers two points of Agitator and one level 2 Decoration slot. In the level 2 Decoration slot, we’ve placed a Counter Jewel 2. This jewel provides a minor attack boost when executing Counter Rising Slash in Sword form.
Consider changing this Decoration if you rarely make use of the Switch Axe’s counter skill. Instead, consider enhancing your Evade Window or Evade Extender with additional points for improved agility and mobility.
In the Chest compartment, you’ll find the Beta version of the Arkvulcan Mail, which was sent over by HR Arkveld. This chest armor offers a single point of Weakness Exposure, along with spaces for embedding Flayer and Maximum Might decorations. These are crucial skills to boost your DPS.
In the “Arms” section, we’ve opted for the “G. Fulgur Vambraces beta” from Guardian Fulgur Anjanath. These offer an additional layer of Maximum Might and boast two level 2 Decoration slots. We’ve filled these with “Evade Extender jewels,” enhancing the jump distance on your Switch Axe’s side hop. However, feel free to add any skills that improve gameplay experience into these slots, such as “Earplugs.
In the waist area, we’re employing the Gore Coil beta from Gore Magala, which offers two stages of Constitution and is part of the path towards the Tyranny set bonus for Gore Magala. For the Decoration slots, a Destroyer Jewel along with a Mighty Jewel deliver the maximum damage enhancement.
In the “Leg” section, you’ll find the “Gore Greaves beta”. This piece completes the initial part of the Gore Magala set bonus and also offers a level in Antivirus, aiding in calming Frenzy. For the Decoration slots, a Level 3 Challenger Jewel enhances Agitator to its third level, while two Sane Jewels complete the final two levels for Antivirus. This configuration boosts Affinity by 15% when Frenzy is cured.
In the final stages, we are employing the “Challenger Charm 2” for the remaining two abilities in Agitator. This skill significantly amplifies attack power and Affinity when the monster is enraged, and it’s one of the highest damage increases attainable through equipment skills.
To achieve the maximum boost in damage per second (DPS), we’re opting for the Corrupted Mantle, but keep in mind that using it skillfully can be challenging since it reduces your maximum health while worn. If you prefer a safer choice, any of the other three Mantles could serve as an alternative.
Tips For Playing The Switch Axe Build

In this battle, remember a few skills that are conditional when facing the monster. The first is ‘Frenzy’ caused by the skill ‘Black Eclipse‘ from the Gore Magala set. Unlike other statuses that heal automatically over time, you’ll need to continuously attack the monster in order to remove the Frenzy effect.
When you strike the monster, the meter fills up. If you inflict enough harm prior to the clock running out, you’ll be able to quell its Frenzy and receive a boost, with the Antivirus skill making this effect even stronger as it aids in calming the Frenzy. However, do bear in mind that before calming the Frenzy, you’ll take increased damage and healing will be less potent, so you’ll need to play boldly to overcome this challenge.
In simpler terms, the ability called “Maximum Might” boosts Affinity when your stamina bar is consistently full for a span of three seconds. The set bonus skill “Second Wind” from the Guardian Fulgur Anjanath makes it less challenging to maintain this state, as emptying the second stamina gauge doesn’t affect the “Maximum Might.
In simpler terms, your third conditional ability, known as Agitator, doesn’t require constant monitoring to activate. Instead, it becomes active when the monster gets enraged, significantly increasing your damage output. When a monster is enraged, that’s when you should be aggressive. Use Counter Rising Slash to maintain offense while also shielding yourself from harm.
Make certain to lance any injuries that manifest on the monster, since using the Partbreaker skill increases damage and facilitates wound infliction.
In summary, adopting an aggressive playstyle would seem advantageous in this setup. By consistently attacking and causing wounds while maximizing damage output, you can effectively immobilize the monster, enhancing your chances of landing those critical Full Release Slashes.
Read More
- CRK Boss Rush guide – Best cookies for each stage of the event
- Fortress Saga tier list – Ranking every hero
- Glenn Greenwald Sex Tape Leak: Journalist Cites “Maliciously Political” Motives
- Mini Heroes Magic Throne tier list
- Grimguard Tactics tier list – Ranking the main classes
- Castle Duels tier list – Best Legendary and Epic cards
- Cookie Run Kingdom Town Square Vault password
- How to Prepare and Dominate the Awakened Hollyberry Cookie Update
- Hero Tale best builds – One for melee, one for ranged characters
- Overwatch Stadium Tier List: All Heroes Ranked
2025-03-12 02:35