
In the Tainted Grail: The Fall Of Avalon, it’s been a while since King Arthur’s golden era, yet unlike him, his loyal Knights of the Round Table and companions could not return from their fate. Many have disappeared, but the most renowned were buried in unique tombs designed especially for them, ensuring their safety.
As the Wyrdness alters the scenery and rearranges things, some previously concealed tombs are emerging. However, there’s no conventional method to access them. It is only King Arthur himself, or someone who inherits his essence and fragments of recollections, who can reopen these tomb doors once more.
Palamedes’ Shield Tombs, Explained

As you delve into the mysteries of Cuanacht, you may discover not one but two distinct burial sites: the Tomb of the valiant knight, Sir Gawain, and the Tomb of his loyal companion, Sir Dagonet.
Instead of ordinary caves, crypts, or other places, these tombs are specifically designed for former knights from the Round Table, as well as other notable figures within King Arthur’s court.
As a fan, I must share that these mysterious artifacts can exclusively be unlocked if you’ve managed to secure the shard of Arthur’s Soul from Palamedes’ Shield during the main campaign. This rule is much like the enigmatic tombs hidden within the Forlorn Swords and the one nestled in the Horns Of The South.
- This will require you to complete the quests Apocalypticists and its subsequent quest, Have A Nice Trip, and Menhir Rites, which requires you to complete both the Corrupted Temple’s quests and the Abyss of Sagremor’s quests.
After completing this segment of the primary narrative and acquiring Palamedes’ Shield, you will now have the ability to visit various tombs. To open these tombs, simply approach the altar bearing the shield symbol, which is usually found near the entrance.
The Tomb Of Sir Gawain
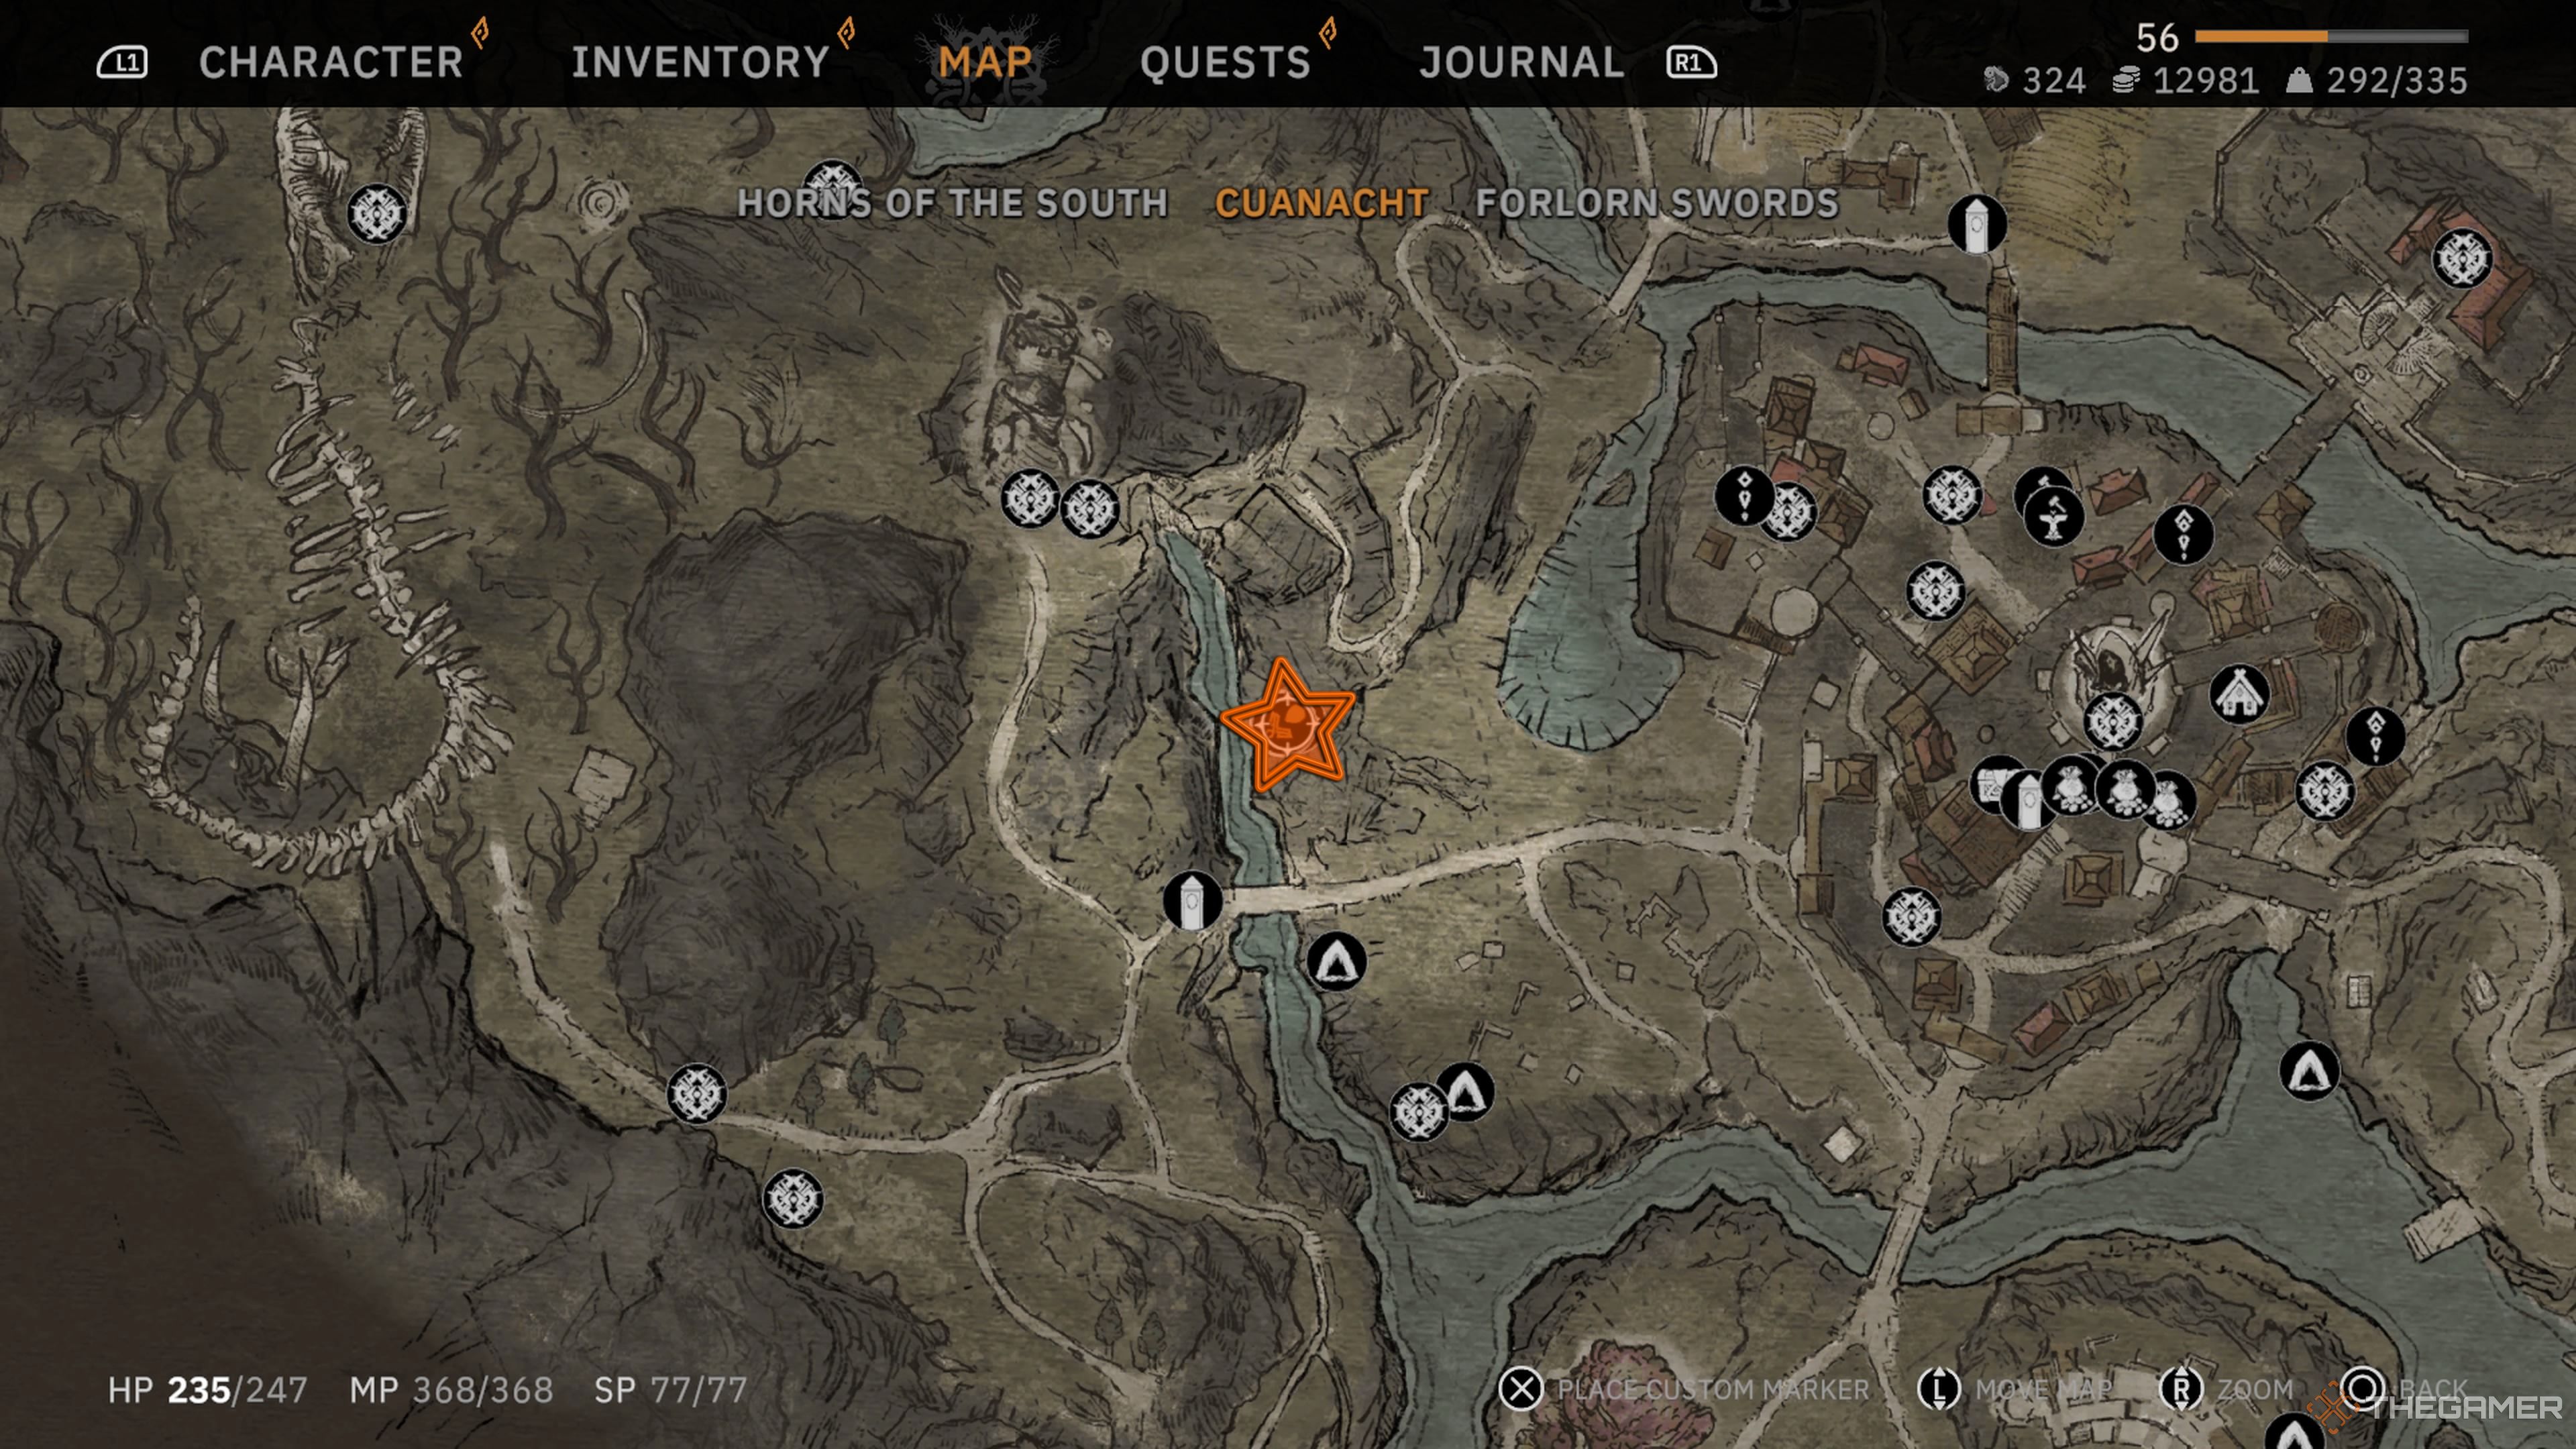
The burial place of Sir Gawain is situated westward from Cuanacht, the city, and is perched atop a cliff overlooking the river. The most straightforward way to get there is by starting at the Wyrdtower teleportation spot, then proceed south along the road until you come across a path descending towards the clifftop. Cross the small bridge, and continue following the path down to reach the tomb.
If you’ve run into Ó Cuinn Cinnamonsage on the isle hidden behind the shore where I awoke post-Island Asylum escapade, you’ll now find him by this bridge. He’s extending an invitation for you to join him in his snug abode, the Cozy Cave, should you require it.
Engage with the altar located exteriorly, and upon stepping inside, the side quest titled “His Heart Was Greener Than Mine” will automatically commence for you. Proceed along the pathway, and you’ll likely encounter adversaries to battle as you descend: Curlghasts and a sprinkling of Dryads.
Upon entering the spacious room at the base, you’ll encounter Marrowghasts that require combat. These creatures come in both sightless and seeing versions. Additionally, you will stumble upon three treasure chests. One is hidden behind a tree, another is on the hill overlooking you, which requires excavation, and the last one is buried beneath the staircase for you to uncover.
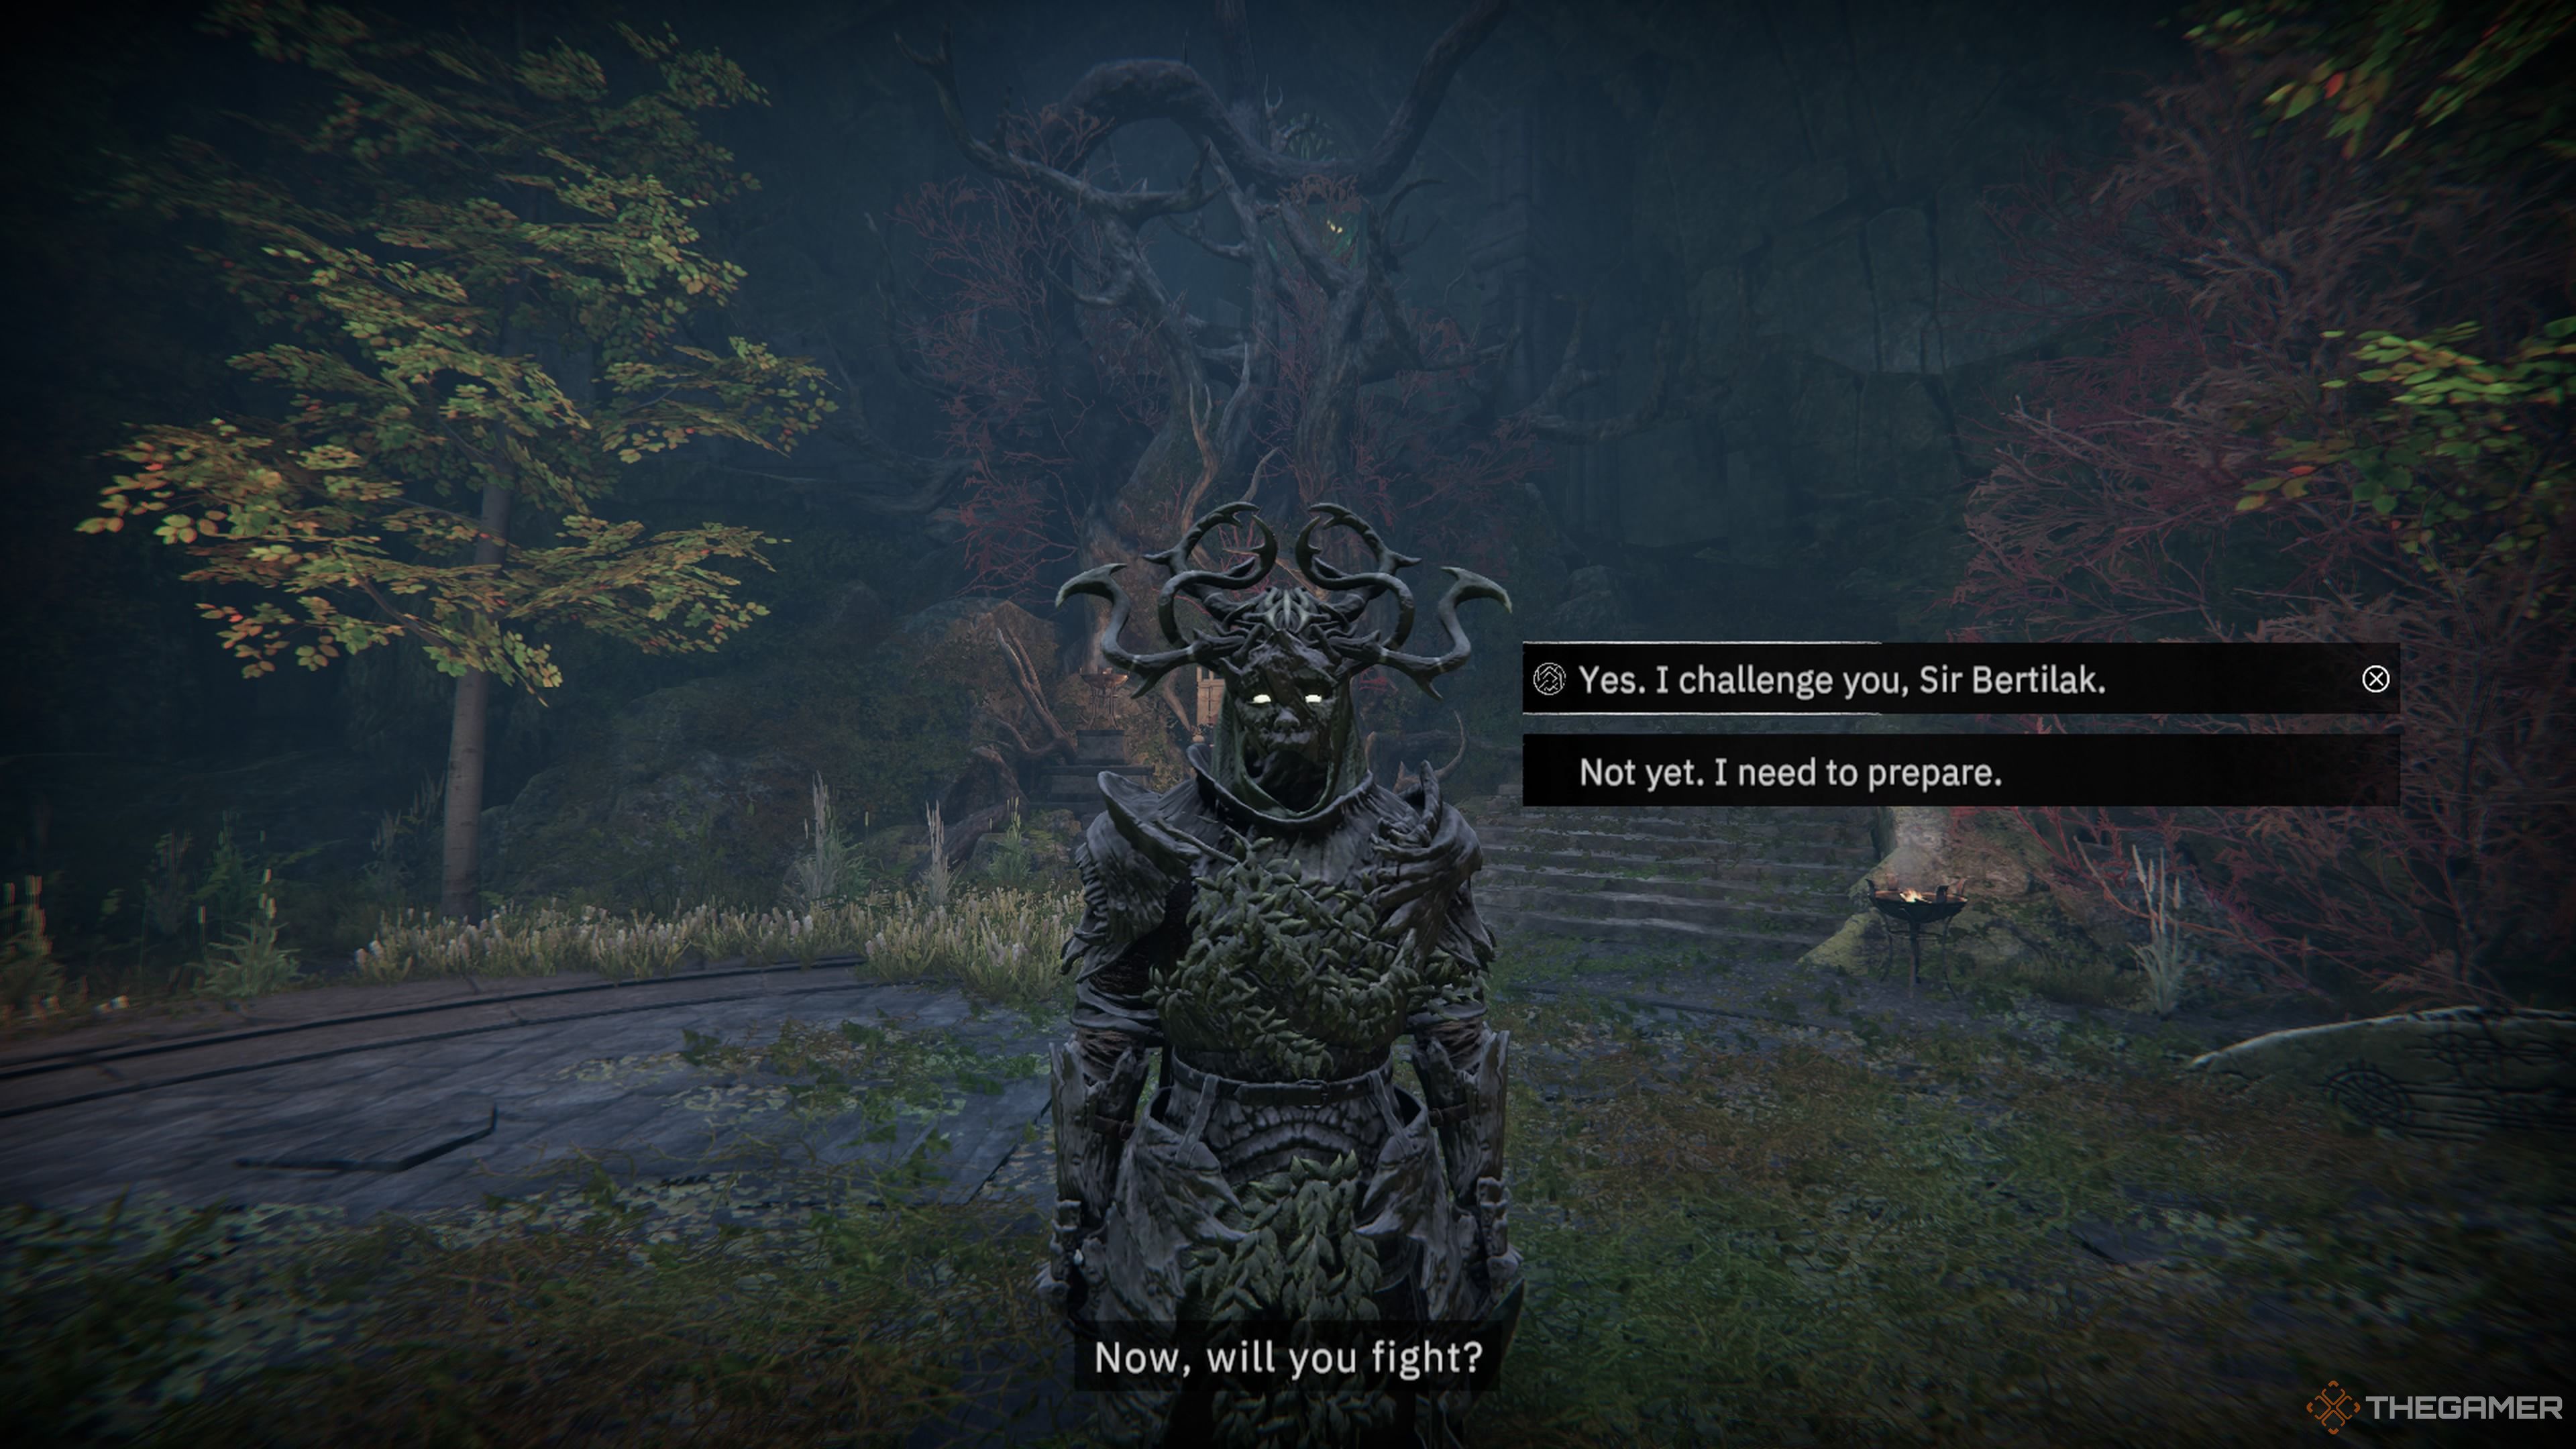
Leap over the damaged bridge and converse with Sir Bertilak in the circular chamber situated at the conclusion of the corridor. In connection with a subplot, you’ll be required to issue a challenge for a duel to Sir Bertilak.
Initially, you’ll go up against Sir Bertilak, who battles much like Galahad. He wields potent two-handed blows, has the ability to launch a magic attack from his axe at range, can hurl a trio of fireballs as another ranged assault, and possesses a protective magic shield that deflects and repels damage.
Or:
First off, you’ll meet Sir Bertilak who fights like Galahad. He’s skilled in delivering powerful two-handed swings, can cast a magic attack from his axe at range, throws three fireballs as another ranged attack, and has a magical shield that absorbs and pushes back damage.
After he’s been overcome, Sir Gawain will stir to life again, and then you’ll need to engage him in combat next. His fighting style is similar to Sir Bertilak’s, but he’s significantly more powerful. His standard attacks can cause poison, which can rapidly deplete your health if you don’t counteract it by eating food or drinking a potion.
- Sir Bertilak’s body can be looted to obtain the Green Knight Axe and the Green Knight armor set, consisting of his Gauntlets, Chestpiece, Sabatons, Helm, Greaves, and Cloak.
- Sir Gawain’s body can be looted to obtain the Oath of Famine greatsword, and Sir Gawain’s Weathered armor set, consisting of his Gauntlets, Cuirass, Sabons, and Helm.
Once they’ve been laid to rest and given their final farewell, you can find your way to Gawain’s genuine tomb by taking the stairs behind his throne. Adjacent to it lies a winding path that will lead you back to the entrance.
At your next bonfire, following the completion of the tomb, you’ll have an opportunity for a chat with King Arthur regarding Gawain – his conversation will be as fresh as newly sprouted leaves compared to mine.
As you depart, you may encounter Fionola, a representative from the esteemed Royal Geographers’ Guild. She will offer you an opportunity to tag along with her, but joining her doesn’t initiate a side quest with her specifically.
The Tomb Of Sir Dagonet
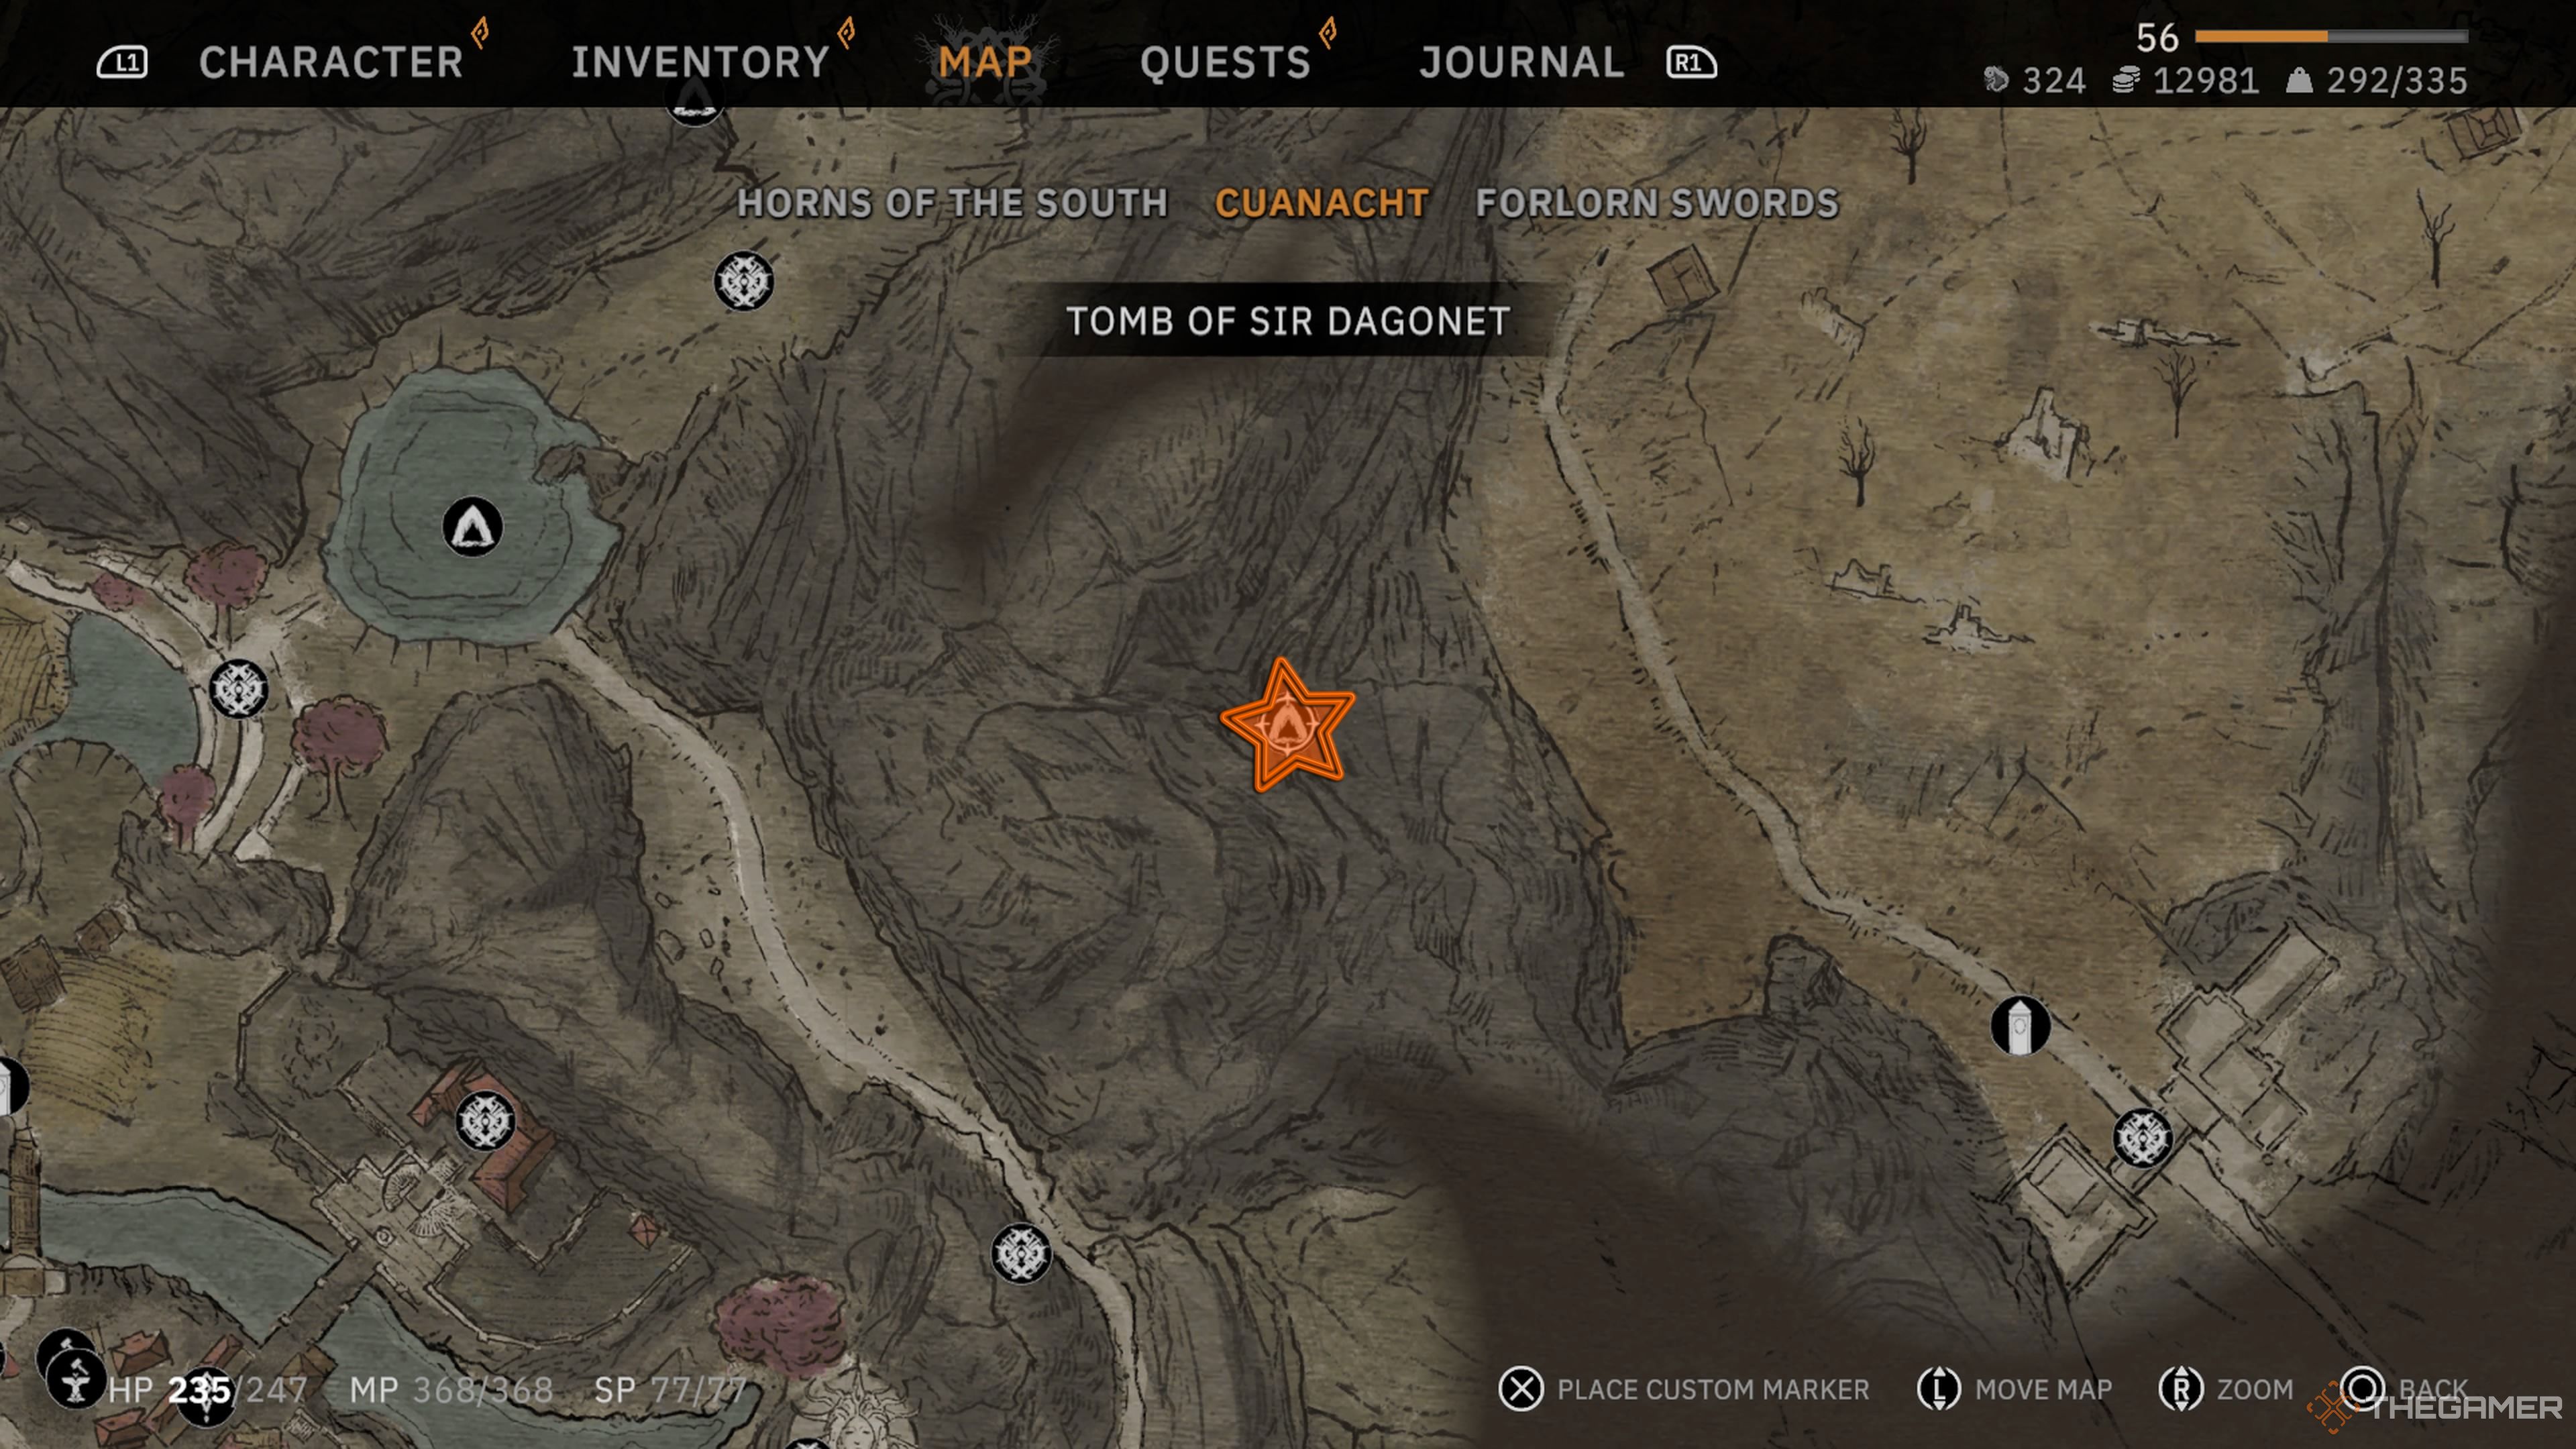
Sir Dagonet’s Tomb is situated on the northern part of Cuanacht. You can reach it by beginning your search from either the Kamelot Gate teleportation spot, or if you haven’t discovered that location yet, the Plains teleportation spot will serve as a starting point for your quest.
Choose either route, head towards the prominent mountain range that bisects the area, sticking to the primary eastern path leading through the gate and past the ruins teeming with Wyrdspawn.
As you approach the Forlorn Swords Northern Gate, depart from the primary route and head towards the south instead. Follow the somewhat concealed steps all the way up until you reach the tomb nestled within the cliff face.
This version maintains the original’s clarity while using more natural and conversational language.
Inside, this time around, you won’t find yourself immediately embarking on a quest, but there are tasks to complete nonetheless. Dagonet’s tomb is teeming with various traps, and the first one you’ll encounter is an arrow trap that fires quickly, located on the wall. To avoid it, either run or slide past it, and you’ll find yourself in a long corridor.
In the initial area, there are no hidden dangers. However, moving forward, you’ll encounter two sections with wall-mounted arrow traps. Just like previously, you’ll need to swiftly dash or glide past them to avoid being hit by the arrows, which can deal a significant amount of damage.
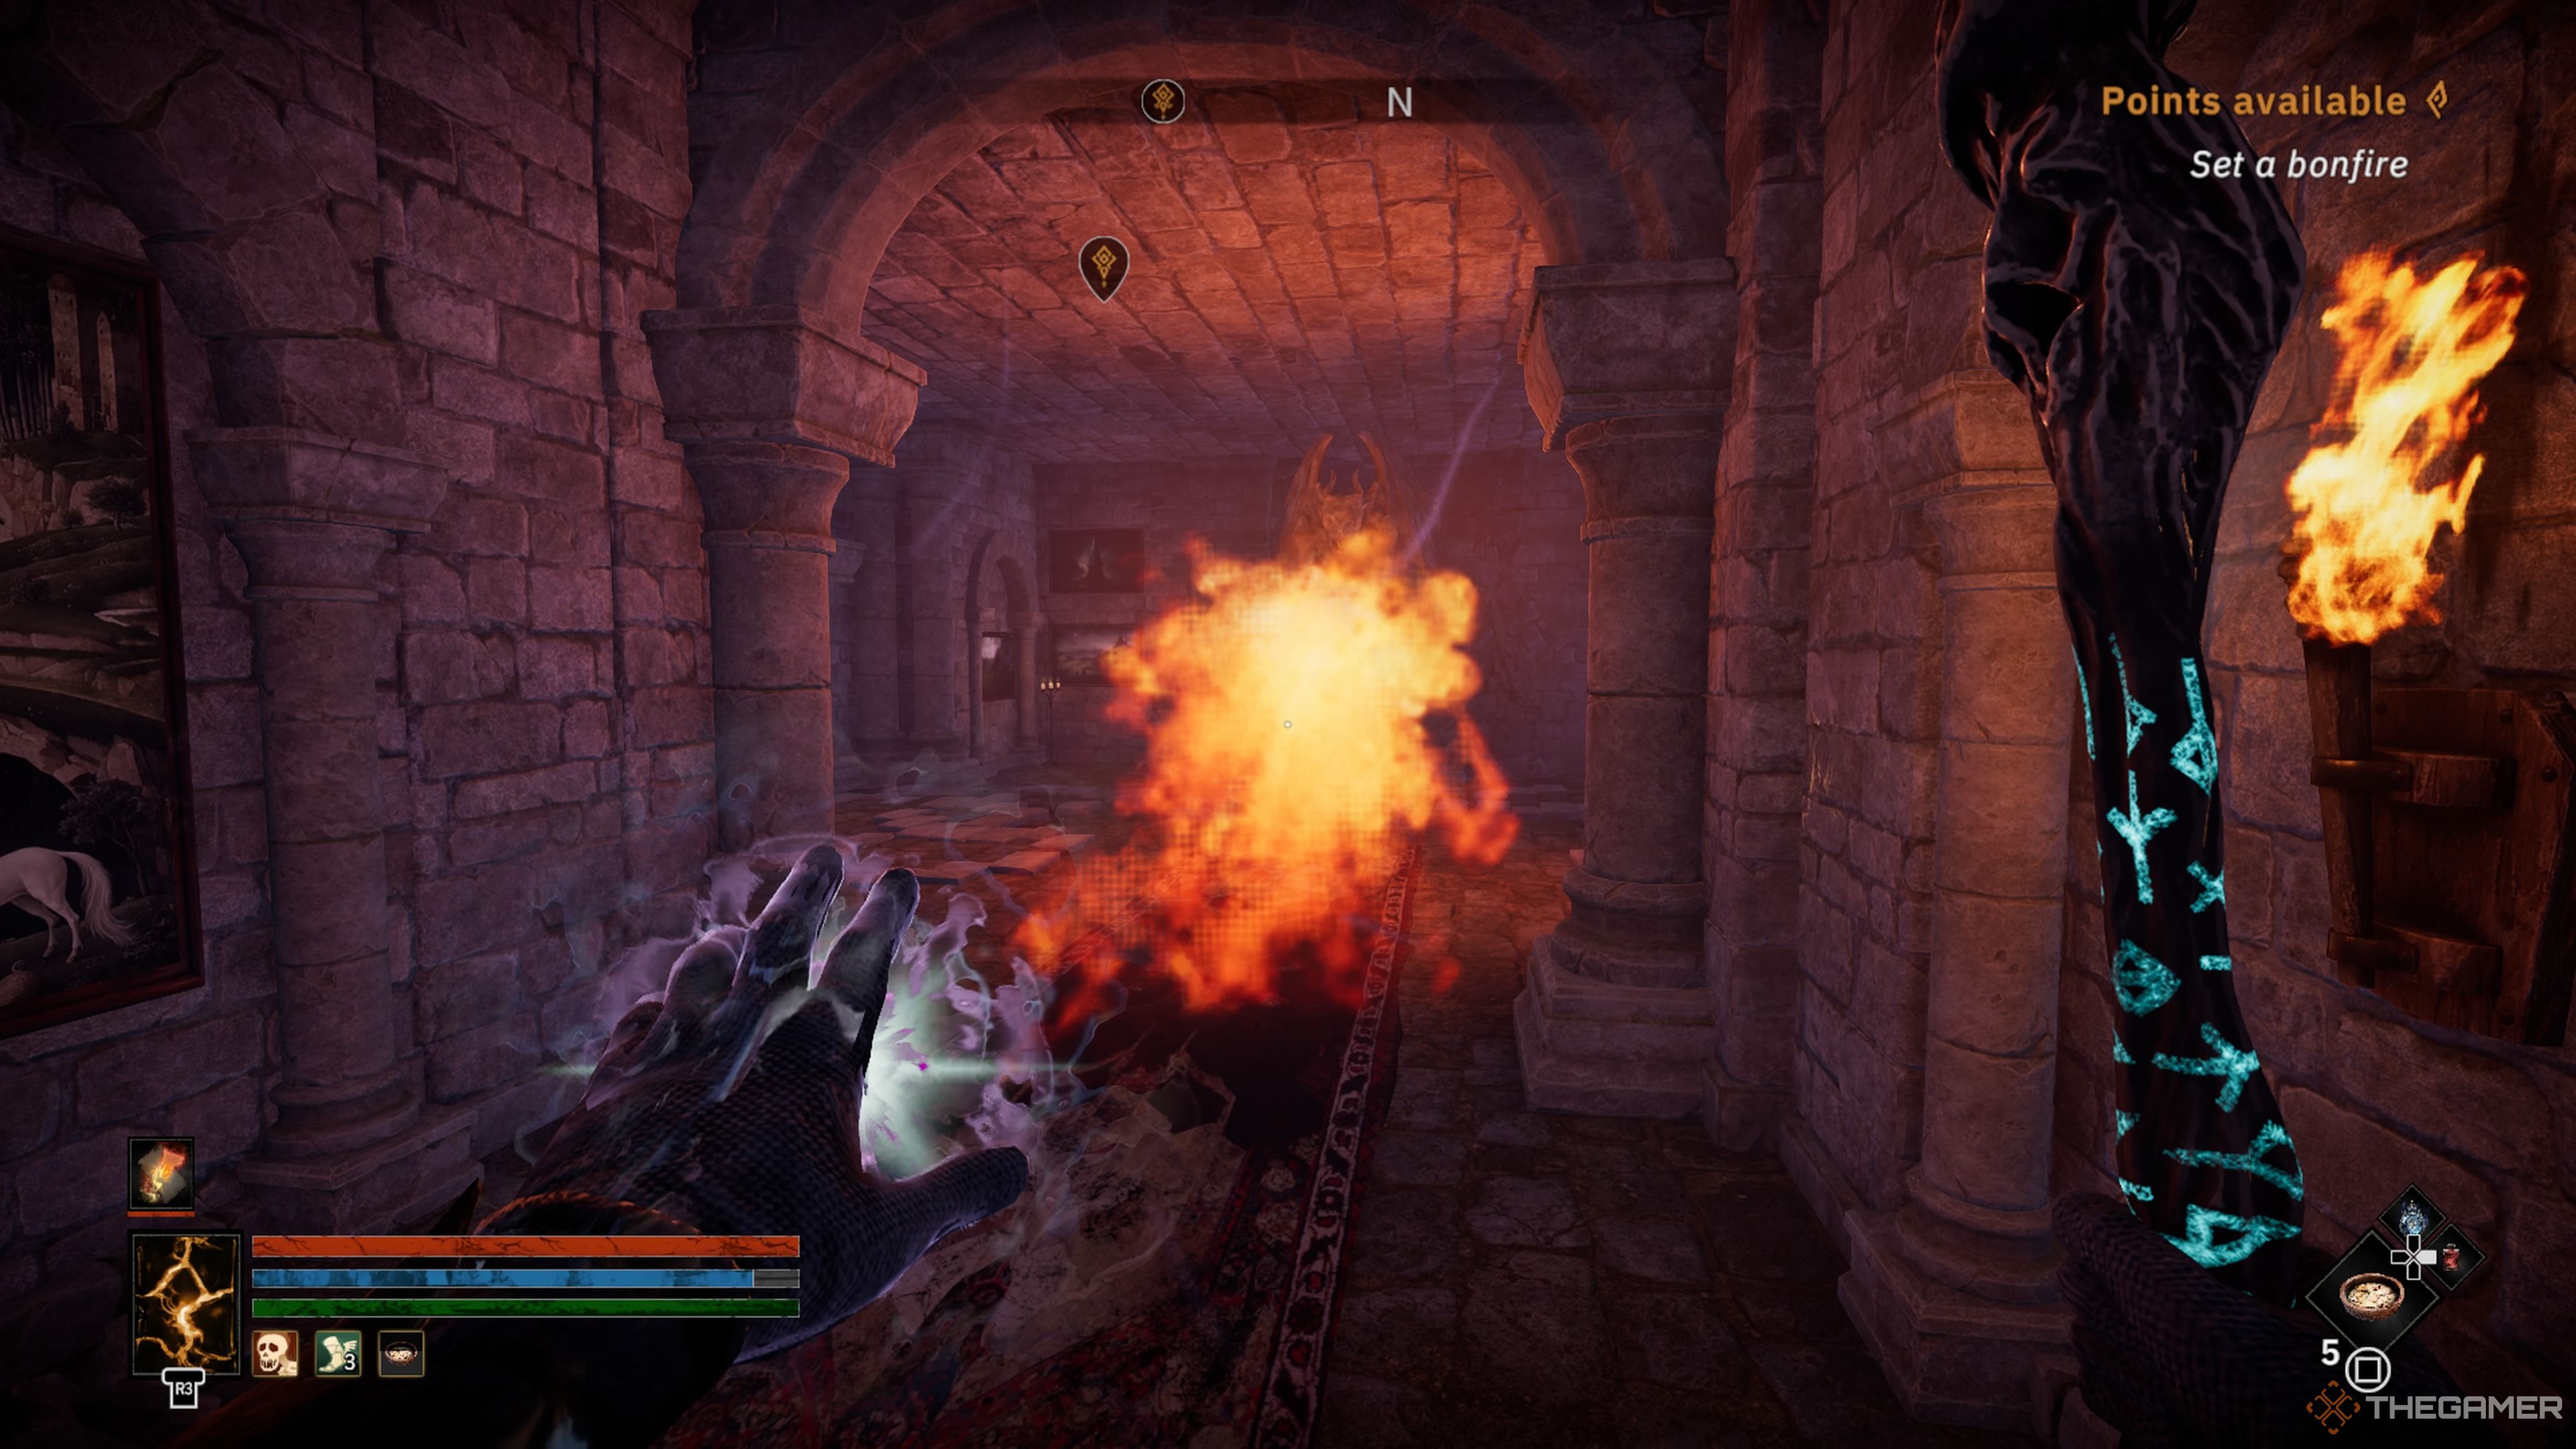
As you reach the final bend in the corridor, you’ll encounter a flamethrower trap emanating from a gargoyle statue. To bypass it safely, simply wait for a lull in the flames and swiftly maneuver around it on either side.
Should you opt for the path on your right, after passing by the gargoyle, you’ll discover a concealed entrance in the wall. This secret passageway will lead you to a crypt region inhabited by an Undead creature, along with a tunnel carved into the wall that eventually returns you to the room with the gargoyle.
To proceed further, head towards the door located on your left side. Be aware that one of the paintings hanging in the hallway might leap off the wall and attempt to harm you. As you reach the bottom of the staircase, you’ll encounter a forking path, with a central niche containing an open casket that you can plunder.
Two routes converge at the same destination, but they each present unique challenges to navigate. The left path is laced with more wall-mounted arrow traps, while the right path encounters spectral hands emerging from the paintings adorning the walls.
As I step into the next chamber, I can’t help but notice a secret entrance subtly blended with the wall. Treading carefully, I sense danger lurking beyond this covert passage – it seems to lead straight down, promising a fall that would not end well. Moving forward means descending the stairs and encountering an Undead adversary along the way.
The upcoming obstacle is a massive pendulum-like axe, which you can dash past as it reaches the extremities of its trajectory. Be wary, as a painting and some spectral hands may pose a threat in the crypts with coffins, then ascend the stairs, enter the hole in the wall, and leap into the hole to descend to the next level.
In the upcoming corridor, you’ll find a greater number of swiftly moving pendulum-like objects, faster than they were earlier. It would be wise to dash past the first two of these, and stay near the wider flooring on the right side of the hall to bypass a danger zone, then leap across the section before reaching the third one, and finally run past it.
In an adjoining room to your right, there’s a concealed doorway that leads to a chamber containing a casket. After that, you’ll need to avoid a painting. At the end of the room, you’ll find another hidden door on the left which you’ll have to pass through in order to continue making progress.
First, vanquish the Wandering Knight, afterward ascend the stairs and descend into the central crypt. You will find the Remaining Jewelry Set in a sack within the crypt, which includes Gloves, Tunic, Slippers, Hood, and Trousers. Proceed through the exit door at the end of the hall, and you’ll be transported back to the starting point.
In the open air, you’re set to engage in another chat with Fionola who carries valuable insights regarding Sir Dagonet. She will also advise you to persist in seeking out the remaining tombs.
Read More
2025-06-11 00:10