
The original article was written by Colin Mieczkowski and updated by Catherine Delossa.
Dead Cells is an entertaining yet challenging RPG with a hint of arcade-style gameplay. It’s widely respected among video games across all platforms, and rightfully so. If you appreciate the difficulty level in games like Dark Souls or challenging platformers, then you’re likely to find Dead Cells enjoyable.
As someone who has ventured into its depths, I can attest to the sheer challenge it presents. That’s why I’m excited to share this Dead Cells walkthrough, which could be your lifeline if you aim to emerge victorious and unscathed from this engrossing game.
Initially, it might appear surprising, but here there are no roadblocks; instead, Dead Cells, being a roguelike game, typically lacks checkpoints. This means you progress through your adventure in one continuous attempt, or as far as possible at least. Fear not, though, as this pattern becomes familiar rather swiftly. Each playthrough offers an opportunity to acquire permanent upgrades that make future attempts easier or increase your chances of reaching further than before.
While the ambiance is fantastic, the battles are rewarding, and the entire experience, with its unpredictable twists, is thrilling. However, if you find yourself overwhelmed at any point, don’t fret. Some aspects of the game mechanics can be a bit murky, so we’ve gathered some essential tips to help navigate the ominous and merciless world of Dead Cells.
Tip #1 – Take advantage of ranged weapons

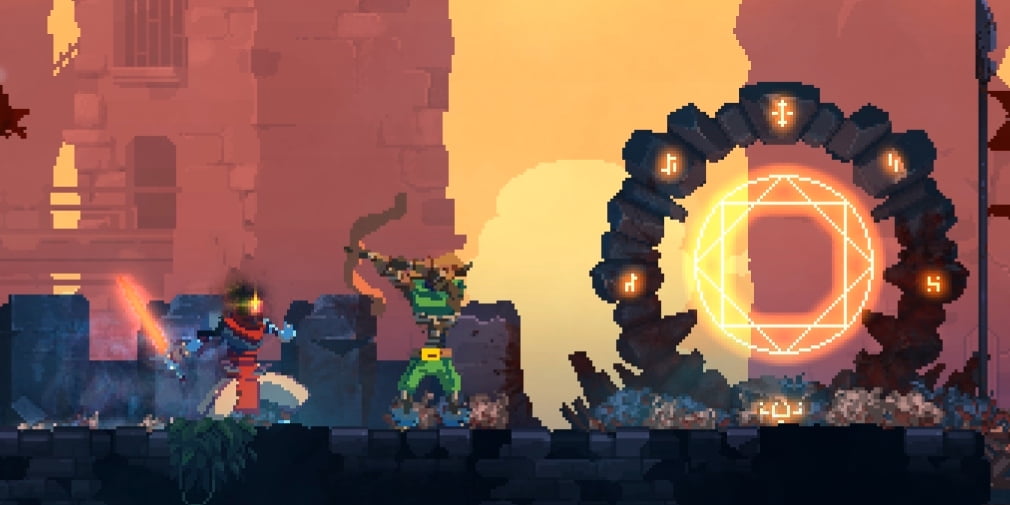
You can use two different weapons in Dead Cells, including a sword and bow and arrows, among other things. Melee attacks certainly look cool, because there aren’t many things as swaggy as using a katana to slice foes.
If you bring a bow and arrow as well, you’ll discover the same “coolness” factor in that place. The thrill of taking down foes from afar adds a touch of style to your kills. Moreover, it can provide a safer means of progression.
From now on, not only will some adversaries hurl objects at you, but with a few well-timed dodges, you’ll find yourself in a safe position. Moreover, since you can attack from afar, you’ll get plenty of time to strategize for the ideal dodge. Lastly, wait until an opportunity arises before releasing your arrow.
Tip #2 – Keep an eye out for doors and portals
One thing you should definitely do in Dead Cells is to be observant – you just never know what you might find. There are several doorways as well as portals that will take you to new areas. Portals are used as checkpoints of sorts for your run.
Even though there aren’t any save spots, these teleporters enable you to move between various places, provided you’re close by. You’ll find this convenient if you suspect you may have overlooked something in a specific region of the world.
Instead of doors typically leading to busy merchants, they usually provide a restful area. Often, you can strengthen yourself there and buy items to restore your health. Therefore, if you encounter doors early in the game, I strongly suggest visiting them for a friendly greeting.
Tip #3 – Embrace death

Familiarize yourself with this place, because Dead Cells combines elements of roguelikes and Metroidvanias. That means you’ll encounter quite a few deaths. Lots of deaths, in fact.
This guide for Dead Cells isn’t just about mastering gameplay techniques; it also helps you handle and learn from failures in the game.
Instead of getting upset over each death, strive to treat it as a chance for growth. Jot down what you might have handled differently in the future, and carry those lessons into your next encounter. Remember, enhancements can make you stronger in upcoming battles too.
What’s particularly aggravating about deaths is the fact that you lose all the achievements you had gathered up until that moment, such as gold and cells. Advancing through levels and using your cells (I’ll elaborate on this later) is crucial for making each attempt valuable. While progress may be gradual, every little bit of progress you make will eventually bring you closer to your objectives.
Tip #4 – The key to offence is a good defence

In Dead Cells, your evasive maneuvers could prove to be just as crucial as your offensive moves like swinging swords or firing arrows. Despite the ferocity of the enemies, you may find yourself frequently dodging and blocking. A common piece of advice from sports coaches is that a strong defense leads to offense, and this principle applies here too.
When you have the opportunity, feel free to strike swiftly against your adversaries. However, if there are many enemies or hurdles to navigate, it’s wise to employ your defensive skills. Avoid incoming assaults and counterattack when needed. Try to outmaneuver them by circling around and striking from behind.
It’s not necessarily required to play cautiously all the time, but it certainly proves beneficial when you find yourself in tricky circumstances. Additionally, ensuring you carry a type of ranged weapon is advisable. Having a good range is indeed advantageous, and it aligns perfectly with your defensive strategy.
Tip #5 – Rolling is your friend

In Dead Cells, like many other roguelike games, mastering the roll move is crucial for success. Spend as much time as you can honing your rolling skills, particularly against weaker adversaries. An intriguing aspect of this game is that when you roll into an enemy, you’ll temporarily become invulnerable (referred to as iFrames). This means you’ll not only dodge their attack but also be pushed away, giving you the opportunity to either evade them or counterattack.
Sure thing! It’s perfectly okay to evade enemies if you find yourself in a tough situation. Sometimes it’s better to retreat and fight another day. Rolling can actually help increase the distance of your horizontal jumps, making it an important move for your platforming skills.
Tip #6 – Slamming the ground is more than just falling with style

Just like adapting to landing with a thud while falling, Dead Cells won’t inflict fall damage on you. However, if you fall too far, you’ll be momentarily stunned and could potentially take damage from surrounding enemies – unless you manage to stun the enemies first.
Performing a ground pound or slam by pressing down and jumping in mid-air not only deals damage to nearby enemies but also temporarily stuns them, possibly even killing them. Additionally, it prevents you from being stunned by excessive falls yourself. However, be cautious of spikes as they can cause harm. So, try to incorporate this move into your regular routine, even if it’s just a short drop.
Tip #7 – Spend your cells wisely

In this game, defeating adversaries and leaders awards you with spheres resembling blue orbs, but when you perish, you forfeit these spheres. You might be wondering what happens to the ones you obtain? During your missions, if you visit The Collector, you can utilize these spheres to purchase enhancements that remain with you, even following death. As a bonus, he will also restore your health and health potions.
When considering upgrades, remember that they’re not all the same in terms of their usefulness. Make sure to review the details of each upgrade before deciding whether it will be beneficial for your needs.
If you’re struggling to decide, consider using your valuable resources to improve your health potion and pocket money during gameplay. Also, select the option to receive a random starting bow, shield, and melee weapon at the start of each round. Lastly, for mutations, choose those that seem useful to you. We suggest Ygdar Orus Li Ox, as it grants an extra life – this is often referred to as YOLO in gaming terms.
Tip #8 – Look for Blueprints

In your gameplay, keep an eye out for blueprints that unveil various melee weapons, shields, and bows. Prioritize locating these as they appear during gameplay. You can discover them by vanquishing bosses and Elite adversaries, though they may also be concealed in secret areas. For a head start, at the opening of the game, leap to the left and then roll to access a hidden room. The same strategy applies to the second area as well.
Here’s another helpful hint: delve into every nook and cranny. Thoroughly search everywhere, as you might stumble upon hidden gems that could determine the outcome between success and failure. Once discovered, bring these items to the Collector to receive a new item in return, using some cells. Not only will this item be at your disposal, but it may also occasionally appear in future playthroughs when least expected, expanding your collection.
Tip #9 – Status effects are everything

Encounters with weapons, abilities, and charms may cause various conditions on your foes. Applying a persistent wound (bleed) that deals continuous damage or slowing their movement by freezing them can be decisive in numerous situations. Enemies might not be able to resist the slow effect. In fact, inflicting a bleed on tougher enemies such as Elites and bosses is highly effective. Keep an eye on your item descriptions for details about these status effects.
To get off to a strong start, be on the lookout for the blueprint of the Blood Sword. Obtaining it early, together with the randomly issued weapon at the beginning of each new game, will significantly reduce the difficulty in your initial playthroughs.
Tip #10 – How to open Timed Doors (aka, gotta go fast)

Have you ever encountered a door that resembles an hourglass? These doors, secretly placed all around the world and sometimes between locations, will lock if not approached within a given timeframe. They also display how long they’ve been sealed, offering a tantalizing hint of what could have transpired behind them.
After you get accustomed to Dead Cells, give it a go at unlocking those Timed Doors! It’s best to wait until you’re ready because navigating through enemies without killing them and reaching the doors in time will reward you with valuable loot. The first one is situated in the second area, and you have exactly two minutes to get there. Don’t worry, it may seem challenging, but with practice, you’ll succeed!
These rooms might hold an excess of cells, robust blueprints, genetic mutations, and various other elements.
Tip #11 – Take on the daily challenge

If you successfully defeat The Concierge, Dead Cells’ initial boss, you’ll gain access to the tower in the starting area. Inside this tower lies the daily challenge, a dynamic dungeon that transforms every day and is populated with enemies and bosses you’ll encounter later in the game.
Overcome the obstacle, and you’ll gain access to unique Blueprints that aren’t available elsewhere. It’s also an excellent opportunity to hone your abilities!
Tip #12 – Don’t run away; stay on the offensive to regain health

Absolutely, earlier we mentioned that it’s fine if you choose to retreat or defend yourself, but in Dead Cells, there’s a strategic system for restoring health after taking damage. If you get hit by an enemy, swiftly counterattack them to recover a portion of your Health Points (HP).
The amount of harm sustained by your character is symbolized by a yellow section of a green life meter. After each strike against your foe, that yellow section will gradually regain its green color. Act swiftly, for this can reduce even the most formidable opponents’ ability to inflict damage. Familiarize yourself with this exchange mechanism at an early stage, as it is a crucial skill in the realm of Dead Cells.
Tip #13 – Story rooms contain hidden secrets to discover
Scattered globally, you’ll find narrative chambers brimming with additional story details and background information. These spaces serve a role beyond just world creation; delve deep into them for potential rewards like hidden weapons or rarities such as Amulets, which bestow unique abilities, including the triple jump.
Additionally, they may hold additional treasures like gold and apparatus, or secret spots. Be on the lookout as well for narrative chambers showcasing other universes, such as Hollow Knight. These spaces are home to some impressive loot, as demonstrated in the video you just saw.
Tip #14 – Think twice before picking up every scroll

Choosing every scroll you encounter might appear straightforward, but it’s actually more intricate. Scrolls boost one of your attributes: Brutality, Tactics, or Survivability, while simultaneously increasing your health by a certain percentage. Each attribute correlates with a specific weapon or skill set, so selecting attributes that match your character build, or the weapons and abilities you’re utilizing, is crucial for navigating the world of Dead Cells effectively.
As you gather more scrolls, the opponents in subsequent stages grow tougher. Initially boosting your stats is beneficial for preparation, but it might be prudent to stop collecting scrolls if they’re excess. Failing to do so could result in enemies later on being too powerful compared to your current weapons and skills.
Tip #15 – Traps, traps, traps

As a gamer, I’ve got to say, nothing beats the thrill of battling my foes head-on. But hey, who wouldn’t appreciate a bit of assistance every now and then? That’s where traps come in handy! They can be strategically placed around the game world to deal damage when you can’t or don’t want to engage directly. One such trap that stands out is the Sinew Slicer, a nifty turret that keeps your enemies at bay by continuously firing at them. Just remember to stay close; if I stray too far, I’ll see a little lightning bolt above them, letting me know it’s time to move back in.
What makes these traps appear deceptively beneficial is that they operate on a cool-down mechanism rather than being single-use items. This allows for repeated usage once the cooldown period has passed. Furthermore, by incorporating cooldown-reducing mutations, their use becomes almost limitless. Deploy one before engaging a boss or Elite enemy, and you’ll find them vanquished swiftly.
Read More
- Silver Rate Forecast
- Black Myth: Wukong minimum & recommended system requirements for PC
- Gold Rate Forecast
- USD CNY PREDICTION
- Former SNL Star Reveals Surprising Comeback After 24 Years
- Grimguard Tactics tier list – Ranking the main classes
- Arknights celebrates fifth anniversary in style with new limited-time event
- Gods & Demons codes (January 2025)
- Maiden Academy tier list
- PUBG Mobile heads back to Riyadh for EWC 2025
2025-07-17 17:57