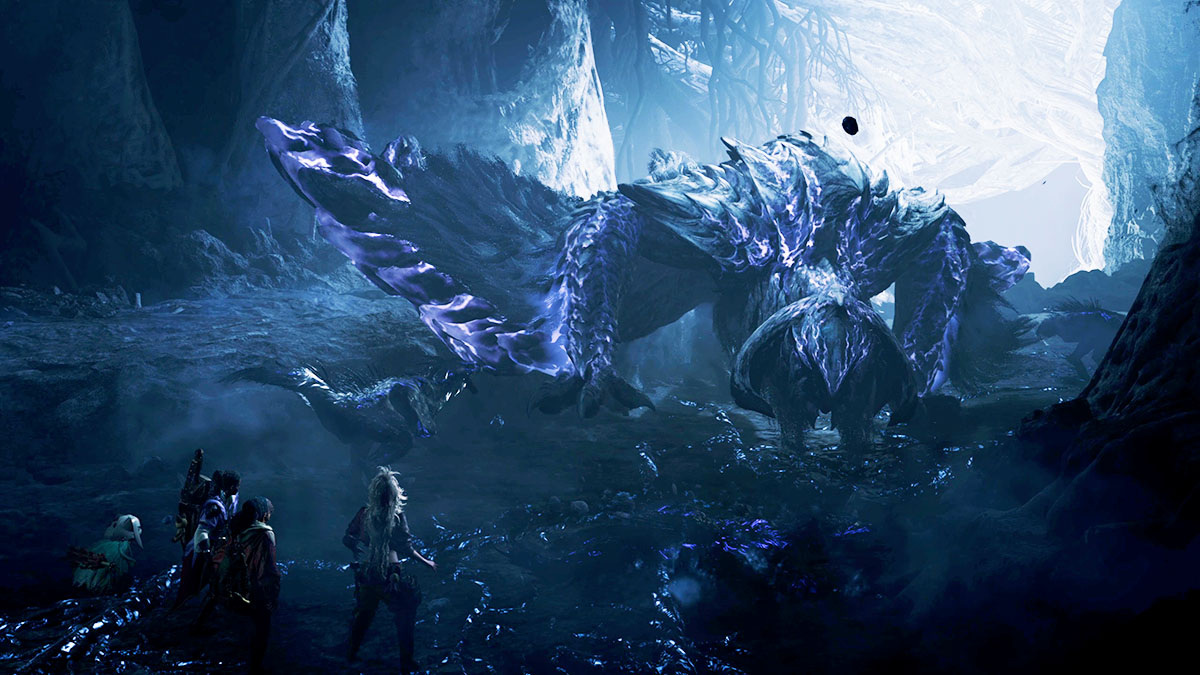
Originally called the White Phantom, Guardian Arkveld stands out as one of the main monsters in Monster Hunter Wilds. Mastering strategies to defeat this enraged, fierce creature will significantly facilitate reaching the endgame of Wilds and grant access to some top-tier Dragon element equipment within the game.
How to slay Guardian Arkveld in Monster Hunter Wilds
Overcoming Arkveld the Guardian for the first time can be quite an extended endeavor; it took me more than 20 minutes during my initial playthrough at Low Rank. The duration may differ for you based on your proficiency with your weapon, the setup of your build, and whether or not you have teammates to assist.
Regardless of your strategy, understanding Arkveld’s vulnerabilities and attack patterns is crucial if you aim to defeat it. Let’s delve into these two aspects initially before exploring other tactics that can help conquer it, irrespective of the tool or weapon you prefer.
All Guardian Arkveld weaknesses
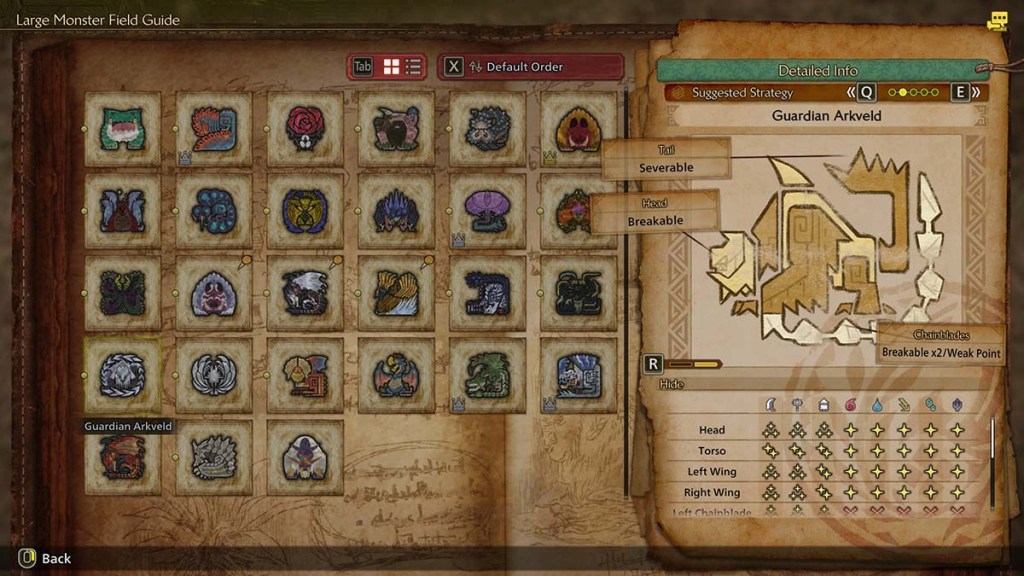
In Monster Hunter Wilds, Arkveld stands out amongst other monsters because it has no particular elemental vulnerability. Contrary to what The Large Monster Field Guide suggests about using Dragon element weapons, you can effectively utilize almost any weapon against this monster in various locations on its body. However, it’s important to note that the Chainblades, the whip-like extensions from its arms, are immune to elemental damage.
In essence, both cutting and blunt forces deal maximum harm to all parts of Arkveld except for the torso and its two legs, but they have a more moderate impact on these specific areas.
Among the three kinds of damage you can inflict on Arkveld, projectiles are the least favorable choice due to their limited effectiveness. They can deal maximum damage only to its head, chainblades, and tail. Against all other parts of its body, they have merely moderate impact.
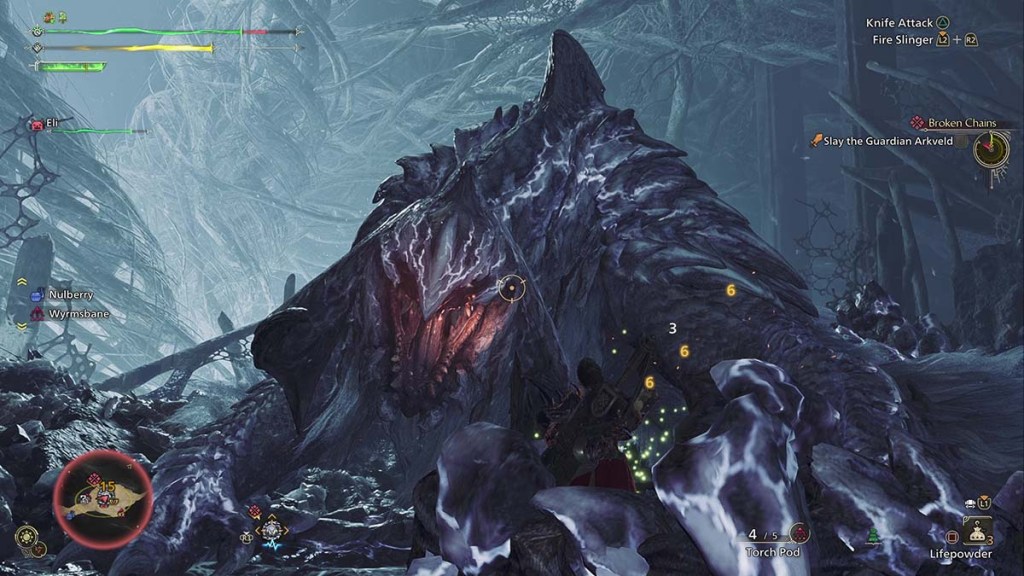
When battling Arkveld, it would be advantageous to aim your attacks at its head, tail, wings, and chainblades. The only spot where I observed white damage numbers was on its back. Generally, you can only reach this area effectively by riding the monster.
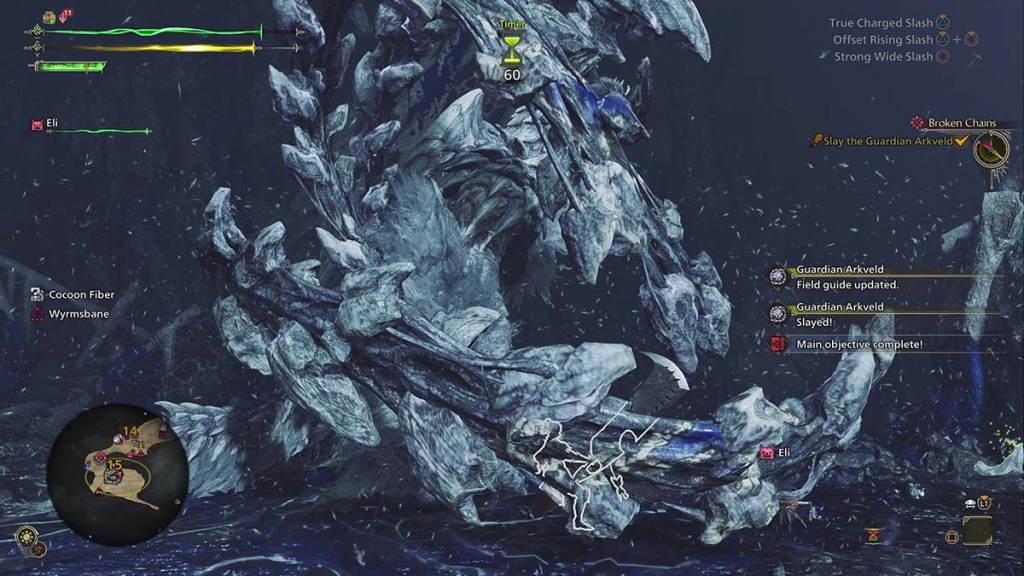
In conclusion, similar to combat in Monster Hunter Wilds, aim to inflict and eradicate numerous Wounds. These Wounds not only absorb extra damage but often reward you with additional monster components that are useful for crafting at the smithy. Moreover, various weapons in Monster Hunter Wilds have special effects linked to damaging Wounds (alongside other attack types), making it advantageous to shatter them whenever the opportunity arises.
All Guardian Arkveld attacks
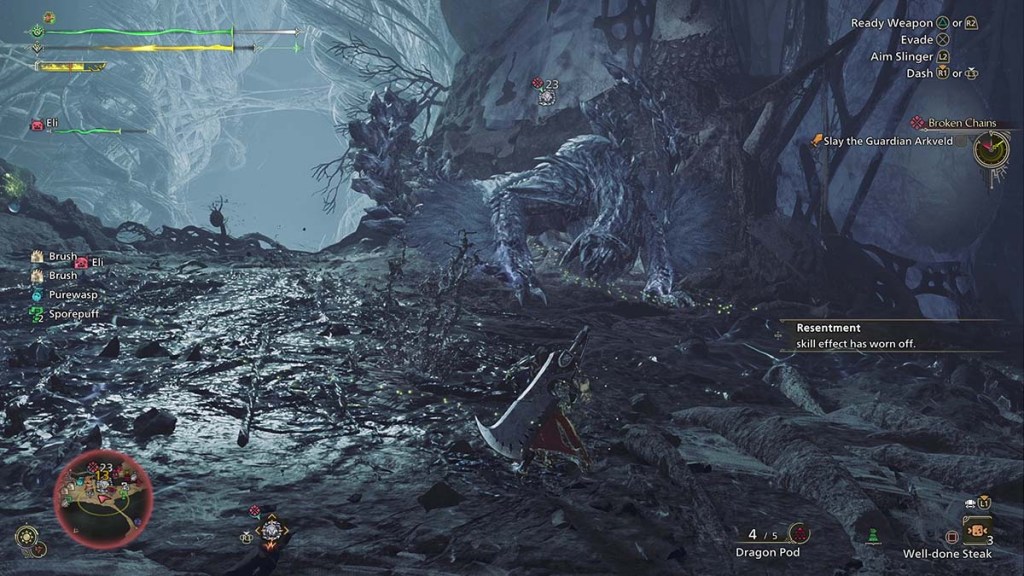
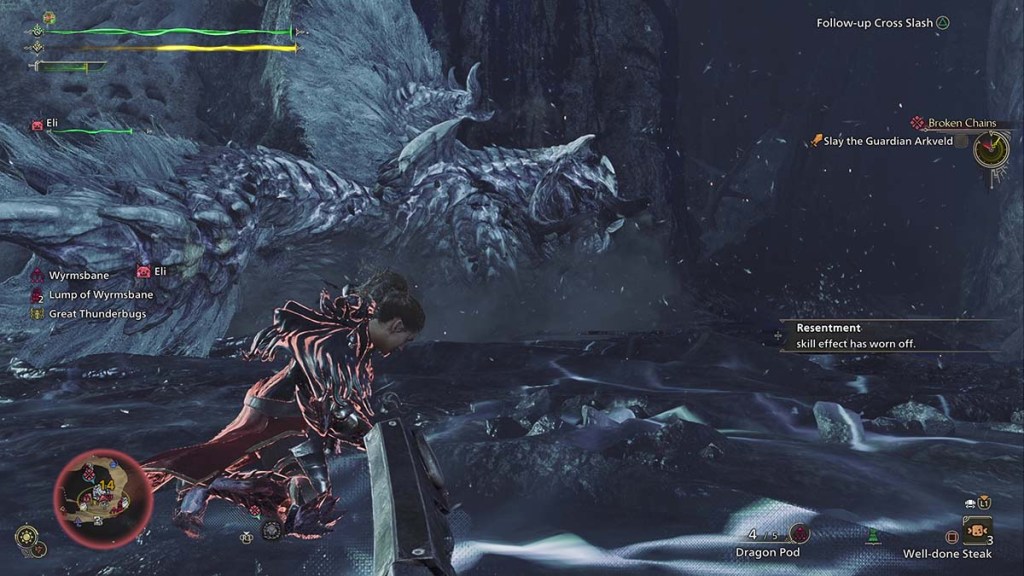
Monsters in the Monster Hunter series often have extra stages beyond just “enraged” or “exhausted,” and Arkveld is no exception. It enters its second phase approximately halfway through its health, and you’ll recognize this transition when its chainblades start glowing red and its attacks produce explosions with a red tint.
Arkveld phase one attacks
Single chain slam
In simpler terms, Arkveld retracts its left wing before lunging towards you. It then slashes with its chainblade and swipes with its sharp talon. The attack may not cause significant harm when blocked, but it’s crucial to keep a safe distance from the impact site if you want to avoid being caught in the subsequent explosion.
Double chain slam
In this assault, Arkveld prepares its right wing before bringing down its right chainblade, which stays embedded for approximately a second. Following this, it repeats the action with its left chainblade. For the right-side strike, move to the left and, conversely, dodge to the right for the left-side strike. If an opportunity arises, utilize the moment when the chainblade is stuck in the ground to inflict extra damage without retaliation.
Spinning grab
Following a swift whirl of its chainblades, Arkveld leaps and twirls on its back legs. If it manages to strike you with one of its spinning chainblades, it will seize you tight. To escape this grip, try firing projectiles at Arkveld’s face from your slinger or repeatedly attack the claw that holds you. If you fail to break free, prepare for significant damage.
Double chainblade explosion
Following an infusion of milky, spectral power into its chainblades, Arkveld assumes a standing position on its hind legs before crashing the chains horizontally in front of it. Not long after, an explosion ensues, accompanied by the emergence of Wylkcrystals. The most effective strategy for dealing with this attack is to block, but if that’s not an option, swiftly move to the side and dodge at the last possible moment.
Small bite
As a fan, I dart away whenever Arkveld lunges, giving it a light nip. This swift strike causes minimal harm and lacks any knockback effect. The key is to keep an eye on Arkveld’s neck retraction – once it does, I promptly step back to dodge the bite.
Spinning tail slap
As a fan finding myself in close proximity to Arkveld’s tail, I’ve noticed an intriguing behavior: it occasionally coils its tail and whirls around swiftly. Being too close during this spin could propel me away, but luckily, dodging into or through the attack allows me to evade it safely.
Tail flick
Standing right behind Arkveld could prompt it to tuck its tail and then swiftly whip the end of it towards you. Unlike a slap, dodging left or right is advisable to evade this attack, but it’s quite manageable to dodge or block effectively with its lengthy wind-up.
Charge
In a different phrasing, Arkveld swipes its left side and chainblade over itself before lunging towards you by thrusting the base of its wing into the ground. If you subtly evade to your right, you can glide under its wing undamaged and without experiencing any knockback.
Chainblade uppercut
In a swift motion, Arkveld brandishes his chainblades, leaping into the air. He performs another flourish mid-air before executing an uppercut, slicing his left chain diagonally across the arena. This attack vaporizes any Wyvern Milk Puddle you’re standing on, leaving Wylkcrystals behind. To avoid damage, dodge at the crucial moment or block as Arkveld starts dragging his chainblade along the ground.
Chainblade drag
Following a swift slash of its left wing and chainblade across its torso, Arkveld plunges the blade into the ground in front of itself, then firmly roots it and pulls back, performing this attack whether standing still or charging ahead.
Enrage three-hit combo
In times of rage, Arkveld employs this specific attack sequence. First, it swipes its left chainblade across its body and follows up with a sweeping slash in front of itself. Next, it executes a powerful overhead strike using its right-hand blade, culminating in a drag. It’s crucial to either dodge or block each of these three moves, as they possess significant forward thrust, and dodging one may lead Arkveld to adjust its position.
Arkveld phase two attacks
When Arkveld drops to roughly half its health, it transitions into its second stage. In the Ruins of Wyveria, it’ll hunt for a cocoon to consume. If not in Wyveria, it will power up its chainblades with vivid energy. Throughout this phase, it can utilize all its initial abilities as well as the freshly acquired ones.
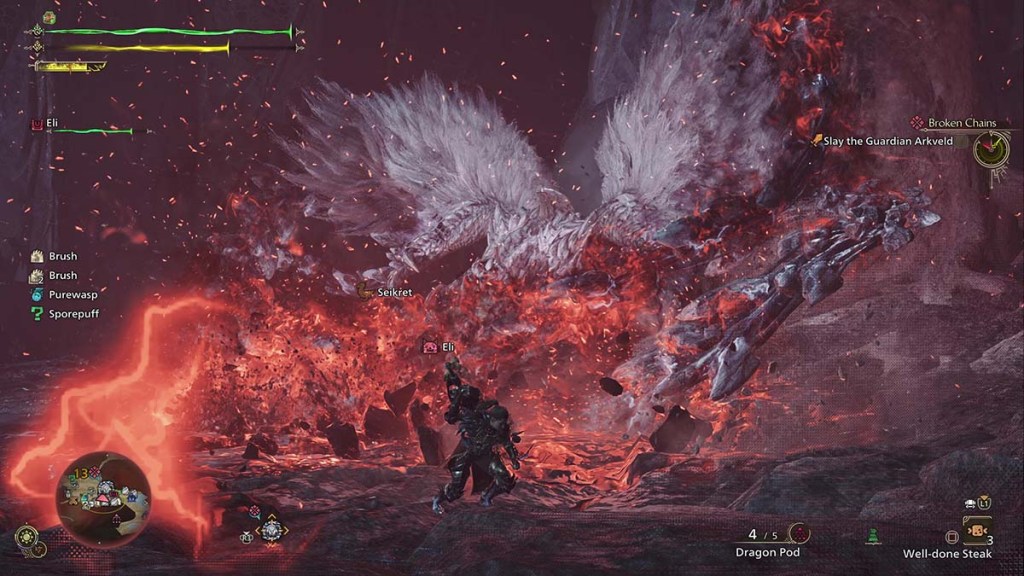
Large chainblade explosion
Arkveld will leap upward using its hind legs, displaying its chainblades, followed by charging these blades with red energy before impaling the ground in front of it. This action generates an energy blast beneath the ground that increases in power as it moves further from Arkveld. To evade this wave and its subsequent explosions, you can move to the side if you’re close to the monster or pass through them if you anticipate the wave’s approach. Alternatively, you can run far enough away to avoid being hit by the explosive blasts.
Single chain explosion
As an enthusiast, I’d rephrase it like this: During a swift assault, Arkveld plunges just one pair of chainblades into the ground. Instead of unleashing a wave, it generates two narrow lines of pulsating red energy that detonate. A slight dodge to the left when you spot the attack coming should be enough to evade it.
Uppercut into exploding slam
This assault initiates similarly to the first phase’s uppercut. But once Arkveld executes and swivels, it raises up on its hind legs and crashes its chainblades forcefully, causing a big burst of red energy. If you successfully evade the initial uppercut charge, then you can dart to your right to steer clear of the chainblades.
Triple swipe into slam
Arkveld slices its left chainblades over its own form, making a curve from right to left. It then prepares for an attack moving from left to right, followed by another sweep from right to left. The assault concludes as Arkveld leaps into the air, spins, and thrusts the blades down in a straight line. To block this series of strikes, you’ll need to maintain your guard throughout. Mastering the timing to perfectly block each strike requires extra precision. Dodging isn’t recommended due to the back-and-forth pattern of the attack.
Chainblade fist slam
Arkveld sprawls its limbs wide, seeming almost to mock you, and then clenches its chainblades together into a ball before slamming them forcefully in front of you. The attack’s initial impact generates destructive energy waves, making it crucial to keep a safe distance from Arkveld to avoid having your head bashed.
Jumping energy slam
At the beginning of the assault, Arkveld positions itself, builds up red energy in its chainblades, and leaps towards you before crashing down with the blades on its left side.
Tips for beating Guardian Arkveld
Surprisingly enough, my top advice for defeating Arkveld is to stay near it. Many of its attacks work optimally when you’re at a medium distance, and there are certain secure spots in front and to the side of the monster that you can utilize effectively. Here are some points to consider:
1. Position yourself strategically close to Arkveld. This reduces the effectiveness of many of its attacks.
2. Look for safe spots in front and to the side of the monster where you can hide or dodge effectively. These spots can provide a significant advantage in combat.
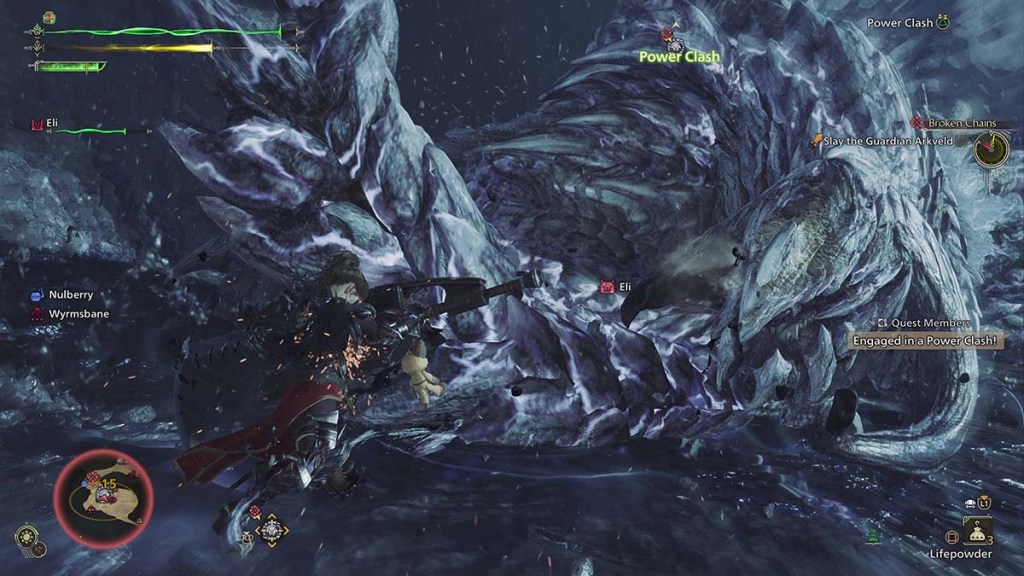
- Blocking is your friend. If your weapon has or can act as a shield, blocking Arkveld’s attacks is a safe way to deal with almost anything in its arsenal. Executing enough Perfect blocks also engages an Offensive Clash that can leave the monster open to counterattacks.
- Abuse I-Frames. If your weapon doesn’t have a block, odds are it has a way to generate additional invincibility frames. Longsword’s Iai Slash, the Switch Axe’s sidestep, etc. are all great ways to neutralize any threat Arkveld’s attacks have.
- Don’t get fancy. Only use Offset attacks and other flashy moves when you know you can land them. They’re cool and look sexy to pull off, but if your timing is wrong by even a fraction of a second, all you’ll end up with is your behind on the ground.
- Keep a Farcaster handy. You can’t hunt monsters if you spend all your time on a cart, and you’ll spend a lot of time on a cart if you don’t have any healing items. A Farcaster is a free trip back to camp so you can restock. Using one is less desirable if you’re fighting with a group, as it leaves your co-op partners down a hunter, but it is better to save the cart than use it.
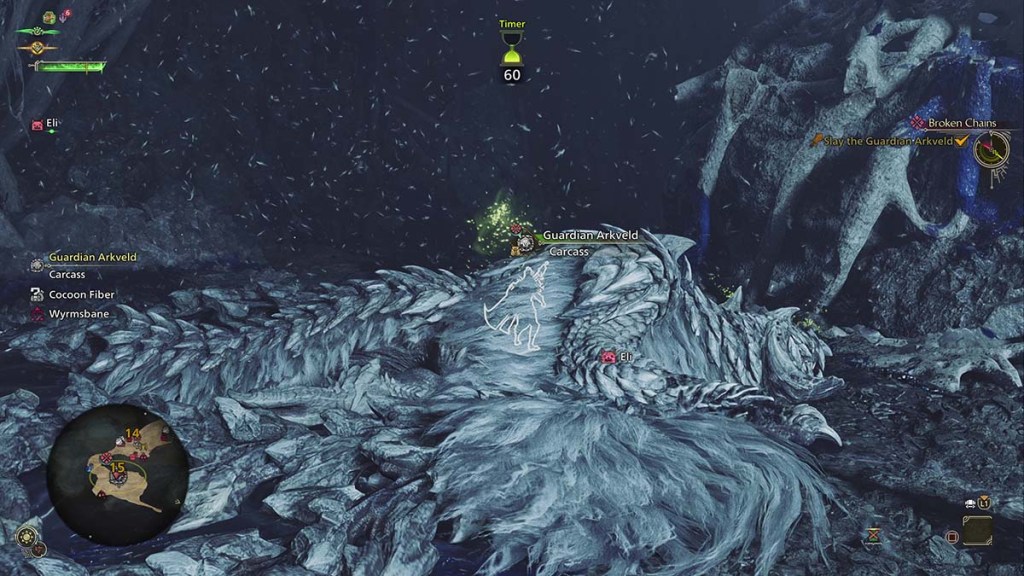
Apart from that, continue dealing damage to Arkveld and it will eventually fall. You’ll probably find yourself battling it more once you reach High Rank due to its Dragon element weapons and equipment. Even if you’re not interested in the armor stats, crafting the High Rank versions will allow them to be used as layered armor, making the cost of admission worthwhile. In Monster Hunter Worlds, fashion is the ultimate goal in the endgame.
Read More
- Gold Rate Forecast
- Silver Rate Forecast
- Honor of Kings returns for the 2025 Esports World Cup with a whopping $3 million prize pool
- PUBG Mobile heads back to Riyadh for EWC 2025
- USD CNY PREDICTION
- Kanye “Ye” West Struggles Through Chaotic, Rain-Soaked Shanghai Concert
- Arknights celebrates fifth anniversary in style with new limited-time event
- Every Upcoming Zac Efron Movie And TV Show
- Mech Vs Aliens codes – Currently active promos (June 2025)
- Hero Tale best builds – One for melee, one for ranged characters
2025-03-09 19:48