
In contrast to its predecessor, Elden Ring: Nightreign employs a distinct narrative style. While the former heavily relied on environmental storytelling and item descriptions, Nightreign offers a more straightforward approach in some areas, yet it’s less direct in others. A central narrative unfolds where you must vanquish the Nightlords, rather than relying solely on the atmosphere and lore found within items.
Each Nightfarer that can be played has its own distinct story waiting to be uncovered via Remembrances. These stories manifest differently depending on the character, with Raider’s memories being more straightforward yet complex to unearth. Not only do these Remembrances offer an engaging way to delve into the characters, but they also reward players uniquely as well.
What Is The Journal?
The journal, you might say, is quite extensive. It houses individual records for every character, detailing their past experiences prior to gathering at the Roundtable Hold for their confrontation with the Night. Although each author’s writing style varies, the method of unlocking these memories follows a similar pattern across all characters, and each set contains exactly eight entries in total.
At your leisure in the Roundtable Hold, you’re free to peruse these regardless of your current character. With each additional entry you accrue, there comes a point where more won’t be unlocked due to a Remembrance appearing. Therefore, it’s advisable to complete the Remembrances as soon as they become available, ensuring you continue to gain new Journal entries.
How To Unlock Memory Fragments
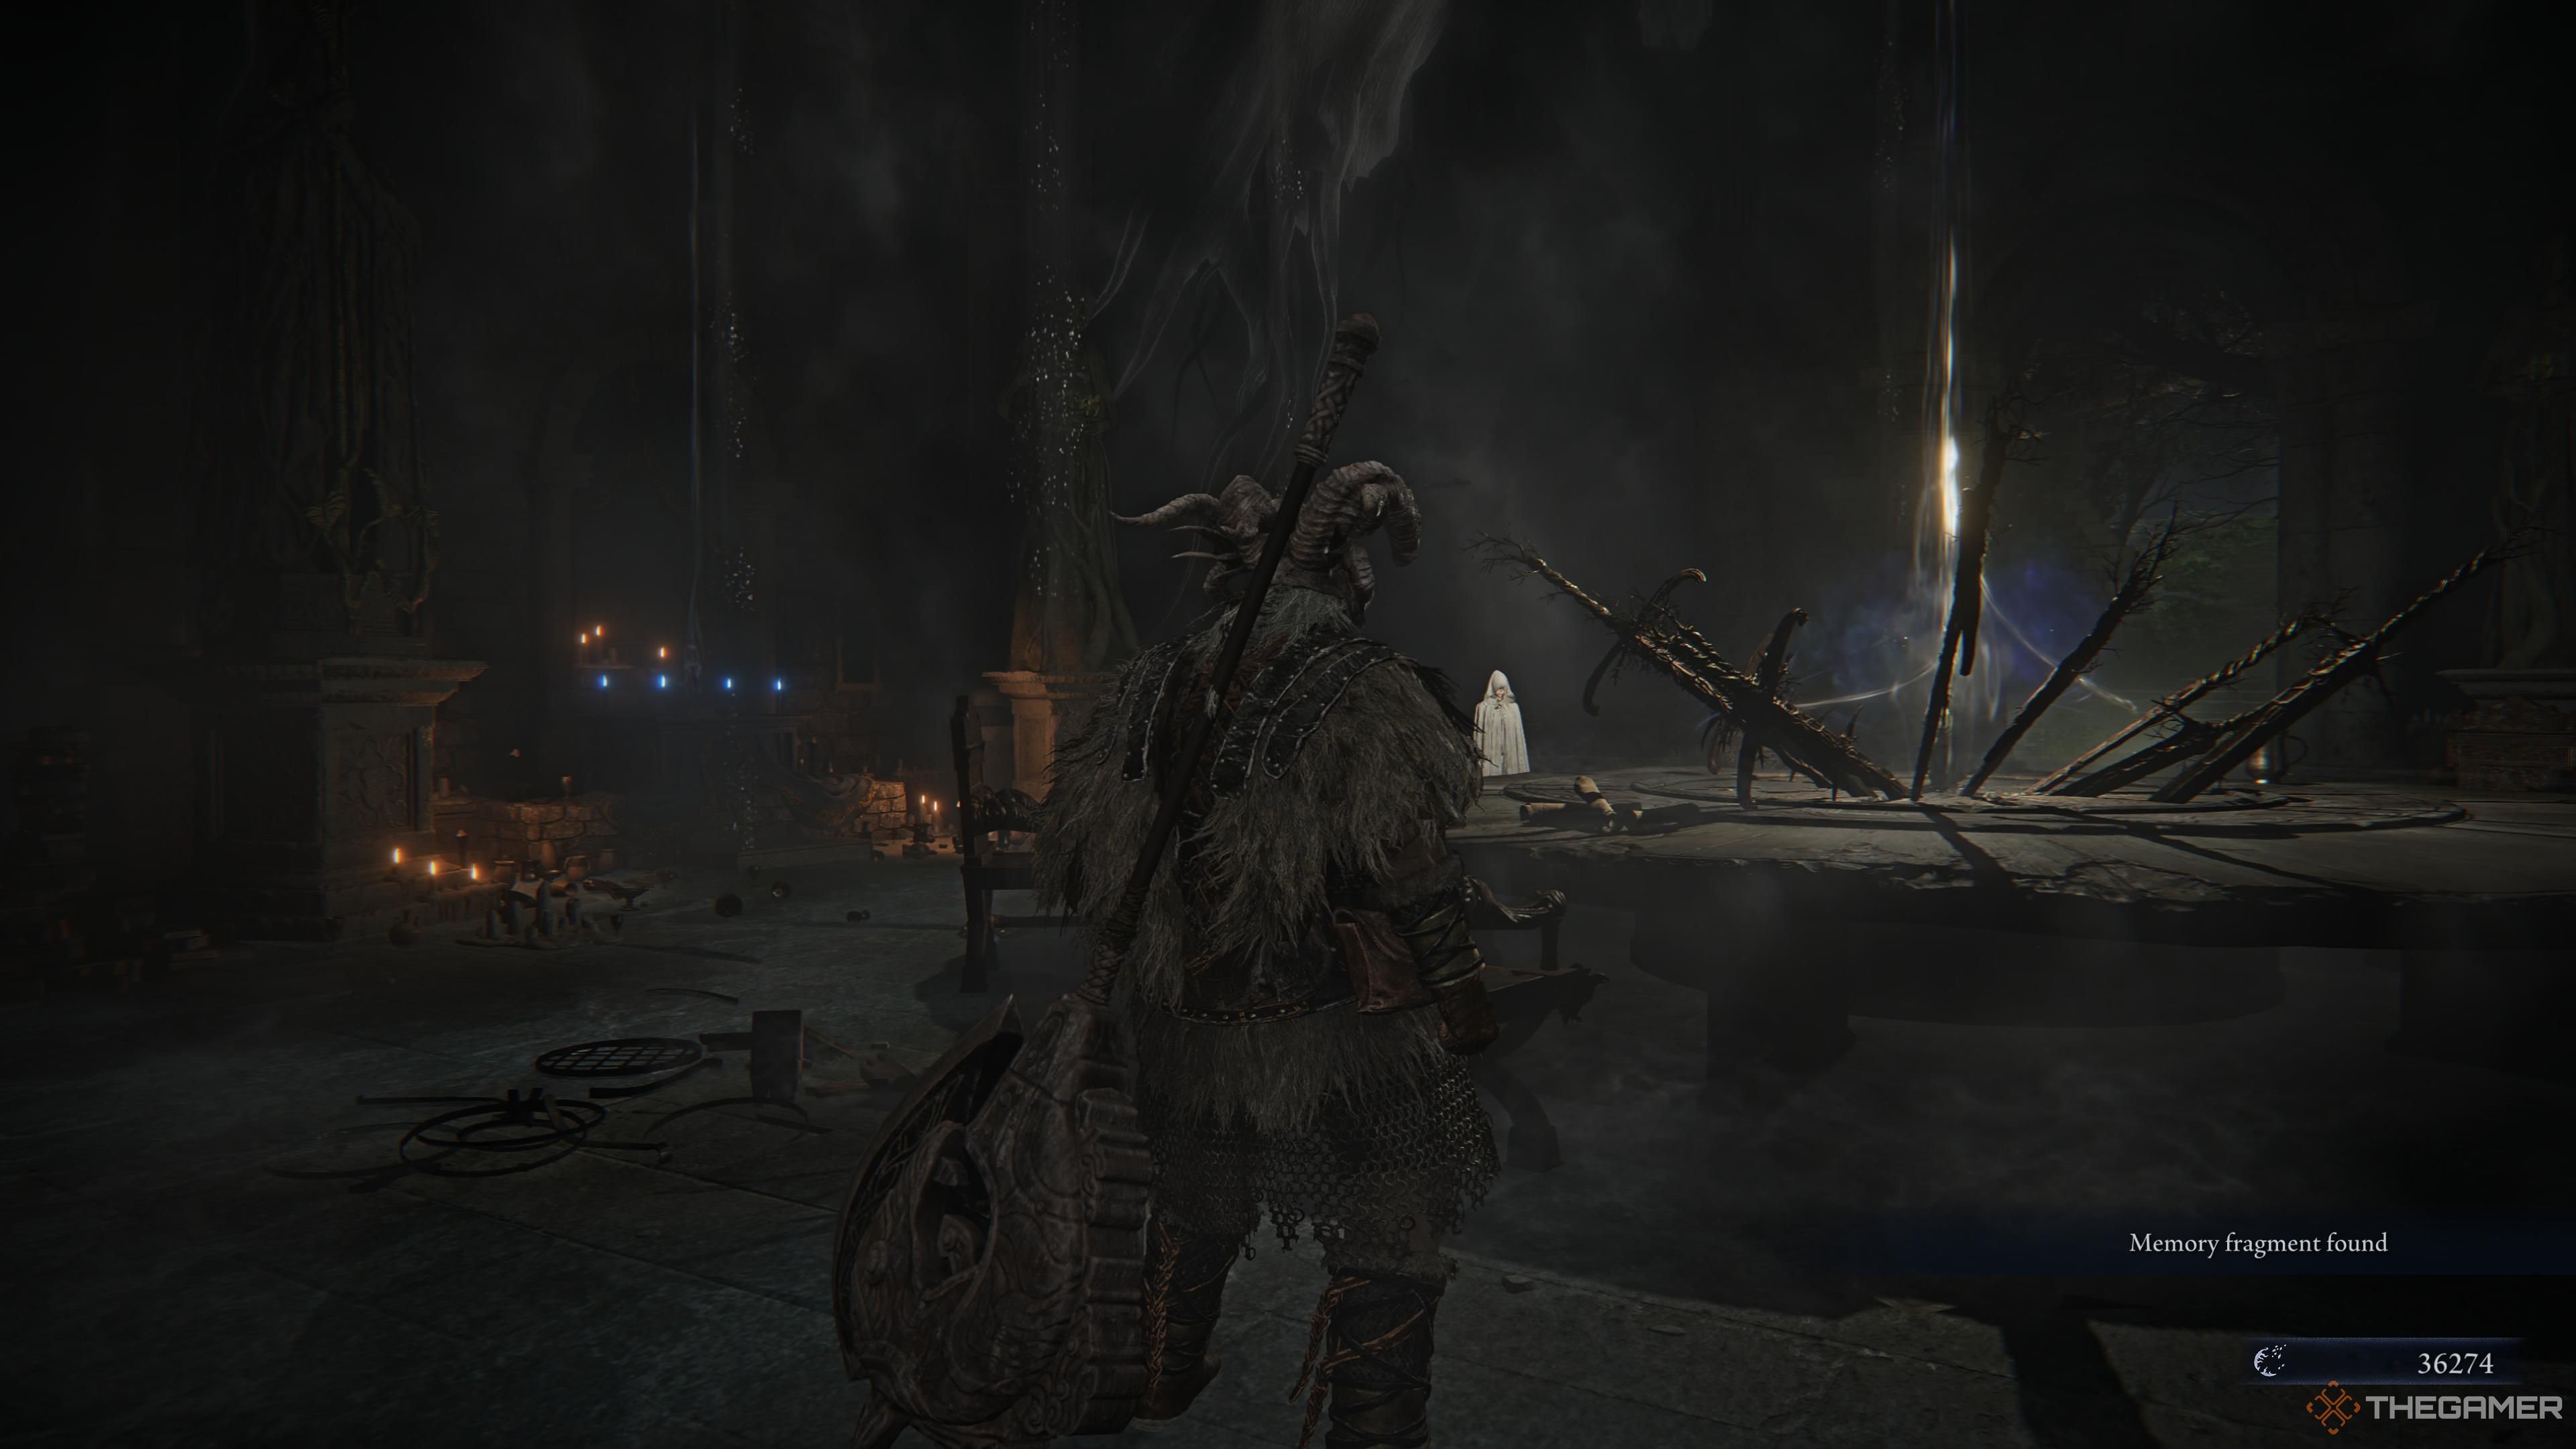
In this game, Memory Fragments serve as keys to unlocking new Journal entries and Remembrances. Contrary to how it might seem, these fragments are not items you can physically collect and store. Rather, once you accomplish specific tasks, a message will appear in the corner of your screen saying, ‘Memory fragment discovered.’
To put it simply, what are these goals? They can vary for certain characters such as Executor. You can uncover a Memory Fragment by skillfully deflecting multiple attacks, but this method is somewhat random. However, a reliable approach is participating in Expeditions and emerging victorious. The initial Remembrance will be accessible on the first night, provided you advance far enough to confront the first boss, even if you don’t win.
In simpler terms, encountering further pieces of memory will become less frequent. To uncover these memories fully, you must first defeat the Nightlord during the second stage of the Expedition, which grants the second Remembrance. Subsequently, overcoming the Nightlord again is necessary to access the third Remembrance. In other words, if you wish to experience the entire story of a Nightfarer, consistent victory against Nightlords will be essential.
Each completed Remembrance also unlocks another Journal entry.
Raider’s Remembrances
In the game, Raider, similar to other Nightfarers, possesses three total tasks known as Memories that you need to accomplish. These Memories are initiated from the Journal, where a ‘Start Memory’ button is located at the bottom of the most recent entry. After starting a Memory, you’ll be transported to a realm called the Realm of Memories. This area resembles the regular world, but certain characters will be in specific locations for the purpose of the Memory, and the objectives within the Memory can be completed.
In certain instances with Raider, some memories may ask you to visit Limveld for a task. Keep in mind that this can only happen when you’re within the Realm of Remembrance, so ensure you’re there before attempting to find a match.
Remembrance #1
Most other characters need to travel to Limveld for some or all of their memories, but not Raider. His memories unfold exclusively within the Roundtable Hold and locations distinct to his recollections, which makes them all solitary adventures.
In the initial account, there are several brief instructions to adhere to prior to stepping into the amphitheater, where it’s necessary for us to engage in combat with a Gladiator. Here’s the sequence of tasks:
1. Task one:
2. Task two:
3. Task three:
4. Final task:
(Assuming that each task is numbered and described sequentially.)
You can also check the Journal during the Remembrance for your next objective.
- Speak with the Iron Menial.
- Touch the monument.
- Speak with the Iron Menial about the Monument.
- Touch the monument again to enter the Coliseum.
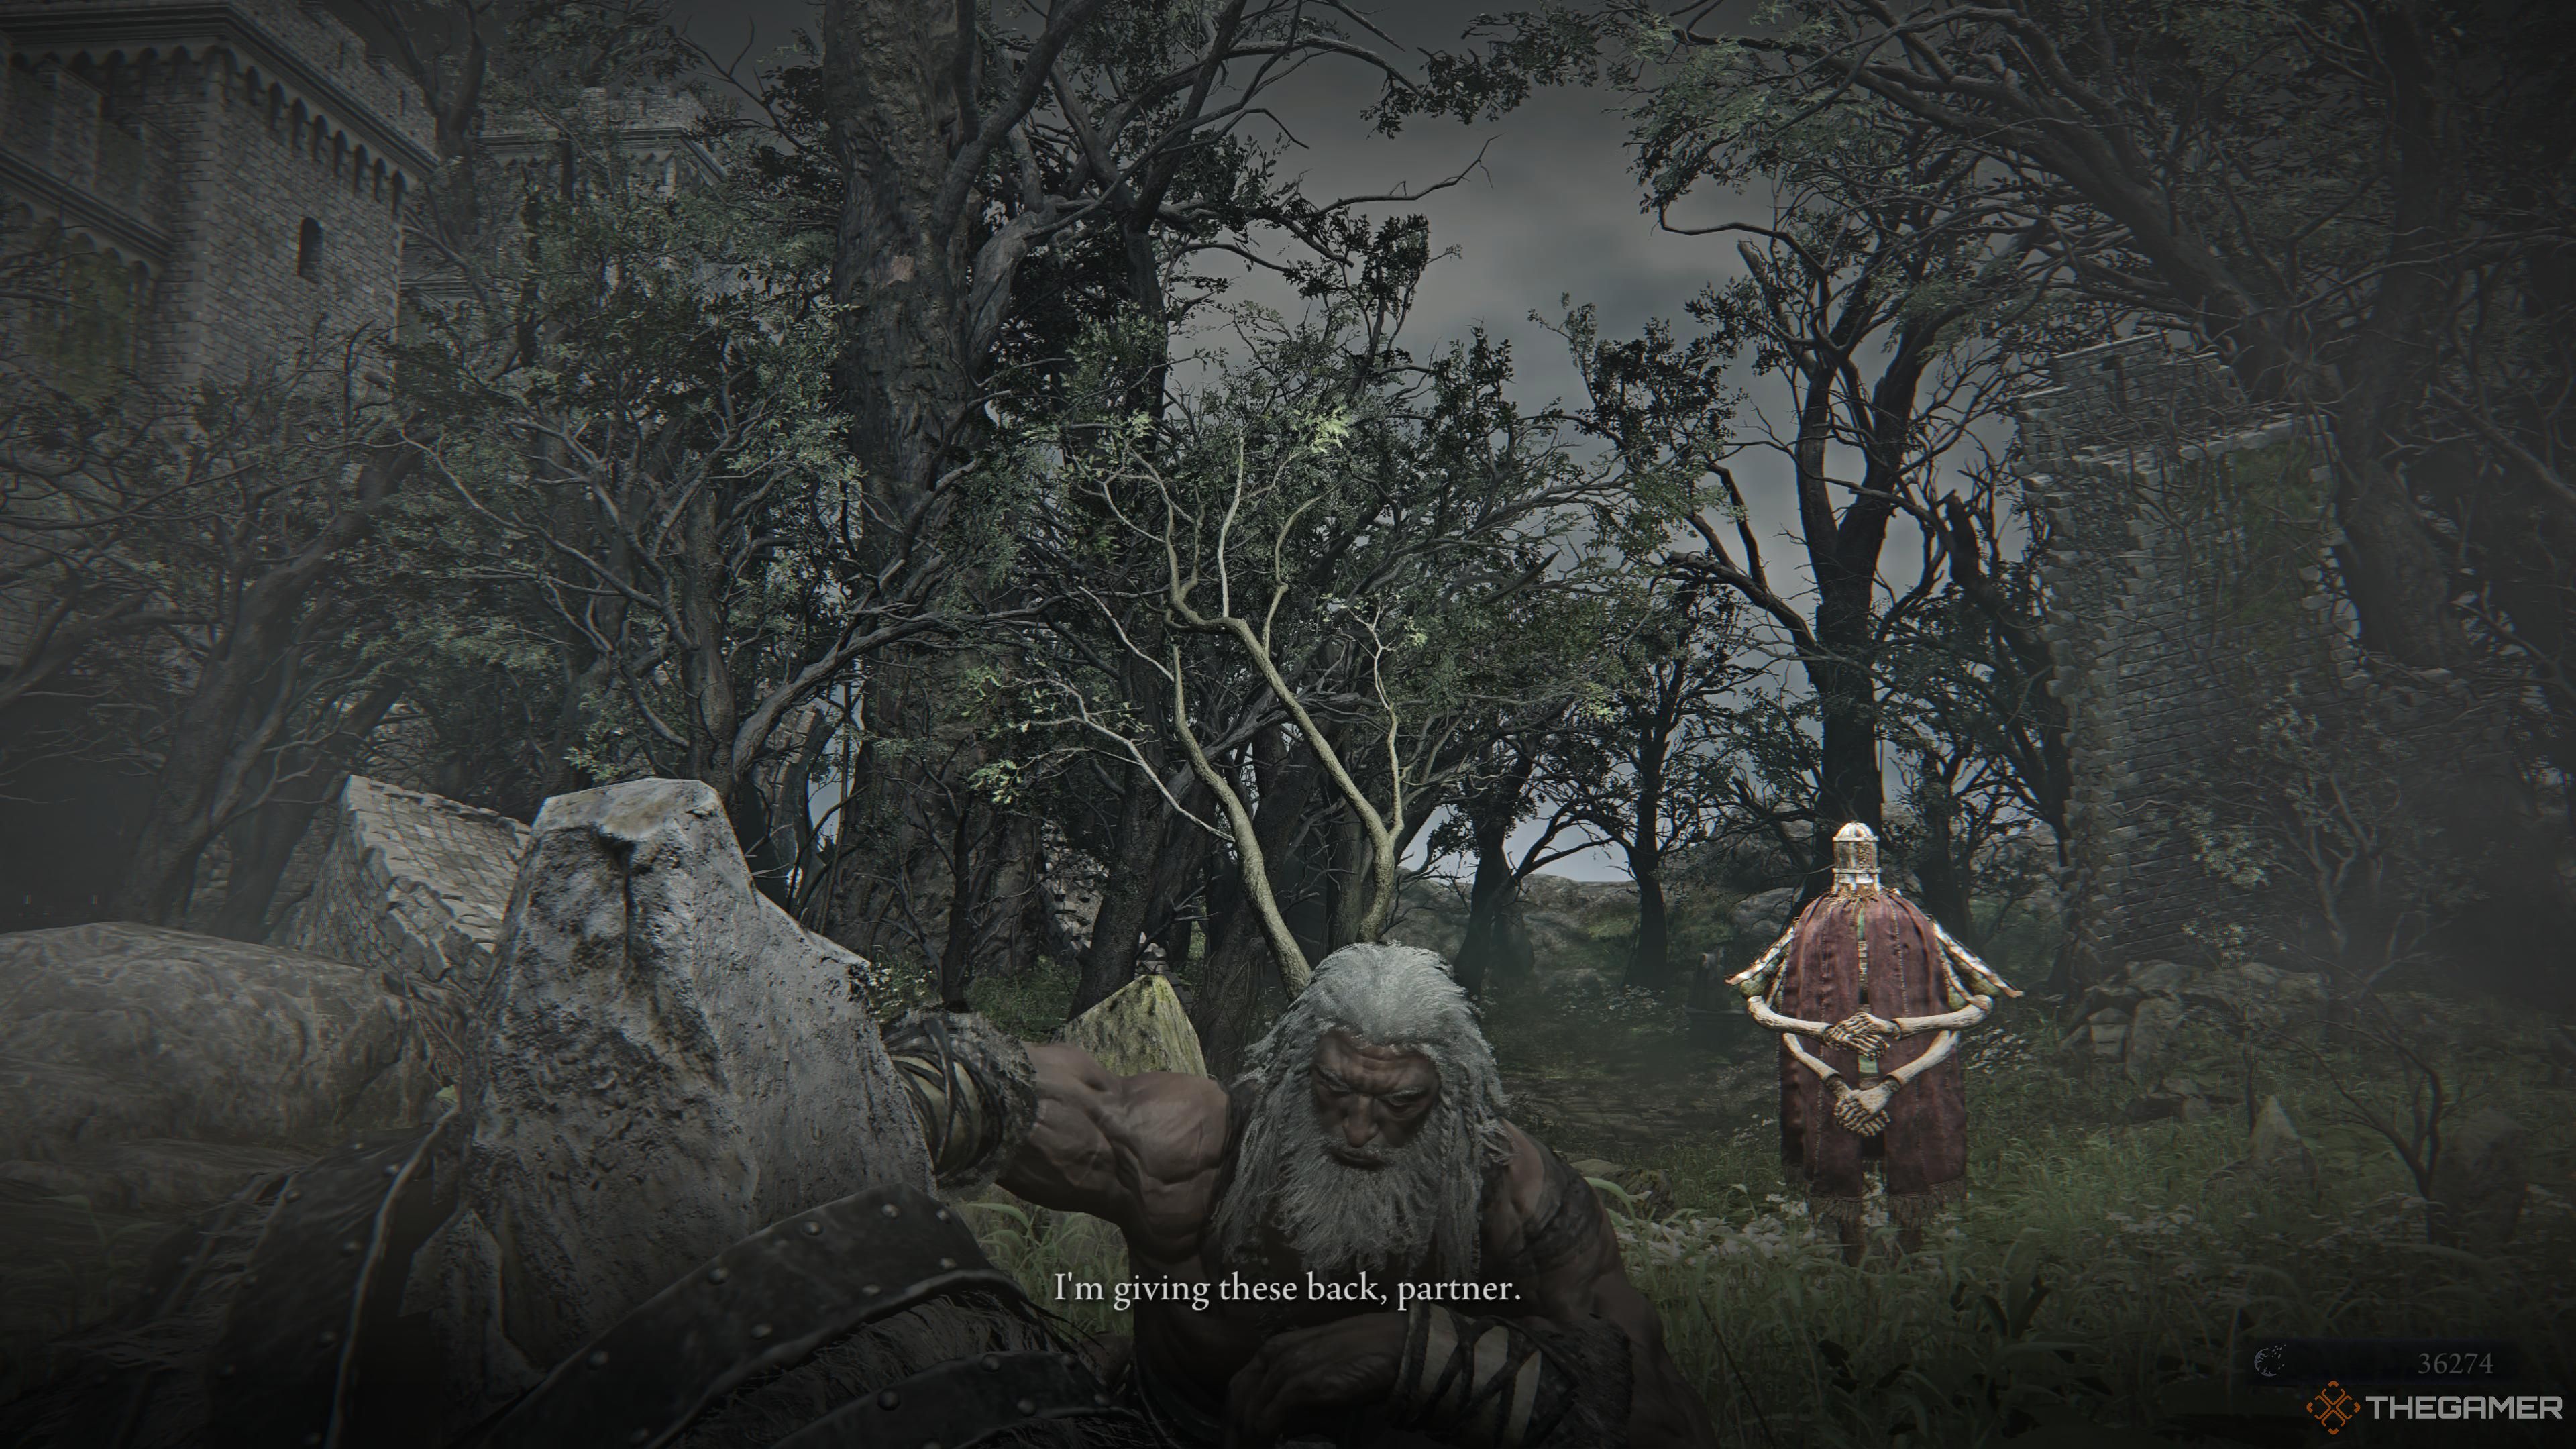
- Defeat the Gladiator to get the Torn Braided Cord.
- Give the Cord to the Menial, then you can end the Remembrance.
In simpler terms, the Gladiator is not too challenging an opponent, making it less complex to defeat. However, remember that your tactics from Relic Rites can be utilized in these single combat scenarios. Thus, construct a build that maximizes your strength in one-on-one conflicts.
Once the Commemoration concludes, you’ll receive the “Torn Braided Cord” as a sacred artifact, enhancing the already potent Character Skill of the Raider even further.
Remembrance #2
In the second instance of remembrance for the Raider, the adversary was noticeably stronger than before. The sequence of events unfolded as follows:
1. Initial confrontation with an extremely formidable foe.
2. A series of intense battles ensued.
3. Despite the opponent’s overwhelming power, the Raider stood resilient and fought valiantly.
4. The struggle continued until a decisive moment was reached.
5. Ultimately, the Raider managed to prevail against all odds, demonstrating their unwavering determination and skill.
- Talk to the Iron Menial.
- Touch the monument to enter the Coliseum.
- Defeat the Blinded Elder Lion.
- Talk to the Iron Menial.
As previously mentioned, to finish this Remembrance, you need to defeat the Elder Lion. Be aware that this Elder Lion is quicker and packs a stronger punch compared to the Gladiator, so proceed with caution. However, remember that they can be staggered by powerful two-handed strikes from your axe, so get close and attack relentlessly. Opt for frequent attacks over heavy ones to maintain speed.
Once completed, you will unlock a new Relic Rite for Raider with a new Chalice.
Remembrance #3
1. The final Remembrance for Raider is similar to the previous ones.
2. However, it stands out because of its increased difficulty level compared to the last two.
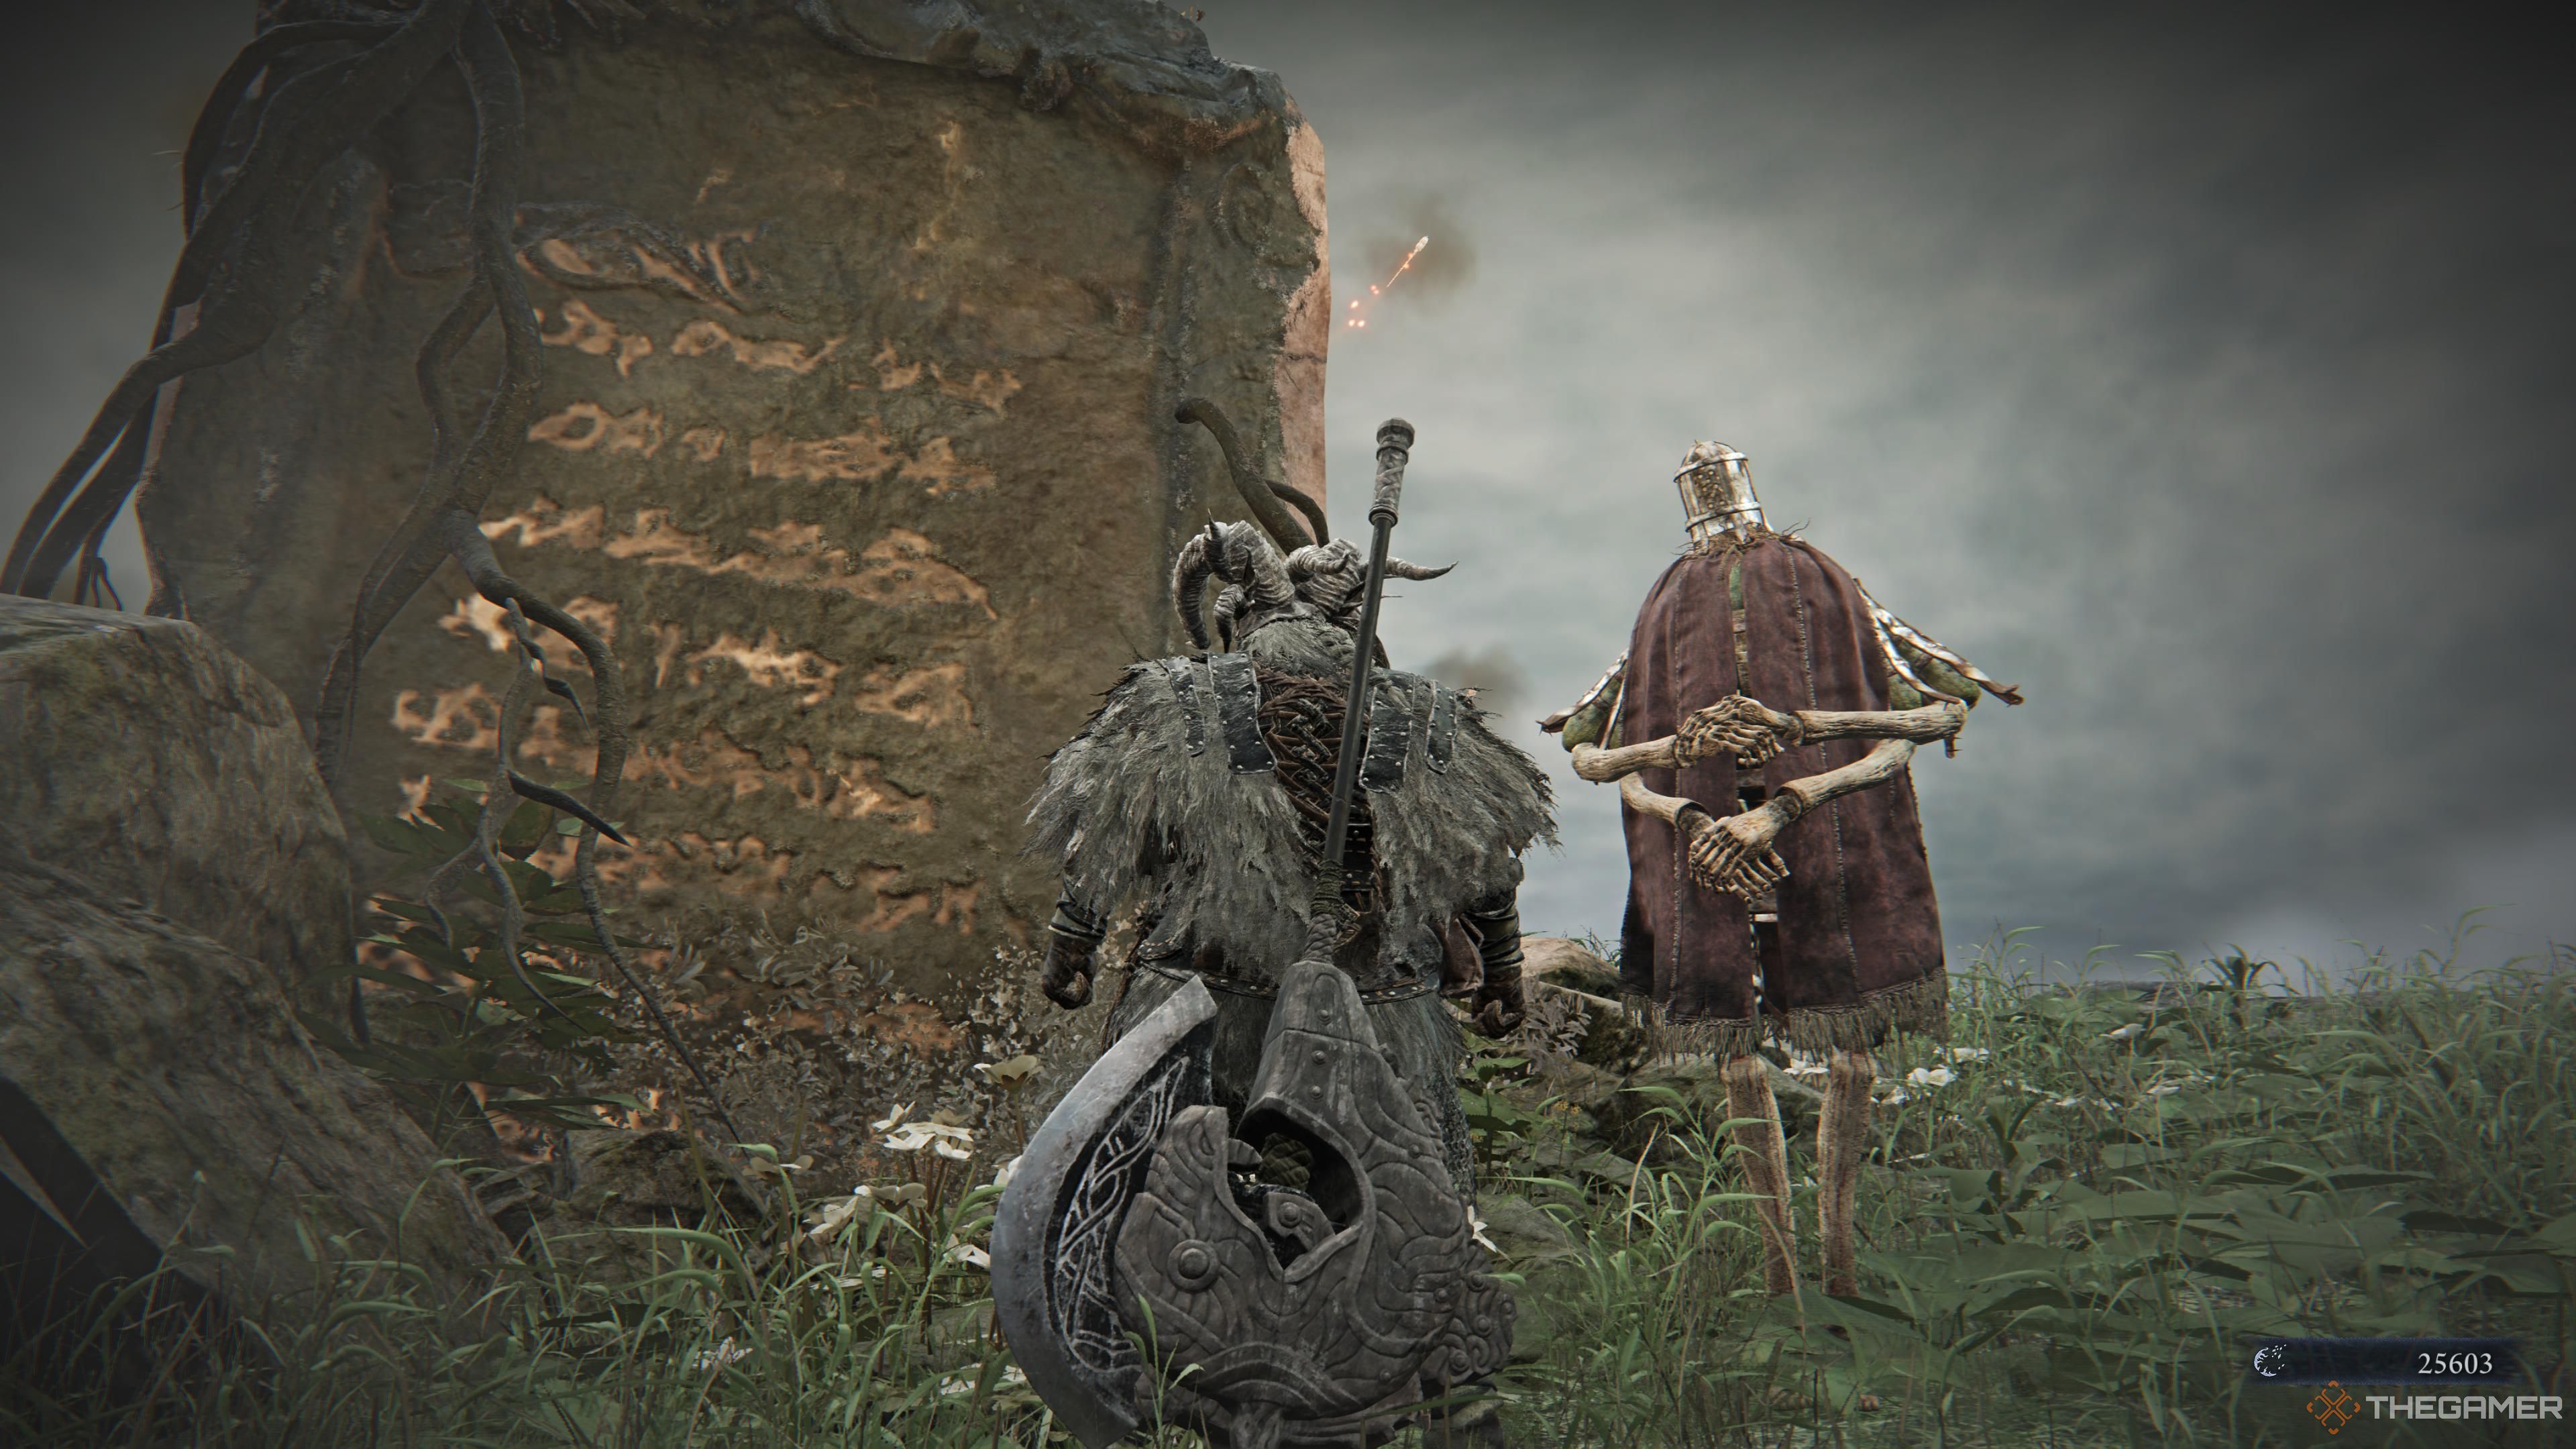
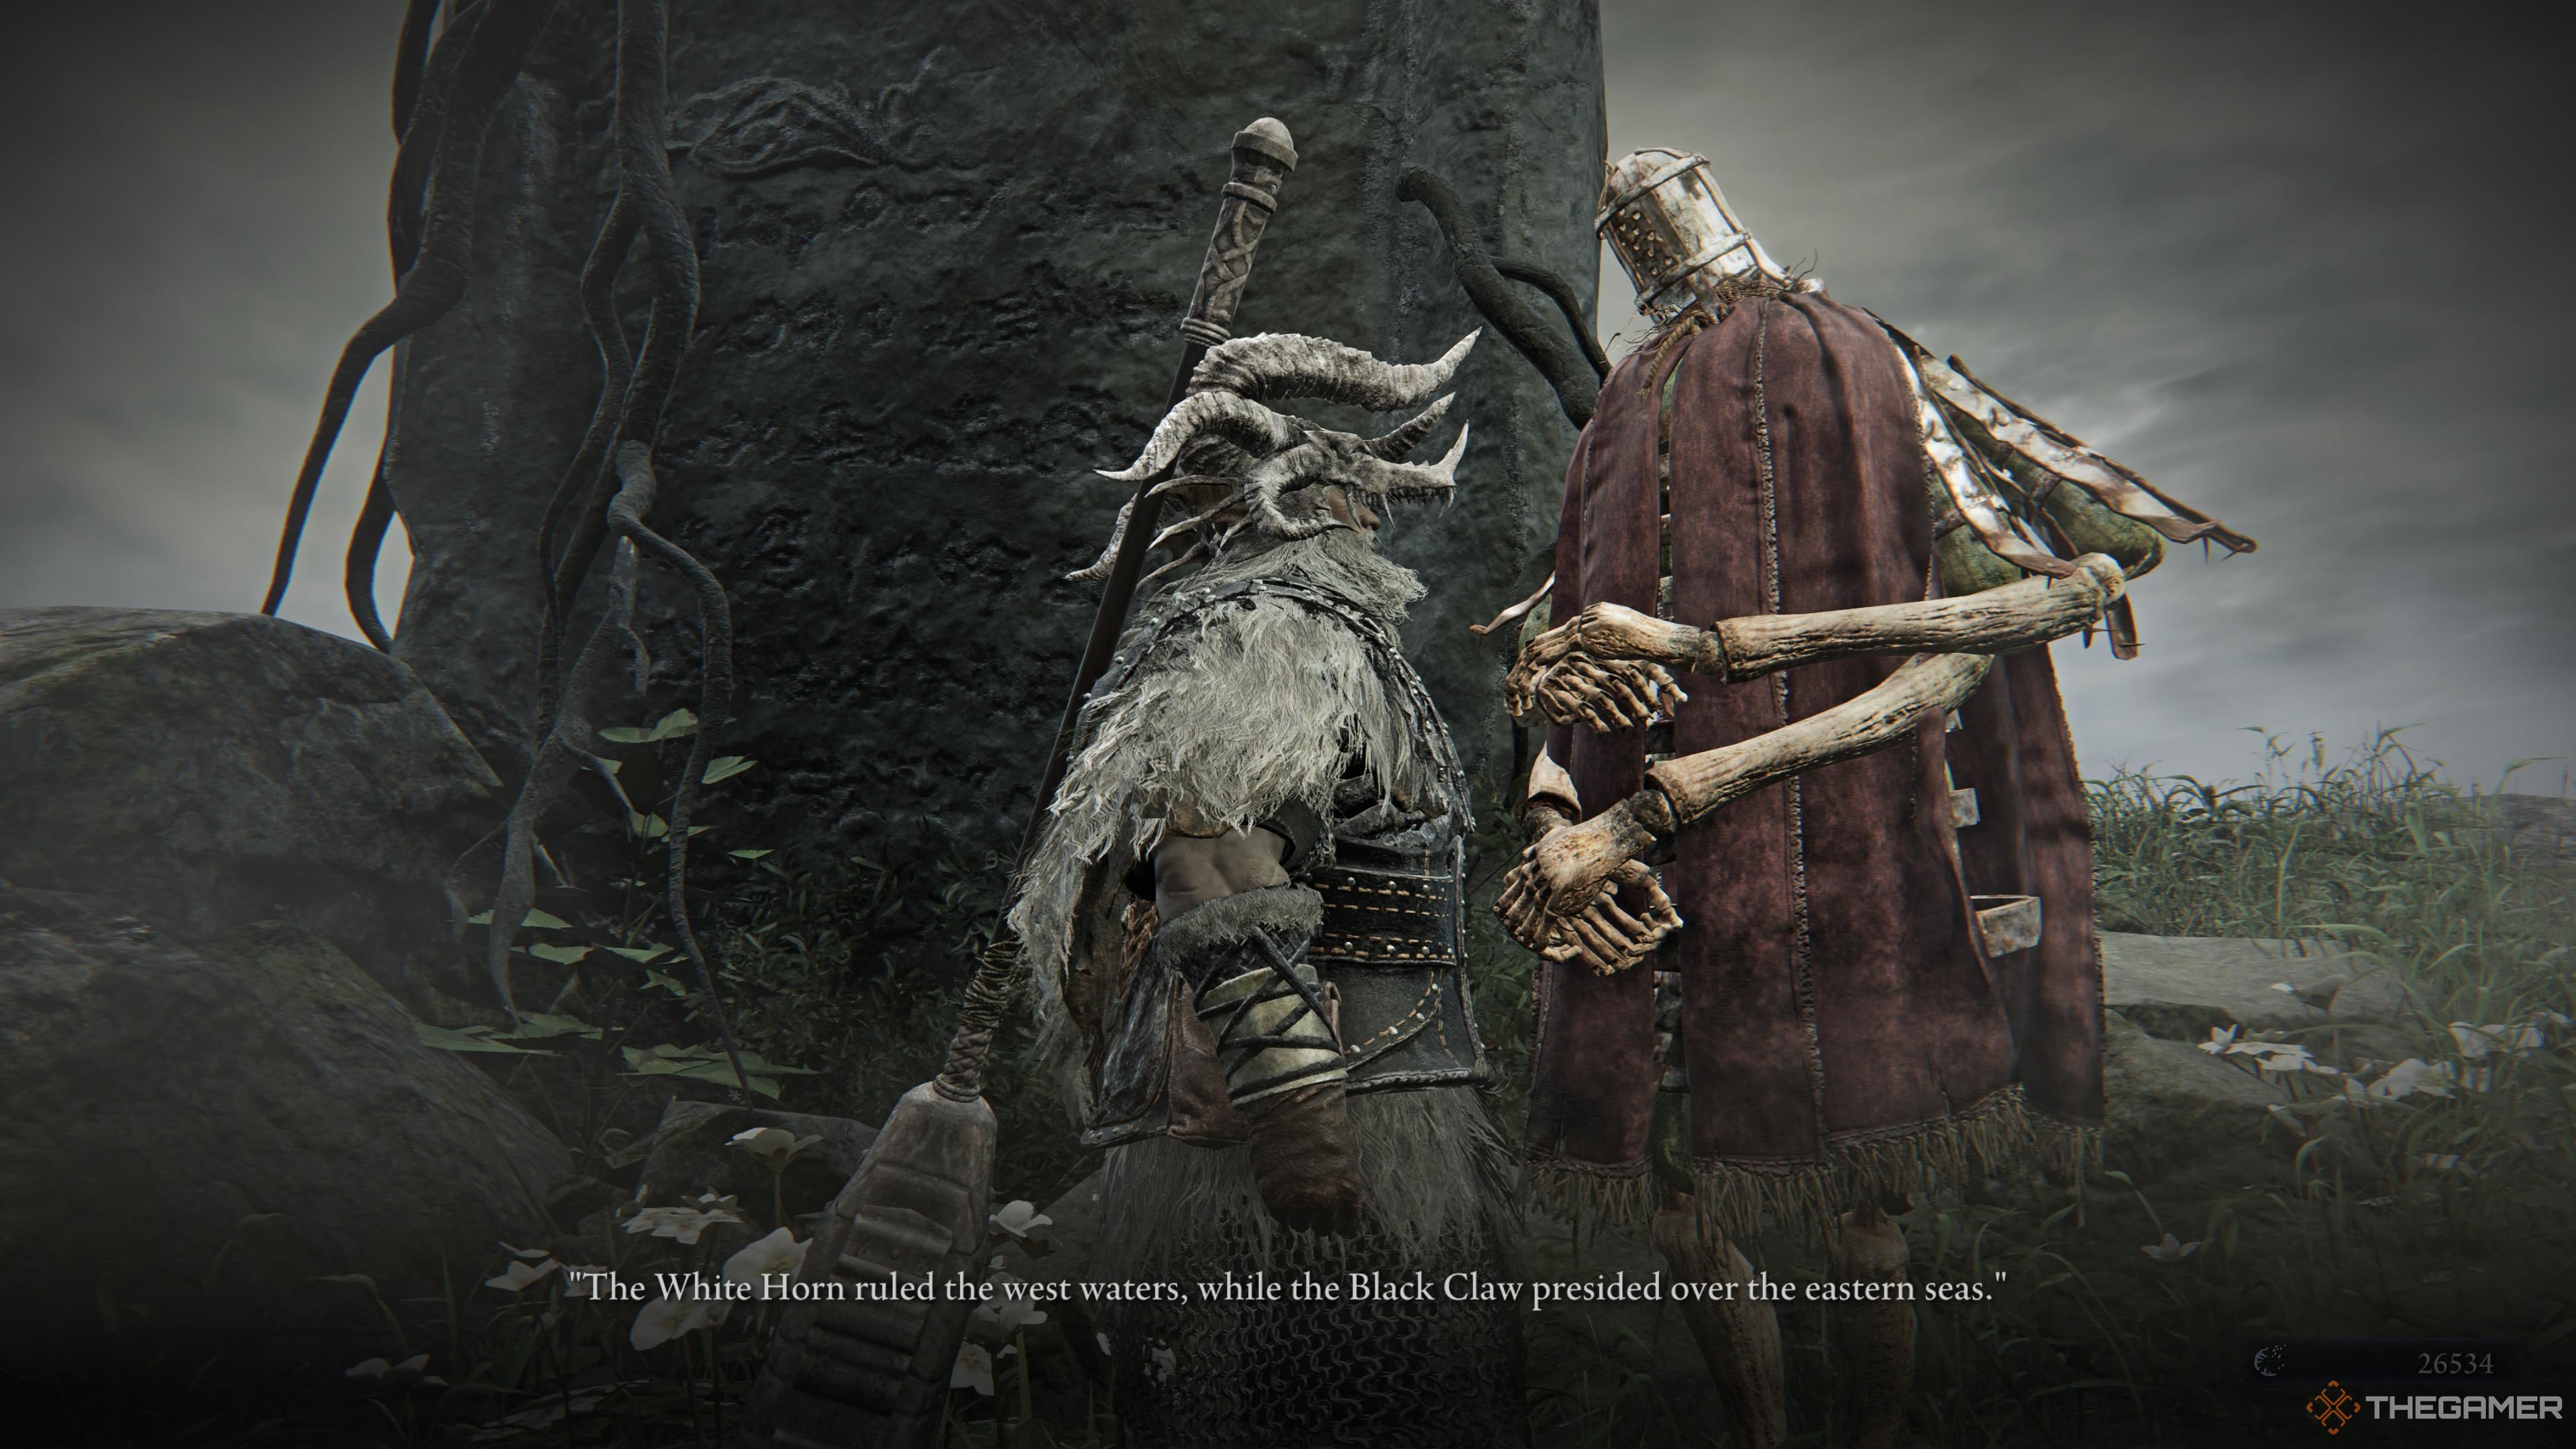
- Talk to the Menial, who states the monument is not active.
- Walk to the shore, where you will be transported to the coliseum.
- Defeat White Horn.
- Speak to the Iron Menial once again.
- Make an offering at the memorial.
In the initial round, the White Horn engages in combat similar to the Raider, but it equips a pair of colossal weapons instead. It shares all the same moves, including Character Skills. Both parties can be quickly stunned by each other’s attacks. Aggressive play is advised, aiming to deplete as much health as possible. Similar to the Elder Lion, prioritize quick regular attacks over heavy ones that take longer to execute.
Once their health drops roughly halfway, they will metamorphose into an Ulcerated Tree Spirit. At this stage, it would be wise to activate your Totem Stela for added attack and defense power-ups. During this phase, the attacks become more intense but are generally easier to handle. Instead of trying to withstand their blows head-on, focus on dodging and staying close. With persistence, you’ll chip away at their strength and eventually claim victory.
To acquire this item, you’ll be granted the Raider’s Remembrance attire, along with a distinctive artifact known as the “Black Claw Pendant”. This pendant has a special ability: it restores health to anyone who defeats an adversary in close proximity to the Totem Stela.
Finishing all of a character’s Memories will also grant you access to a special, prolonged finale once you’ve defeated the last boss with them.
Read More
- Mech Vs Aliens codes – Currently active promos (June 2025)
- Gold Rate Forecast
- Honor of Kings returns for the 2025 Esports World Cup with a whopping $3 million prize pool
- Every Upcoming Zac Efron Movie And TV Show
- Grimguard Tactics tier list – Ranking the main classes
- Silver Rate Forecast
- Hero Tale best builds – One for melee, one for ranged characters
- Kanye “Ye” West Struggles Through Chaotic, Rain-Soaked Shanghai Concert
- EUR USD PREDICTION
- Gods & Demons codes (January 2025)
2025-05-30 14:37