As a seasoned adventurer with countless tales of daring escapades under my belt, I must say that the labyrinthine puzzle of the Sacred Wounds in the Vatican Underworld was one of the most intriguing challenges I’ve ever encountered! It’s a testament to the ingenuity of those who designed it, and I can only imagine the countless hours spent on its conception.
As an enthusiast, I can’t help but share my excitement about immersing myself into the intellectual challenge that is the mystery hidden beneath the Vatican in Indiana Jones and the Great Circle. It ignites both my brain cells and my spirit of exploration!
If you’re finding it hard to progress with the Sacred Wounds Puzzle, this walkthrough provides a detailed, sequential explanation to help you continue your exciting journey.
How To Solve the Sacred Wounds Puzzle
You’ll need a bottle of sacramental wine before you can access the Sacred Wounds Puzzle.

Once you gather and deliver four pictures of the Mysterious Inscriptions found throughout the Vatican, Father Antonio will pass something on to you.
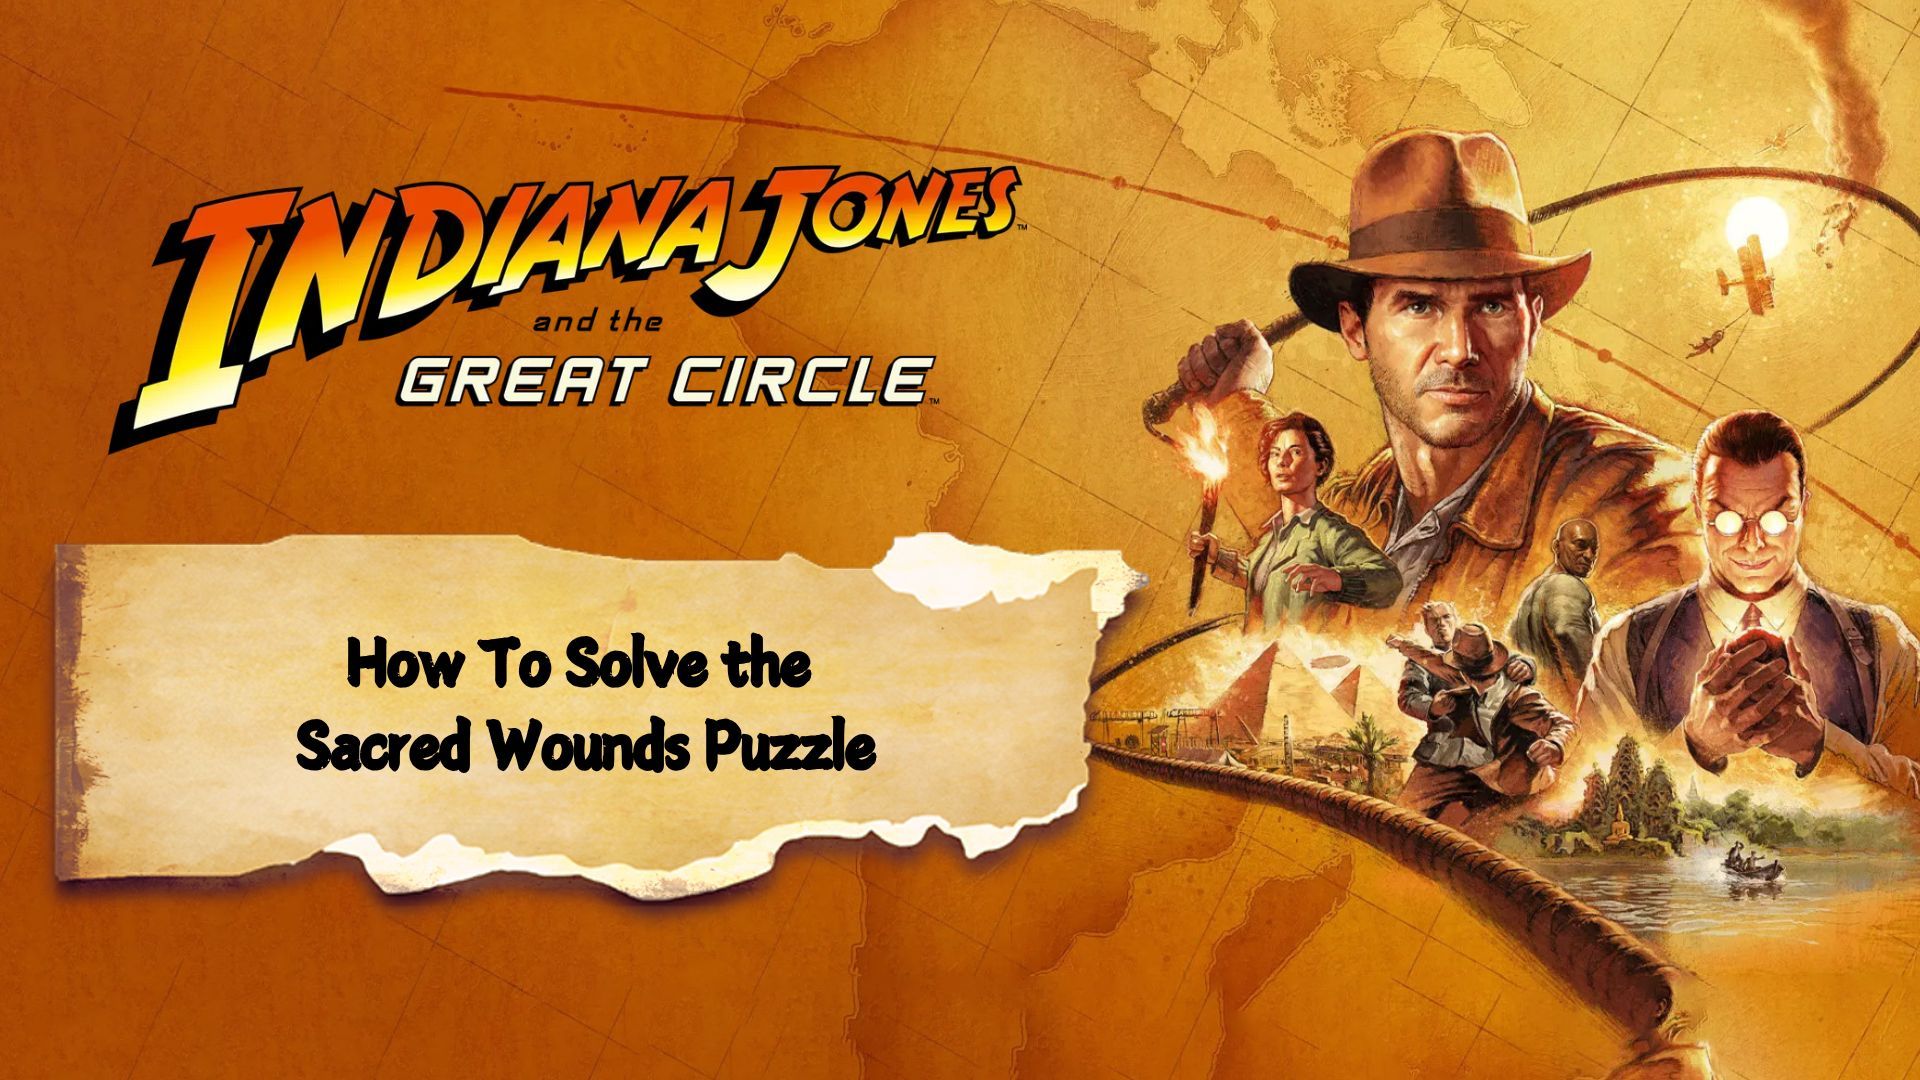
In this task, you’ll find inscriptions related to the “Stolen Cat Mummy” quest. Your goal is to photograph these inscriptions using your camera and later hand them over to Antonio’s library.
Place the pictures on his table, followed by examining them closely using a magnifying glass, focusing particularly on the golden parts, and deciphering the written content.
After finishing this task, Antonio will hand over the wine, which helps with the puzzle.
Go ahead, grab the wine, then make your way towards Nicholas the Fifth’s Tower, which stands close by the Vatican Post Office.
However, watch out for the guards at the entrance, as they can spot your disguise.
Step inside and have a look at the western chamber, which features an altar adorned by a wall painting depicting St. George battling a dragon.
Snap a picture of the mural, then pour the wine into the basin under it.
Interact with the mural and rotate it until St. George appears above the dragon.
This will open the Underworld Gate and show a secret staircase going down.
It’s pitch black ahead, so light a torch or candle at the altar before you enter the Underworld.
Move down the worn-out stairs, lighting torches and braziers to light your way.
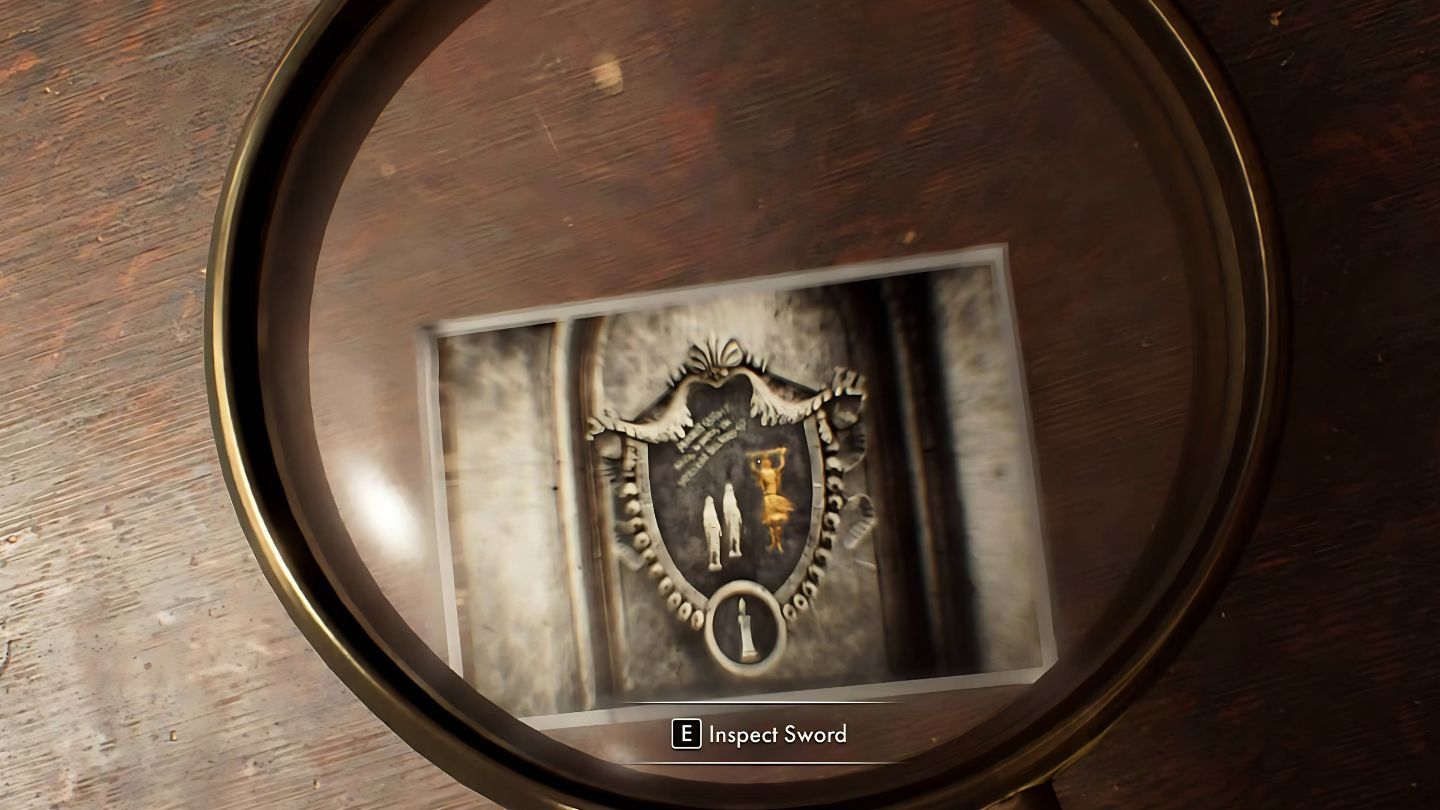
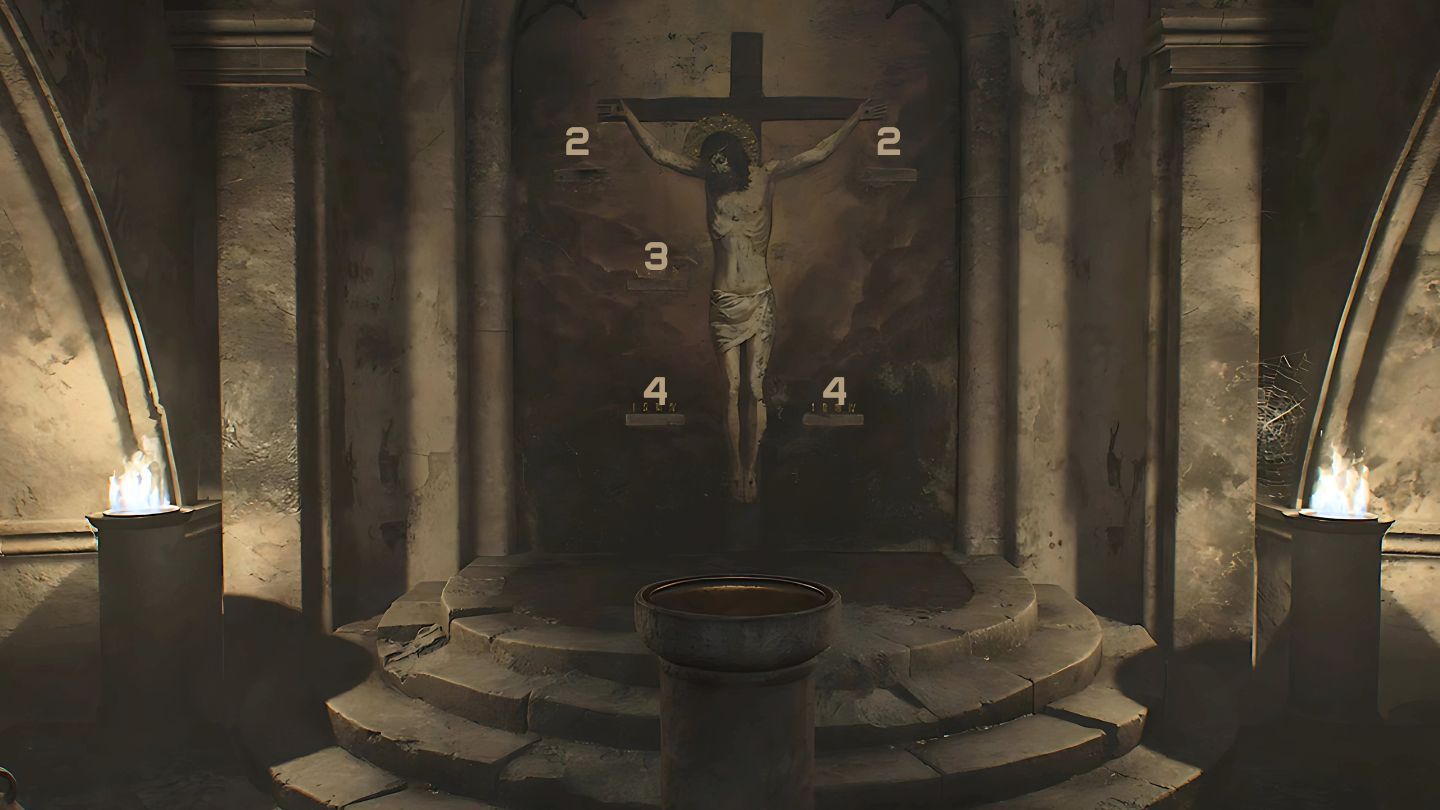
Continue straight ahead until you find a large room featuring a mural depicting Jesus on the cross, often referred to as the “Sacred Wounds” mural.
This mural is the main part of the puzzle, with five levers that stand for the crucifixion wounds.
To find the solution for the puzzle, you’ll have to locate five additional murals hidden within the main room and adjacent spaces.
Each mural depicts a different wound of Jesus, and filling wine into the basins positioned in front will reveal Roman numerals.
These digits tell you where to place the levers on the central mural. Here’s where to find them:
Left Hand (Holy Chalice)
To the main mural’s left is a smaller depiction of Jesus holding a chalice.
Move the bust blocking the basin, pour some wine in, and check the number that appears: “2.“
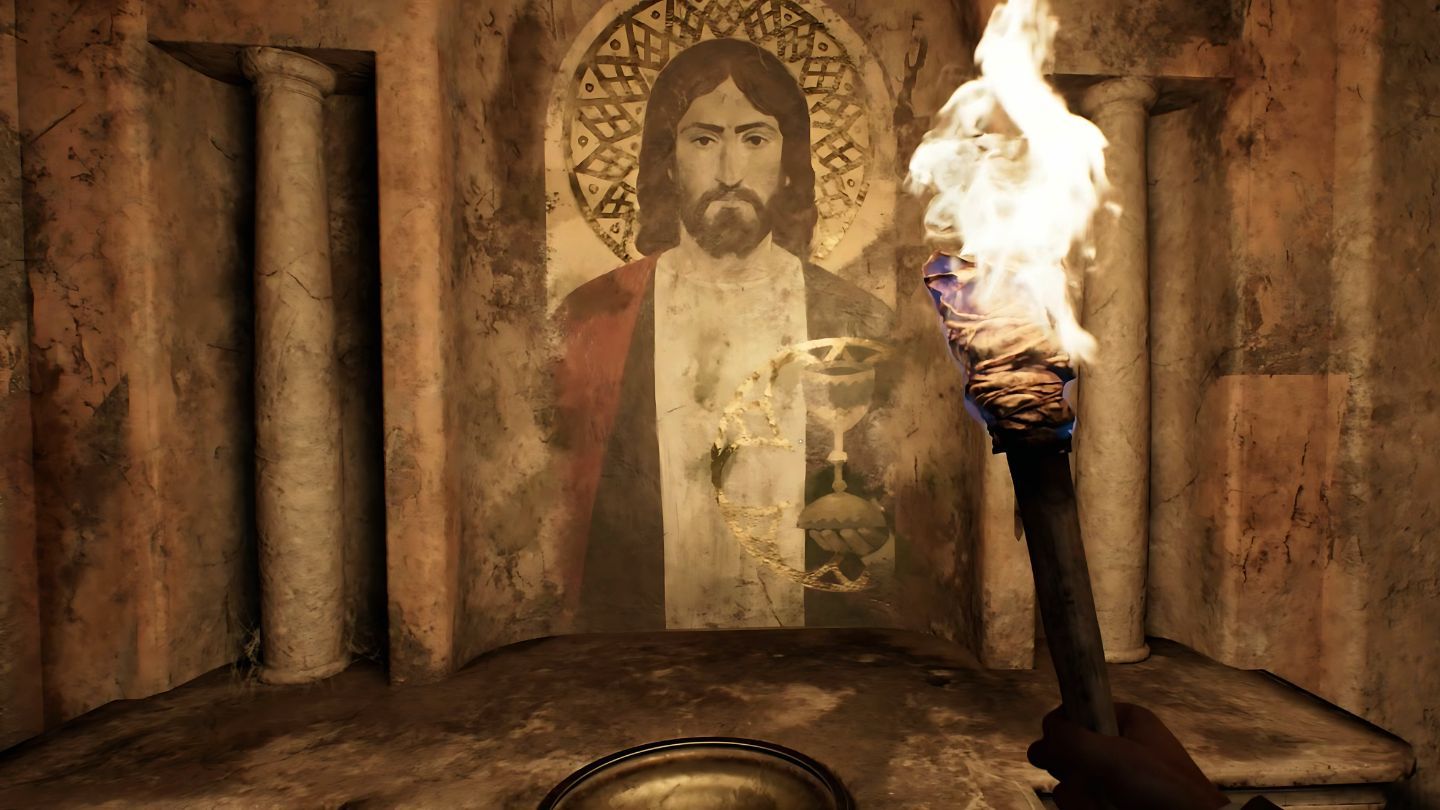
Right Hand (Body of Christ)
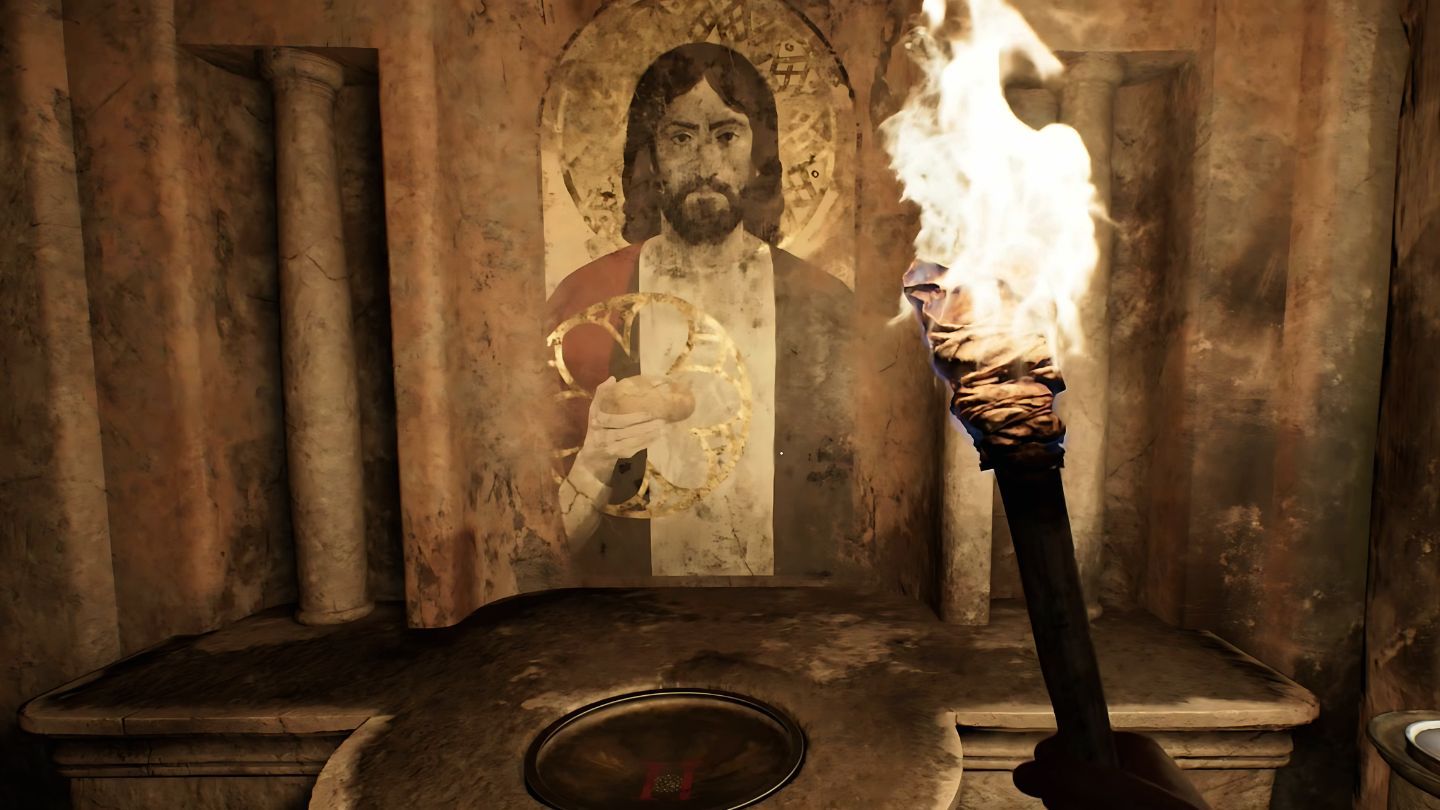
Enter a fenced chamber on your left, where you’ll find a beautiful mural depicting Jesus with bread. Pour some liquid into the basin to reveal the number “2.“.
The gate behind you will shut, but you can head down a different path to the next mural.
Torso (Spear of Longinus)
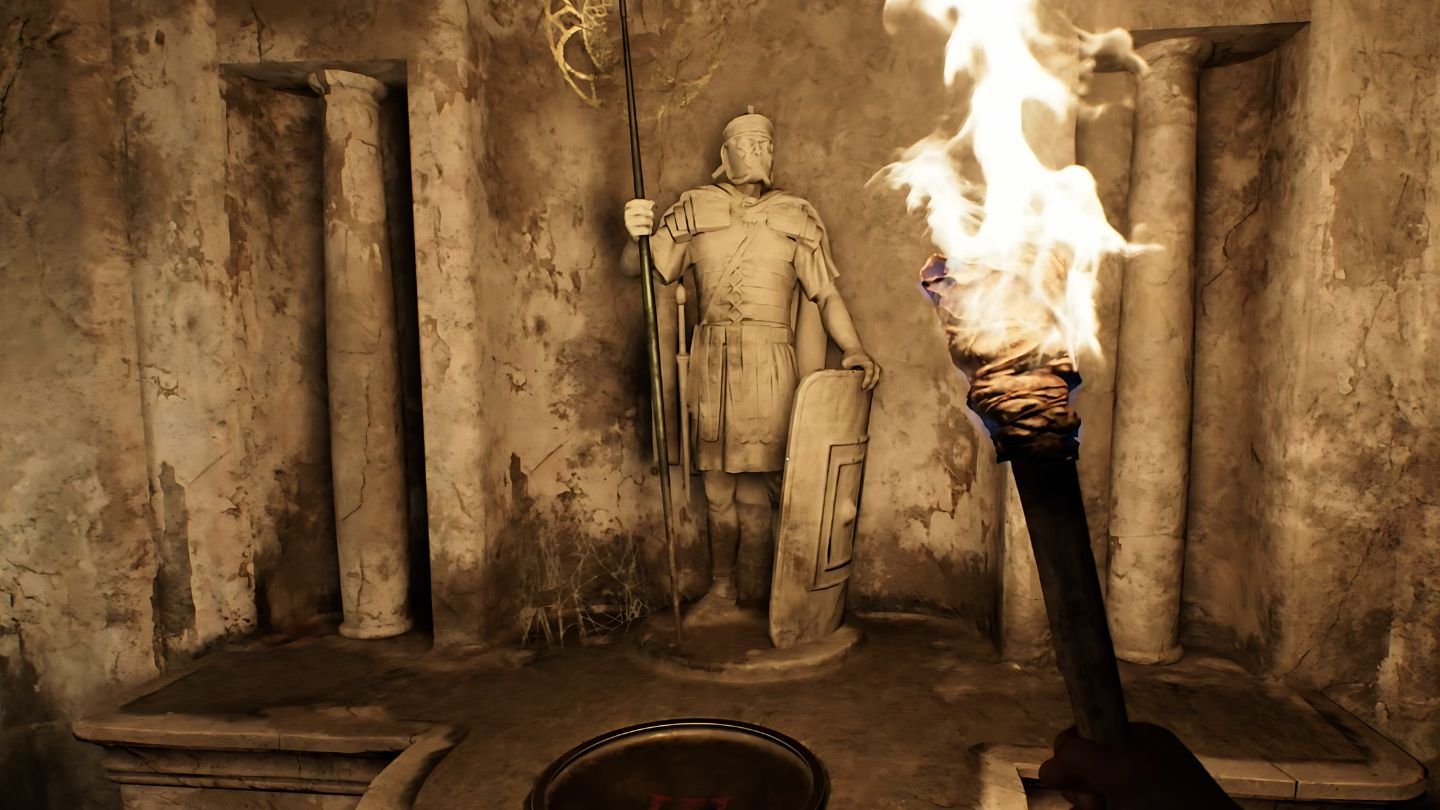
The room next door has a statue of Longinus with the spear that pierced Jesus’ side. Pour wine into the basin to reveal the numeral “3.”
Use a candlestick or iron rod to break through the tattered wall and return to the main chamber.
Right Foot (Walking on Water)

On the right part of the significant painting, there’s a depiction of Jesus walking on water. Fill a container placed before it with wine to uncover the number “3”.
Left Foot (Anointment of Jesus)
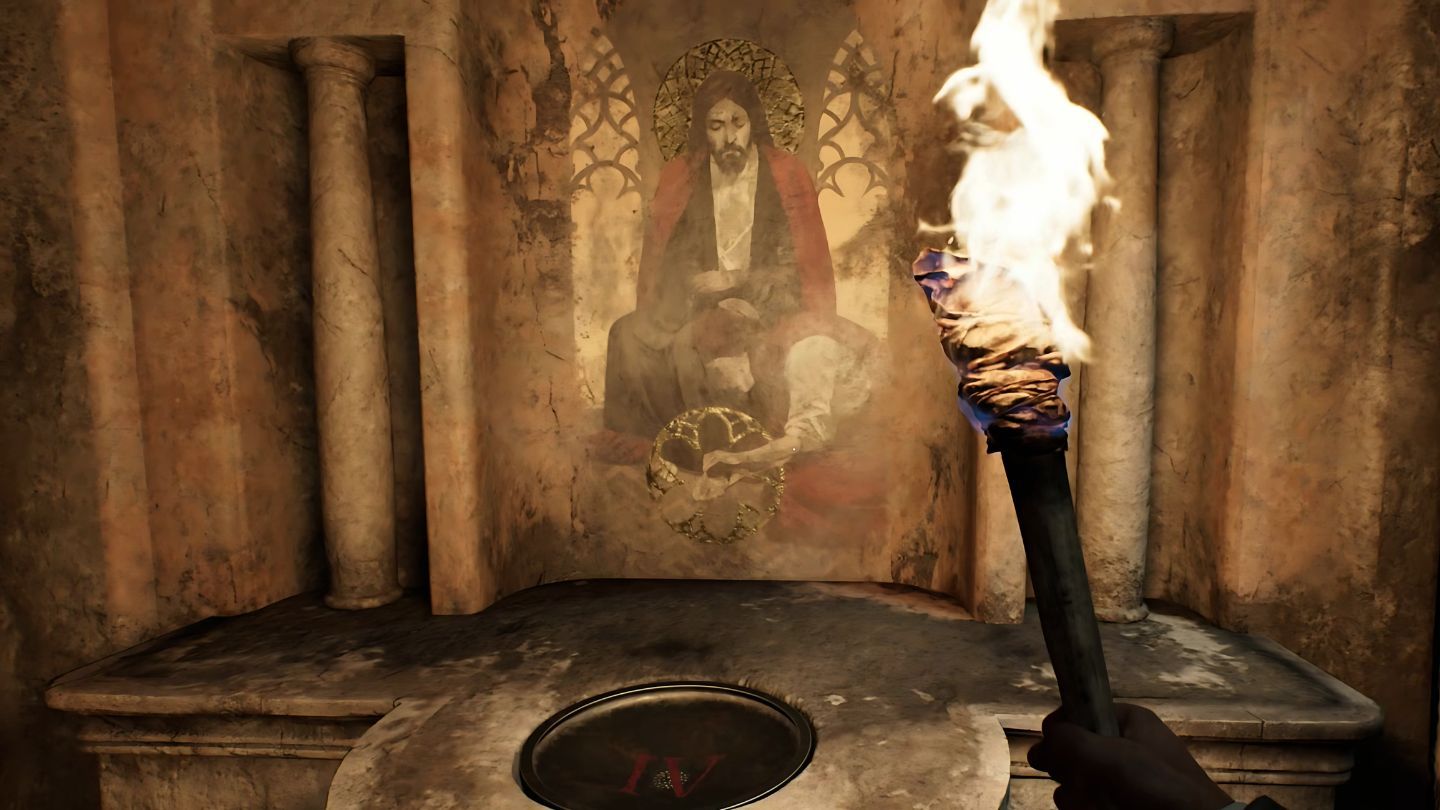
To reach the last mural, slip through a gap in the wall on the far right side of the room.
This mural depicts Mary anointing Jesus’ left foot. Fill the basin with wine to reveal the numeral “4.”
Use the nearby chain to unlock the gate and return to the main chamber.
Alright, let’s rewind and head back to that Sacred Wounds mural again. This time, I’ll adjust the levers according to the Roman numerals etched on each section of the mural. Let’s see if it triggers something magical this time!
Looking at it from the viewer’s angle, the correct positions are:
- Left Hand: II
- Right Hand: II
- Torso: III
- Right Foot: III
- Left Foot: IV
Set each lever to its number to align with the correct wounds.
When the levers are set up correctly, the mural will spin, opening a secret passage behind it.
This route gets you further into the Underworld, where more surprises and hurdles appear.
The tomb of the warrior giant and a stack of Vatican relics are in there, too.
Did you encounter any tricky guards or challenges while solving the puzzle?
Read More
- Silver Rate Forecast
- Gold Rate Forecast
- Gods & Demons codes (January 2025)
- Mech Vs Aliens codes – Currently active promos (June 2025)
- Honor of Kings returns for the 2025 Esports World Cup with a whopping $3 million prize pool
- Superman: DCU Movie Has Already Broken 3 Box Office Records
- Grimguard Tactics tier list – Ranking the main classes
- Former SNL Star Reveals Surprising Comeback After 24 Years
- USD CNY PREDICTION
- Kanye “Ye” West Struggles Through Chaotic, Rain-Soaked Shanghai Concert
2024-12-10 00:14