
Fans of the Fashion Editor in My Talking Angela 2 are going to love the brand-new Hair Salon.
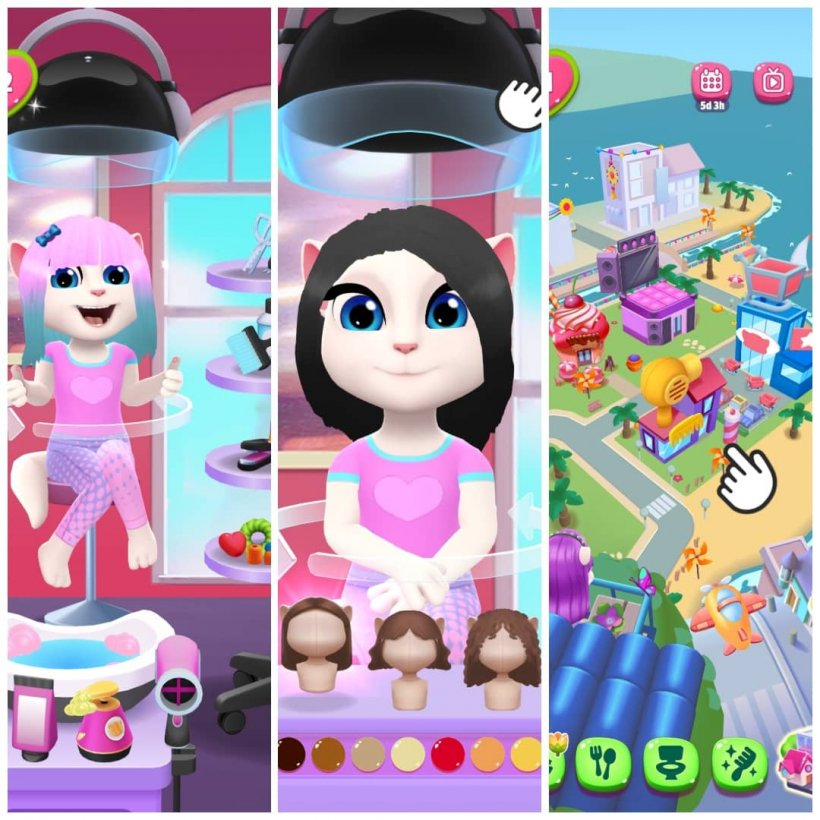
Earlier, you could only select among given hairstyles for Talking Angela. However, things are about to get more exciting! Now, not only can you customize her hairdo, but also wash, dry, cut it, color it, and even add accessories – all according to your creative whim!
So, here’s a step-by-step guide to every feature of My Talking Angela 2’s Hair Salon.
Note: In some territories, the feature may be subject to a purchase.
1 Get Talking Angela booked in for her appointment
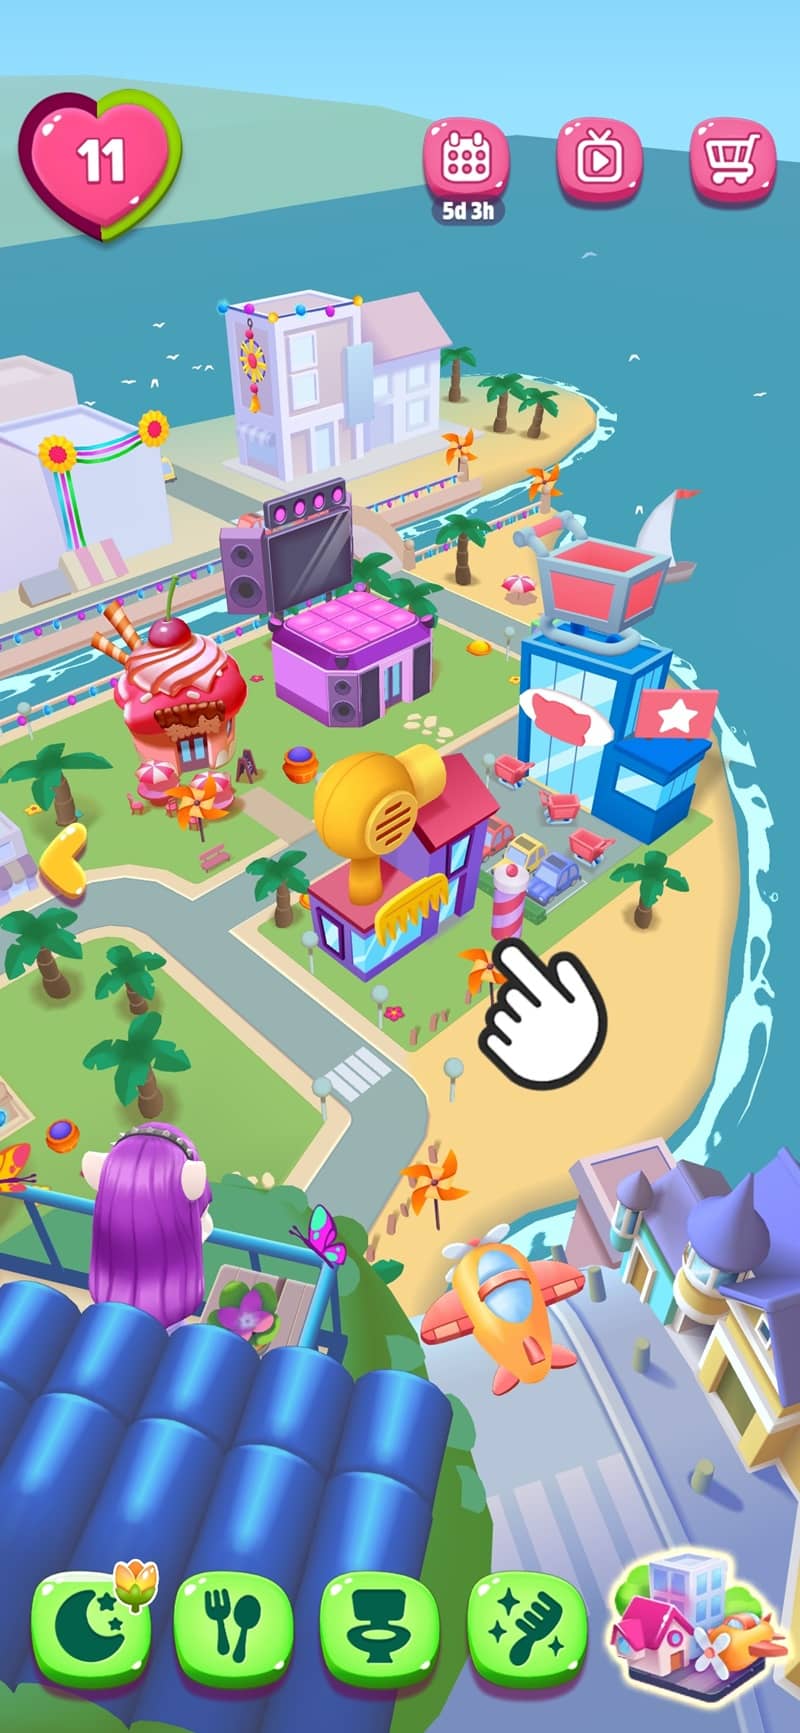
To reach the Hair Salon, simply tap the box of hair items found beside Talking Angela’s feet in her bedroom. This box has an image of a comb on it, and once you open it, you’ll discover a hairdryer and brush inside.
If the box isn’t there, move to the balcony, gaze over the city by tapping or swiping the arrow located on the right side of your screen. You’ll easily spot it – it’s the building with a barber pole in front and a large blow dryer atop. Just tap to enter.
Angela’s beauty spot offers another choice. To access it, click the hairbrush symbol, then select the styrofoam head model. Finally, tap the box of hairstyling tools visible near the mirror, and you’re good to go!
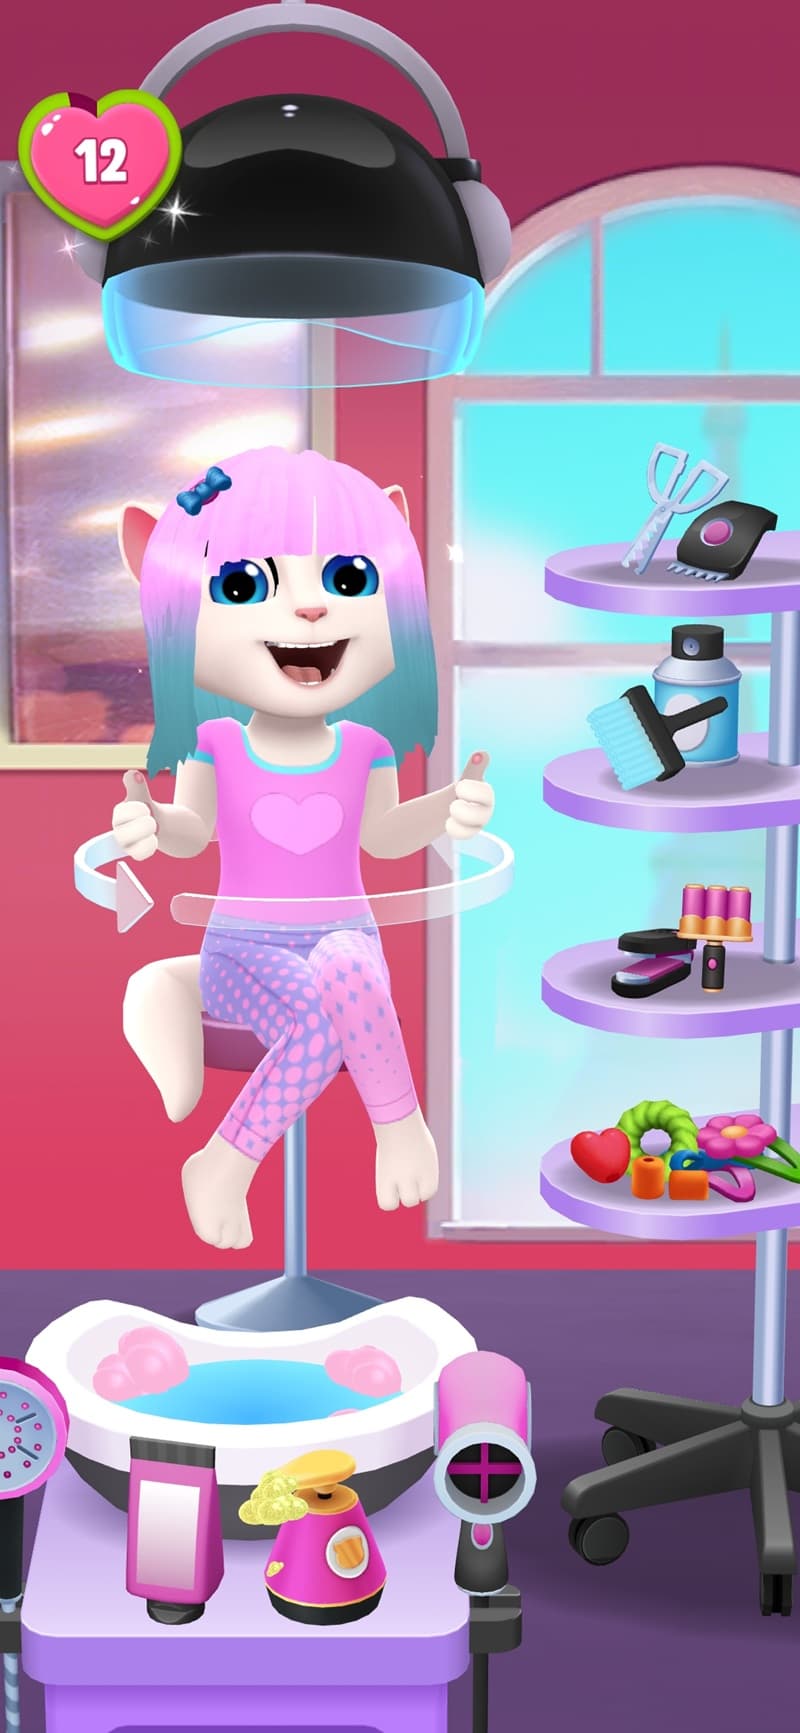
2 Choose a Base Style and Colour
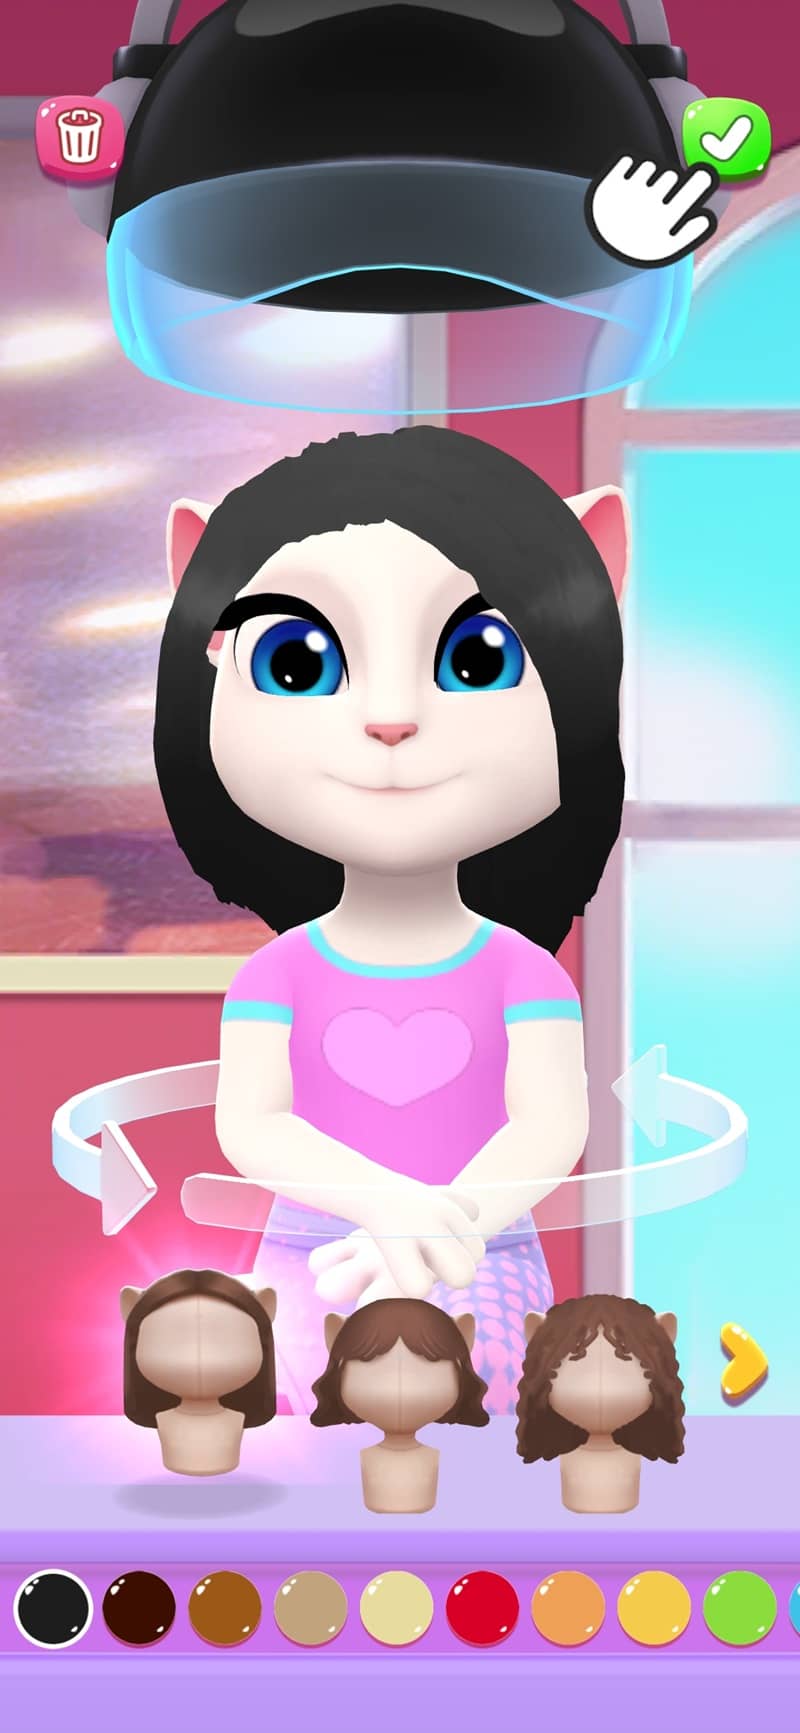
After Angela is prepared for her transformation, it’s time to select a new hair style and color. You can browse through these options either by swiping or using the navigation arrows. If you want a comprehensive look at your selection, simply move your finger left and right around the looping arrow near Angela; this will rotate her chair, allowing you to view her from all angles.
As I embark on this exciting journey of reinventing my style, I understand the importance of starting with a solid base. Rest assured, even if it seems simple at first, there’s an abundance of creative resources at my disposal to bring my vision to life.
3 Wash and Blow Dry

Just as you’d prepare for a professional haircut at a salon, it’s most effective to wash and dry your hair before trimming or styling. Guide Angela into position over the sink by tapping on it. Once there, press to activate the shower head and gently move your finger through her hair to wet it. Applying shampoo and conditioner is just as simple; move your finger again over her hair to distribute them evenly.
Once you’ve soaped up, rinsed off, and given your screen a quick tap on the green checkmark in the upper right-hand corner (indicating readiness), it’s time to start haircutting!
4 Cut, Shape, and Style
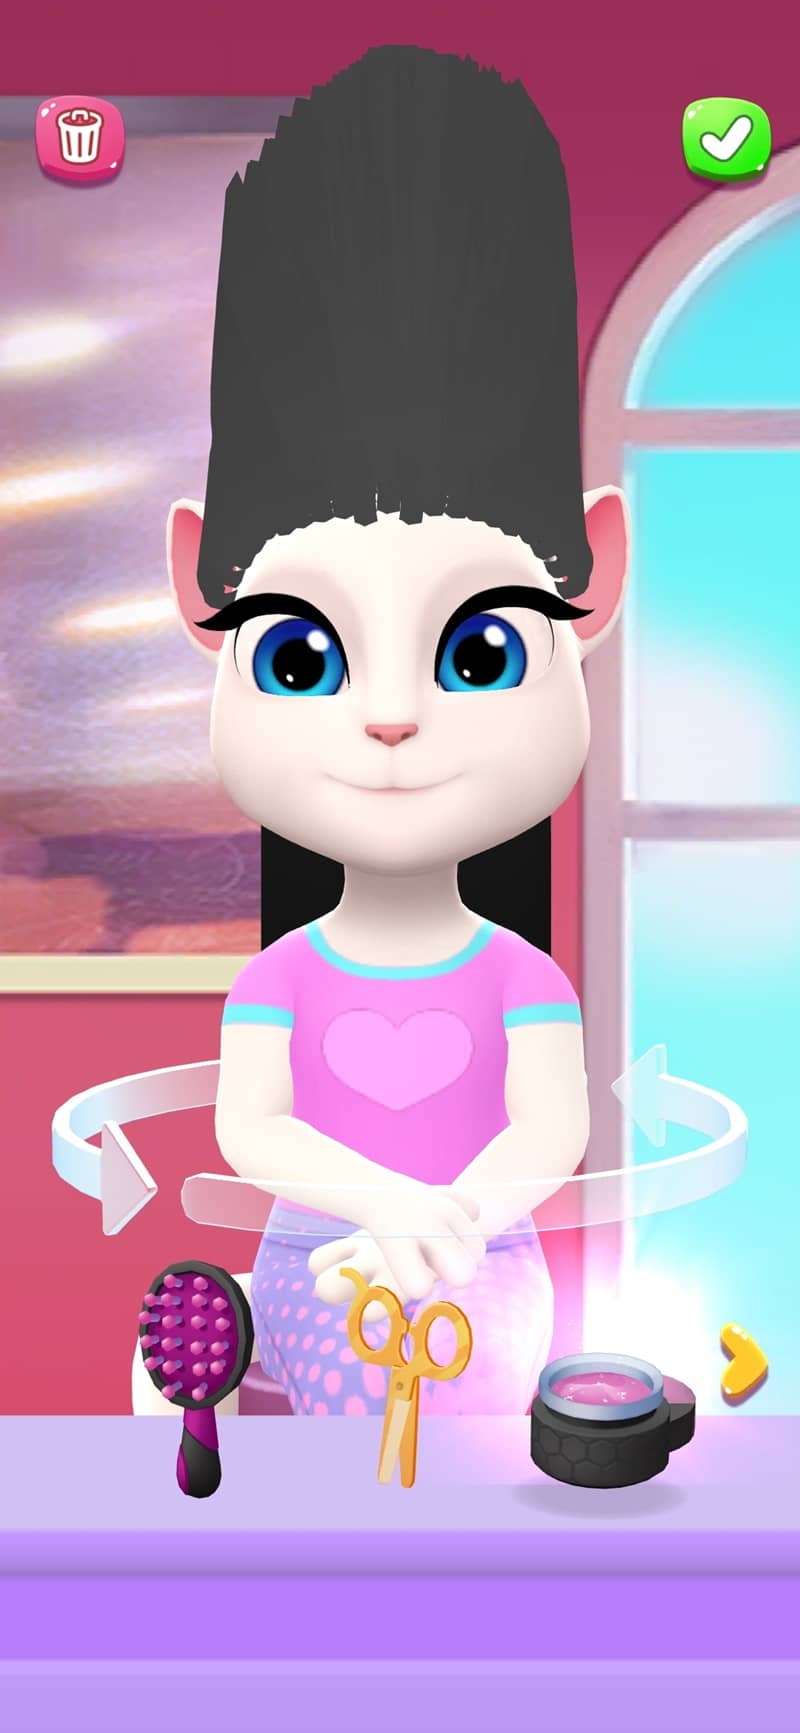
Near Angela, there’s a cart stocked with scissors and clippers. Just give them a gentle tap to begin using them.
At your convenience, there’s a hairbrush available for you to style Angela’s hair as desired. Additionally, this brush can help in gently removing any styling gel that has been applied.
Or simpler:
You have a handy hairbrush to style Angela’s hair and remove any applied styling gel if needed.
Next up are the Gold Scissors: these will cut in sharp, straight, precise lines.
Additionally, there’s the product called Styling Gel. This item offers a firm grip, allowing for greater management of Angela’s hair styling, enabling you to achieve the desired shape and flow.
After that, it’s time for the Clippers: they work much like golden scissors, but are used specifically on the ends of the hair. If you desire Angela’s hair to be shorter or even removed altogether, apply these clippers near the root area.
If you trim Angela’s hair a bit too much with the clippers, don’t worry! There’s always the Hair Potion, a handy tool for those who prefer Angela’s hair to be longer. To use it, simply select the potion and keep your finger on Angela’s hair to let it grow.
The Comb works the same way as the brush, but offers more precision i.e. it moves one strand at a time.
At the top, you’ll find the “Silver Scissors,” ideal for adding texture. They will help create softer, more authentic hair lines for her.
5 Add Some Color
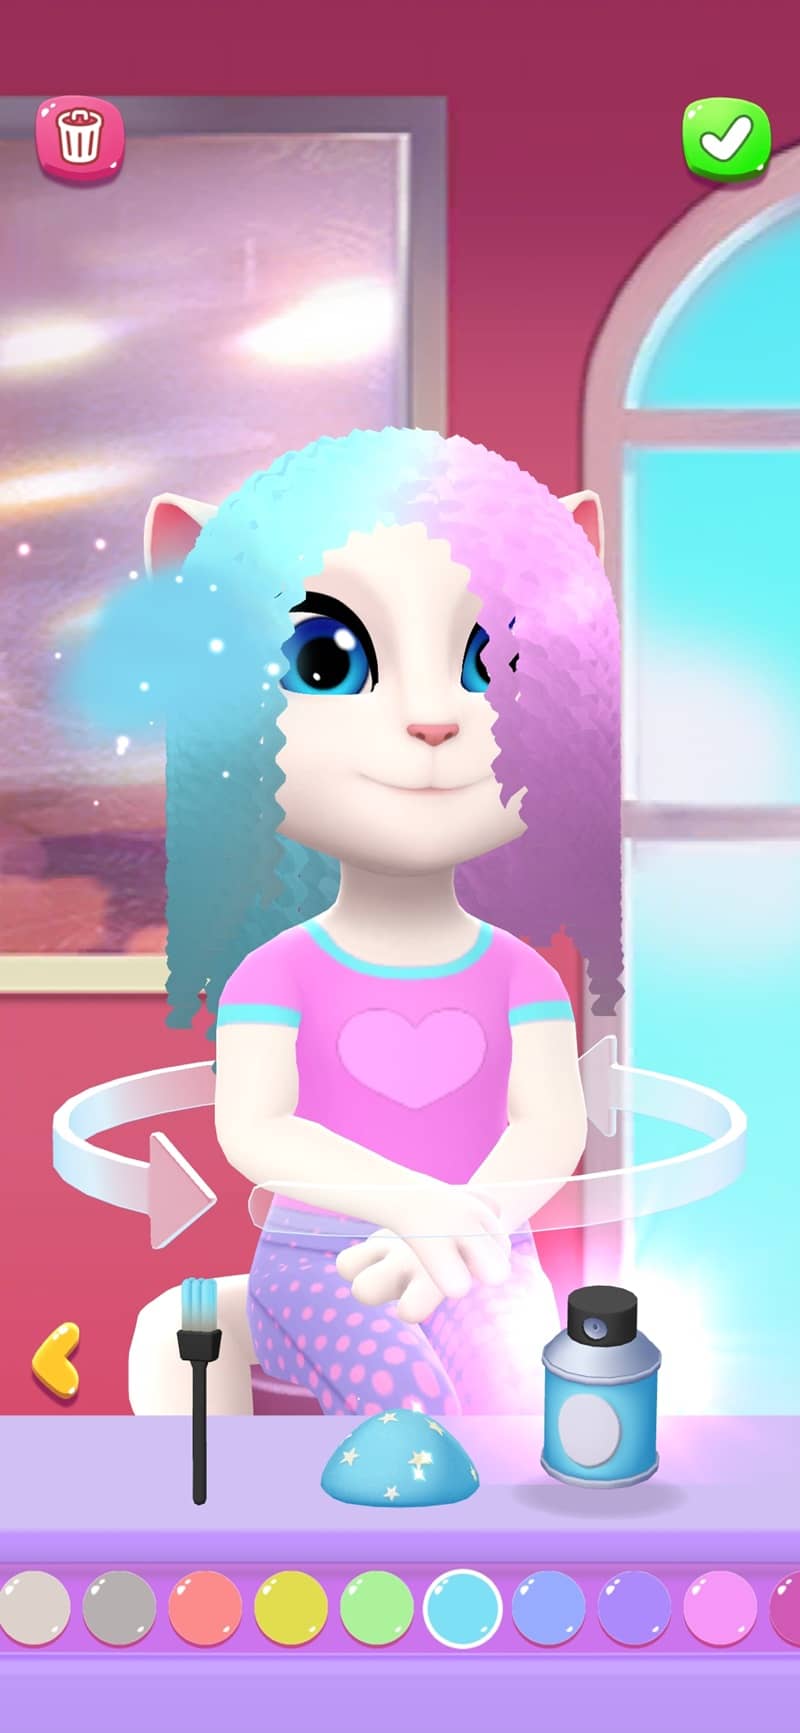
On the second rack, you’ll find the fresh color scheme. Simply touch the paint can and brush to give Angela’s hair a lively makeover. There’s an abundance of options to select from.
The Colour Brush: this broad, flat brush will allow you to apply bold, broad strokes of colour.
The Ombre Effect: This versatile technique allows you to create stunning color gradients effortlessly. Adjust the placement of each gradient by simply sliding your finger along the interface. You can start with a basic two-color scheme or continue building up your design, stacking each new hue on top of the previous one.
The Splotch Brush: use this brush to add playful splotches of colour.
The “Detailed Paintbrush”: Use it when you desire to apply intricate color details. It allows you to create thin lines or color only the edges or trim.
The Glitters Tool: this tool will add twinkling coloured stars to Talking Angela’s hair.
In wrapping up, let me introduce a fantastic tool I adore: The Colour Spray! This magical brush allows me to drench my work in an array of hues all at once, making it perfect for those moments when precision isn’t paramount. Additionally, it’s ideal for creating beautiful, non-horizontal color gradients—something the Hair Colour Wax doesn’t offer.
Remember, each time you use a colouring tool you can select from any of the varied choices on
the bottom bar – swipe left and right to see them all.
6 Straighten and Curl
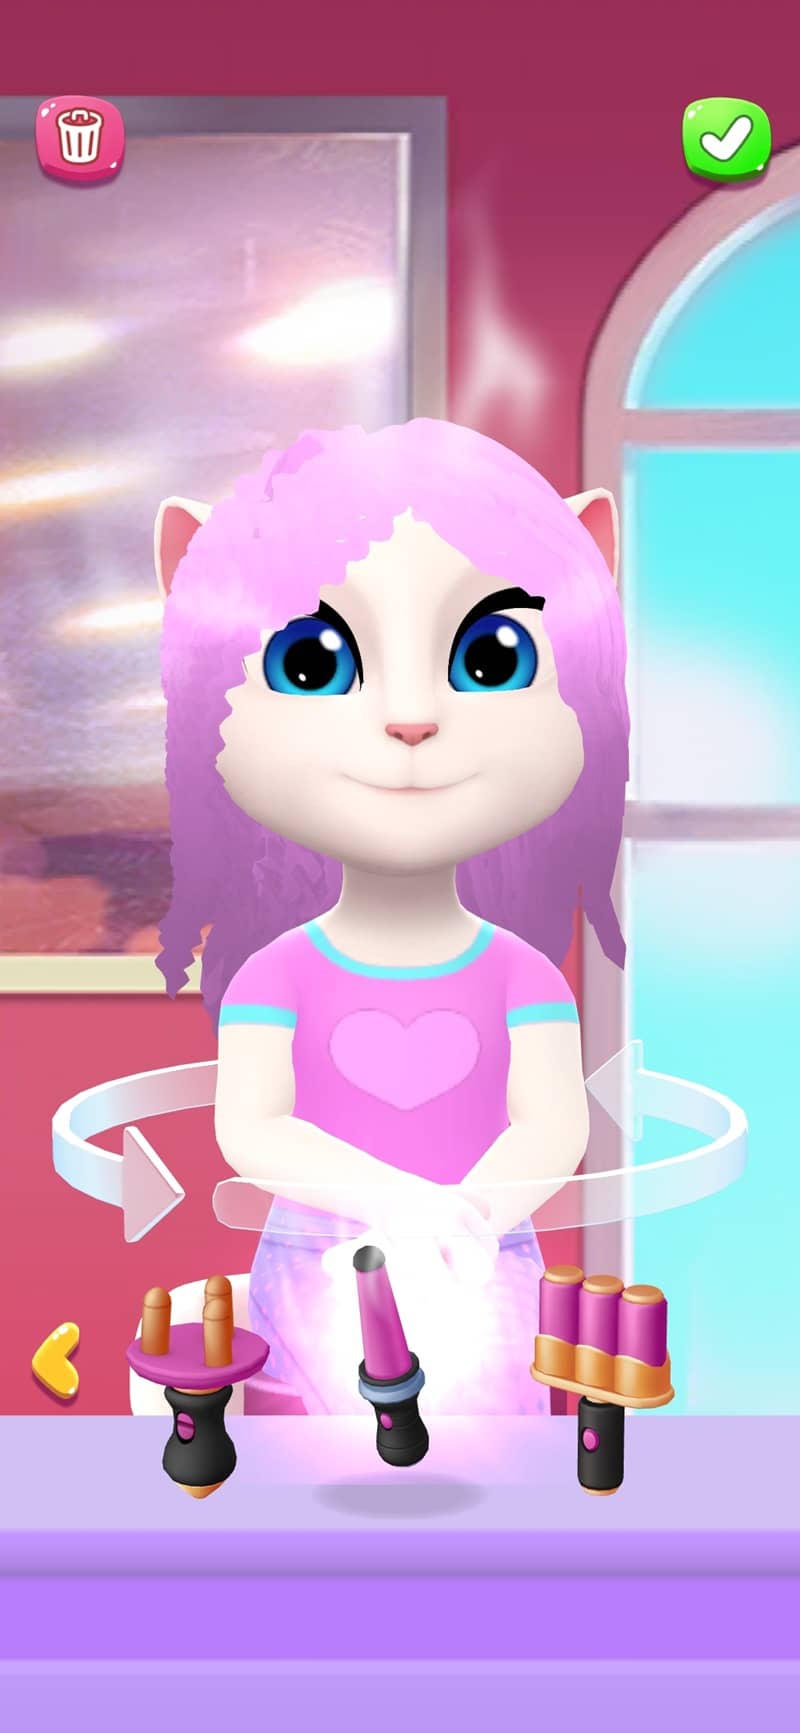
On the third shelf, you’ll find both a Hair Straightener and a Waver. The Hair Straightener is perfect for achieving a sleek, smooth, flat hairstyle that is super straight. It’s ideal if you’re aiming for a bold, sharp, clean-cut look. On the other hand, the Waver is designed to create looser, more flowing waves.
Then there is the Curling Wand: this tool puts tight, bouncy curls into Angela’s hair.
After that, you have the Braider: effortlessly transform any single strand into an intricately woven braid by just tapping or sliding your finger over it.
7 Add Accessories
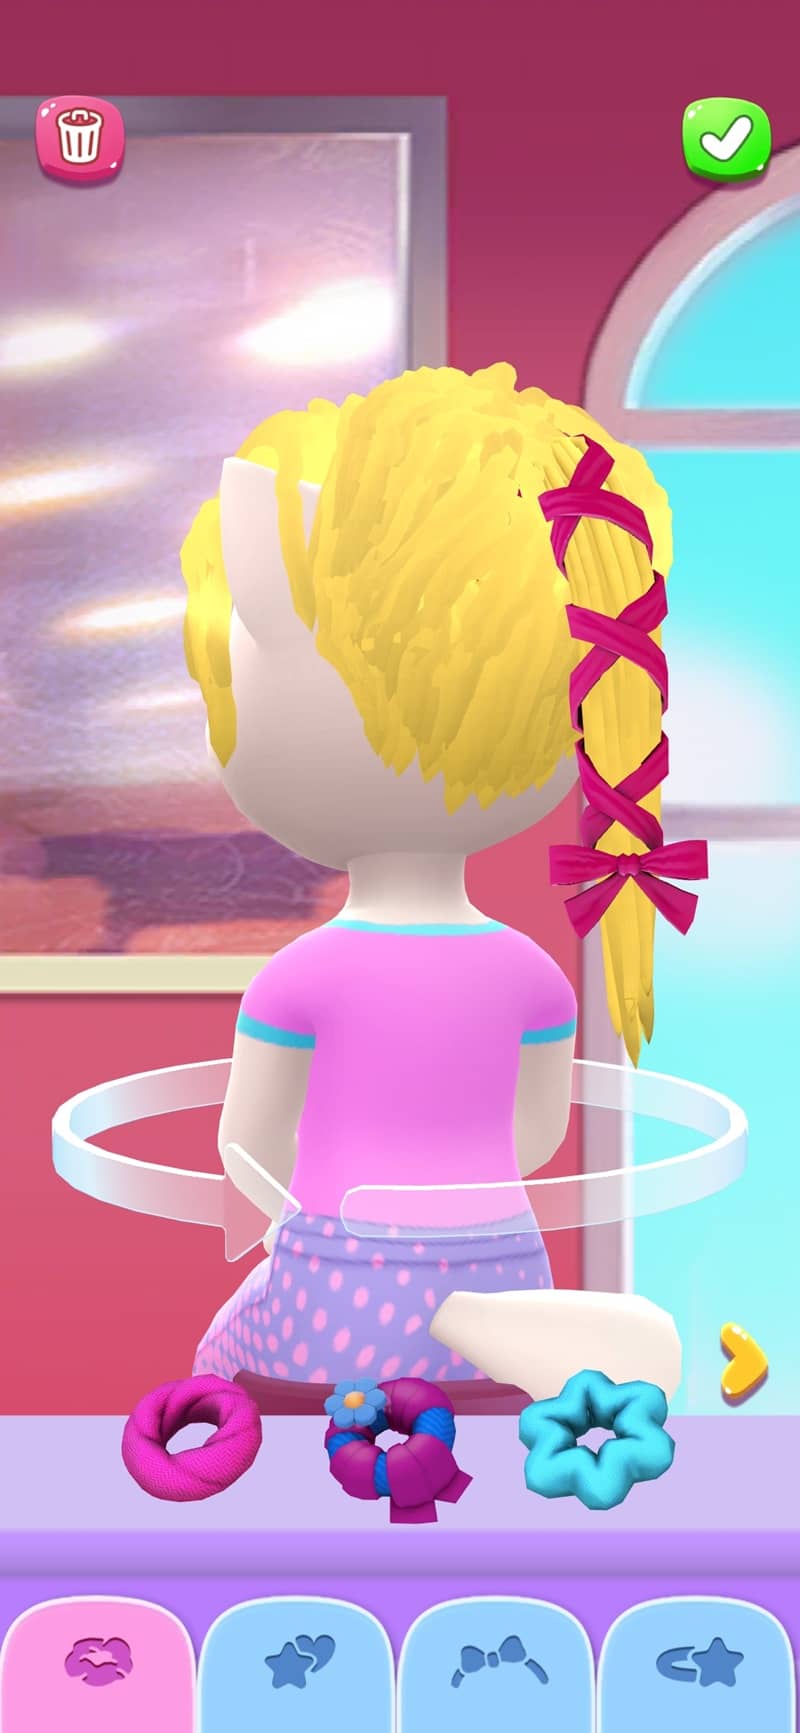
At the very top shelf are where you’ll find the assortment of accessories. The ‘Accessories’ section has four sections situated at its base: Scrunchies, Buns, Beads, and Headbands, as well as Clips. Above these sections, you will see the items within each category. You can navigate through the entire collection by swiping left or right, or using the arrow keys to scroll.
A scrunchie serves as an accessory for Angela’s hairstyle, creating either a ponytail or a bun-like structure. Each scrunchie comes in its unique style, varying from simple designs to braided ones, some even adorned with additional ribbons. The styles of buns range from the casual and disheveled to formal and neat. You can also embellish individual hair strands with beads, giving them a braided appearance. There’s an array of colors and shapes available, allowing for personalized combinations and patterns.
Opt for a head accessory like a headband or hair clips to neatly secure Angela’s tresses. You can pick from stylish bands adorned with bows, hearts, and floral patterns, or go playful with options featuring bunny ear or ladybug wing headbands!
8 Save Your Hairstyle and Show It Off!
Have you completed the task? To confirm and save your changes, click on the checkmark in the upper right corner followed by the Save button. This will take you directly to Angela’s dressing table where your newly created or unlocked style has been added. From there, you can modify the hairstyle, delete it, or return to the Salon to start anew.
In My Talking Angela 2, you can enjoy all its exciting features while keeping your personal hairstyle intact. If you ever feel unsatisfied with your character, simply tap the trash icon located at the top-left corner of the screen. However, be cautious – once you press the Delete button, your style will be erased permanently!
Ready to show off your salon skills? Share your Angela hairstyles on social media! Tag
Angela’s official pages and use #TalkingAngela to get a shoutout from Talking Angela herself!
Read More
- Grimguard Tactics tier list – Ranking the main classes
- 10 Most Anticipated Anime of 2025
- USD CNY PREDICTION
- Box Office: ‘Jurassic World Rebirth’ Stomping to $127M U.S. Bow, North of $250M Million Globally
- Silver Rate Forecast
- Gold Rate Forecast
- Black Myth: Wukong minimum & recommended system requirements for PC
- Mech Vs Aliens codes – Currently active promos (June 2025)
- “Golden” Moment: How ‘KPop Demon Hunters’ Created the Year’s Catchiest Soundtrack
- Maiden Academy tier list
2025-07-10 12:19