Quick Links
How to start The Reckoning
- The Critical Path
- Finding Sam (Optional)
- Facing Von Aulitz (Optional)
- Wrapping things up
As a seasoned gamer, I find myself on the brink of Kingdom Come Deliverance II’s final showdown. The decisions I make in these closing missions will significantly shape my end-game scenario. In this pivotal quest, two critical choices await me, each with far-reaching consequences for the game’s conclusion.
In The Reckoning, it might be more crucial to focus on secondary tasks rather than the primary mission objective.
Although you could finish this mission swiftly, rushing through might cause you to overlook poignant narrative elements, a concealed accomplishment, and crucial character developments. Take time to delve into these aspects and discover their significance instead.
How to Find and Start The Reckoning
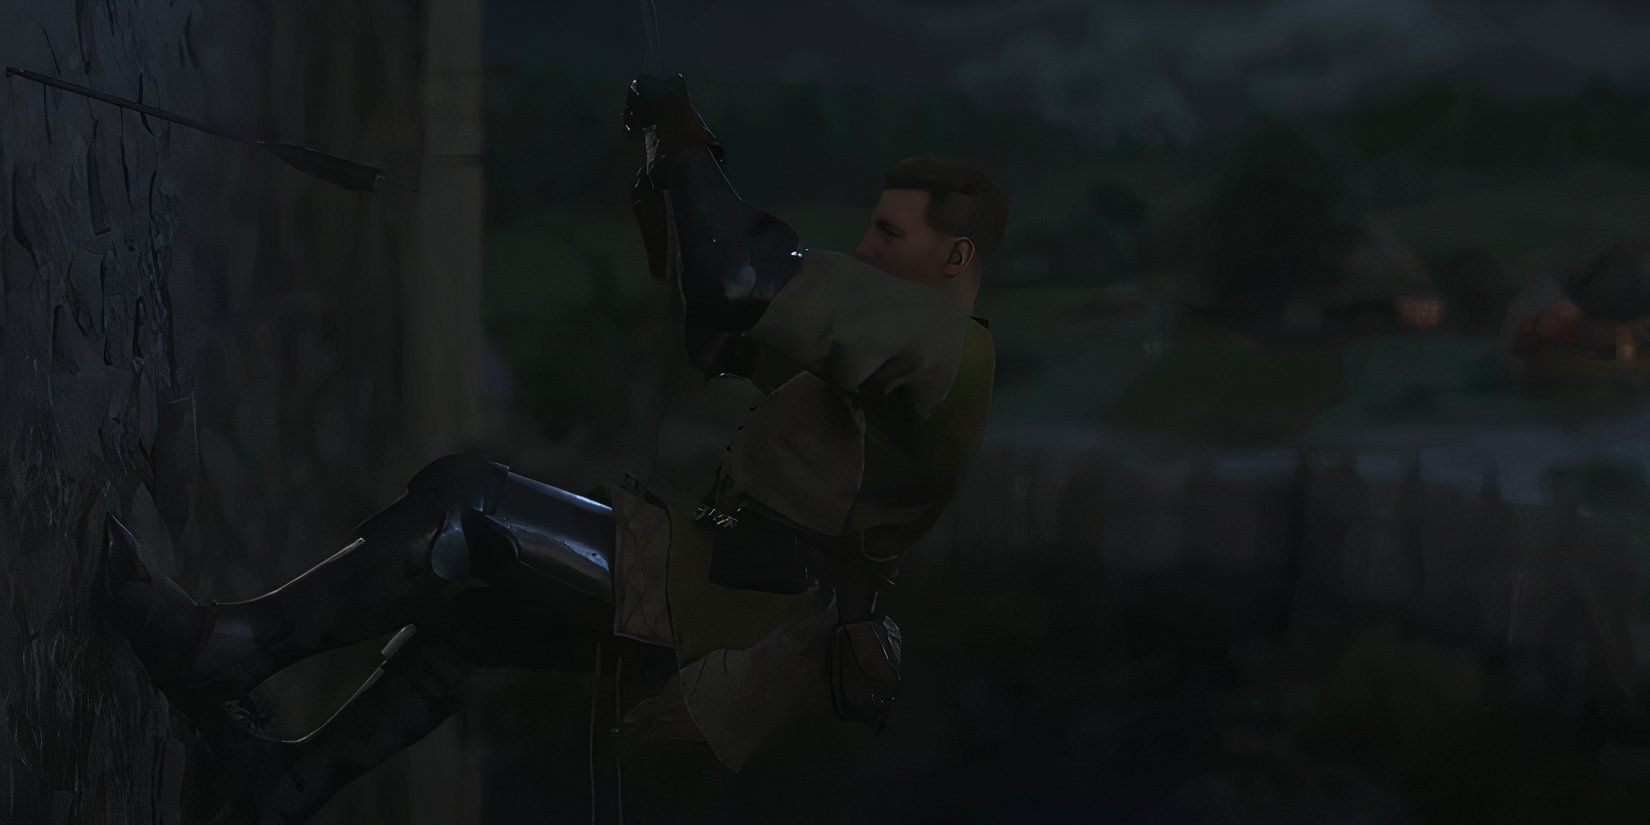
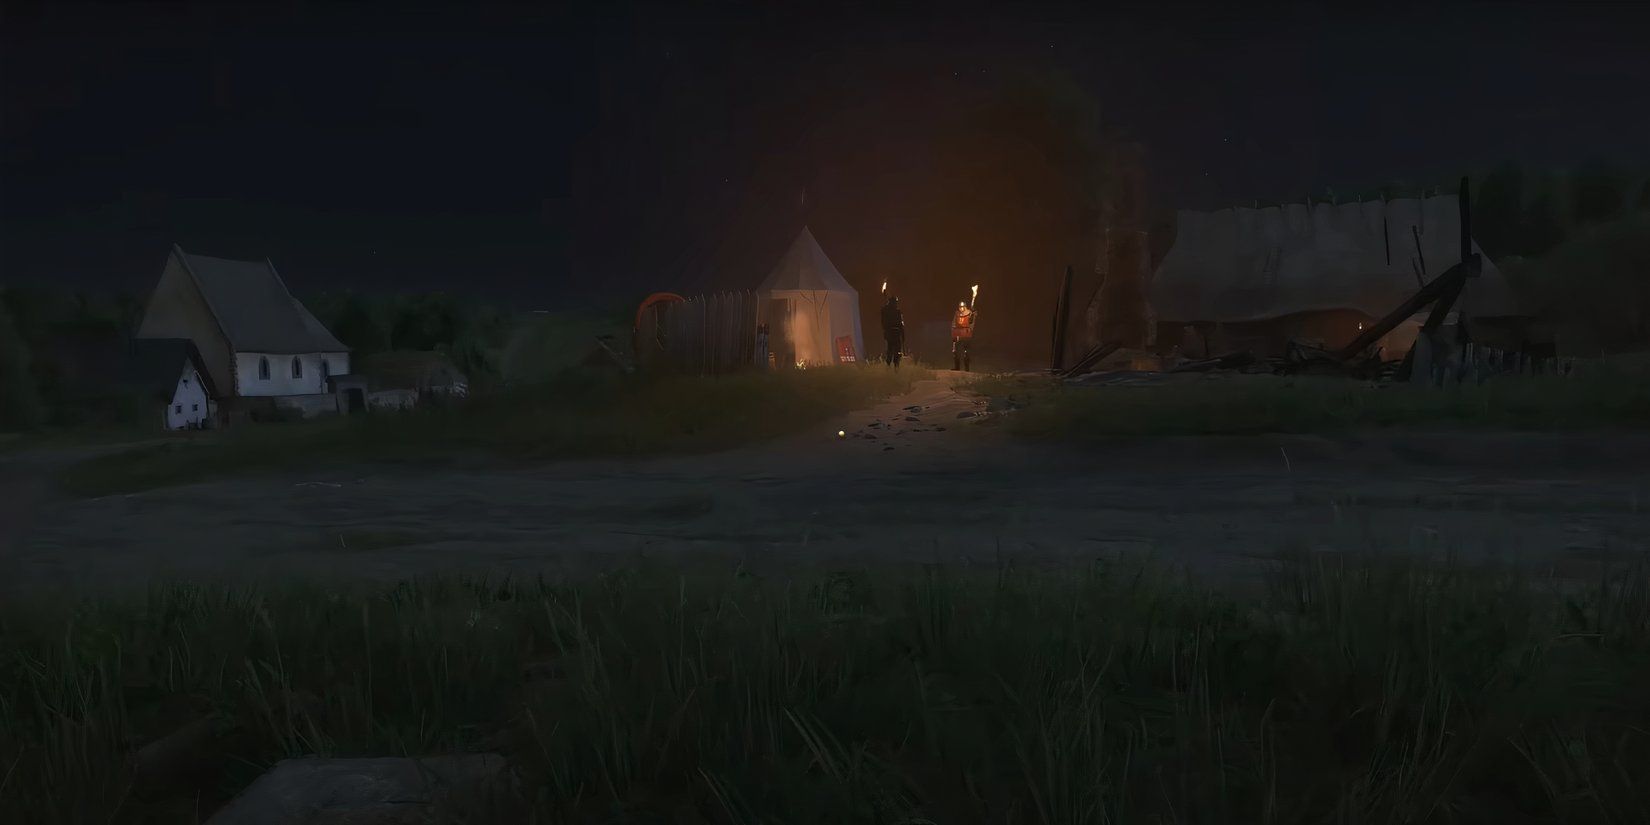
The Sequel, aptly titled “The Reckoning,” unfolds straightaway following the resolution of the Hunger and Despair primary mission during Suchdol’s siege. Joined by Samuel, Henry descends the city walls, only to discover himself singular at the base with the narrative transitioning effortlessly—no further actions or dialogue prompts required—as it is a natural extension of the main plotline progression.
The Critical Path
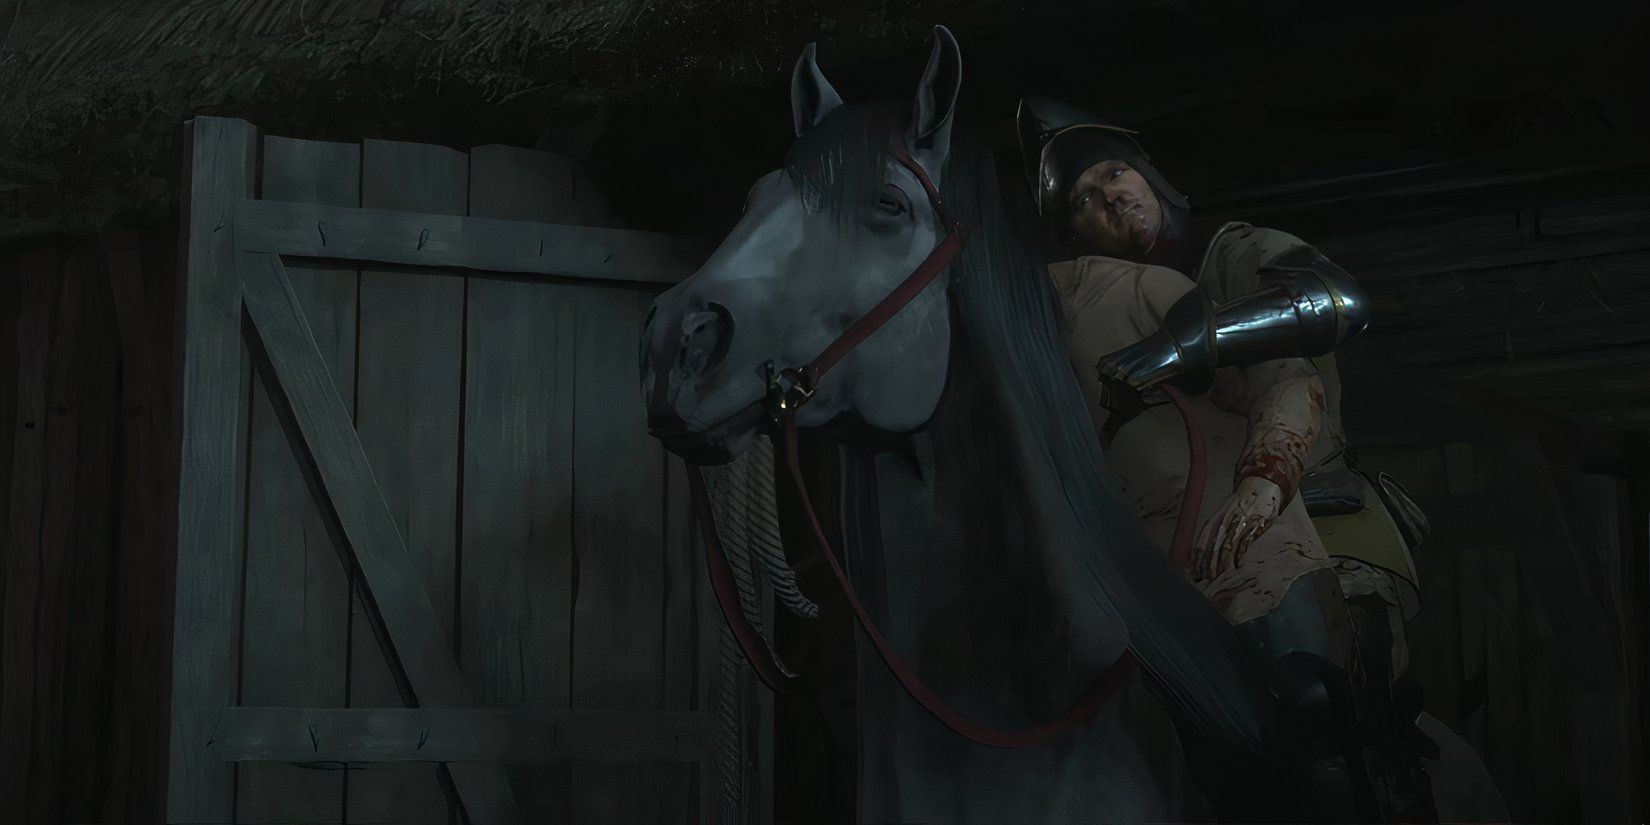
During The Reckoning, your task is simply to secure a horse for Henry, enabling him to swiftly seek out additional support.
Heading towards the western part of the village will lead you to some stables and a horse. Interacting with this horse will instantly complete the quest and transition you to The Last Rites. But keep in mind that choosing this option means Henry’s brother won’t survive, and you’ll miss an opportunity for a secret achievement, so it’s best to avoid it if you can.
Finding Sam (Optional)
There are essentially three distinct strategies for tackling this mission. One option is to charge straight into the camp, brandishing your sword, ready to battle everyone in sight. However, this action might set off an alarm and result in a tough, intense fight. If you’re after a challenge or valuable loot, this approach could work, but it’s also quite risky.
A more covert approach entails moving silently through the camp while wearing dark attire. The game seems to anticipate this stealthy behavior, but remember to save your progress periodically to avoid losing progress if you’re discovered while lurking around.
Gradually taking out or neutralizing secluded guards without revealing their whereabouts could significantly simplify this mission if an alarm is triggered.
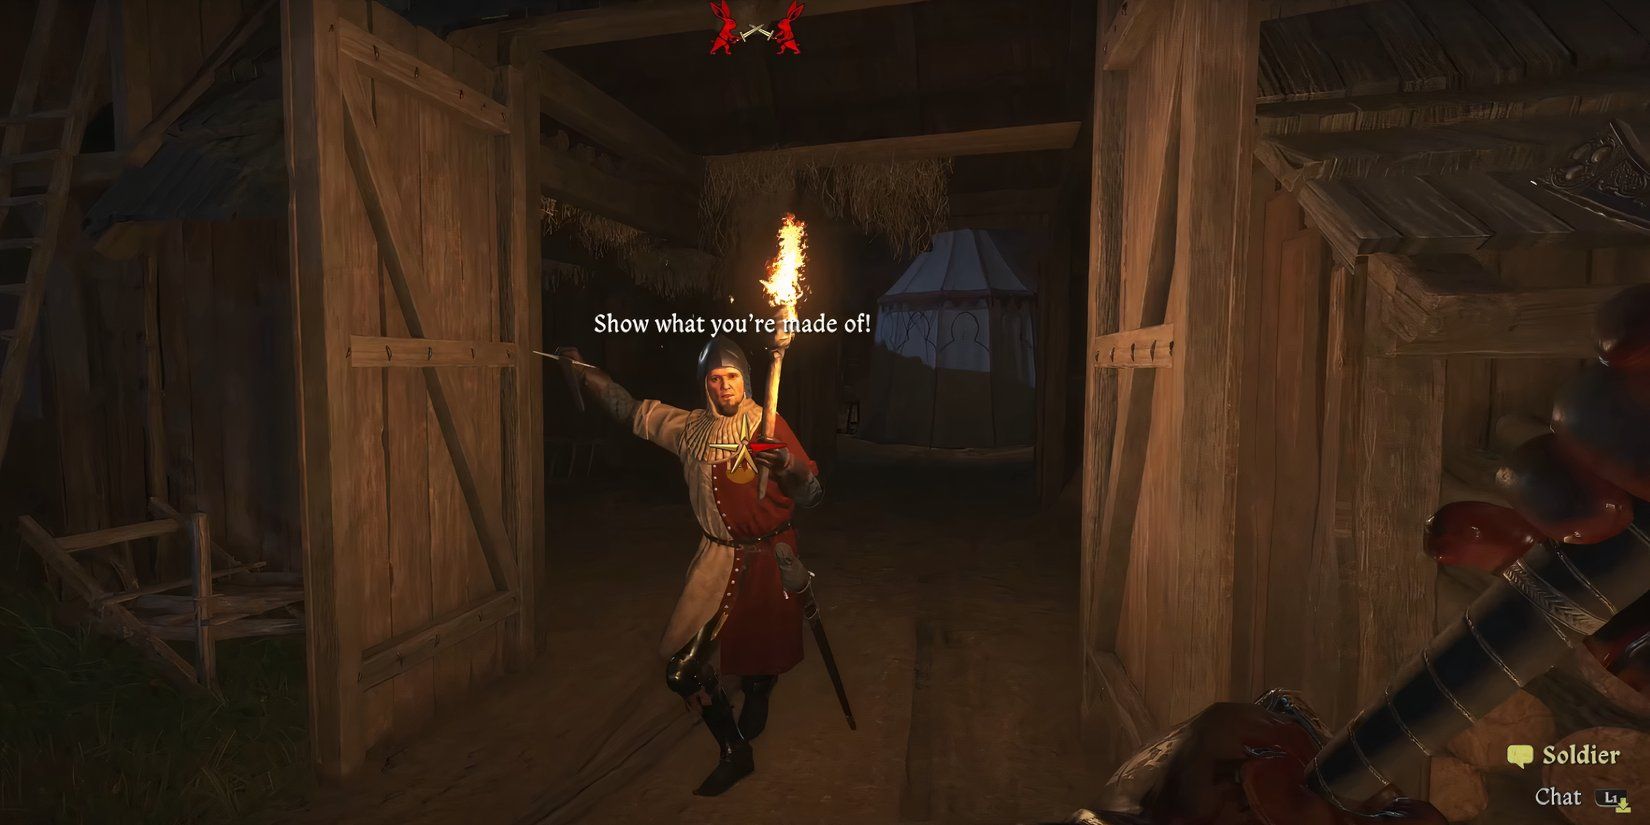
A more straightforward strategy would be to take down a soldier from Prague and wear his uniform. With this disguise, Henry should be able to move relatively freely within the camp, which will make it significantly simpler for him to locate whatever he’s seeking.
If you’re attempting a peaceful playthrough or accidentally left your dagger at home, you might discover Prague-style soldier outfits hidden in chests spread across the camp as well.
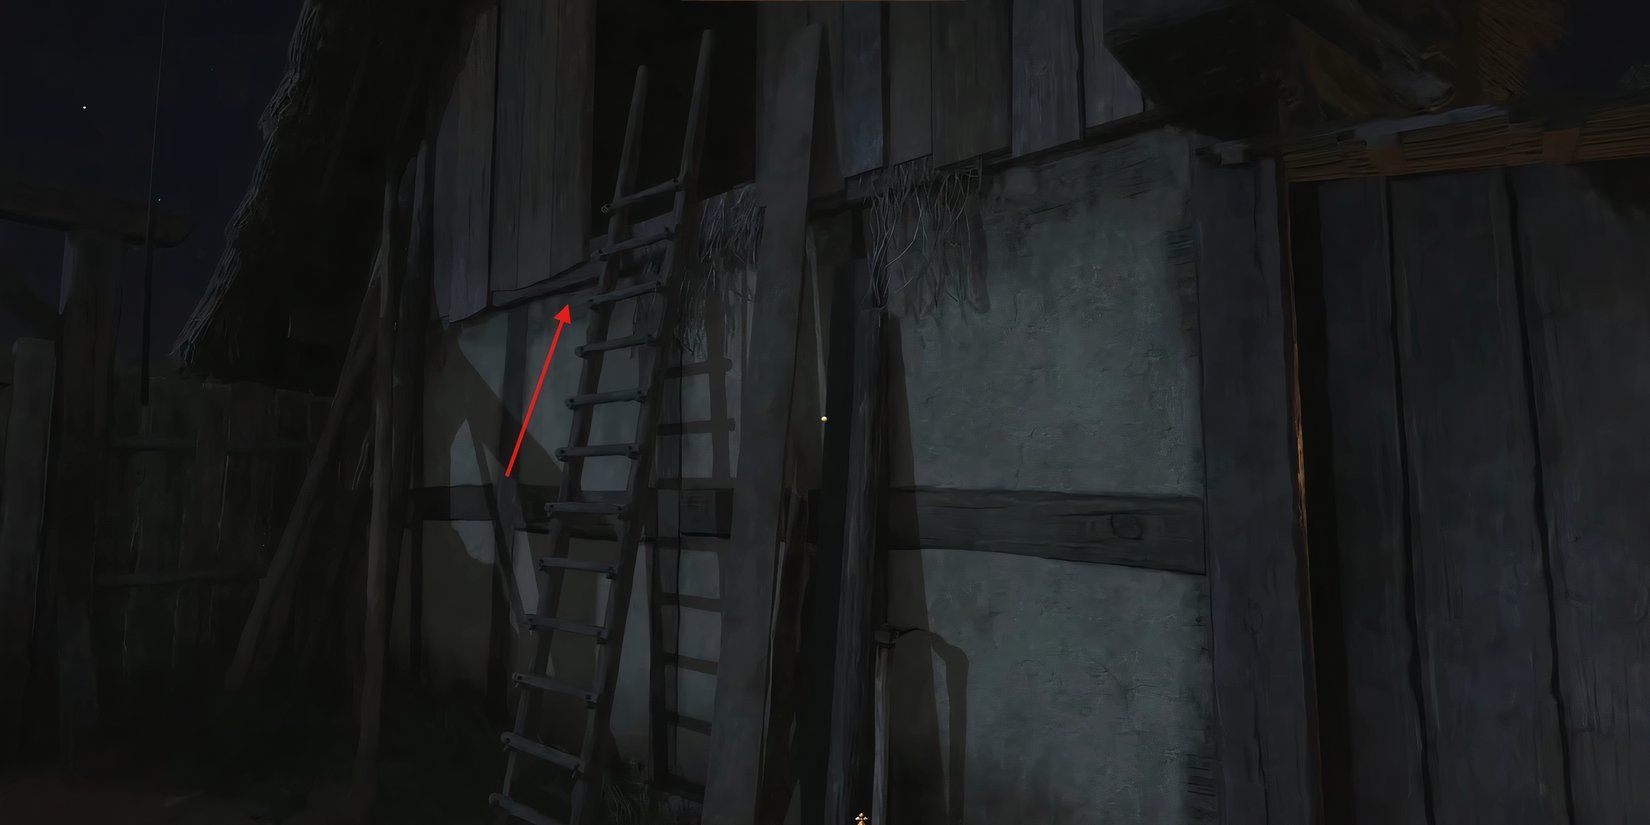
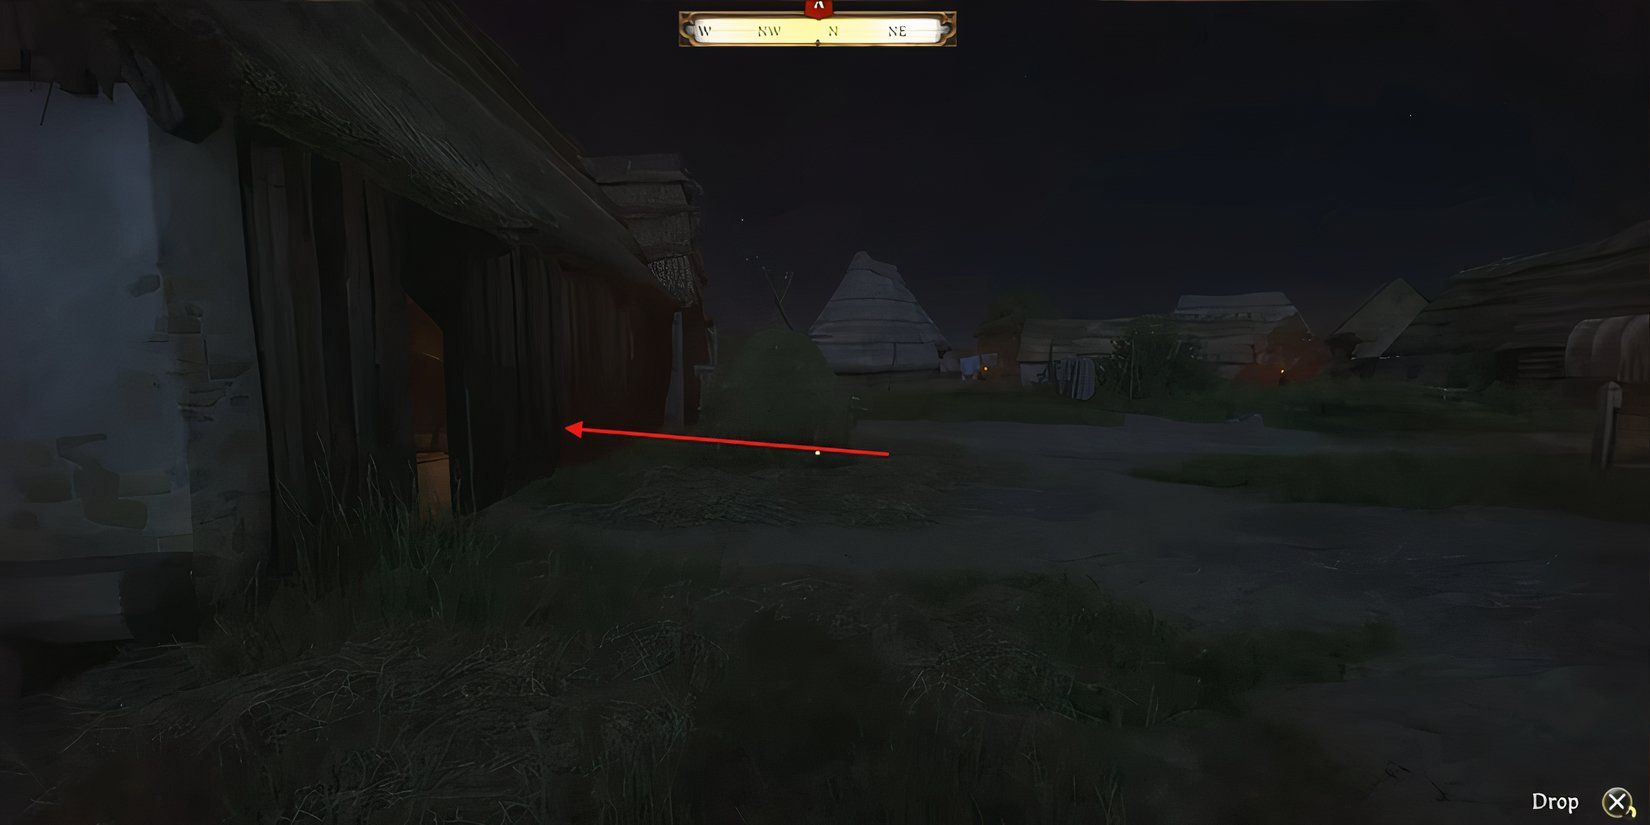
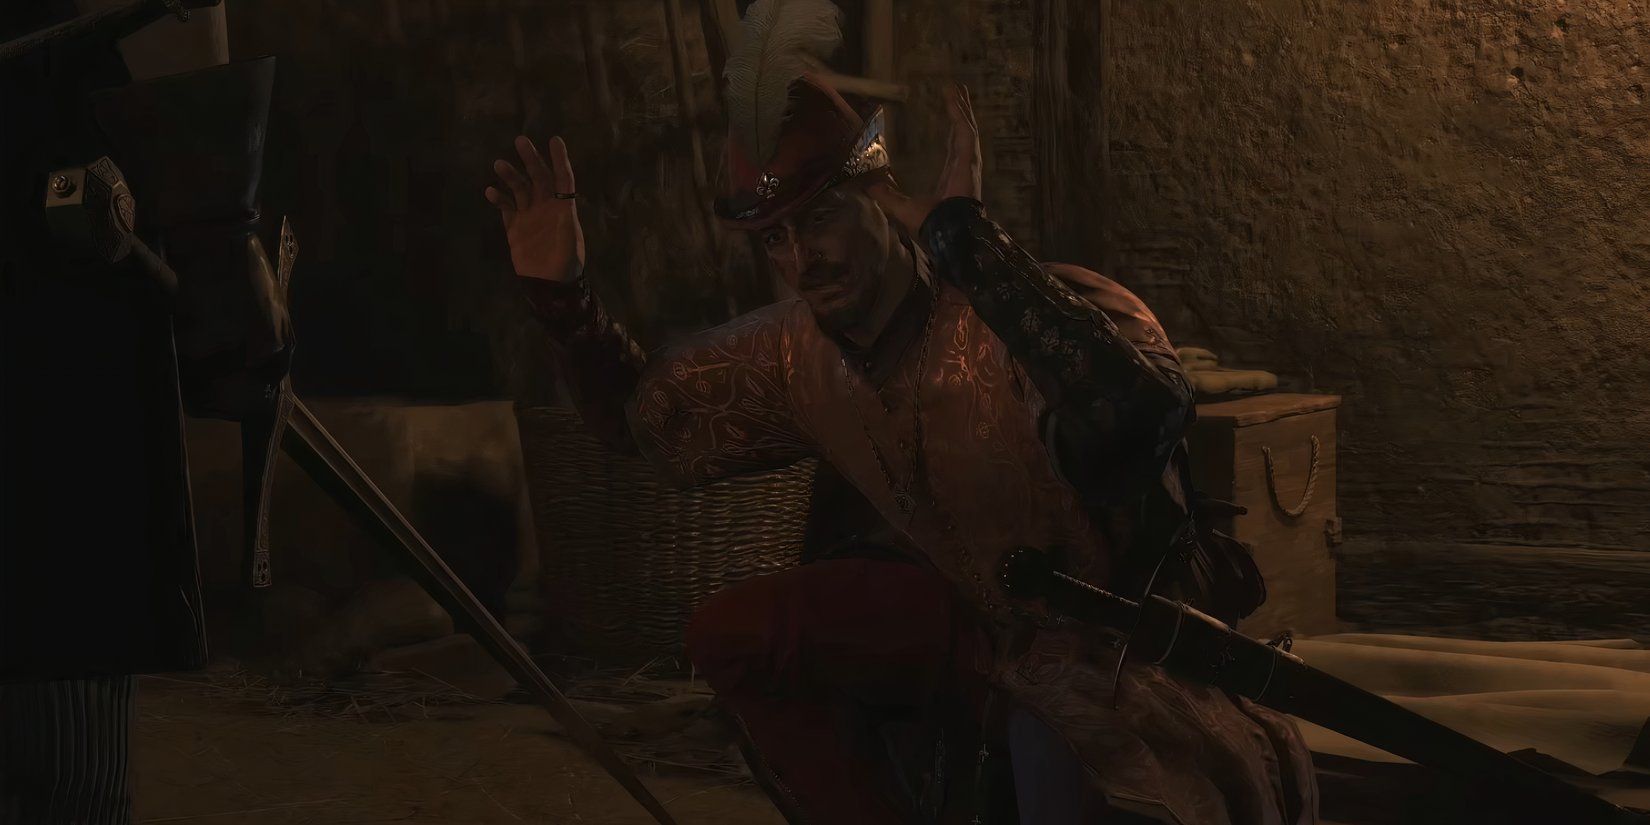
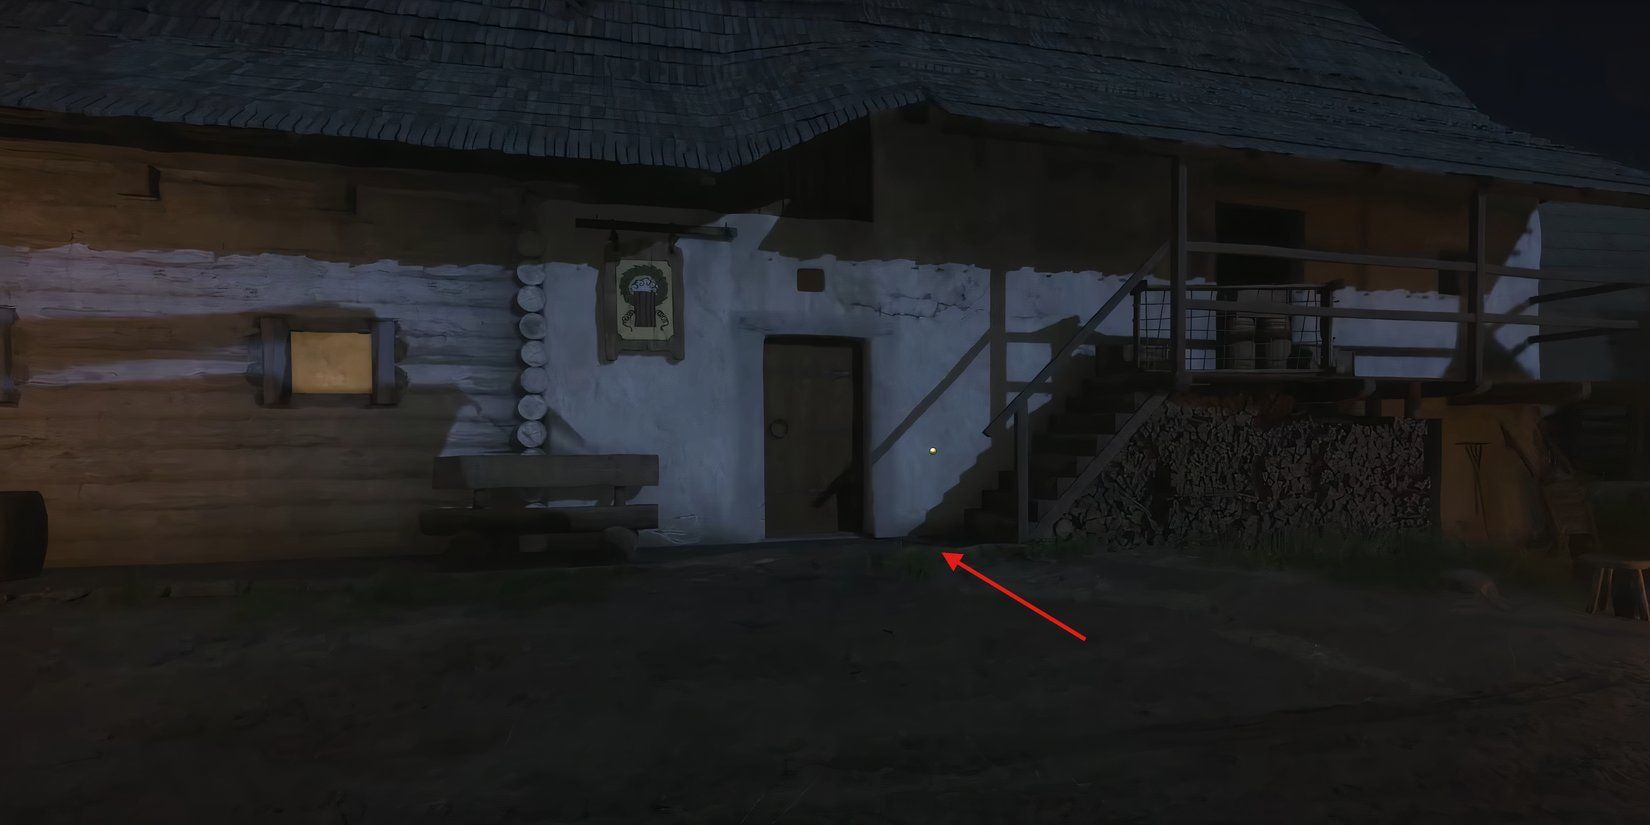
Samuel is hidden inside a barn situated near the southern outskirts of Suchdol, opposite the local tavern. You’ll find a ladder propped against the wall; use it to access the attic where you can surprise Vauquelin Brabant, who earlier in the game betrayed Henry. Swords will be brandished, initiating a duel.
Hint: Brabant forgoes wearing a helmet. A swift attack on his exposed skull could potentially turn a difficult battle into an easy victory.
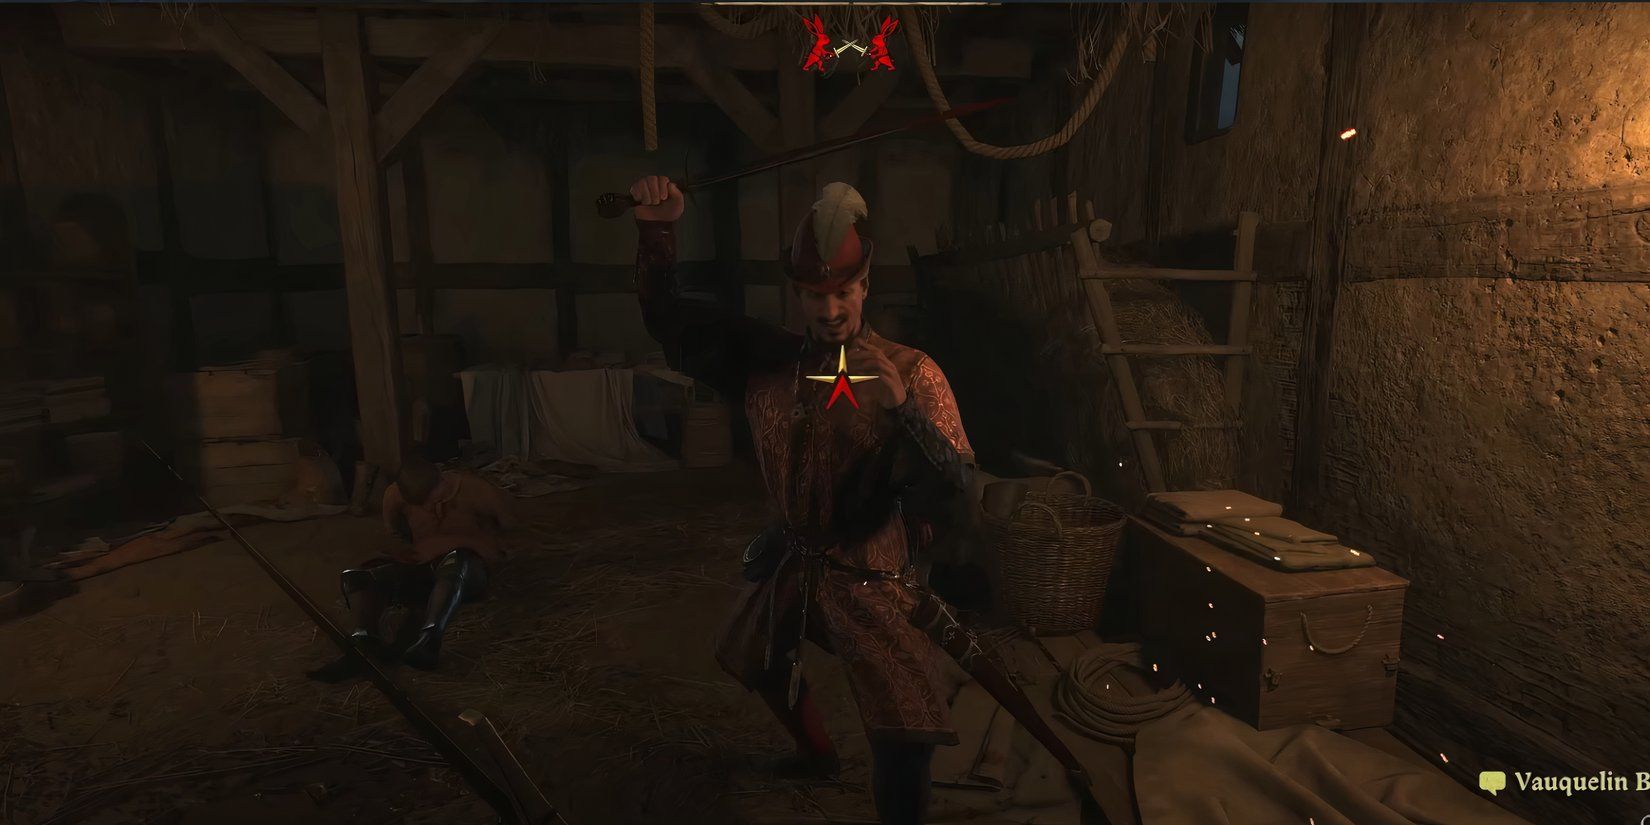
After being overcome, the battle will transition into a conversation where Brabant pleads for mercy. If you choose to show leniency, he’ll hastily depart to sound the alarm. This could significantly complicate the mission, given the number of remaining soldiers in Suchdol.
This chat could serve as one of the subtle clues hinting at Henry’s ultimate game scenario. Choosing to eliminate Brabant might simplify the mission, but it could potentially result in a less favorable conclusion for the game.
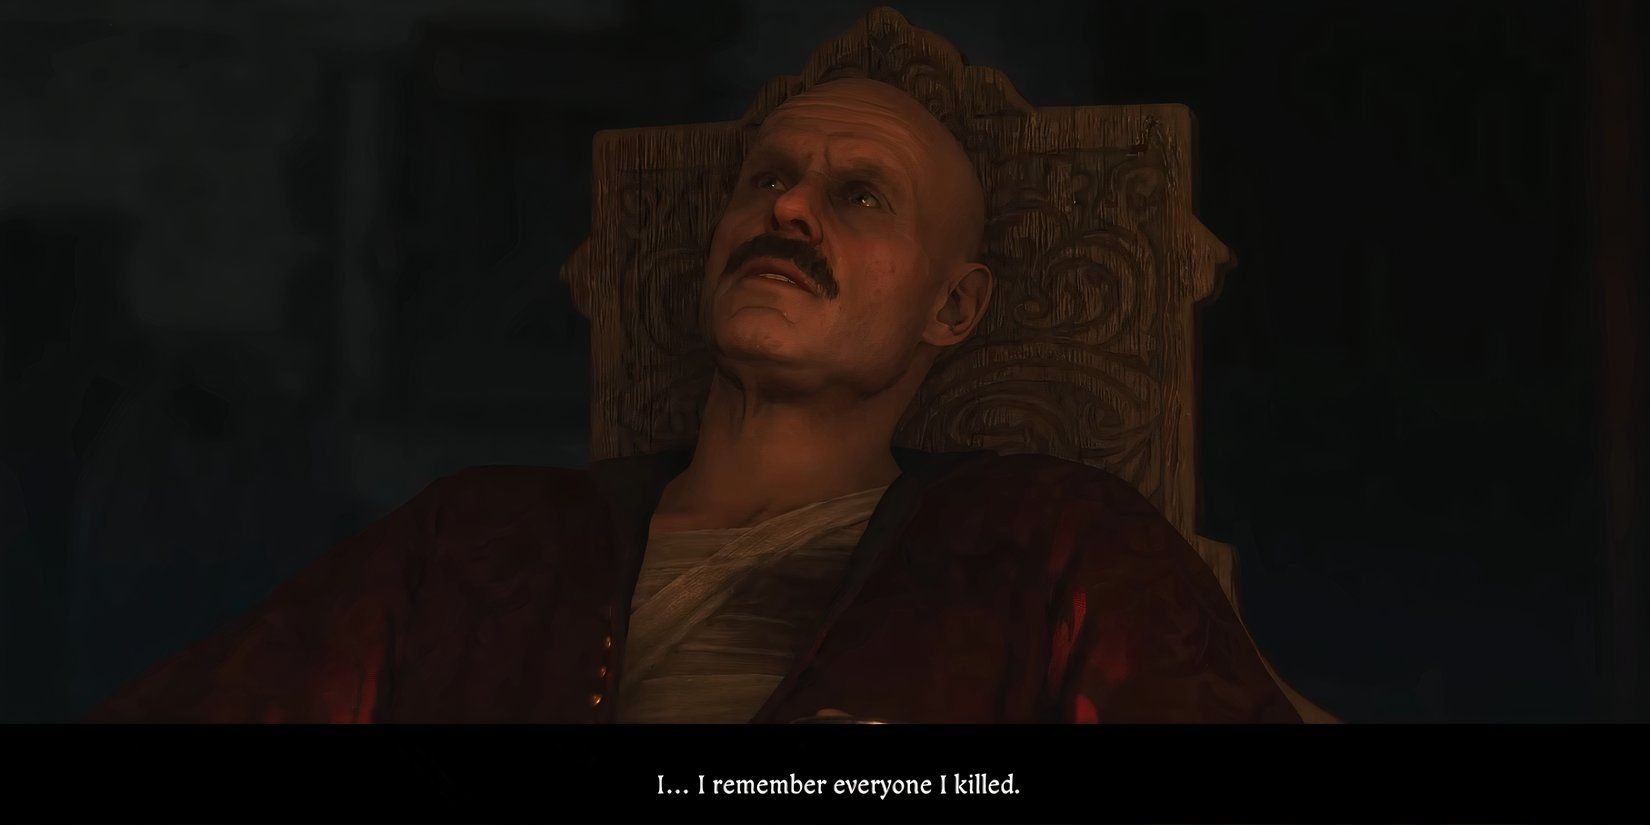
As Brabant lay on his deathbed, he whispered about Von Aulitz, revealing he’d succumbed to a festering wound in the town square. In this moment, I found myself torn between tending to Samuel and swiftly mounting our horses. Yet, it was clear that Henry might never have another opportunity to confront the man who took his parents from him.
Facing Von Aulitz (Optional)
Abandon Sam for now (he isn’t moving just yet), and head towards the town center and its biggest structure. You can either sneak past some guards near the fire pit, or take a longer route to find the entrance. The door has an extremely tough lock, but you can acquire a key from guards or pick it open to gain access. Gaining entry will unlock the “Face to Face” achievement.
Indeed, Aulitz is succumbing to the infection from his wounds. If your scholarship level is 18 or above, you’ll unlock additional dialogue. However, Henry has the power to decide what action to take. Choosing to let him live can lead to a more favorable game conclusion, but it’s not mandatory.
Wrapping Things Up
After completing all the secondary tasks, the last move in ‘The Reckoning’ is ensuring Samuel reaches safety. If you’re still dressed as a soldier from Prague, you can discreetly carry Samuel to the stables, pretending you’ve been ordered to bury him without causing any suspicion.
If that’s not the case, you’ll have to either battle or outwit the remaining adversaries. Climb onto a horse to instigate the concluding cinematic sequence and wrap up the mission.
Read More
- 10 Most Anticipated Anime of 2025
- Gold Rate Forecast
- USD MXN PREDICTION
- Pi Network (PI) Price Prediction for 2025
- Silver Rate Forecast
- USD CNY PREDICTION
- Brent Oil Forecast
- How to Watch 2025 NBA Draft Live Online Without Cable
- USD JPY PREDICTION
- Grimguard Tactics tier list – Ranking the main classes
2025-04-23 14:09