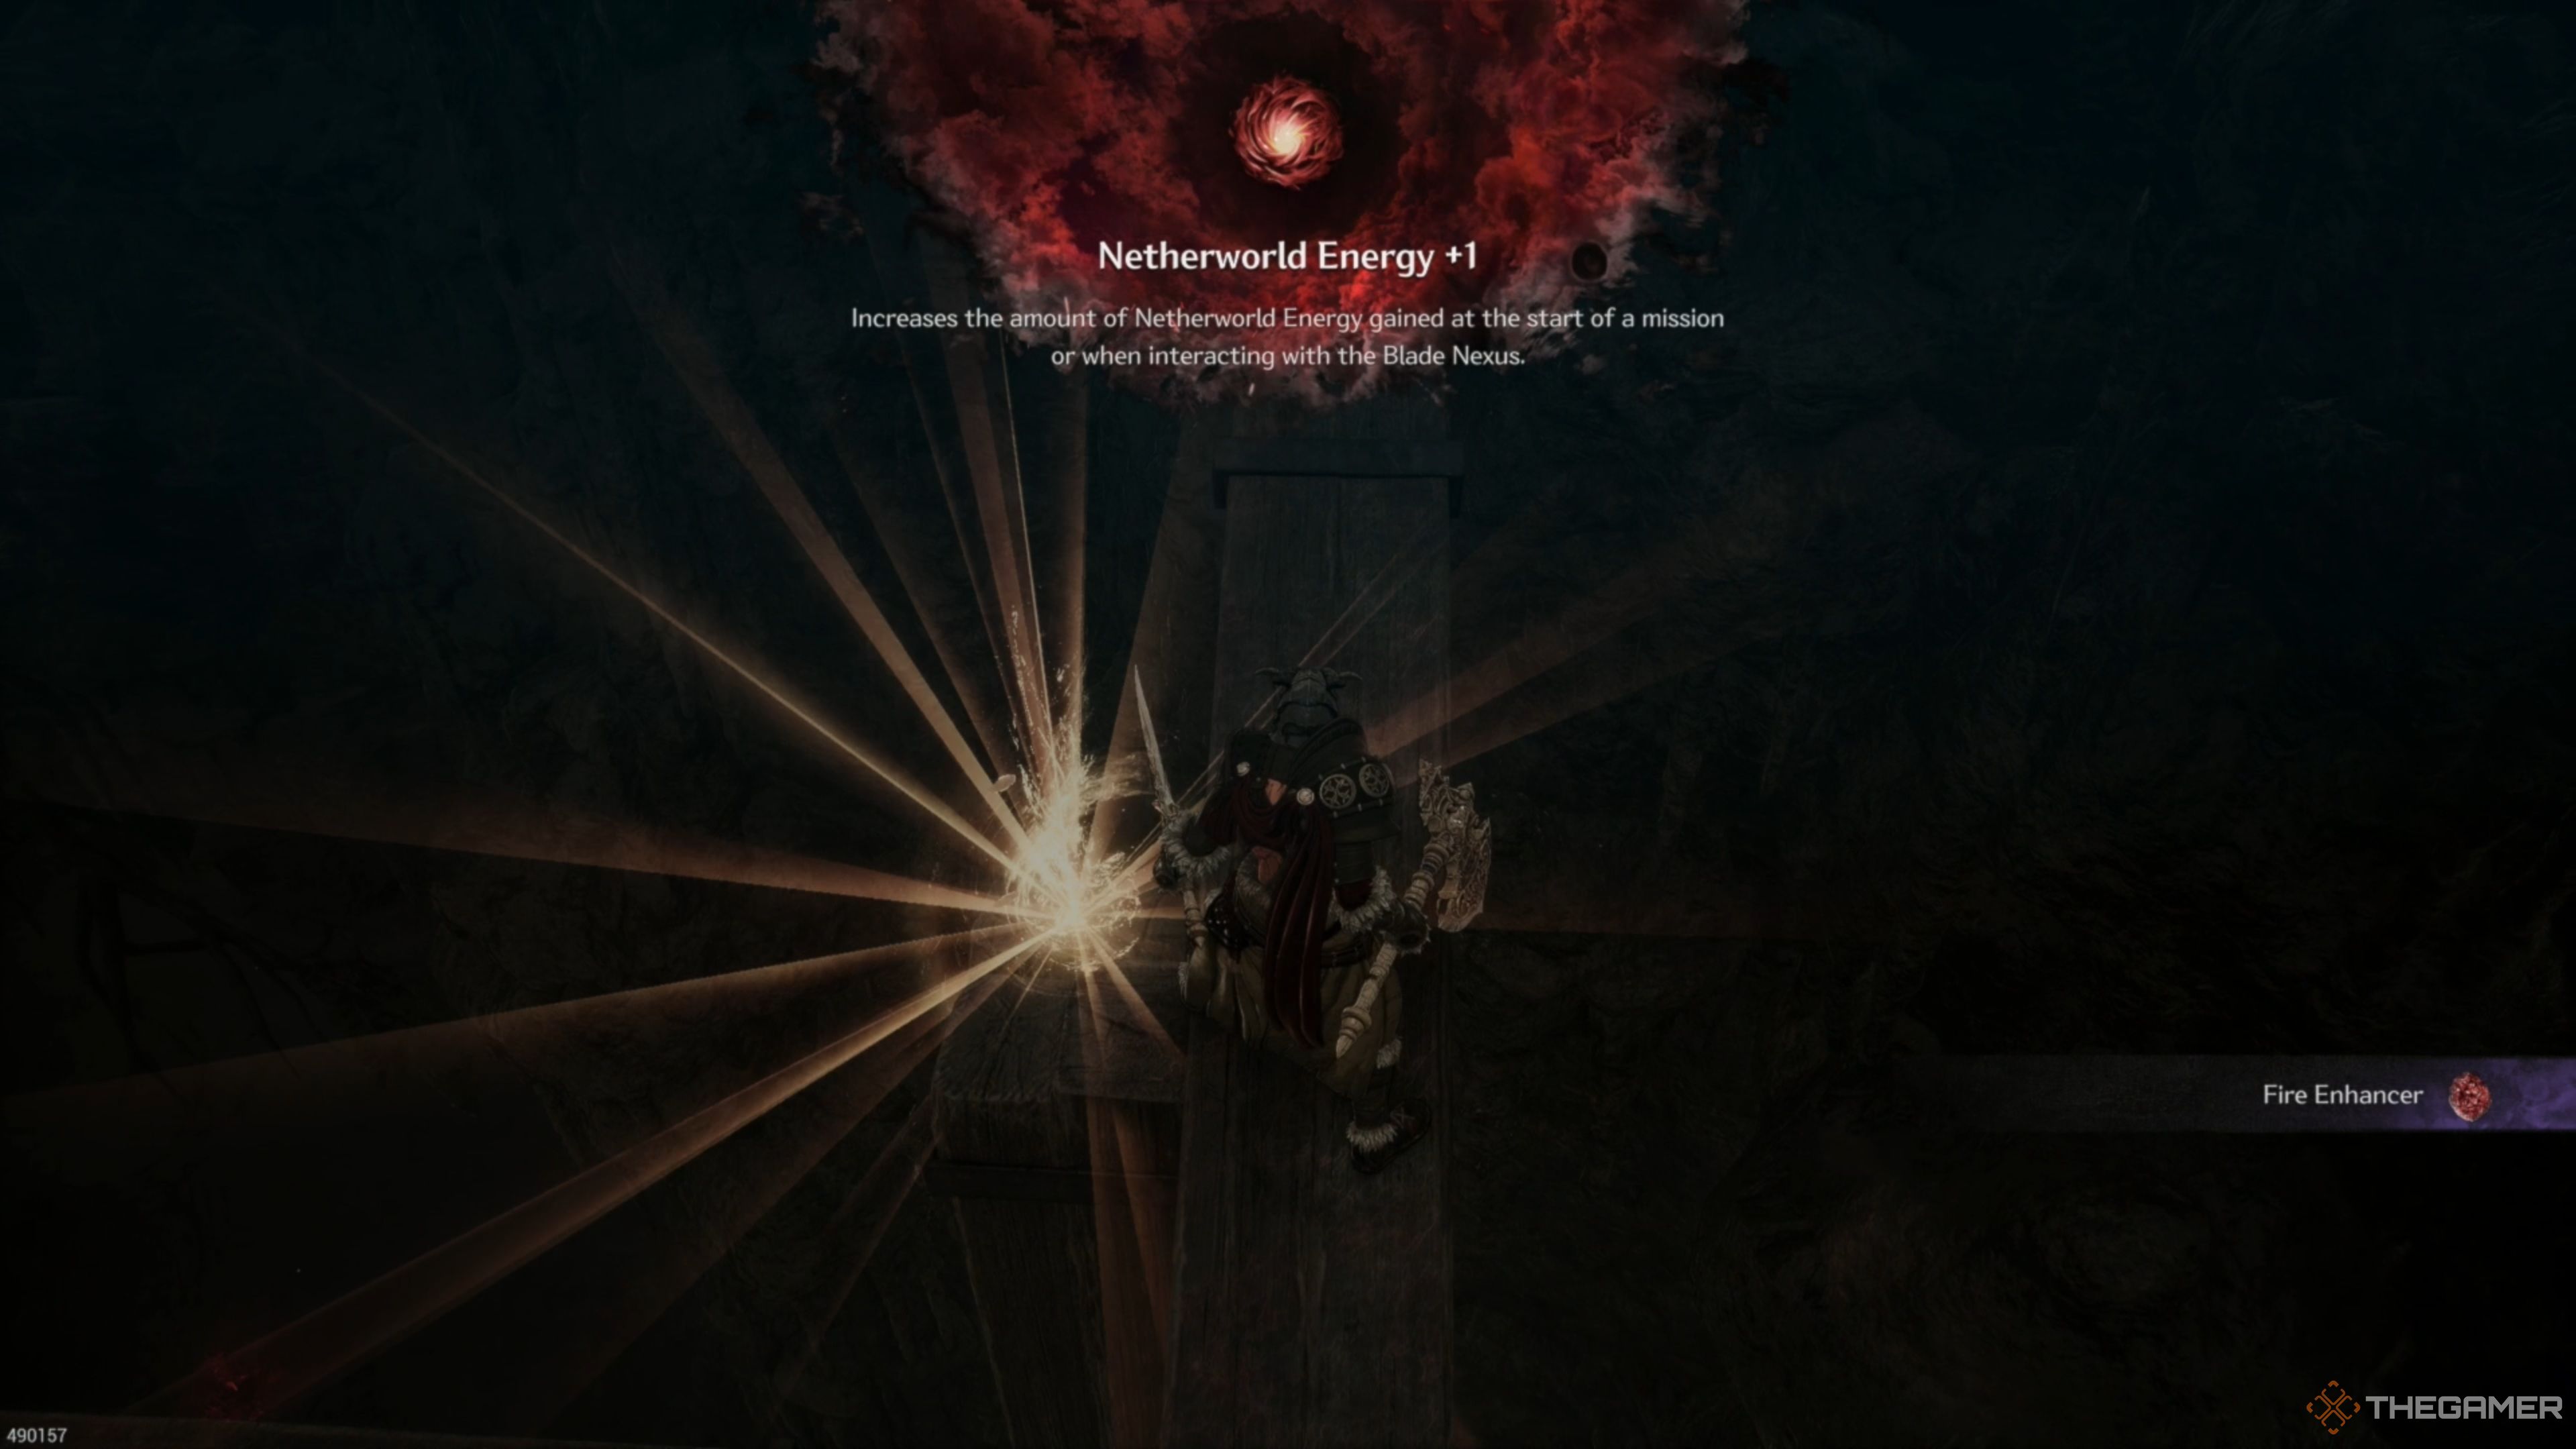
Every game in the Soulslike genre typically includes an item akin to the Estus Flask, and The First Berserker: Khazan follows suit. The equivalent in this game is called Netherworld Energy, which operates similarly to the Estus Flask – it recharges following a world reset at a Blade Nexus, and can be enhanced with specific upgrades. However, unlike many Soulslikes, The First Berserker is more economical when offering additional charges of these vital consumables.
In this tutorial, I’ll show you the spot for every Netherworld Energy recharge point, along with tips on enhancing their power. Once we’ve wrapped up, you’ll be fully aware of how to obtain these highly beneficial restoration resources.
Forgotten Temple Netherworld Energy

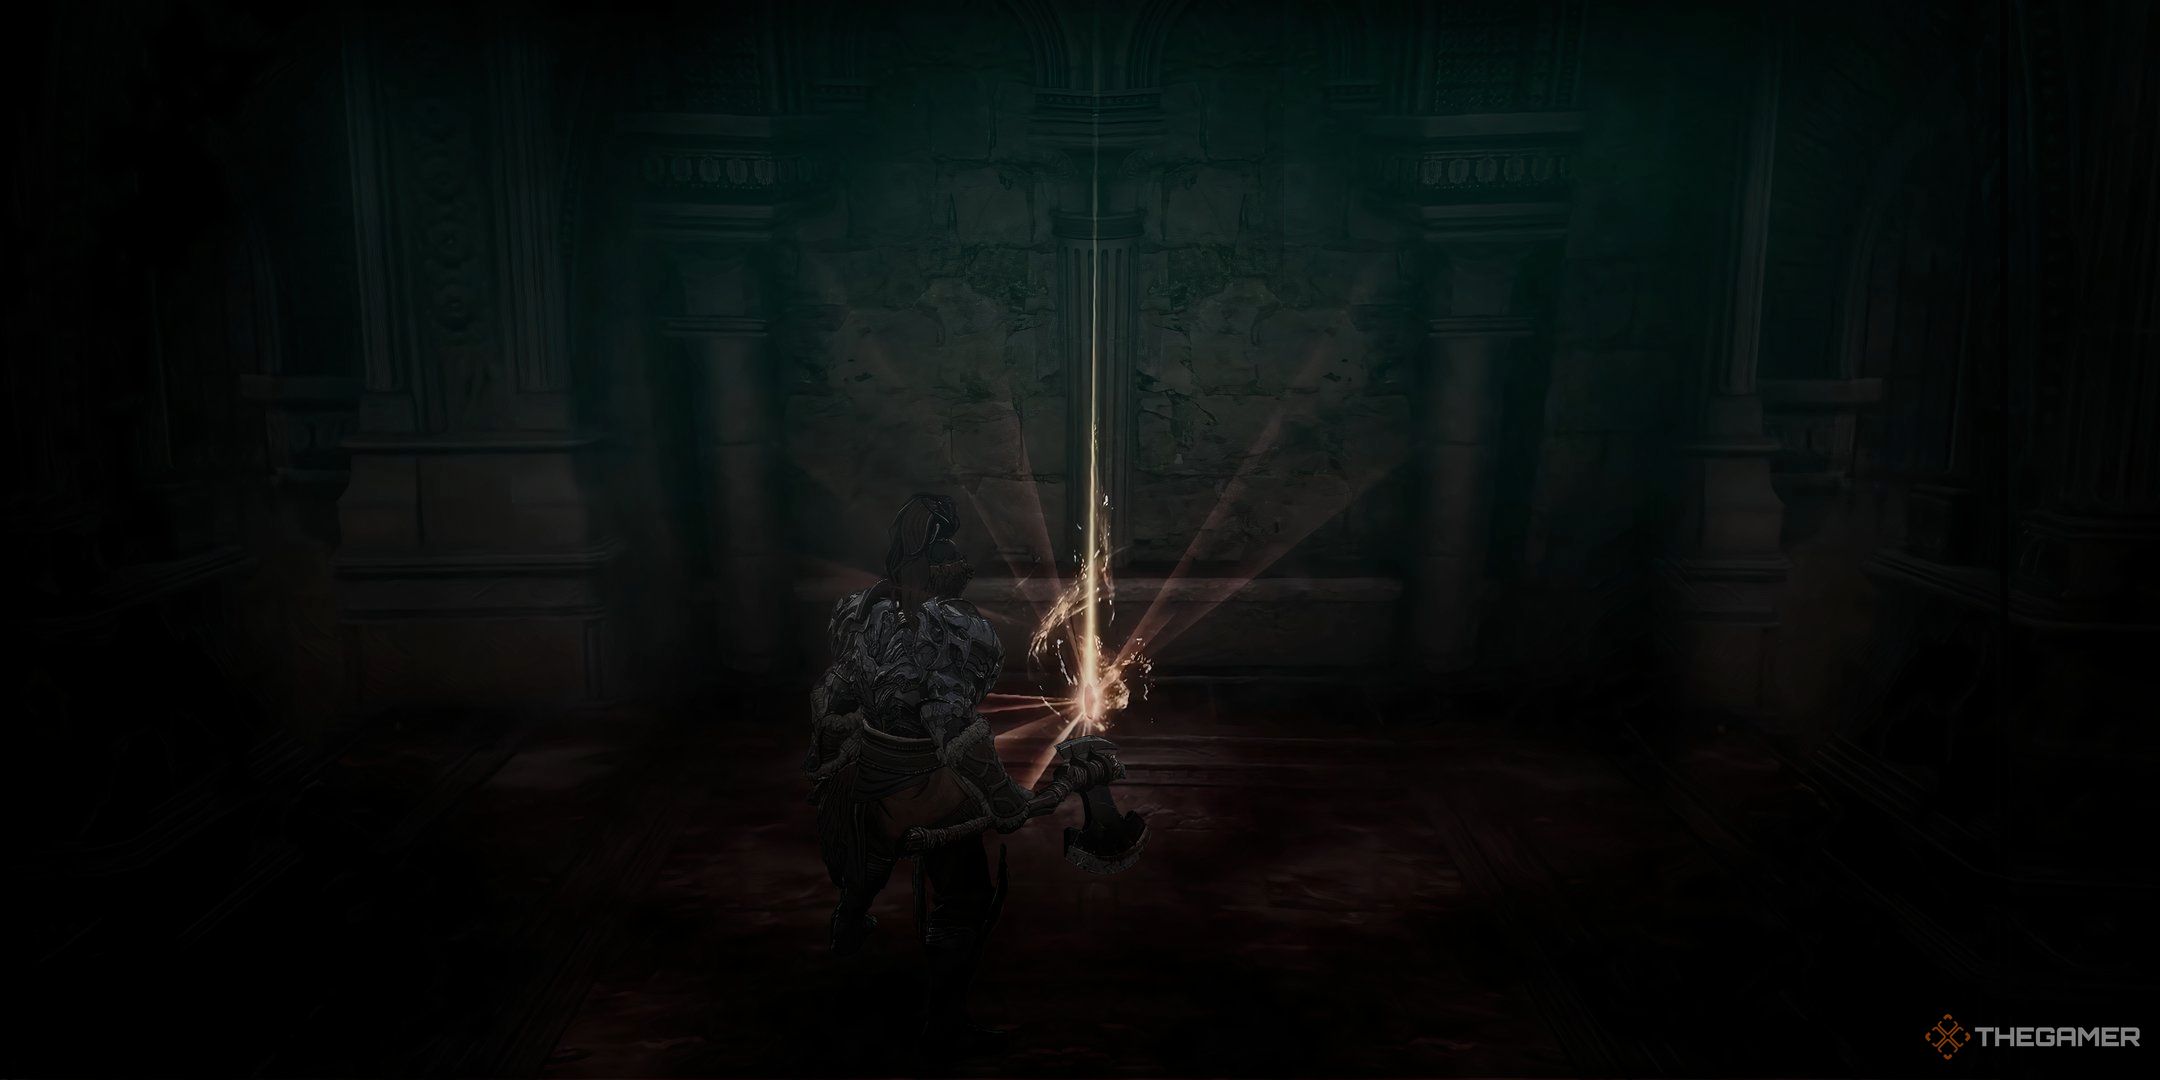
In the Forgotten Temple, your initial Netherworld Energy charge can be found near the bard. To reach there, teleport to the Forgotten Temple Entrance Blade Nexus and make your way inside. Climb the stairs within the temple. You’ll encounter some Dragonkin paying homage to a colossal skeleton in the room’s center.
Ascend the staircase to reach the second floor, then turn right. You’ll spot two archers ahead. Eliminate them, then make your way down to the lower area. In this location, you’ll find a bard. Adjacent to the bard are a few steps that descend to a radiant object bathed in amber light – it’s none other than the Netherworld Energy you’re after!
Strange Stench Netherworld Energy
During the initial stages of the Stange Stench mission, you’ll discover the second Netherwold Energy. Navigate towards the Collapsed Mine Blade Nexus. Once you reach the top via the unlocked lift, exit the elevator and turn left. Then, follow the beam’s path forward. You’ll notice the Netherworld Energy glowing at the top of the structure, illuminating the edge of the beam.
Watch out for bats when you are crossing the beam: they will try to knock you off of it.
If the elevator isn’t unlocked, search for a ladder that ascends to the wooden supports serving as the lift rigging. Once found, ascend the ladder and follow the supports until you can jump onto the central platform. Then, climb over to the other side of the supports where you came up and continue your ascent.
As you continue ascending, pass by an enormous cluster of spider eggs and carry on till you reach the highest beam. Instead of turning right, which would direct you to the elevator’s top, veer left and keep moving along the wooden beams upward. Be cautious, there are bats around! You’ll find the Netherworld Energy at the very edge of the uppermost beam.
Devoured Village Netherworld Energy
Make your way towards the Underground Water Facility named Blade Nexus. If you see a shortcut gate on your right open, go through it. Otherwise, navigate down to the lower level of the room by using the ladder that’s there. Once you reach the bottom, climb the next ladder, follow the pipe, and keep moving forward until you arrive at the spot where the shortcut gate would have taken you.
Make your progress past several spiders. After taking a right turn, engage in combat with the colossal spider. Then, enter the room to your left that’s filled with spider eggs. Traverse through that room, then move across the hallway and into another room also brimming with spider eggs. Be cautious as there’s a spider on the ceiling. Now, ascend the ladder that leads to a pipe above and turn left.
Soon, you’ll come across another junction ahead (or junction within the pipe); take another turn to the left. You’ll encounter a Poisoned and Agitated Husk. Once you defeat them, travel along this pipe till you reach a room where Netherworld Energy is resting in the middle of it. Be careful, there are two more Rotund Spiders lurking above ready to pounce on you.
Atlante The Precise Netherworld Energy
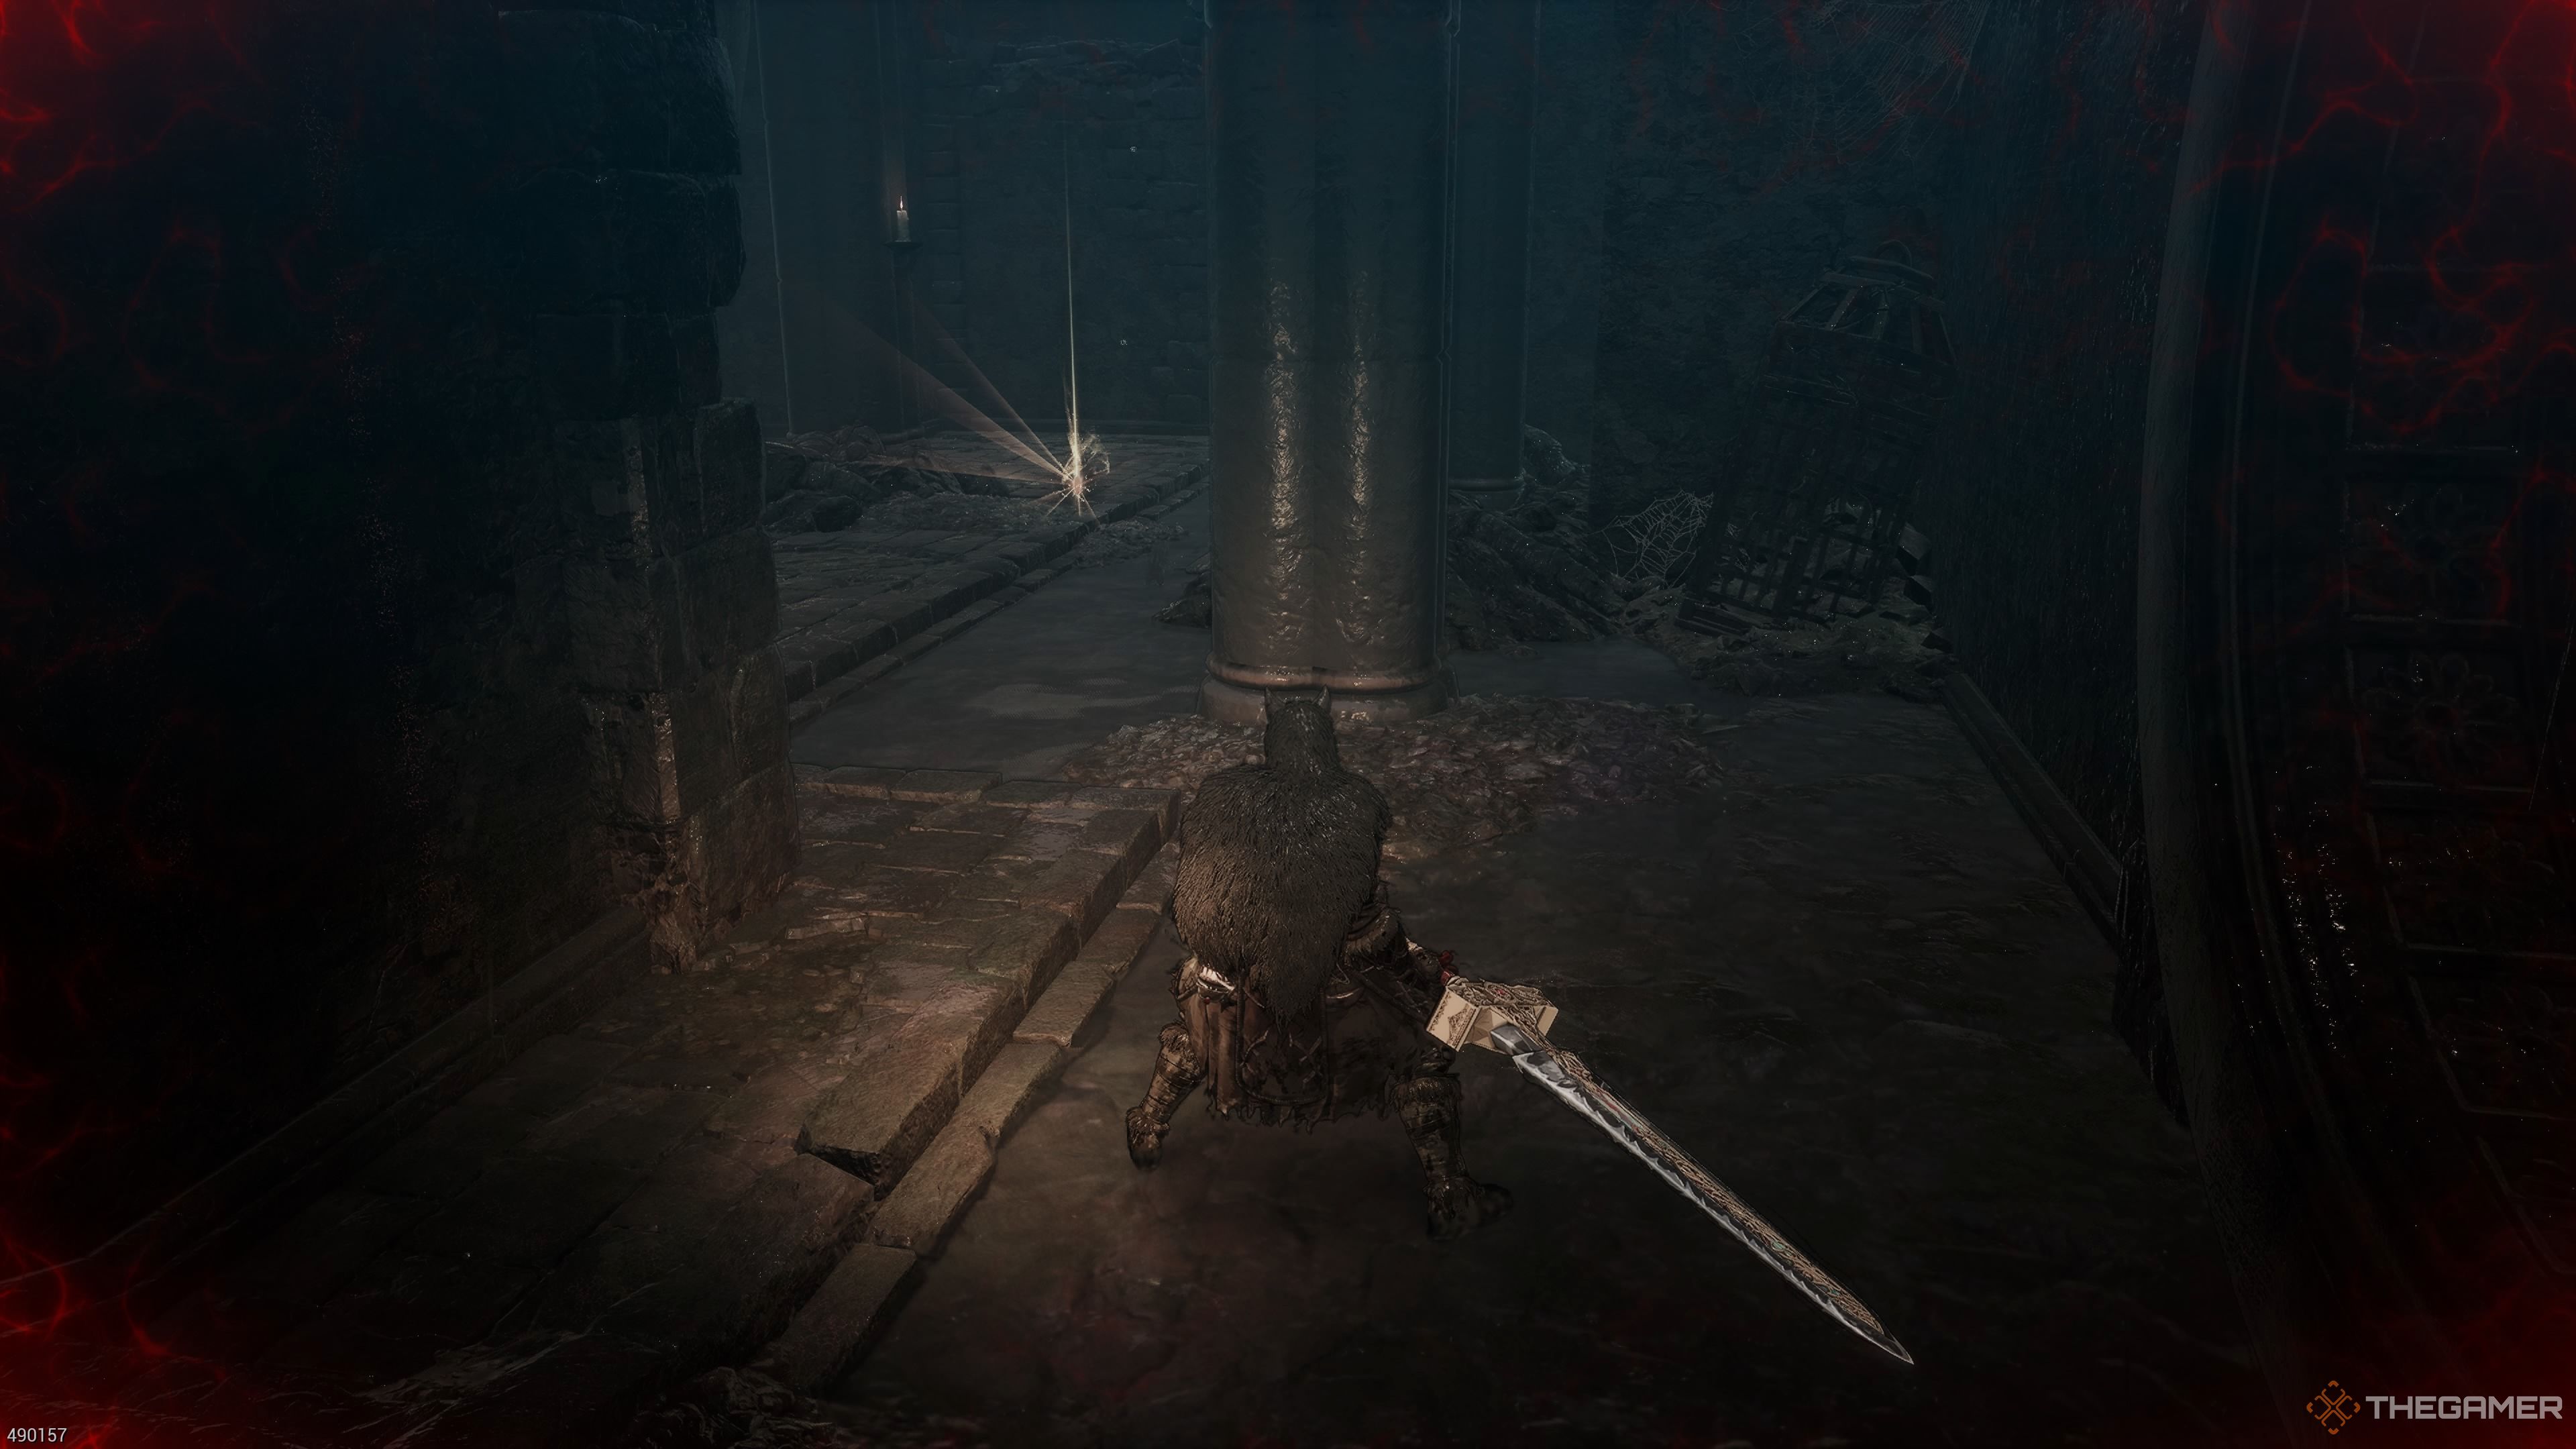
Among all Netherworld Energy charges in the game, this particular one is likely the simplest. Make your way to the Blade Nexus within the Destroyed Ruins. Proceed straight and you’ll encounter a colossal shadow figure wielding a greatsword, which is one of the Renowned Warriors.
After overcoming him, make your way directly into the following zone where you’ll engage a second Notable Warrior’s Shade. This one, though, will be an Elite version. Once you’ve conquered this elite adversary, you’ll easily spot the Netherworld Energy positioned to the left of the entrance leading to the next segment of this stage. It’s quite visible out in the open.
The Vow Netherworld Energy
Begin at the Forbidden Passage Blade Nexus. Ascend the stairs situated beside the Nexus, then veer left. When you reach the room with multiple paths, turn left again, continue along the path stained with blood to a ladder and descend it. In the subsequent area, drop down to the lower level; you’ll find yourself in the chamber where you battled the Renowned Warrior’s Shadow. Move through the shortcut gate into the gory hallways.
Here’s another option:
Starting point: The Forbidden Passage Blade Nexus. Ascend the nearby stairs, then turn left. As you reach the room with multiple paths, take the left fork, continue along the blood-streaked pathway to a ladder, and descend it. In the following area, drop down to the lower level: you’ll be in the chamber where you fought the Renowned Warrior’s Shadow. Proceed through the shortcut gate into the grimy hallways.
Yet another option:
From the Forbidden Passage Blade Nexus, head up the stairs next to it, and turn left. Once you reach the room with multiple path options, take the left turn, follow the trail of blood to a ladder, then descend it. In the ensuing area, drop down to the lower level: you’ll be in the chamber where you fought the Renowned Warrior’s Shadow. Advance through the shortcut gate into the grisly hallways.
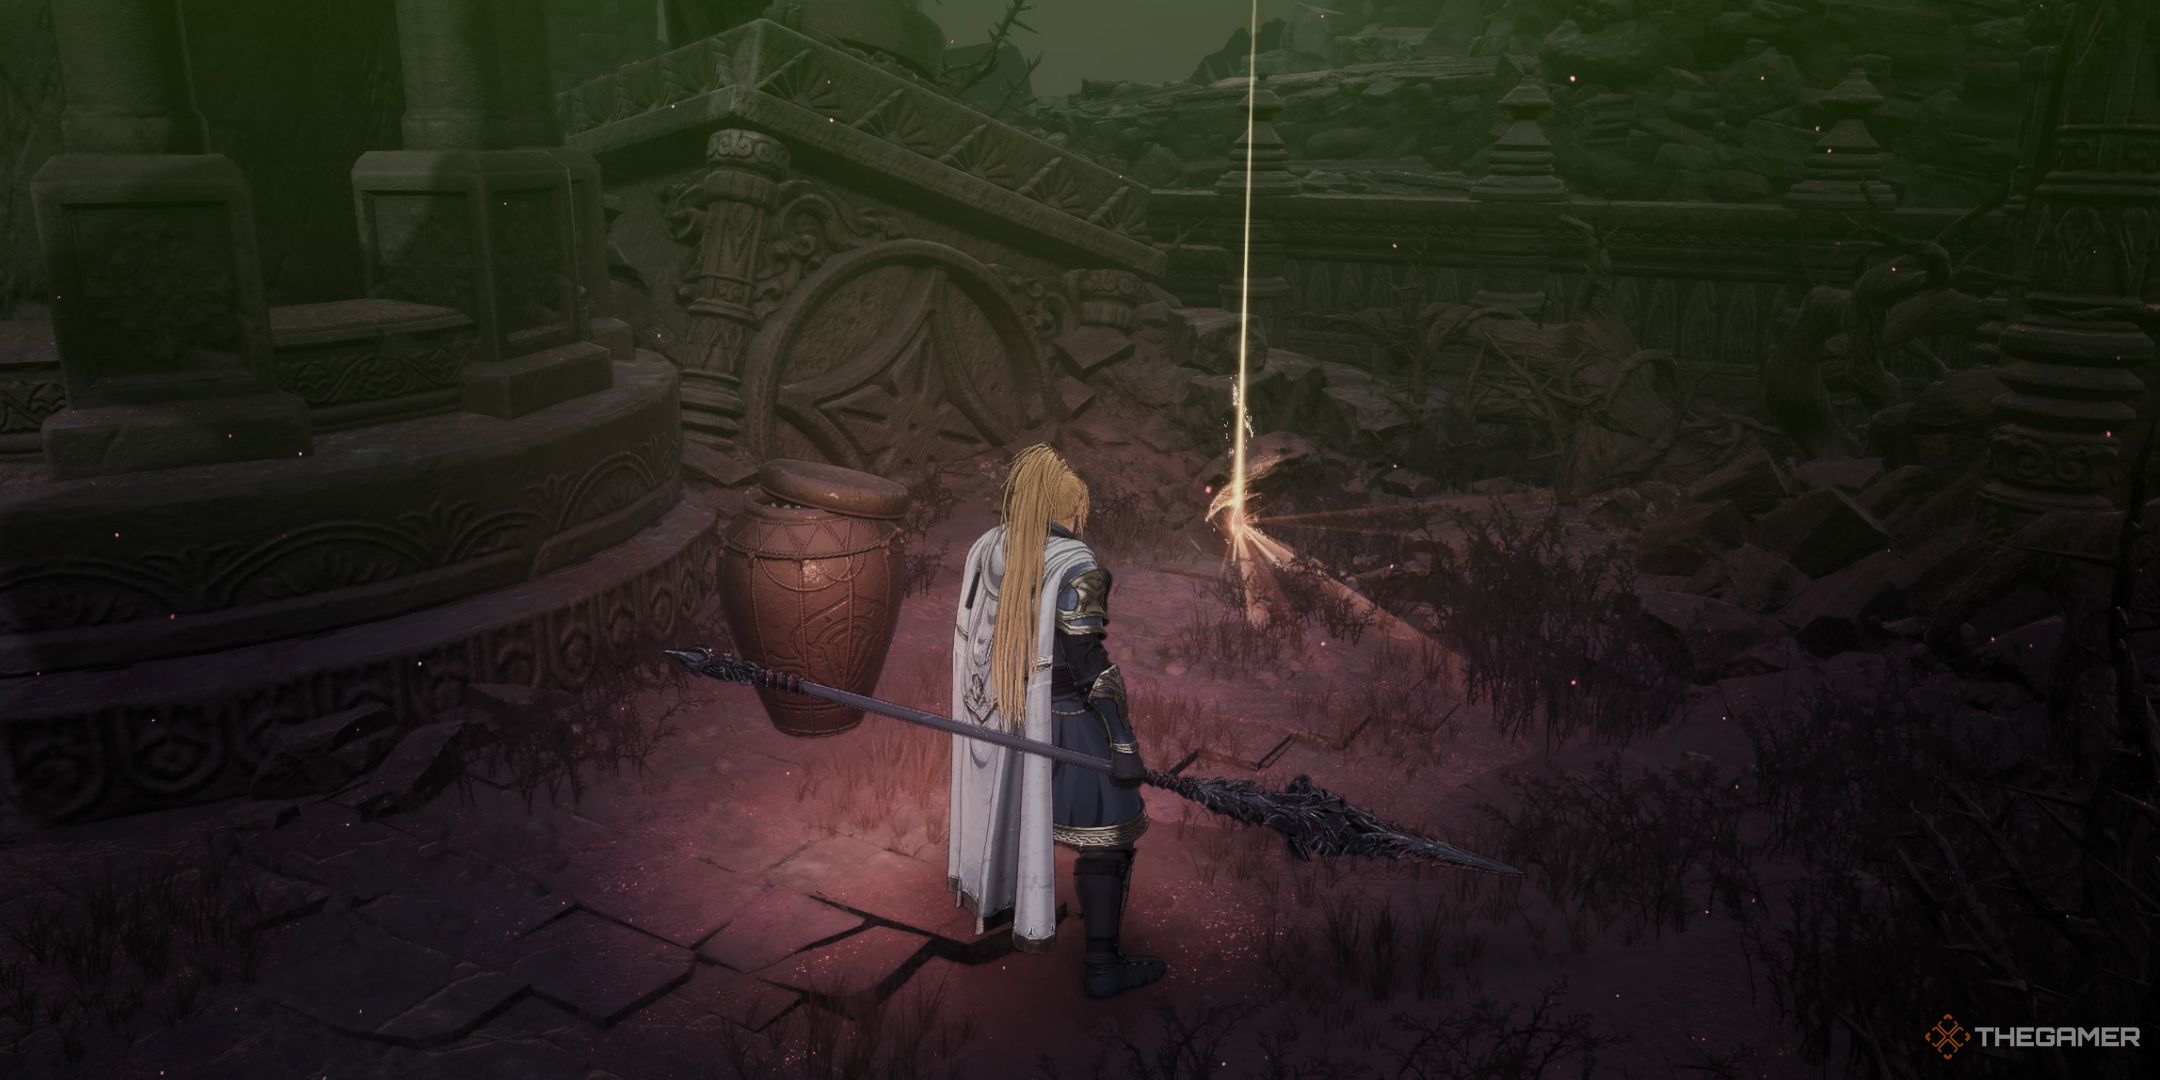
Follow the corridor ahead, make a left turn, and then a right. You’ll ascend a short flight of steps, and you’ll find yourself in a room with two individuals known as Yoma Pursuers. After that, take another right up another small set of stairs, and when you enter the following compact room, turn left to access the passageway. There, you will encounter another Yoma Pursuer who is standing guard in the hallway.
Now, when you reach the end of the hallway, turn right and continue along the path until you enter a large room. In this room, there are two Undead Shieldbearers and an Undead Ice Archer. To the left of the Ice Archer, close by, is where you’ll find the Netherworld Energy.
Equipment Sets That Increase Netherworld Energy
In the game, there are two complete armor sets – the Cleric and Ashen Wolf sets – that can boost your Netherworld Energy. You can certainly get individual pieces separately, but if you aim to collect a full set, we provide the details on how to obtain the recipe for each armor piece in the following sections.
Ashen Wolf Set

During your mission “The First Act Of Revenge,” you’ll find the Ashen Wolf set in the vicinity where you battle the Double-Bladed Butcher. If you happen to miss it initially, the Central Storehouse Entrance Blade Nexus is nearby. After navigating through the storehouse, you’ll be in the correct location. This area is also where a Boulder trap is set up.
The Ashen Wolf armor enhances your ability to heal Netherworld Energy by 20%, providing a rather beneficial addition.
| Number Of Pieces Equipped | Special Effect |
|---|---|
| 2 Pieces | Dodge stamina cost decreased by 10% |
| 3 Pieces | Health recovery increased by 20% |
| 4 Pieces | 10% stamina damage increase for Composed and Potent attacks. |
| 5 Pieces | Obtain 1 more Netherworld Energy |
| 6 Pieces | 15% damage increase for Potent attacks. |
Cleric Set

As a gamer, I’d say: “To get hold of the Cleric Set, you’ve got to take down a Pincer Spider using nothing but Brutal Attacks and Brink Guards. To make this task easier, it’s wise to gear up with one of the skills that triggers a Brink Guard to deal damage. For instance, consider equipping the ‘Breakdown’ skill for your spear, ‘Avenger’ for your greatsword, or the ‘Blowback’ skill if you prefer Dual Wield.
After getting ready, make your way to the stage known as Strange Stench, and interact with one of the Pincer Spiders. You’ll find one conveniently located near the foot of the Cave Blade Nexus, so it would be wise to go there first. Once you’ve conquered this task, simply select the Pincer Spider in Daphrona’s Codex, and you’ll receive the recipe as a reward.
| Number Of Pieces Equipped | Special Effect |
|---|---|
| 2 Pieces | Guard stamina damage decreased by 10% |
| 3 Pieces | Max stamina increased by 200 |
| 4 Pieces | 15% damage increase. |
| 5 Pieces | Obtain 1 more Netherworld Energy |
Increasing Netherworld Energy Charges With Phantoms
In simpler terms, there won’t be any ghost helping you with extra Netherworld Energy, but once you enhance Adelhaide The Philanthropic, she will grant you a Netherworld Energy charge whenever you perform a Brutal Attack – only if you have no remaining charges left. That’s the best help you can get, I’m sorry to say.
For more information on phantoms, read our guide here.
Read More
- 10 Most Anticipated Anime of 2025
- Gold Rate Forecast
- Grimguard Tactics tier list – Ranking the main classes
- PUBG Mobile heads back to Riyadh for EWC 2025
- Castle Duels tier list – Best Legendary and Epic cards
- USD MXN PREDICTION
- Silver Rate Forecast
- Brent Oil Forecast
- How to Watch 2025 NBA Draft Live Online Without Cable
- USD CNY PREDICTION
2025-03-30 06:05